Blog

  • CHEAT DAY: Decadent Chocolate Peppermint Protein Delights!

    CHEAT DAY: Decadent Chocolate Peppermint Protein Delights!

    Introduction & My Personal Story

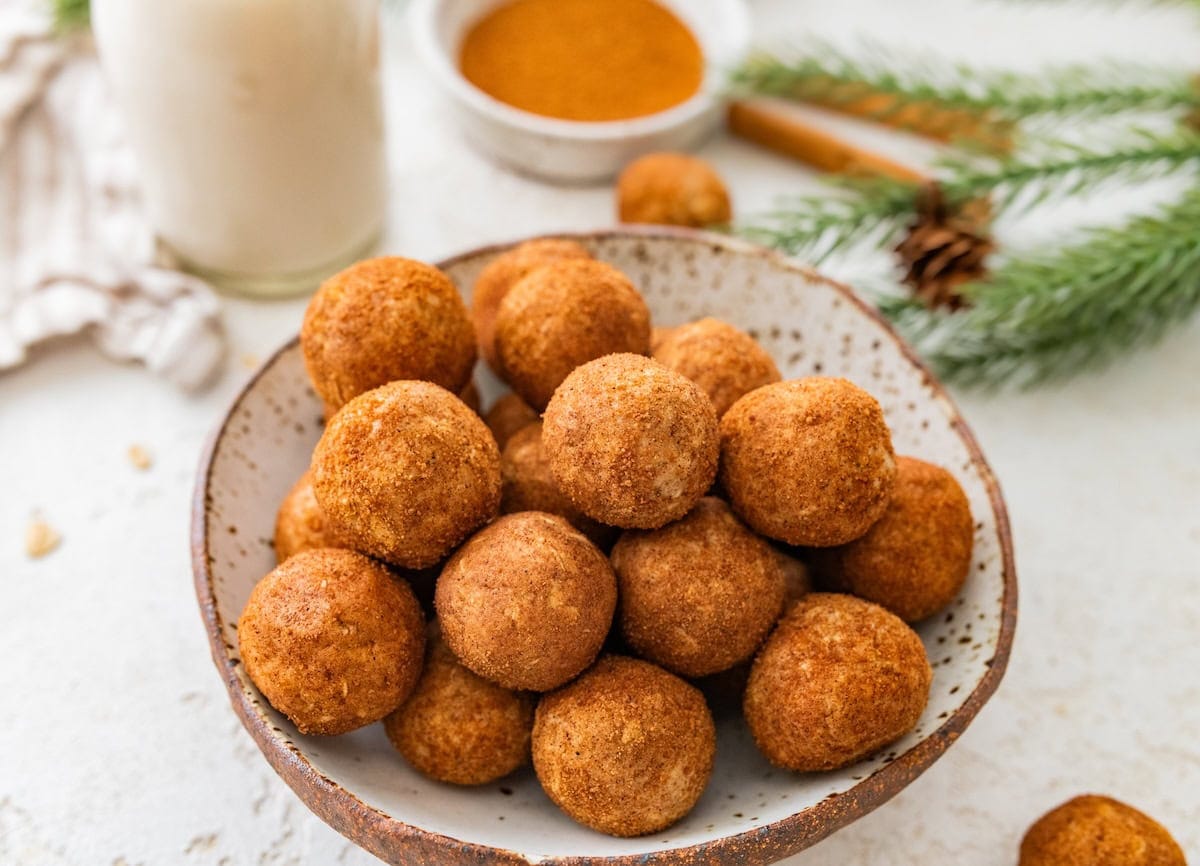
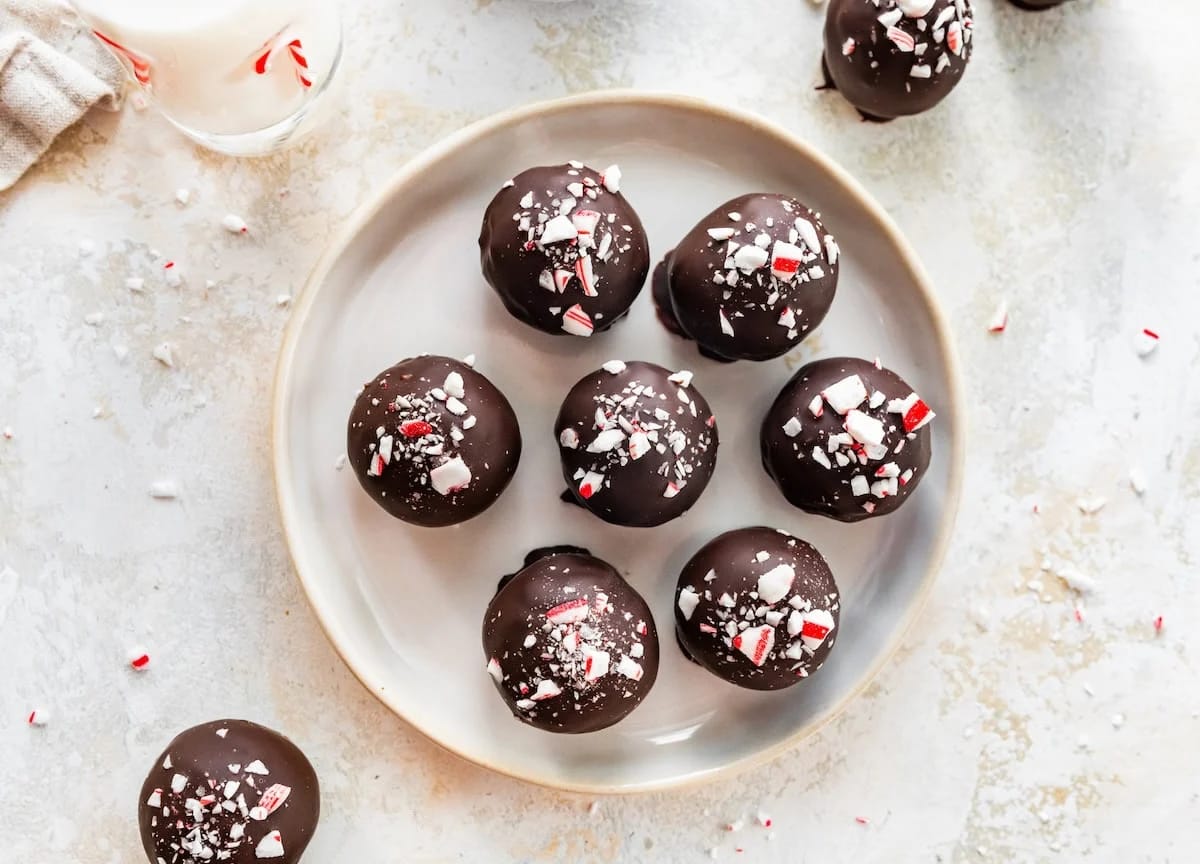
    Let me take you back to a crisp winter’s afternoon, the kind that demands a cozy sweater and a warm mug of cocoa. I was browsing through a local market when the festive scents of peppermint and chocolate wafted through the air, instantly evoking memories of holidays past. This was the moment the idea for my Decadent Chocolate Peppermint Protein Delights was born. In my 5 years of experience as a chef, I’ve always believed that indulgence and nutrition can coexist harmoniously, and these protein balls are a testament to that belief. They remind me of the joy of sneaking a piece of peppermint bark from the holiday cookie tray, but with a nutritious twist that aligns with my fitness goals. What started as a simple experiment in my kitchen has evolved into a beloved cheat day indulgence, offering the perfect balance of rich chocolate, refreshing peppermint, and a protein punch. These little delights have become a staple in my home, especially during the festive season, and I’m thrilled to share the recipe with you.

    Why You’ll Love This Recipe

    • No-Bake: No oven required, making it a quick and easy treat.
    • High-Protein: Each ball is packed with protein to fuel your day.
    • Festive Flavor: Chocolate and peppermint create a classic holiday taste.
    • Healthy Indulgence: Satisfies sweet cravings without derailing your diet.
    • Make-Ahead: Perfect for preparing in advance and storing for a quick snack.

    Detailed Ingredients

    • 1 cup (150g) **Medjool dates**, pitted
    • 1/2 cup (60g) **oat flour**
    • 1/4 cup (25g) **cacao powder**
    • 1/2 cup (50g) **chocolate protein powder**
    • 2 tablespoons **maple syrup**
    • 1/4 cup (60g) **nut butter** (almond or peanut)
    • 1/4 teaspoon **sea salt**
    • 1 teaspoon **peppermint extract**
    • 1/2 cup (90g) **dark chocolate chips**
    • 1 tablespoon **coconut oil**
    • 2 tablespoons **crushed candy canes** or **flaky sea salt** for topping

    Step-by-Step Instructions

    Step 1: Begin by gathering your ingredients. Ensure your **Medjool dates** are pitted and soft. If they feel a bit dry, soak them in warm water for about 10 minutes to rehydrate.

    Step 2: In a food processor, combine the **dates**, **oat flour**, **cacao powder**, **chocolate protein powder**, **maple syrup**, **nut butter**, **sea salt**, and **peppermint extract**. Blend the mixture until it forms a thick, sticky dough. Chef’s Tip: If your dough seems too dry, add a splash of water and pulse again until the desired consistency is achieved.

    Step 3: Using your hands, scoop out portions of the mixture and roll them into evenly sized balls. Place each ball onto a parchment-lined plate or tray. This should yield approximately 12-15 balls, depending on size.

    Step 4: In a microwave-safe bowl, combine the **dark chocolate chips** and **coconut oil**. Microwave in 30-second intervals, stirring between each, until the chocolate is fully melted and smooth. Stir in the **peppermint extract** to enhance the flavor.

    Step 5: Dip each protein ball into the melted chocolate, allowing any excess to drip off before placing it back on the parchment. Immediately sprinkle with **crushed candy canes** or **flaky sea salt** for a festive touch.

    Step 6: Refrigerate the chocolate-coated balls for about 15-20 minutes, or until the chocolate has set and hardened.

    Common Mistakes to Avoid

    • Dry Dough: If the dough is too dry, it won’t hold together. Add a bit more water or syrup to achieve the right consistency.
    • Over-Melting Chocolate: Be cautious not to overheat the chocolate as it can seize. Use short intervals in the microwave and stir often.
    • Uneven Balls: For uniform balls, use a small cookie scoop to portion the dough evenly.

    How to Store & Reheat

    Store these protein delights in an airtight container in the refrigerator for up to one week. For longer storage, you can freeze them for up to three months. To enjoy, simply take them out of the freezer and let them sit at room temperature for a few minutes before eating.

    Ingredient Substitutions

    • Dates: If you don’t have Medjool dates, use regular dates or dried figs, but ensure they’re soft.
    • Nut Butter: Swap almond or peanut butter with sunflower seed butter for a nut-free option.
    • Oat Flour: You can substitute with almond flour for a gluten-free version.

    Nutrition Facts

    • Calories: 150 per ball
    • Protein: 6g
    • Fat: 7g
    • Carbohydrates: 20g
    • Serving Size: 1 ball

    Frequently Asked Questions

    • Can I make these vegan? Yes, ensure all ingredients, including chocolate chips and protein powder, are vegan-friendly.
    • What if I don’t have a food processor? You can try using a blender, but you may need to work in smaller batches.
    • How do I make the balls firmer? Refrigerate them for longer before dipping in chocolate.
    • Can I add other flavors? Absolutely! Try adding a dash of vanilla extract or a pinch of cinnamon for variation.

  • Brain Fuel: Blueberry Bliss!

    Brain Fuel: Blueberry Bliss!

    Introduction & My Personal Story

    There’s something magical about blueberries that takes me back to my childhood summers, spent wandering through my grandmother’s garden. She had these sprawling blueberry bushes that seemed to stretch on forever, and I would spend hours plucking the plump, indigo berries straight from the branch. Those sun-drenched afternoons are etched in my memory, the sweet-tart burst of each berry a reminder of simpler times.

    Fast forward to my culinary career, and blueberries have remained a staple in my kitchen. In my 5 years of experience as a chef, I’ve learned to appreciate their versatility and nutritional powerhouse status. This led me to create a recipe that harnesses their brain-boosting potential: the Blueberry Power Puree. Perfect for a quick snack or an addition to your morning routine, this puree is a nod to my childhood nostalgia while catering to the modern need for quick, healthy, and delicious brain fuel.

    Whether you’re a busy professional, a parent trying to sneak more nutrients into your child’s diet, or simply someone who loves the taste of fresh blueberries, this recipe is sure to become a favorite. Join me as we dive into the wonders of this simple yet profound dish.

    Why You’ll Love This Recipe

    • Quick and easy to prepare, ready in just 10 minutes.
    • Packed with antioxidants and Omega-3s for enhanced brain function.
    • Versatile: Enjoy it on its own or as a topping for various dishes.
    • Kid-friendly and a great way to introduce fruits to little ones.
    • Stores well, making it perfect for meal prep and busy weeks.

    Detailed Ingredients

    Here’s what you’ll need to whip up this brain-boosting puree:

    • Blueberries: 500 grams (about 3 cups). Look for firm, plump berries with a deep blue color. Avoid berries that are soft or have a dull appearance.
    • Water: 60 ml (1/4 cup). Adjust the amount based on your desired puree consistency.

    Step-by-Step Instructions

    Creating the perfect Blueberry Power Puree is all about simplicity and technique. Follow these steps for a flawless result:

    Step 1: Sort & Rinse

    Begin by carefully sorting through your blueberries. Discard any that are underripe, soft, or moldy. This step is crucial as it ensures only the best berries make it into your puree. Rinse them thoroughly under cold running water to remove any dirt or pesticides.

    Step 2: Blend

    Transfer the rinsed blueberries to a high-powered blender or food processor. Add a splash of water—about 60 ml (1/4 cup)—to facilitate blending. Blend the mixture until completely smooth. If you prefer a thinner consistency, add more water gradually. For a silky texture, strain the puree through a fine-mesh sieve to remove any remaining skins.

    Step 3: Serve

    Once blended to your desired consistency, the puree is ready to serve. It can be enjoyed on its own, especially by little ones, or used as a delicious topping for yogurt, oatmeal, or chia pudding. The vibrant color and refreshing taste are sure to brighten any dish.

    Step 4: Store

    Transfer the puree to an airtight container and store it in the refrigerator for up to 3-4 days. For longer storage, freeze the puree in silicone ice cube trays or small jars. This method allows for easy portioning and can keep the puree fresh for up to 3 months.

    Step 5: Thaw

    When you’re ready to use your stored puree, thaw it in the refrigerator overnight. Alternatively, you can quickly defrost it by placing the container in a warm water bath. Ensure the puree is fully thawed before serving.

    Common Mistakes to Avoid

    Even simple recipes like this one can have pitfalls. Here are some common mistakes and how to avoid them:

    • Using low-quality blueberries: Always choose fresh, firm berries. Soft or moldy berries will affect the taste and texture of your puree.
    • Not rinsing thoroughly: Skipping this step can lead to a gritty texture and possible contamination. Rinse well!
    • Over-blending: While you want a smooth puree, over-blending can cause the mixture to become too thin. Adjust water content gradually.
    • Improper storage: Ensure containers are airtight to prevent spoilage and maintain freshness.

    How to Store & Reheat

    Proper storage is key to maintaining the freshness and nutritional value of your puree:

    • Refrigeration: Store in an airtight container in the fridge for up to 3-4 days.
    • Freezing: Use silicone ice cube trays or small jars to freeze portions. This method keeps the puree fresh for up to 3 months.
    • Reheating: For frozen puree, thaw in the refrigerator overnight or use a warm water bath for quick defrosting.

    Ingredient Substitutions

    If you need to swap ingredients, here are some safe alternatives:

    • Blueberries: Substitute with raspberries or blackberries for a similar antioxidant boost.
    • Water: Use coconut water for added flavor and electrolytes.

    Nutrition Facts

    Here’s the nutritional breakdown per serving (approx. 100g):

    • Calories: 43 kcal
    • Protein: 1 g
    • Fat: 0.5 g
    • Carbohydrates: 11 g
    • Serving Size: 100 g

    Frequently Asked Questions

    Here are some questions I often receive about this recipe:

    • Can I use frozen blueberries? Yes, frozen blueberries work well. Thaw them before blending for best results.
    • Is this recipe suitable for babies? Absolutely! It’s a great way to introduce fruits to infants. Just ensure the puree is smooth and free of any skins.
    • How can I enhance the flavor? Add a splash of lemon juice or a pinch of cinnamon for an extra kick.
    • Can I sweeten the puree? If you prefer a sweeter taste, consider adding a bit of honey or maple syrup, but remember that blueberries are naturally sweet.

  • 5-MINUTE FUEL: Dreamy Chocolate Buttercream with Just 5 Ingredients!

    5-MINUTE FUEL: Dreamy Chocolate Buttercream with Just 5 Ingredients!

    Introduction & My Personal Story

    Chocolate buttercream frosting holds a special place in my heart. It takes me back to my grandmother’s kitchen, where the aroma of chocolate and the warmth of her love blended perfectly. Every Sunday, she would bake a batch of her famous chocolate cupcakes, always topped with this dreamy chocolate buttercream. As a child, I would eagerly wait for her to hand me the spoon to lick off the remnants of the sweet, creamy frosting. Fast forward to today, and I’ve spent the last five years mastering this deceptively simple yet utterly satisfying recipe. It’s a go-to for both beginners and seasoned bakers alike. The magic lies in its simplicity and the quality of ingredients. With just five ingredients, you can whip up a decadent frosting in mere minutes. Whether you’re a busy parent, a professional on the go, or someone who simply cherishes a quick yet delicious treat, this chocolate buttercream is your ticket to delightful indulgence. Let me guide you through this easy yet luxurious recipe that promises to transform your cakes, cupcakes, or even just a spoon into something extraordinary.

    Why You’ll Love This Recipe

    • Quick and easy: Ready in just 5 minutes.
    • Minimal ingredients: Requires only 5 pantry staples.
    • No cooking required: Perfect for hot days or quick fixes.
    • Versatile: Ideal for cakes, cupcakes, or as a dessert topping.
    • Rich and creamy: Delivers a luscious chocolate flavor every time.

    Detailed Ingredients

    • 1 cup (227g) unsalted butter, softened to room temperature. Look for a high-fat content butter for the creamiest texture.
    • 3 cups (375g) powdered sugar. Make sure it’s sifted to avoid lumps.
    • 1/2 cup (50g) cocoa powder. Use a high-quality unsweetened cocoa for the best flavor.
    • 2 teaspoons vanilla extract. Pure vanilla extract is recommended over imitation for a richer taste.
    • 2-4 tablespoons milk. Whole milk works best, but any milk can be used depending on preference and dietary needs.

    Step-by-Step Instructions

    Step 1: Begin by ensuring your butter is at room temperature. This is crucial for achieving the right texture. It should be soft enough to press a finger into, but not melted. In my 5 years of experience, I’ve found that this step can make or break your frosting.

    Step 2: In a large mixing bowl, beat the softened butter on high speed for about 2-3 minutes using a hand mixer or a stand mixer fitted with a paddle attachment. The butter should become pale and fluffy, a sign that it’s well-aerated.

    Step 3: Gradually add the powdered sugar and cocoa powder. It’s best to do this in small increments to prevent a sugary dust cloud. Start mixing on low speed until the ingredients are incorporated, then increase to medium speed. The mixture should start to come together and look thick and creamy.

    Step 4: Add the vanilla extract and half of the milk to the butter mixture. Mix on medium speed until everything is well combined. If the frosting seems too thick, add more milk, a tablespoon at a time, until you reach your desired consistency. The frosting should be smooth and spreadable.

    Step 5: Taste the frosting and adjust any ingredients if needed. Sometimes a pinch more cocoa or sugar might be required based on personal preference.

    Step 6: Your chocolate buttercream is now ready to use. Spread it generously over your cake, cupcakes, or even brownies. Chef’s Tip: Use an offset spatula for a smooth, professional finish.

    Common Mistakes to Avoid

    • Using cold butter: Butter that’s too cold won’t whip properly, resulting in a dense frosting.
    • Skipping the sifting of powdered sugar: This can lead to a lumpy frosting, which is not ideal for spreading.
    • Overmixing: While it’s important to mix until smooth, overmixing can incorporate too much air, making the frosting too airy.

    How to Store & Reheat

    Store any leftover buttercream in an airtight container in the refrigerator for up to one week. When you’re ready to use it again, let it come to room temperature. You may need to beat it again to restore its creamy texture. For longer storage, you can freeze the frosting for up to three months. Thaw in the refrigerator overnight and beat before using.

    Ingredient Substitutions

    • Butter: Margarine or vegan butter can be used for a dairy-free version.
    • Powdered sugar: For a less sweet option, reduce the amount by 1/2 cup and adjust cocoa to taste.
    • Cocoa powder: Dutch-processed cocoa can be used for a richer chocolate flavor.
    • Milk: Any milk alternative like almond, soy, or oat milk can replace regular milk.

    Nutrition Facts

    • Calories: 230 per serving
    • Protein: 1g
    • Fat: 12g
    • Carbs: 29g
    • Serving Size: 2 tablespoons

    Frequently Asked Questions

    Q: Can I make this frosting ahead of time?

    A: Absolutely! You can make it a day or two in advance and store it in the fridge. Just be sure to let it come to room temperature before using.

    Q: My frosting is too runny, what should I do?

    A: If your frosting is too runny, try adding more powdered sugar, a tablespoon at a time, until it thickens to your desired consistency.

    Q: How can I make the frosting more chocolatey?

    A: Add more cocoa powder for a deeper chocolate flavor. Start with an additional tablespoon and adjust to taste.

    Q: Can I use this frosting for piping?

    A: Yes, this frosting holds its shape well and is perfect for piping decorations on cakes and cupcakes.

  • GAINS: Power-Packed Pork and Sauerkraut

    GAINS: Power-Packed Pork and Sauerkraut

    Introduction & My Personal Story

    As a chef with 5 years of experience, I’ve spent countless hours in the kitchen experimenting with flavors and textures to fuel my passion for both cooking and fitness. The Power-Packed Pork and Sauerkraut dish is more than just a meal; it’s a nostalgic trip down memory lane. I remember the first time I encountered this hearty combination. It was during a visit to my grandmother’s cozy kitchen, where the aroma of pork roasting with tangy sauerkraut filled the air. She had a knack for creating meals that satisfied both the soul and the body, and this dish was no exception.

    Over the years, I’ve adapted her classic recipe to fit a more protein-focused lifestyle. This dish has become my go-to when I need a robust meal that supports muscle recovery and growth. The tender, juicy pork, paired with the zesty sauerkraut, is not only delicious but also packed with nutrients. It’s a recipe that bridges the gap between traditional comfort food and modern nutritional needs, making it a staple in my kitchen and a favorite among friends and family. Whether you’re a fitness enthusiast or just someone who appreciates a good meal, this dish is sure to become a beloved part of your culinary repertoire.

    Why You’ll Love This Recipe

    • High in Protein: Perfect for muscle recovery and growth.
    • Rich in Flavor: A delightful blend of savory pork and tangy sauerkraut.
    • Easy to Prepare: Simple steps for a rewarding meal.
    • Nutritious: Packed with vitamins and minerals.
    • Versatile: Great for meal prep or a family dinner.

    Detailed Ingredients

    • 2.5 kg (5.5 lbs) pork butt: Look for a cut with good marbling for tenderness.
    • 1 tablespoon salt
    • 1 teaspoon black pepper
    • 1 tablespoon garlic powder
    • 2 tablespoons vegetable oil
    • 2 large onions, sliced
    • 2 apples, peeled and sliced (Granny Smith works well for a tart flavor)
    • 3 cloves garlic, minced
    • 2 tablespoons brown sugar
    • 2 tablespoons Dijon mustard
    • 1 tablespoon caraway seeds
    • 1 teaspoon smoked paprika
    • 1 bay leaf
    • 1 kg (2.2 lbs) sauerkraut, drained
    • 500 ml (2 cups) chicken broth

    Step-by-Step Instructions

    Step 1: Preheat and Prepare
    Preheat your oven to 300°F (150°C). This low and slow cooking method ensures the pork becomes tender and flavorful. Gather all your ingredients, ensuring everything is within reach for a smooth cooking process.

    Step 2: Season the Pork
    Generously season the pork butt with salt, black pepper, and garlic powder. This creates a flavorful crust during searing. Chef’s Tip: Ensure the pork is at room temperature before seasoning to allow for even cooking.

    Step 3: Sear the Pork
    In a large Dutch oven, heat the vegetable oil over medium-high heat. Carefully add the pork and sear each side for about 8-10 minutes until a deep golden crust forms. This step locks in the juices, making the pork succulent.

    Step 4: Sauté the Onions and Apples
    Reduce the heat to medium. Add the sliced onions and apples to the pot. Cook for about 5-8 minutes, stirring occasionally, until they are softened and lightly browned. The apples add a subtle sweetness that balances the dish.

    Step 5: Add the Aromatics
    Stir in the minced garlic, brown sugar, Dijon mustard, caraway seeds, smoked paprika, remaining black pepper, and bay leaf. Cook for about a minute until the mixture is fragrant, enhancing the depth of flavor.

    Step 6: Build the Base
    Add the drained sauerkraut to the pot, spreading it evenly. Pour in the chicken broth, stirring to create a flavorful bed for the pork. The sauerkraut absorbs the spices, becoming a delicious accompaniment.

    Step 7: Roast the Pork
    Place the seared pork butt on top of the sauerkraut mixture. Cover with a lid and roast in the oven for 3 to 3½ hours. The pork should be fork-tender, indicating it’s ready.

    Step 8: Brown and Reduce
    Remove the lid, increase the oven temperature to 375°F (190°C), and continue roasting for another 20-30 minutes. This step browns the pork further and reduces the juices slightly, intensifying the flavors.

    Step 9: Rest and Shred
    Remove the pot from the oven and let the pork rest for about 10 minutes. Using two forks, shred the pork directly in the pot, mixing it with the sauerkraut mixture to soak up all the flavors.

    Step 10: Serve and Enjoy
    Serve the pork and sauerkraut warm, straight from the pot. This protein-rich meal is perfect for fueling your body post-workout or enjoying a hearty family dinner.

    Common Mistakes to Avoid

    • Skipping the Sear: Don’t skip searing the pork; it seals in the juices and adds flavor.
    • Overcooking the Sauerkraut: Add the sauerkraut just before roasting to avoid it becoming mushy.
    • Insufficient Seasoning: Make sure to season the pork generously for a well-rounded taste.
    • Not Resting the Pork: Allow the pork to rest before shredding to retain its juices.

    How to Store & Reheat

    Storage: Once cooled, store the pork and sauerkraut in an airtight container in the refrigerator for up to 3 days.

    Reheating: To reheat, place the mixture in a covered oven-safe dish and warm in a preheated oven at 350°F (175°C) for about 15-20 minutes. Alternatively, reheat in a microwave-safe dish, stirring occasionally, until heated through.

    Ingredient Substitutions

    • Pork Butt: You can substitute with pork shoulder for a similar texture.
    • Apples: Pears can be used for a different flavor profile.
    • Chicken Broth: Vegetable broth works well if you prefer a lighter base.
    • Dijon Mustard: Whole grain mustard adds a unique texture and flavor.

    Nutrition Facts

    • Calories: 319 kcal per serving
    • Protein: 34g
    • Fat: 15g
    • Carbohydrates: 10g
    • Serving Size: 1/8 of the recipe

    Frequently Asked Questions

    Q: Can I make this recipe in a slow cooker?

    A: Yes, after searing the pork, transfer it along with the other ingredients to a slow cooker. Cook on low for 6-8 hours.

    Q: Is there a vegetarian version of this dish?

    A: Yes, replace the pork with jackfruit and use vegetable broth to create a vegetarian-friendly version.

    Q: Can I freeze leftovers?

    A: Absolutely. Store in a freezer-safe container for up to 2 months. Thaw in the refrigerator before reheating.

    Q: What sides pair well with this dish?

    A: Mashed potatoes or a fresh green salad complement the flavors beautifully.

  • LATE NIGHT FUEL: Golden Tofu, Greens & a Coconut Cream Dream

    LATE NIGHT FUEL: Golden Tofu, Greens & a Coconut Cream Dream

    Introduction & My Personal Story

    There’s something magical about the quiet hours of the night when the world falls silent and my kitchen becomes a sanctuary. As a chef, I’ve spent countless nights experimenting with flavors, searching for the perfect dish to fuel my late-night creativity. The Golden Tofu, Greens & a Coconut Cream Dream is the result of one such night, a dish that combines the earthy flavors of tofu and vibrant greens with the creamy richness of coconut milk. In my 5 years of experience, I’ve found that late-night cooking requires more than just sustenance—it demands a dish that invigorates the senses without weighing you down. This recipe has become a favorite, not just for its delicious taste but for the way it energizes my late-night grind. It’s like a warm hug that whispers, ‘You got this.’ Let me take you through this culinary journey that promises to keep your mind sharp and your spirit high.

    Why You’ll Love This Recipe

    • Quick and easy to prepare, perfect for late-night cravings.
    • Rich in protein and nutrients to fuel your productivity.
    • Light yet satisfying, ensuring you stay energized without feeling sluggish.
    • Uses simple, accessible ingredients you might already have in your pantry.
    • Vegan-friendly and adaptable for various dietary needs.

    Detailed Ingredients

    To craft this delightful dish, gather the following ingredients:

    • Extra-firm tofu: 400 grams, drained and pressed.
    • Spinach: 200 grams, fresh.
    • Frozen peas: 1 cup (150 grams).
    • Onion: 1 medium, diced.
    • Garlic: 3 cloves, minced.
    • Ginger: 1-inch piece, minced.
    • Turmeric powder: 1 teaspoon.
    • Cumin seeds: 1.5 tablespoons.
    • Garam masala: 2 teaspoons.
    • Vegetable broth: 1 cup (240 ml).
    • Chili paste: 1 tablespoon (adjust to taste).
    • Lemon juice: 1 tablespoon.
    • Strained tomatoes: 1 cup (240 ml).
    • Sugar: 1 teaspoon.
    • Salt: To taste.
    • Coconut milk: ½ can (200 ml).
    • Fresh cilantro: For garnish.
    • Oil: For cooking.

    Step-by-Step Instructions

    Step 1: Prepare the Tofu

    Start by draining and pressing the extra-firm tofu for 20-30 minutes to remove excess moisture. This step is crucial for achieving that delightful golden crust. Once pressed, cut the tofu into 1-inch cubes.

    Step 2: Prepare the Aromatics

    Dice the onion, mince the garlic and ginger, and chop the spinach. Set these aside as they will form the base of your flavor profile.

    Step 3: Toast the Spices

    In a dry pan over medium heat, toast the turmeric, cumin seeds, and garam masala for about 4 minutes. You’ll know they’re ready when your kitchen is filled with a warm, inviting aroma. Remove from heat and set aside.

    Step 4: Blend the Spinach Mixture

    In a food processor, combine the diced onion, minced garlic, ginger, and a handful of spinach to create a paste. Gradually add more spinach until the mixture is fully blended.

    Step 5: Cook the Tofu

    Heat a bit of oil in a skillet over medium-high heat. Add the tofu cubes and cook until they are golden on all sides, tossing frequently to ensure even cooking.

    Step 6: Add the Spices

    Once the tofu is golden, stir in the toasted spices, ensuring each cube is well coated with the fragrant mix.

    Step 7: Combine Ingredients

    Add the spinach mixture to the skillet, followed by the vegetable broth, chili paste, lemon juice, strained tomatoes, sugar, and salt. Mix everything well and bring to a gentle simmer.

    Step 8: Simmer

    Allow the mixture to cook for 8-10 minutes, reducing the liquid slightly and letting the flavors meld together beautifully.

    Step 9: Add the Peas

    Stir in the frozen peas, allowing them to cook through. Taste and adjust the salt if necessary.

    Step 10: Finish with Coconut Milk

    Pour in the coconut milk and stir to combine. Let the curry simmer for another 10 minutes until it’s creamy and aromatic.

    Step 11: Garnish and Serve

    Finish your dish with a generous sprinkle of fresh cilantro and serve hot. Enjoy the creamy, spicy, and invigorating flavors that will keep you going through the night.

    Common Mistakes to Avoid

    Cooking is an art, and sometimes things can go awry. Here are some common mistakes and how to avoid them:

    • Not pressing the tofu: This can lead to soggy tofu that doesn’t absorb flavors well. Be patient and let it press for the recommended time.
    • Overcooking the spices: Toasting spices is about releasing their oils, not burning them. Keep an eye on them to avoid bitterness.
    • Skipping the simmer: Allowing the curry to simmer is crucial for developing flavor depth. Don’t rush this step.

    How to Store & Reheat

    Proper storage ensures your meal remains fresh and delicious. Store leftovers in an airtight container in the refrigerator for up to 3 days. To reheat, gently warm the curry in a saucepan over low heat, adding a splash of water or broth if it has thickened too much.

    Ingredient Substitutions

    Flexibility in cooking is key. Here are some ingredient swaps that won’t compromise the integrity of the dish:

    • Tofu: Swap with paneer or tempeh for a different texture.
    • Spinach: Kale or Swiss chard can be used if spinach is unavailable.
    • Coconut milk: Substitute with almond or cashew milk for a lighter version.

    Nutrition Facts

    • Calories: 350 per serving
    • Protein: 18g
    • Fat: 22g
    • Carbs: 25g
    • Serving Size: 1 bowl (approx. 300g)

    Frequently Asked Questions

    • Can I freeze this curry? Yes, it freezes well. Store in a freezer-safe container for up to 2 months.
    • Is this dish spicy? It has a mild kick, but you can adjust the chili paste to your preference.
    • What can I serve with this curry? It pairs beautifully with basmati rice or naan bread.
    • How can I make this dish gluten-free? Ensure all ingredients, like the broth and spices, are certified gluten-free.

  • CHEAT DAY: Sinfully Delicious Snickerdoodle Protein Balls!

    CHEAT DAY: Sinfully Delicious Snickerdoodle Protein Balls!

    Introduction & My Personal Story

    Ah, the blissful aroma of cinnamon and sugar wafting through the kitchen. If there’s one cheat day indulgence that never fails to bring a smile to my face, it’s **Snickerdoodle Protein Balls**. My journey with these little bites of heaven began a few years ago when I was trying to find a way to satisfy my sweet tooth without completely derailing my fitness goals. In my 5 years of experience as a chef, I’ve learned that the key to enjoying your food is all about balance and creativity. So, I set out to craft a recipe that offers the best of both worlds: the nostalgic taste of a classic snickerdoodle cookie paired with the nutritious boost of a protein-packed snack.

    I remember my first attempt at these delightful treats. I was skeptical, unsure if I could truly capture the essence of a snickerdoodle in a healthy form. But as I rolled the dough into perfect little spheres and coated them in a cinnamon-sugar mix, I knew I was onto something special. The first bite was a revelation—a delightful, chewy texture with just the right amount of sweetness. These **Snickerdoodle Protein Balls** became an instant hit not only with me but with everyone I shared them with. Now, they’re a staple in my kitchen, especially when I need a quick, satisfying treat that doesn’t compromise my health goals.

    Why You’ll Love This Recipe

    • Quick and easy: No baking required, ready in under 30 minutes.
    • Nutritious: Packed with protein to fuel your day.
    • Customizable: Easily adjust ingredients to suit dietary needs.
    • Convenient: Perfect for meal prep and on-the-go snacking.
    • Delicious: All the flavors of a classic snickerdoodle in a guilt-free form.

    Detailed Ingredients

    • 1 cup rolled oats (100g) – Look for gluten-free if needed.
    • 1/2 cup oat flour (60g) – Provides a smooth texture.
    • 1/2 cup vanilla protein powder (60g) – Choose your favorite brand for best results.
    • 1/2 cup cashew butter (120g) – Creamy and rich, or swap with almond butter.
    • 1/4 cup maple syrup (60ml) – Adds natural sweetness.
    • 1 tsp vanilla extract – For that classic snickerdoodle flavor.
    • 1 tsp ground cinnamon – Essential for the snickerdoodle taste.
    • 1/4 tsp salt – Enhances all the flavors.
    • 2-3 tbsp almond milk – To adjust the dough consistency.
    • 1/4 cup coconut sugar (50g) – For the coating.

    Step-by-Step Instructions

    Step 1: Gather and Measure – Before you begin, gather all your ingredients and measure them out precisely. This will make the process smooth and ensure consistency in your protein balls.

    Step 2: Mix the Base – In a medium bowl, combine **rolled oats**, **oat flour**, **vanilla protein powder**, **cashew butter**, **maple syrup**, **vanilla extract**, **cinnamon**, and **salt**. Stir with a sturdy spoon until a thick dough forms. If the mixture feels too dry, gradually add **almond milk** until it comes together. The dough should be pliable but not sticky.

    Step 3: Form the Balls – Using a small cookie scoop or tablespoon, portion out the dough and roll it between your hands to form smooth balls, about 1 inch in diameter. This recipe should yield approximately 12-15 balls.

    Step 4: Prepare the Coating – In a shallow bowl, mix together **coconut sugar** and an extra dash of **cinnamon**. This will give your protein balls that iconic snickerdoodle finish.

    Step 5: Coat the Balls – Roll each **protein ball** in the cinnamon sugar mixture until fully coated. Ensure an even coating for the best flavor and texture.

    Step 6: Chill and Enjoy – Place the coated balls in the fridge for 15-20 minutes to firm up. This step is crucial for the flavors to meld together and for the balls to hold their shape.

    Common Mistakes to Avoid

    • Overmixing the dough: This can lead to a tough texture. Mix just until combined.
    • Skipping the chilling step: Without chilling, the balls may fall apart.
    • Using dry ingredients: Ensure your nut butter is creamy and fresh for the best consistency.

    How to Store & Reheat

    Refrigerate: Store your **Snickerdoodle Protein Balls** in an airtight container in the fridge for up to one week. This keeps them fresh and chewy.

    Freeze: For longer storage, place the balls in a freezer-safe container. They can be frozen for up to three months. To enjoy, simply thaw them in the fridge overnight or at room temperature for about 30 minutes.

    Ingredient Substitutions

    • Nut Butter: Swap cashew butter with almond or peanut butter for a different flavor profile.
    • Sweetener: Replace maple syrup with honey or agave for a different sweetness level.
    • Flour: Use almond flour instead of oat flour for a grain-free option.

    Nutrition Facts

    • Calories: 150 per ball
    • Protein: 5g
    • Fat: 7g
    • Carbohydrates: 18g
    • Serving Size: 1 ball

    Frequently Asked Questions

    • Can I make these vegan? Yes, use a plant-based protein powder and ensure your sweeteners are vegan-friendly.
    • How can I make this recipe gluten-free? Use certified gluten-free oats and oat flour.
    • What if I don’t have coconut sugar? Regular granulated sugar or brown sugar can be used for the coating.
    • Are these suitable for kids? Absolutely! They’re a great healthy snack option for children.
    • Can I double the recipe? Yes, this recipe scales well. Just ensure you have a large enough bowl for mixing.

  • Fast Fuel: Irresistible Gingerbread Pancakes on a Budget!

    Fast Fuel: Irresistible Gingerbread Pancakes on a Budget!

    Introduction & My Personal Story

    There’s something truly magical about waking up on a brisk winter morning to the smell of freshly cooked gingerbread pancakes wafting through the house. Growing up, my mother had a knack for transforming the simplest of ingredients into a breakfast feast that could rival any holiday banquet. These gingerbread pancakes were always a family favorite, especially during the festive season. The warmth of the ginger paired with the sweetness of the molasses created a comforting start to our day. In my 5 years of experience as a chef, I’ve found few things that can lift the spirits quite like these pancakes. They’re more than just a meal; they’re a reminder of the cozy mornings spent with family, laughter echoing in the kitchen, and the joy of sharing something delicious with loved ones. Today, I bring you a recipe that captures that essence, one that is not only delightful but also budget-friendly, ensuring you can enjoy these treats without any stress on your wallet.

    Why You’ll Love This Recipe

    • Quick and easy to prepare, perfect for busy mornings.
    • Uses budget-friendly ingredients you likely have on hand.
    • Rich in flavor with a perfect balance of spices.
    • Provides a warm, comforting start to the day.
    • Great for the whole family, loved by kids and adults alike.

    Detailed Ingredients

    • 1 cup (120g) all-purpose flour
    • 1 teaspoon baking powder
    • 1/2 teaspoon baking soda
    • 1/4 teaspoon salt
    • 1 teaspoon ground ginger
    • 1 teaspoon ground cinnamon
    • 1/4 teaspoon ground nutmeg
    • 1/4 cup (50g) brown sugar
    • 3/4 cup (180ml) warm milk
    • 1 large egg
    • 2 tablespoons unsalted butter, melted
    • 2 tablespoons molasses
    • 1 teaspoon vanilla extract

    When shopping, look for fresh spices to ensure the flavors are robust and aromatic. Opt for unsulphured molasses for a more authentic taste.

    Step-by-Step Instructions

    Step 1: Prepare the Dry Ingredients
    In a large mixing bowl, combine the flour, baking powder, baking soda, salt, ground ginger, cinnamon, nutmeg, and brown sugar. Whisk these together until everything is well blended. This ensures that your pancakes will rise evenly and have a consistent flavor throughout.

    Step 2: Mix the Wet Ingredients
    In another bowl, whisk together the warm milk, egg, melted butter, molasses, and vanilla extract. The warm milk helps to integrate the molasses smoothly, preventing clumping. Chef’s Tip: Ensure the melted butter is not too hot; otherwise, it may start to cook the egg.

    Step 3: Combine Wet and Dry Mixtures
    Gently pour the wet ingredients into the dry ingredients. Stir just until combined; it’s okay if the batter is a little lumpy. Overmixing can lead to tough pancakes. Let the batter rest for 10-15 minutes. This resting period allows the flour to hydrate and the baking powder to activate, resulting in fluffier pancakes.

    Step 4: Cook the Pancakes
    Heat a non-stick skillet or griddle over medium heat. Lightly grease the surface with butter or cooking spray. Using a 1/4 cup measure, pour the batter onto the skillet. Cook until you see bubbles forming on the surface, about 1 minute. Flip and cook the other side until golden brown, approximately 30 seconds. Adjust the heat as necessary to prevent burning.

    Step 5: Keep Pancakes Warm
    As you finish cooking, place the pancakes on a plate and cover them with a clean towel or keep them in a warm oven (around 200°F) to maintain their warmth until all are ready to serve.

    Step 6: Serve and Enjoy
    Serve your pancakes with a dollop of butter, a drizzle of syrup, or a sprinkle of powdered sugar. Pair with your favorite hot beverage for a complete breakfast experience.

    Common Mistakes to Avoid

    One common mistake is overmixing the batter, which can result in dense pancakes. Remember, lumps are okay. Another pitfall is cooking on too high a heat, which can burn the outside while leaving the inside undercooked. Always keep your heat at medium. Finally, not letting the batter rest can lead to flat pancakes, as the resting time is crucial for fluffiness.

    How to Store & Reheat

    Store any leftover pancakes in an airtight container in the refrigerator for up to 3 days. To reheat, place them in a toaster or a preheated oven at 350°F for about 5 minutes until warmed through. You can also freeze them in a single layer on a baking sheet, then transfer to a freezer bag for up to 2 months. Reheat directly from frozen in the toaster or oven.

    Ingredient Substitutions

    If you’re out of an ingredient or need to cater to dietary restrictions, here are some swaps:

    • Flour: Use whole wheat flour for a heartier texture.
    • Milk: Substitute with almond milk or oat milk for a dairy-free version.
    • Egg: Replace with a flax egg (1 tablespoon flaxseed meal + 2.5 tablespoons water).
    • Molasses: Use honey or maple syrup, though the flavor will be slightly different.

    Nutrition Facts

    • Calories: 357 kcal per serving
    • Protein: 6g
    • Fat: 12g
    • Carbohydrates: 56g
    • Serving Size: 3 pancakes

    Frequently Asked Questions

    Q: Can I make the batter ahead of time?
    A: Yes, you can prepare the batter the night before and store it in the refrigerator. Just give it a good stir before cooking.

    Q: Can I double the recipe?
    A: Absolutely! This recipe doubles nicely. Just ensure you have a large enough bowl for mixing and a big enough skillet for cooking.

    Q: What can I serve with these pancakes?
    A: Fresh fruit, bacon, or sausage are great sides. A dollop of whipped cream can also add a festive touch.

    Q: Are these pancakes suitable for freezing?
    A: Yes, they freeze very well. Just be sure to separate them with parchment paper to prevent sticking.

  • ZERO PREP: Instant Chips & Guac Cravings Satisfied!

    ZERO PREP: Instant Chips & Guac Cravings Satisfied!

    Introduction & My Personal Story

    Ah, guacamole! It takes me back to those bustling Sunday afternoons in my tiny kitchen, where the aroma of fresh cilantro and lime would wrap around me like a warm hug. In my 5 years of experience as a chef, I’ve learned that sometimes the most satisfying dishes are the simplest. This recipe for Instant Chips & Guac has been my go-to snack for those unexpected cravings. I remember one particular day when I had a house full of friends and nothing prepared. A quick rummage through my pantry and fridge, and I managed to whip up this zero-prep guacamole that left everyone asking for seconds. The secret is in using the freshest ingredients and the right balance of flavors. Every bite is a creamy, tangy explosion that feels like a mini fiesta in your mouth. Whether it’s game day, a casual get-together, or just a quiet evening at home, this dish never fails to impress. It’s a testament to the fact that you don’t need hours in the kitchen to create something truly delicious.

    Why You’ll Love This Recipe

    • **Quick and Easy:** Ready in under 5 minutes, no cooking required.
    • **Fresh and Flavorful:** Bursting with the natural taste of ripe avocados and zesty lime.
    • **Minimal Cleanup:** Just a bowl and a fork, and you’re done!
    • **Versatile Snack:** Perfect for parties, solo snacking, or as a side dish.
    • **Healthy:** Packed with healthy fats, vitamins, and antioxidants.

    Detailed Ingredients

    • **3 ripe avocados** (about 450 grams) – Look for avocados that give slightly to pressure, indicating ripeness.
    • **1 lime** (about 2 tablespoons of juice) – Choose limes that are firm yet slightly soft to the touch.
    • **2 Roma tomatoes** (about 150 grams) – Opt for firm, red tomatoes for the best flavor.
    • **¼ red onion** (about 30 grams) – Adds a lovely crunch and sharpness.
    • **1 jalapeño** (optional) – For those who like a bit of heat.
    • **2 tablespoons fresh cilantro** – Fresh cilantro brings a burst of herby freshness.
    • **2 garlic cloves** – Use fresh garlic for the best punch of flavor.
    • **Salt** – A pinch to enhance all the flavors.

    Step-by-Step Instructions

    Step 1: Prepare the Avocados

    Slice the avocados in half lengthwise, remove the pits, and scoop the flesh into a mixing bowl. Chef’s Tip: To prevent browning, keep the pit in the bowl until ready to serve. Mash the avocados using a fork until you reach your desired consistency. Some prefer it chunky, while others like it smooth.

    Step 2: Add the Fresh Ingredients

    Dice the Roma tomatoes and ¼ red onion finely. If using, chop the jalapeño, removing seeds for less heat. Mince the garlic cloves and roughly chop the cilantro. Add these ingredients to the mashed avocados.

    Step 3: Season and Mix

    Squeeze the juice of one lime over the mixture, and add a pinch of salt. Stir everything together until well combined. Taste and adjust the lime juice and salt according to your preference. Chef’s Tip: Let it sit for a couple of minutes to let the flavors meld together.

    Step 4: Serve or Store

    Enjoy your guacamole immediately with your favorite chips, or cover it tightly with plastic wrap (press it directly onto the surface of the guac to prevent browning) and store in the fridge for up to 3 days.

    Common Mistakes to Avoid

    • **Using Unripe Avocados:** They won’t mash well and lack the creamy texture needed.
    • **Over-mixing:** This can make the guac too smooth and lose its chunky texture.
    • **Not Enough Lime Juice:** It not only adds flavor but also helps prevent browning.
    • **Skipping Salt:** It’s essential for bringing out the flavors of the other ingredients.

    How to Store & Reheat

    To store guacamole, place it in an airtight container and press plastic wrap directly onto the surface to minimize air exposure. Store in the refrigerator for up to 3 days. To reheat, though not typically necessary, you can let it sit at room temperature for about 30 minutes before serving to bring back some of the flavors.

    Ingredient Substitutions

    • **Avocados:** No true substitute, but if you’re out, try a similar dip with mashed peas for a different twist.
    • **Lime Juice:** Lemon juice can be used in a pinch.
    • **Cilantro:** If you’re not a fan, parsley can be used, though it changes the flavor profile.
    • **Jalapeño:** For a milder option, use bell pepper, or skip entirely for no heat.

    Nutrition Facts

    • **Calories:** 250 per serving
    • **Protein:** 3 grams
    • **Fat:** 22 grams
    • **Carbs:** 15 grams
    • **Serving Size:** 1/4 of the recipe

    Frequently Asked Questions

    Q: Can I make guacamole ahead of time?

    A: Yes, but it’s best enjoyed fresh. If making ahead, store as directed to minimize browning.

    Q: What chips go best with guacamole?

    A: Tortilla chips are a classic choice, but pita chips or vegetable sticks work well too.

    Q: How can I make my guacamole spicier?

    A: Add more jalapeño or a dash of cayenne pepper for extra heat.

    Q: Is guacamole healthy?

    A: Yes, it’s high in healthy fats and contains plenty of vitamins and minerals.

  • GAINS: Perfect Roux for Muscle-Building Gumbo!

    GAINS: Perfect Roux for Muscle-Building Gumbo!

    Introduction & My Personal Story

    Ah, gumbo! The dish that instantly transports me back to my early days in the kitchen, where I first learned the art of crafting a perfect roux. I remember standing beside my grandmother, who hailed from the heart of Louisiana, as she patiently stirred the roux until it reached that signature deep chocolate color. It was a labor of love, and she always said, “A good gumbo starts with a good roux.” Over the years, I’ve taken that wisdom to heart, blending it with my own culinary experiences to create a version of gumbo that not only brings comfort but also packs a punch of protein for those looking to fuel their muscles.

    In my 5 years of experience as a chef, I’ve learned that a dish like gumbo is all about balance. It’s about marrying flavors and textures, and in this case, it’s about creating a meal that not only delights the taste buds but also supports an active lifestyle. Whether you’re a seasoned athlete or someone just starting their fitness journey, this gumbo is designed to keep you going strong. It’s hearty, satisfying, and brimming with nutrients that will help you recover after a tough workout. So, let’s dive into this muscle-building masterpiece and make some gains!

    Why You’ll Love This Recipe

    Detailed Ingredients

    For this muscle-building gumbo, you’ll need:

    • **13.5 oz. andouille sausage**, sliced
    • **1 lb. boneless, skinless chicken thighs**, cubed
    • **2 tablespoons Creole seasoning**
    • **¾ cup vegetable oil**
    • **1 cup all-purpose flour**
    • **1 large onion**, diced
    • **1 green bell pepper**, diced
    • **3 ribs of celery**, sliced
    • **2 garlic cloves**, minced
    • **12 oz. frozen okra**
    • **1 teaspoon dried thyme**
    • **3 bay leaves**
    • **¼ teaspoon salt**
    • **¼ teaspoon black pepper**
    • **6 cups chicken broth**
    • **2 tablespoons hot sauce**
    • **¼ bunch fresh parsley**, chopped
    • **2 green onions**, sliced
    • **2 cups uncooked rice**

    When shopping, look for fresh vegetables and high-quality sausage to ensure the best flavor.

    Step-by-Step Instructions

    Sear the Sausage: Heat 1 tablespoon of vegetable oil in a large, deep skillet over medium heat. Once hot, add the sliced andouille sausage. Brown both sides, about 5 minutes each. Remove and set aside.

    Cook the Chicken: Toss the cubed chicken thighs with 1 tablespoon of Creole seasoning. Add to the skillet, searing for 5 minutes on each side. Remove and cover with foil to keep warm.

    Make the Roux: Lower the heat to medium-low and add **¾ cup vegetable oil** and **1 cup all-purpose flour**. Stir constantly for about 2 hours until it reaches a dark brown color. This step requires patience, as the roux is the foundation of flavor. Chef’s Tip: Keep stirring to prevent burning!

    Add Vegetables: Increase heat to medium. Stir in the diced onion, green pepper, and sliced celery. Cook until softened, about 5 minutes.

    Combine Ingredients: Add the browned chicken, sausage, any accumulated juices, minced garlic, and frozen okra. Season with the remaining tablespoon of Cajun seasoning, dried thyme, bay leaves, salt, and pepper.

    Simmer: Pour in the chicken broth. Bring to a boil, then lower the heat and simmer until thickened, about 30 minutes. The gumbo should have a rich, deep flavor by now.

    Final Touches: In the last 5 minutes, stir in hot sauce, chopped parsley, and sliced green onions, saving some for garnish.

    Cook the Rice: Prepare the rice according to package instructions. Typically, use 4 cups of water and let simmer until tender.

    Serve: Once the rice is cooked, fluff with a fork and serve with gumbo. Garnish with reserved parsley and green onions. Enjoy!

    Common Mistakes to Avoid

    • Burning the Roux: Stir constantly and adjust the heat as needed. If it burns, you’ll need to start over.
    • Overcooking the Meat: Keep an eye on the chicken and sausage to ensure they don’t dry out.
    • Skipping the Simmer: Allow the gumbo to simmer to develop deep flavors and thicken properly.

    How to Store & Reheat

    Store any leftover gumbo in airtight containers in the refrigerator for up to 3 days. For longer storage, freeze in portion-sized containers for up to 3 months. To reheat, thaw overnight in the refrigerator if frozen, then warm on the stove over medium heat until hot.

    Ingredient Substitutions

    • Sausage: Substitute with turkey sausage or a plant-based alternative for a different flavor profile.
    • Chicken Thighs: Use chicken breasts if preferred, but adjust cooking time to prevent drying out.
    • Vegetable Oil: Can be replaced with canola oil or a similar neutral oil.
    • Okra: If not a fan, consider using zucchini or omit entirely.

    Nutrition Facts

    • Calories: 673 kcal
    • Protein: 27g
    • Fat: 36g
    • Carbs: 53g
    • Serving Size: 1 cup of gumbo with rice

    Frequently Asked Questions

    Q: Can I make this gumbo spicier?

    A: Absolutely! Add more hot sauce or a pinch of cayenne pepper to turn up the heat.

    Q: What’s the best way to thicken the gumbo?

    A: The roux does most of the work, but you can also let it simmer uncovered to reduce further.

    Q: Can I make this recipe vegetarian?

    A: Yes, substitute the sausage and chicken with plant-based proteins and use vegetable broth.

    Q: What should I serve with gumbo?

    A: It’s traditionally served with rice, but you can also enjoy it with crusty bread or cornbread.

  • LATE NIGHT FUEL: Skip Takeout—This Easy Egg Drop Soup Always Delivers!

    LATE NIGHT FUEL: Skip Takeout—This Easy Egg Drop Soup Always Delivers!

    Introduction & My Personal Story

    There’s something magical about a bowl of **Egg Drop Soup** at midnight. I remember the first time I made this comforting dish was during my college days. It was one of those late nights when the library was my second home, and takeout was my best friend. But one evening, craving something warm and homemade, I ventured into the kitchen to whip up a simple yet satisfying bowl of soup. It was love at first slurp.

    In my 5 years of experience as a chef, I’ve come to realize that this dish is the perfect blend of simplicity and flavor. The delicate ribbons of eggs, the aromatic ginger, and the subtle umami of soy sauce create a harmony that’s hard to resist. It’s become a staple in my late-night routine, not just for its taste, but also for how it fuels my creativity without the dreaded food coma. Whether you’re burning the midnight oil or simply seeking a quick meal, this **Easy Egg Drop Soup** is your ticket to culinary satisfaction.

    Why You’ll Love This Recipe

    • Quick and easy to prepare, perfect for late-night cravings.
    • Light yet satisfying, keeping you focused and energized.
    • Uses simple, readily available ingredients.
    • Customizable to suit your taste preferences.
    • Low in calories, making it a guilt-free indulgence.

    Detailed Ingredients

    • **8 oz mushrooms**, sliced – Look for firm and fresh mushrooms with no dark spots.
    • **3 green onions**, sliced – Choose bright green stalks that are crisp.
    • **1 Tbsp fresh ginger**, grated – Pick ginger that is firm and smooth.
    • **4 cups chicken broth** – Opt for low-sodium broth for better control over seasoning.
    • **2 cups water**
    • **1 Tbsp soy sauce** – Use a good quality soy sauce for richer flavor.
    • **1 Tbsp cornstarch + 1 Tbsp water** – This will help thicken the soup.
    • **2 large eggs**, whisked
    • **2 cups fresh spinach** – Look for vibrant green leaves, free from wilting.

    Step-by-Step Instructions

    Start by heating a tablespoon of oil in a pot over medium heat. Add in the **sliced mushrooms**, **green onions**, and **grated ginger**. Sauté these ingredients for about 3-5 minutes until the mushrooms soften and release their moisture. The aroma of ginger should fill your kitchen, signaling it’s time for the next step.

    Pour in the **chicken broth**, **water**, and **soy sauce**. Stir everything together, then prepare your cornstarch slurry by mixing **1 tablespoon of cornstarch** with **1 tablespoon of water**. Slowly add this to the pot, stirring constantly to avoid any lumps. Increase the heat and bring the mixture to a gentle boil.

    Once boiling, reduce the heat to low. Now comes the exciting part—creating those iconic egg ribbons. Gently swirl the soup with a spoon, then slowly drizzle the **whisked eggs** into the pot. Allow the eggs to set without stirring for 1-2 minutes. You’ll see beautiful, silky strands forming in the broth.

    Finally, add the **fresh spinach** to the soup. Stir until the spinach wilts, which should take about a minute. Taste and adjust the seasoning with more soy sauce if needed. Serve the soup hot, and enjoy its comforting warmth.

    Common Mistakes to Avoid

    • **Overcooking the eggs**: Make sure to reduce the heat and let the eggs set undisturbed for perfect ribbons.
    • **Lumpy soup**: Always mix cornstarch with water before adding to avoid clumps.
    • **Too salty**: Use low-sodium broth and add soy sauce gradually to control the saltiness.
    • **Watery soup**: Ensure your cornstarch slurry is well-mixed to thicken the broth adequately.

    How to Store & Reheat

    Store any leftover soup in an airtight container in the refrigerator. It will keep well for up to 3 days. To reheat, pour the soup into a pot over medium heat, stirring occasionally until heated through. Avoid boiling to prevent the eggs from overcooking.

    Ingredient Substitutions

    • **Vegetable broth** can replace chicken broth for a vegetarian option.
    • **Tamari** can be used instead of soy sauce for a gluten-free version.
    • **Tofu** cubes can be added for extra protein.
    • **Kale** can replace spinach for a different leafy green flavor.

    Nutrition Facts

    • Calories: 150 per serving
    • Protein: 10g
    • Fat: 5g
    • Carbohydrates: 15g
    • Serving Size: 1 cup

    Frequently Asked Questions

    • Can I make this soup in advance? Yes, the flavors meld beautifully when made a day ahead. Just store it properly and reheat gently.
    • What can I serve with Egg Drop Soup? It’s perfect on its own or alongside some steamed rice or dumplings.
    • Is there a vegan option? Absolutely, swap the chicken broth for vegetable broth and skip the eggs.
    • How can I make the soup spicier? Add a dash of chili oil or some sliced chili peppers for heat.