Introduction & My Personal Story
There’s something uniquely comforting about a warm, hearty casserole. Growing up, my mother would often prepare a chicken and rice casserole that seemed to cure any ailment, big or small. As a young aspiring chef, I was mesmerized by how a simple dish could bring the family together, providing not just nourishment but a sense of unity. Fast forward to my twenties, when I began my journey as a professional chef, I realized the power of protein-rich meals, especially for those leading an active lifestyle. In my 5 years of experience crafting recipes that fuel fitness enthusiasts, I’ve come to appreciate this revamped version of my childhood favorite. The “Gains: Power-Packed Chicken & Rice Casserole” is more than just a meal; it’s a testament to the power of nutrition in muscle recovery and strength building. Every bite is a nostalgic nod to my roots, yet it’s tailored for today’s active warriors. Let’s dive into why this dish is not only delicious but also a powerhouse of nutrients.
Why You’ll Love This Recipe
- High in **protein** for muscle recovery and growth.
- Rich in **flavor** with a blend of spices and creamy sauce.
- Perfect for meal prep – stays fresh and tasty for days.
- Simple, straightforward steps for a hassle-free cooking experience.
- Customizable with your favorite vegetables and spices.
Detailed Ingredients
To create this power-packed casserole, you’ll need the following ingredients:
- 1 ½ cups long-grain white rice (uncooked)
- 3 cups water (for cooking rice)
- 1 boneless, skinless **chicken breast** (approximately 300 grams), cut into ½-inch cubes
- ½ teaspoon salt
- ½ teaspoon pepper
- 1 tablespoon olive oil
- 1 small yellow onion, diced
- 3 medium carrots, diced
- ½ lb. broccoli florets, thawed if frozen
- 3 tablespoons butter
- 3 tablespoons all-purpose flour
- 1 cup chicken broth
- 1 cup whole milk
- 1 teaspoon smoked paprika
- ½ teaspoon garlic powder
- ½ teaspoon onion powder
- 2 cups shredded cheddar cheese
When shopping, look for fresh, vibrant vegetables, and high-quality **chicken** to ensure the best taste and nutritional value.
Step-by-Step Instructions
Step 1: Prep the Oven and Dish
Preheat your oven to 350°F (175°C). Spray an 8×10-inch casserole dish with nonstick spray to prevent sticking.
Step 2: Cook the Rice
In a saucepan, bring 3 cups of water to a boil. Add 1 ½ cups of long-grain white rice, reduce to a simmer, and cover. Cook according to package instructions until the rice is tender and yields about 4 cups.
Step 3: Prepare the Chicken
While the rice is cooking, cut your **chicken breast** into ½-inch cubes. Season with ½ teaspoon of salt and ½ teaspoon of pepper.
Step 4: Sear the Chicken
Heat a large skillet over medium-high heat. Add 1 tablespoon of olive oil and the seasoned chicken cubes. Sear for about 2 minutes on each side until lightly browned. Transfer the chicken to a large bowl.
Step 5: Sauté the Vegetables
In the same skillet, add the diced onion and carrots. Sauté for about 5 minutes until softened. Add them to the bowl with the chicken.
Step 6: Make the Sauce
Using the same skillet, melt 3 tablespoons of butter over medium heat. Add 3 tablespoons of flour, whisking constantly until the mixture becomes foamy. Cook for about 1 minute to eliminate the raw flour taste.
Step 7: Add Liquids to the Sauce
Slowly whisk in 1 cup of chicken broth, allowing the mixture to simmer and thicken. Gradually add 1 cup of whole milk, whisking continuously until the sauce coats the back of a spoon.
Step 8: Season the Sauce
Turn off the heat and stir in 1 teaspoon of smoked paprika, ½ teaspoon of garlic powder, and ½ teaspoon of onion powder. Mix well with the remaining salt and pepper.
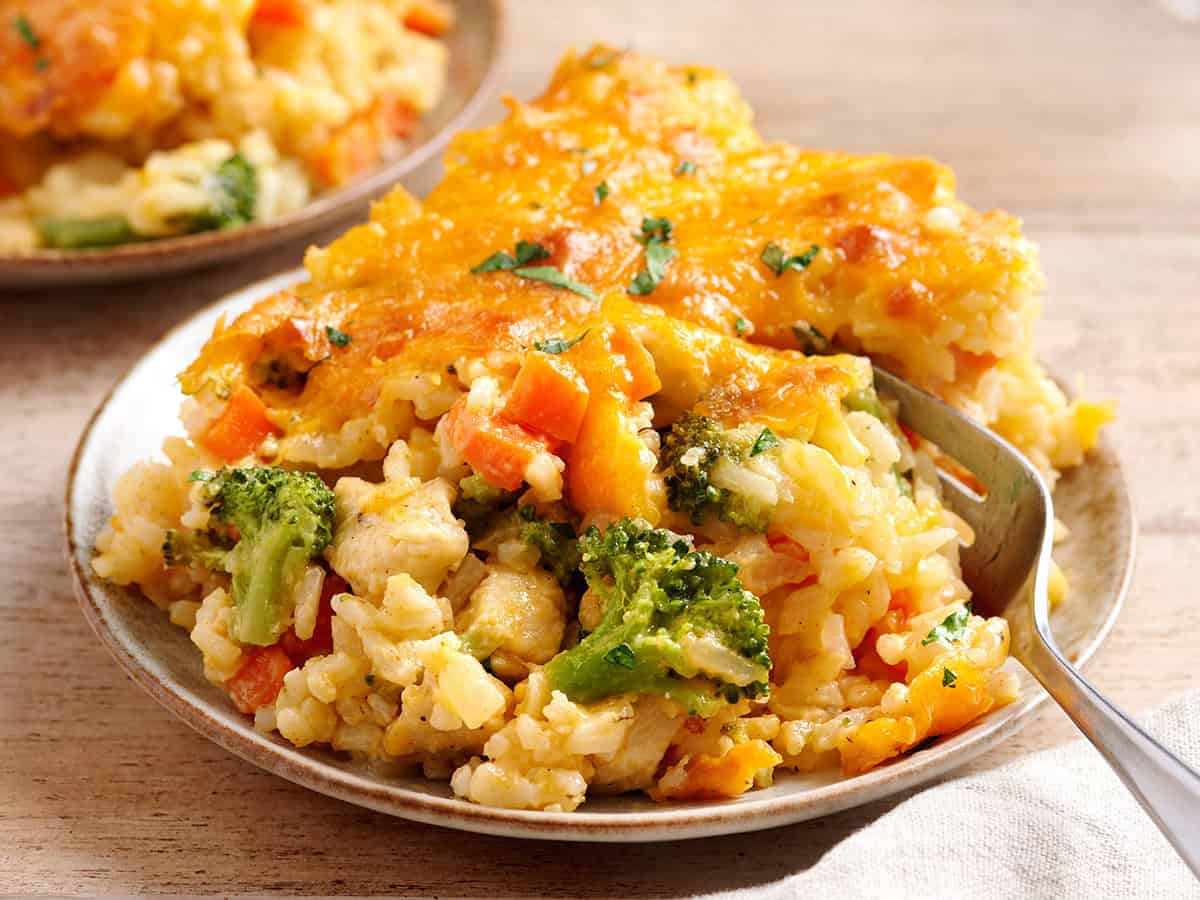
Step 9: Combine All Ingredients
In the bowl with the chicken and vegetables, add the broccoli florets, cooked rice, and half of the shredded cheddar cheese (about 1 cup). Pour in the sauce and mix until everything is well combined.
Step 10: Assemble the Casserole
Transfer the mixture to the prepared casserole dish. Smooth out the top and sprinkle the remaining shredded cheese evenly over the mixture.
Step 11: Bake
Bake in the preheated oven for about 35 minutes, or until the edges are golden brown and the cheese is bubbly.
Step 12: Serve
Serve hot as a hearty, protein-packed meal. Perfect for post-workout recovery or a comforting family dinner.
Common Mistakes to Avoid
Here are a few pitfalls to watch out for when making this casserole:
- Overcooking the chicken: Searing should be brief to prevent dryness. Aim for just a light browning.
- Undercooked rice: Ensure the rice is fully cooked before adding it to the casserole to avoid crunchy bites.
- Runny sauce: Allow the sauce to thicken properly before combining with other ingredients. It should coat the back of a spoon.
How to Store & Reheat
To store leftovers, allow the casserole to cool completely. Transfer to an airtight container and refrigerate for up to 4 days. For longer storage, freeze for up to 3 months. To reheat, preheat the oven to 350°F (175°C) and warm the casserole until heated through, about 20-25 minutes. If reheating from frozen, allow it to thaw overnight in the refrigerator first.
Ingredient Substitutions
- Chicken: Swap with turkey or tofu for a different protein source.
- Rice: Use brown rice for a nuttier flavor and more fiber.
- Cheese: Substitute with mozzarella or a dairy-free alternative if preferred.
- Milk: Almond or soy milk can be used for a lactose-free option.
Nutrition Facts
- Calories: Approximately 513 kcal per serving
- Protein: 24g
- Fat: 23g
- Carbohydrates: 45g
- Serving Size: 1/6 of the casserole
Frequently Asked Questions
- Can I make this casserole ahead of time? Yes, prepare the casserole up to the baking step, cover, and refrigerate for up to 24 hours before baking.
- Is this recipe gluten-free? Substitute the all-purpose flour with a gluten-free flour blend to make it gluten-free.
- Can I add more vegetables? Absolutely, feel free to add bell peppers, peas, or any of your favorite veggies.
- How can I make this spicier? Add a pinch of cayenne pepper or a chopped jalapeño to the sauce for extra heat.
Leave a Reply