Blog

  • CHEAT DAY: Irresistible High-Protein S’mores You’ll Crave!

    CHEAT DAY: Irresistible High-Protein S’mores You’ll Crave!

    Introduction & My Personal Story

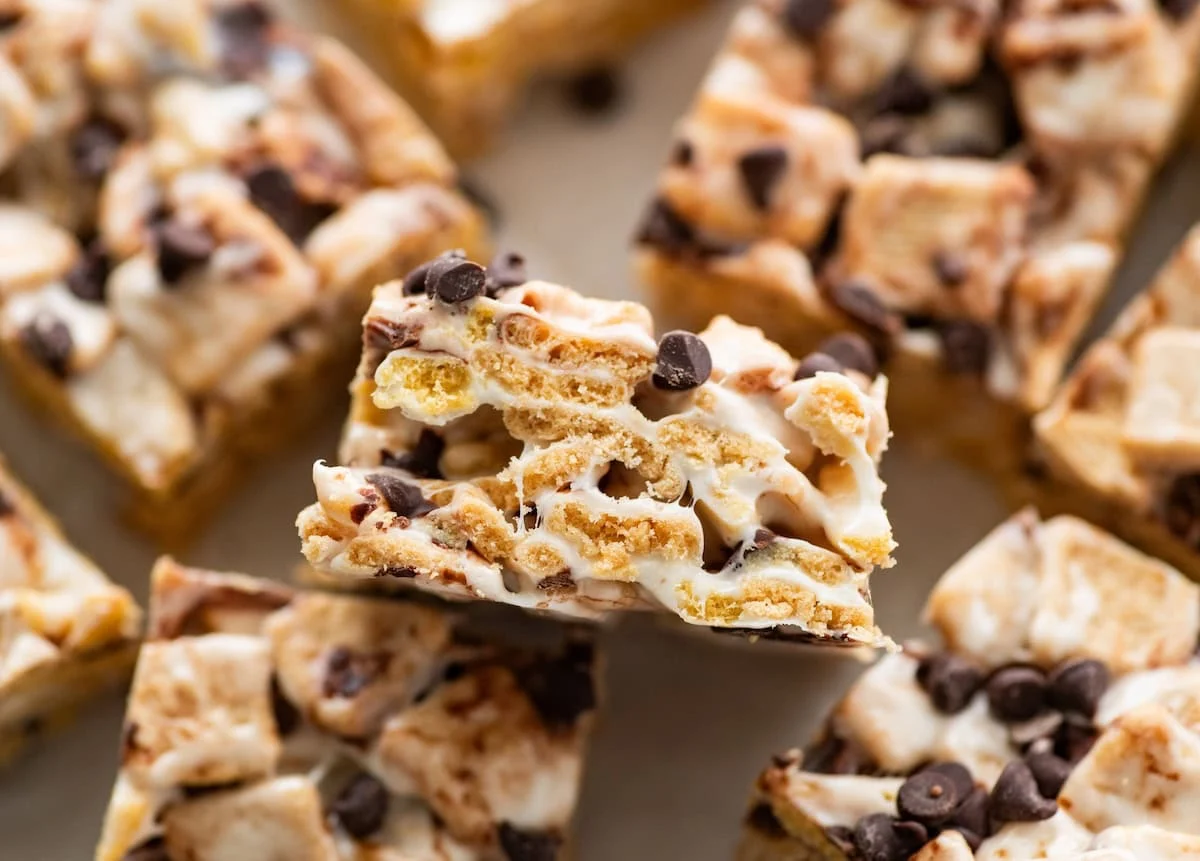
    Ah, the joy of a cheat day! For me, it’s not just about indulging in something delicious but about reliving a cherished memory. My journey with these **High-Protein S’mores** began during a camping trip with close friends. I remember the crackling campfire, the laughter, and the challenge of making the perfect s’more without burning it. As the gooey marshmallow sandwiched between graham crackers and chocolate melted in my mouth, I was transported back to a simpler time full of joy and camaraderie. Fast forward to my culinary career, I wanted to recreate that nostalgic delight but with a twist – a healthier, protein-packed version that I could enjoy on any cheat day without the guilt.

    In my 5 years of experience as a chef, I’ve learned that indulging doesn’t mean sacrificing nutrition. These **High-Protein S’mores** are a testament to that philosophy. They’re a no-bake treat that combines the classic flavors of s’mores with a boost of protein, making them not just a treat for the taste buds but also a little reward for the body. Every time I make them, I’m reminded of those nights under the stars, and I hope this recipe brings a bit of that magic into your home.

    Why You’ll Love This Recipe

    • **No-Bake Simplicity**: Perfect for when you want a quick and easy treat without turning on the oven.
    • **High-Protein**: Packed with protein to satisfy your cravings and keep you full longer.
    • **Guilt-Free Indulgence**: Enjoy a sweet treat without the guilt, thanks to its healthier ingredients.
    • **Customizable**: Easily tweak the ingredients to fit your dietary needs or taste preferences.
    • **Kid-Friendly**: A fun and delicious treat that’s perfect for the whole family.

    Detailed Ingredients

    Here’s what you’ll need to gather for this delightful cheat day treat:

    • **Butter**: 1 tablespoon. Look for unsalted butter for better control over the saltiness.
    • **Mini Marshmallows**: 5 ounces. Opt for fresh marshmallows that are soft and squishy.
    • **Honey Graham Catalina Crunch Cereal**: 9 ounces. This provides the crunch and a touch of sweetness.
    • **Mini Chocolate Chips**: 2-3 tablespoons. Choose high-quality semi-sweet or dark chocolate for a richer flavor.

    Step-by-Step Instructions

    Let’s dive into making these **High-Protein S’mores** step by step:

    Step 1: Prepare Your Pan
    Line an 8×8-inch baking dish with parchment paper or lightly grease it. This will make it easy to remove the s’mores once they’re set.

    Step 2: Melt the Marshmallows
    In a medium saucepan over medium-low heat, melt 1 tablespoon of butter. Add 5 ounces of mini marshmallows and stir continuously. The key here is to keep the heat low and stir patiently until the marshmallows are completely melted and smooth. Chef’s Tip: Be careful not to overheat to prevent the marshmallows from becoming too sticky and difficult to mix.

    Step 3: Mix in the Cereal
    Immediately add 9 ounces of Honey Graham Catalina Crunch cereal to the saucepan. Gently fold the cereal into the melted marshmallow mixture until it’s evenly coated. You’ll want to work quickly here to ensure everything combines well before the marshmallow cools down too much.

    Step 4: Add Chocolate Chips
    Let the mixture cool for about 30–60 seconds. This slight cooling prevents the chocolate chips from melting completely. Fold in 2-3 tablespoons of mini chocolate chips, ensuring they’re well distributed throughout the mixture.

    Step 5: Transfer and Set
    Transfer the mixture to your prepared pan. Use a spatula or parchment paper to lightly press it into an even layer. For an extra chocolatey touch, sprinkle any remaining chocolate chips on top and gently press them in.

    Step 6: Let It Cool
    Allow the mixture to cool at room temperature for about 30-60 minutes. This will give it time to set before you cut it into squares.

    Common Mistakes to Avoid

    • **Overheating the Marshmallows**: Keep the heat low to prevent the marshmallows from becoming too sticky.
    • **Skipping the Cooling Step**: Letting the mixture cool slightly before adding chocolate chips is essential to prevent them from melting completely.
    • **Uneven Mixing**: Make sure to fold the cereal and marshmallow mixture thoroughly to ensure every piece is coated.

    How to Store & Reheat

    • Room Temperature: Store in an airtight container for up to 3 days.
    • Refrigerator: Keep chilled for up to 7 days for a firmer, chewy texture.
    • Freezer: Freeze squares in a freezer-safe container for up to 2 months. Thaw at room temperature before eating.

    Ingredient Substitutions

    • **Butter**: Substitute with coconut oil or a plant-based margarine for a vegan option.
    • **Mini Marshmallows**: Use vegan marshmallows if needed.
    • **Honey Graham Catalina Crunch Cereal**: Swap with any high-protein cereal of your choice.
    • **Mini Chocolate Chips**: Use dairy-free chocolate chips for a vegan-friendly treat.

    Nutrition Facts

    • **Calories**: Approximately 150 per serving.
    • **Protein**: 5 grams.
    • **Fat**: 6 grams.
    • **Carbs**: 20 grams.
    • **Serving Size**: 1 square (based on 16 squares per batch).

    Frequently Asked Questions

    • Can I make these s’mores gluten-free?
      Yes, just ensure the cereal and marshmallows you use are certified gluten-free.
    • What’s the best way to cut the s’mores?
      Use a sharp knife and cut while they are still slightly warm for cleaner edges.
    • Can I add nuts or other mix-ins?
      Absolutely! Chopped nuts or dried fruit can add extra flavor and texture.
    • How can I make these s’mores more indulgent?
      Drizzle with melted chocolate or add a layer of peanut butter before setting.
    • Are these safe for kids?
      Yes, they’re a fun and tasty treat for kids, but be mindful of the sugar content.

  • 5-MIN FUEL: Delicious & Versatile Homemade Hummus!

    5-MIN FUEL: Delicious & Versatile Homemade Hummus!

    Introduction & My Personal Story

    Ah, hummus. Every time I whip up a batch, I’m transported back to my childhood kitchen, where the comforting aroma of garlic and tahini would dance through the air. My mother, a culinary genius in her own right, would often prepare this creamy delight as a snack for our bustling family gatherings. It was her go-to dish, not only because of its simplicity but because it brought everyone together around the kitchen table, each of us dipping our pita bread or crunchy veggies into the communal bowl. In my 5 years of experience as a chef and food blogger, I’ve come to realize that this humble dish is much more than a simple snack—it’s a bridge that connects people through taste and tradition. Whether you’re a seasoned cook or a kitchen novice, this 5-minute homemade hummus recipe is a testament to the fact that great food doesn’t have to be complicated. Let’s dive into how you can bring this delicious and versatile dish into your own home.

    Why You’ll Love This Recipe

    • Ready in just 5 minutes, perfect for busy schedules.
    • Rich in protein and fiber, making it a nutritious snack.
    • Versatile base that can be customized with various flavors.
    • Uses simple pantry ingredients you likely already have.
    • Vegan and gluten-free, catering to a wide range of dietary needs.

    Detailed Ingredients

    To make this delicious homemade hummus, gather the following ingredients:

    • 1 can (15 oz) of chickpeas (also known as garbanzo beans). Look for ones without added preservatives for the best flavor.
    • 2 tablespoons of olive oil. Extra virgin is preferred for its robust flavor.
    • ¼ cup of lemon juice, freshly squeezed for a bright, tangy kick.
    • ¼ cup of tahini. Opt for a smooth, high-quality brand to avoid a bitter taste.
    • 1 clove of garlic, peeled. Fresh garlic is key for that spicy undertone.
    • ½ teaspoon of salt. Adjust according to taste.
    • ¼ teaspoon of cumin. Adds a warm, earthy depth to the hummus.
    • Optional: A splash of water to adjust consistency.

    Step-by-Step Instructions

    Step 1: Start by draining and rinsing the can of **chickpeas**. This removes excess sodium and helps to achieve that smooth texture in your hummus. Chef’s Tip: For an extra creamy texture, you can peel the skins off the chickpeas, although it’s not necessary if you’re short on time.

    Step 2: In a food processor, combine the drained **chickpeas**, **olive oil**, **lemon juice**, **tahini**, **garlic**, **salt**, and **cumin**. Pulse the mixture for about 30 seconds to start breaking everything down.

    Step 3: Scrape down the sides of the food processor and continue to pulse until the mixture is smooth and creamy. This should take about 1-2 minutes. If the hummus is too thick, add a splash of water or more **olive oil** and pulse again until you reach your desired consistency.

    Step 4: Taste the hummus and adjust the seasoning as needed. You might want to add more **salt**, **lemon**, or **garlic** depending on your preference.

    Step 5: Serve immediately with pita bread, fresh vegetables, or as a spread for sandwiches. Feel free to customize with flavor variations like roasted red pepper or sun-dried tomato for a unique twist.

    Common Mistakes to Avoid

    • **Using canned chickpeas without rinsing:** This can lead to an overly salty hummus.
    • **Over-processing the mixture:** This can make the hummus too fluffy rather than creamy. Pulse until just smooth.
    • **Skipping the tahini:** Tahini is essential for that authentic hummus flavor. Don’t skip it!
    • **Not tasting as you go:** Always taste and adjust seasonings before serving.

    How to Store & Reheat

    Store your homemade hummus in an airtight container in the refrigerator. It will keep well for up to 5 days. If the hummus separates over time, just give it a good stir before serving. While hummus is best enjoyed fresh, if you need to reheat it, gently warm it in the microwave for 30 seconds, stirring halfway through. However, it’s typically served cold or at room temperature.

    Ingredient Substitutions

    • If you’re out of **tahini**, try using almond butter or sunflower seed butter for a nutty flavor.
    • No **lemon juice**? Lime juice can work in a pinch, though it will alter the flavor slightly.
    • To make it oil-free, replace **olive oil** with a bit of aquafaba (the liquid from the chickpea can) or water.

    Nutrition Facts

    Here’s a quick look at the nutrition profile for a serving size of 2 tablespoons:

    • Calories: 166 kcal
    • Protein: 5 grams
    • Fat: 13 grams
    • Carbs: 9 grams
    • Serving Size: 2 tablespoons

    Frequently Asked Questions

    Q1: Can I use dried chickpeas instead of canned?

    A1: Absolutely! Just be sure to soak and cook them thoroughly before using. It does add extra time but can enhance the flavor.

    Q2: Is it possible to make hummus without a food processor?

    A2: Yes, you can use a blender, though it may require more liquid to achieve the same smoothness. Alternatively, mash with a fork for a chunkier texture.

    Q3: How can I make the hummus spicier?

    A3: Add a pinch of cayenne pepper or a few dashes of hot sauce to the mixture before processing.

    Q4: What are some serving suggestions for hummus?

    A4: Serve with pita bread, fresh veggies, or use as a spread in wraps and sandwiches.

    Q5: Can I freeze hummus?

    A5: Yes, hummus freezes well. Store in an airtight container and freeze for up to 4 months. Thaw in the fridge before serving.


  • Focus Win: Vegan Power Bowl!

    Focus Win: Vegan Power Bowl!

    Introduction & My Personal Story

    There’s something truly magical about the simplicity and power of a well-crafted vegan power bowl. I remember the first time I made this dish; it was a sunny afternoon in my tiny kitchen, and I was on a quest to create something that was not only delicious but also packed with nutrients to fuel my busy lifestyle. In my 5 years of experience as a chef, I’ve learned that food is not just about satisfying hunger—it’s about nourishing the body and mind. This particular recipe became a staple for me during a hectic period when I was juggling multiple projects and needed that extra edge to stay focused and energized. Each ingredient was carefully chosen for its ability to boost brain power, from the omega-3 rich ingredients to the vibrant, nutrient-dense vegetables. Every time I make this dish now, it brings me back to that moment of discovery and the joy of creating something that truly supports my hustle.

    Why You’ll Love This Recipe

    • High in Omega-3s for improved focus and cognitive function.
    • Quick and easy to prepare, perfect for busy schedules.
    • Rich in flavor and texture, satisfying for both vegans and non-vegans alike.
    • Customizable with ingredient substitutions to suit your taste and dietary needs.
    • Packed with plant-based protein to keep you full and energized.

    Detailed Ingredients

    • 2 medium **sweet potatoes**, peeled and diced (about 500g)
    • 1 medium **red onion**, sliced (about 150g)
    • 2 cups **kale**, chopped (about 100g)
    • 1 can (400g) **chickpeas**, drained and rinsed
    • 3 tablespoons **olive oil**, divided
    • 1/2 teaspoon **salt**, plus more to taste
    • 1/4 teaspoon **black pepper**, plus more to taste
    • 1/4 teaspoon **cumin**
    • 1 tablespoon **brown sugar**
    • 1/2 teaspoon **chili powder**
    • 1 can (400g) **cannellini beans**, drained
    • 2 tablespoons **warm water**
    • 1 tablespoon **apple cider vinegar**

    Step-by-Step Instructions

    Step 1: Preheat your oven to 400°F (200°C). Line a baking sheet with foil or parchment paper for easy cleanup.

    Step 2: Prepare your vegetables. Dice the sweet potatoes into even-sized cubes for even cooking. Slice the red onion and chop the kale into bite-sized pieces.

    Step 3: On the prepared baking sheet, combine the diced sweet potatoes and sliced onion. Drizzle with 1 tablespoon of olive oil, then sprinkle with 1/2 teaspoon of salt, 1/4 teaspoon of pepper, and 1/4 teaspoon of cumin. Toss everything until the vegetables are well coated.

    Step 4: Roast the sweet potatoes and onions for 10 minutes. Remove the tray from the oven, flip the sweet potatoes, and push them to one side. Add the chopped kale to the other side of the tray, drizzle with 2 teaspoons of olive oil, and season with a pinch of salt and pepper. Return to the oven and continue roasting for another 10 minutes, or until the sweet potatoes are tender and the kale is crispy.

    Step 5: While the vegetables roast, prepare the chickpeas. In a medium bowl, combine the drained chickpeas with brown sugar, 1/2 teaspoon chili powder, 1/4 teaspoon salt, and a dash of pepper. Toss until the chickpeas are evenly coated.

    Step 6: Heat a skillet over medium heat and add 1 tablespoon of olive oil. Once the oil is shimmering, add the seasoned chickpeas. Cook for about 8 minutes, stirring occasionally, until the chickpeas are crispy and golden.

    Step 7: For the dressing, blend the drained cannellini beans with 2 tablespoons of warm water, 1 tablespoon of apple cider vinegar, 1 tablespoon of olive oil, 1/2 teaspoon of salt, and 1/4 teaspoon of pepper until smooth. If the dressing is too thick, add more water until you reach your desired consistency.

    Step 8: Assemble your power bowls by dividing the roasted vegetables between two bowls. Top with the crispy chickpeas and drizzle generously with the creamy dressing.

    Step 9: Enjoy your Vegan Power Bowl and feel the focus and energy kick in!

    Common Mistakes to Avoid

    Overcrowding the Baking Sheet: Make sure not to overcrowd the baking sheet when roasting vegetables. This can cause steaming rather than roasting, preventing the vegetables from getting crispy. Use two trays if necessary.

    Not Flipping the Vegetables: Forgetting to flip the sweet potatoes halfway through roasting can result in uneven cooking. Make sure to give them a good toss for even browning.

    Skipping the Chickpea Seasoning: The seasoning is crucial for adding flavor to the chickpeas. Don’t skip it, and make sure the chickpeas are well coated before cooking.

    How to Store & Reheat

    Store any leftovers in an airtight container in the refrigerator for up to 3 days. To reheat, place the power bowl in the microwave for 1-2 minutes or until heated through. Alternatively, reheat the vegetables and chickpeas in a skillet over medium heat until warmed. Chef’s Tip: Add a splash of water to the skillet to prevent the chickpeas from drying out.

    Ingredient Substitutions

    • **Sweet Potatoes:** Swap with butternut squash or carrots for a different flavor profile.
    • **Kale:** Use spinach or Swiss chard if you prefer milder greens.
    • **Chickpeas:** Substitute with black beans or lentils for a varied texture.
    • **Cannellini Beans:** Replace with silken tofu for a soy-based dressing alternative.

    Nutrition Facts

    • Calories: 630 kcal
    • Protein: 16g
    • Fat: 25g
    • Carbohydrates: 85g
    • Serving Size: 1 bowl

    Frequently Asked Questions

    Can I make this power bowl ahead of time? Yes, you can prep the vegetables and chickpeas in advance. Store them separately in the fridge and assemble when ready to eat.

    Is this recipe gluten-free? Absolutely! This Vegan Power Bowl is naturally gluten-free.

    What other toppings can I add? Consider adding avocado, nuts, or seeds for extra texture and nutrients.

    Can I use canned sweet potatoes? Fresh sweet potatoes are recommended for the best texture and flavor, but canned can work in a pinch.

  • ZERO PREP: Show-Stopping Homemade Remoulade in a Flash!

    ZERO PREP: Show-Stopping Homemade Remoulade in a Flash!

    Introduction & My Personal Story

    Ah, remoulade! This zesty, creamy delight has always held a special place in my heart. I remember the first time I tasted it; I was a young chef just starting my culinary journey. It was in a bustling New Orleans kitchen, where the air was thick with the aroma of Cajun spices and the chatter of chefs busy at work. I was tasked with preparing a batch of remoulade for the evening service, and I remember being amazed at how such a simple mix of ingredients could transform into something so flavorful.

    In my 5 years of experience, I’ve learned that while some dishes require hours of preparation and careful attention to detail, others, like this homemade remoulade, can be whipped up in a flash without sacrificing taste or quality. This recipe has become my go-to for those busy weeknights when time is of the essence, yet I still want to serve something that feels special. Whether drizzled over crispy fried shrimp or used as a tangy dip for fresh veggies, this remoulade is a show-stopper every time.

    Today, I’m excited to share with you my zero-prep remoulade recipe that you can make in under five minutes. It’s perfect for those who are short on time but still crave that homemade touch. Let’s dive into this effortless yet impressive dish that will surely become a staple in your kitchen, just as it has in mine.

    Why You’ll Love This Recipe

    • No cooking required – perfect for hot days or when you’re short on time.
    • Minimal cleanup – just one bowl and a spoon.
    • Versatile – use it as a sauce, dip, or spread.
    • Customizable – easily adjust the spice level to your liking.
    • Impressive – tastes gourmet with zero effort.

    Detailed Ingredients

    Here’s what you’ll need to create this quick and delicious remoulade:

    • 1½ cups mayonnaise (350 grams) – Look for a good-quality mayo with a creamy texture.
    • ½ tsp hot sauce – Choose your favorite brand; I love using a classic like Tabasco for its tangy heat.
    • 2 Tbsp grainy mustard (30 grams) – Adds a nice texture and a bit of tang.
    • 2 minced garlic cloves – Fresh garlic is a must; it brings a punch of flavor.
    • 3 Tbsp dill pickle relish (45 grams) – Provides a delightful crunch and acidity.
    • 1 Tbsp prepared horseradish (15 grams) – Adds a spicy kick that balances the richness of the mayo.
    • 1 tsp Worcestershire sauce – Adds depth with its savory, umami notes.
    • ½ tsp smoked paprika – Gives a subtle smokiness that elevates the flavor.
    • ⅛ tsp cayenne pepper – Optional, for an extra hint of heat.
    • 1 Tbsp fresh minced parsley – For a touch of freshness and color.

    Step-by-Step Instructions

    Ready to whip up this quick remoulade? Follow these simple steps:

    Step 1: Gather all the ingredients. Chef’s Tip: Measure and prep everything before you start mixing to streamline the process.

    Step 2: In a medium-sized mixing bowl, combine the mayonnaise, hot sauce, grainy mustard, and minced garlic. Stir with a spoon until the mixture is smooth and well-blended.

    Step 3: Add the dill pickle relish, prepared horseradish, Worcestershire sauce, and smoked paprika to the bowl. Mix until all ingredients are fully incorporated and the sauce has a uniform consistency.

    Step 4: If you’re feeling adventurous, sprinkle in the cayenne pepper for an extra kick. Stir well to ensure the spice is evenly distributed.

    Step 5: Finally, fold in the fresh minced parsley. This not only adds color but also a fresh, herby flavor that brightens the sauce.

    Step 6: Taste the remoulade and adjust seasoning if necessary. You might want to add a bit more hot sauce or salt to suit your personal preference.

    Step 7: Serve immediately with your favorite seafood, or chill in the fridge for about 30 minutes if you prefer a cooler, more melded flavor profile.

    Common Mistakes to Avoid

    Even with a no-prep recipe, there are a few pitfalls to watch out for:

    • Over-mixing: Stir the ingredients just until combined to maintain a nice texture.
    • Using low-quality mayonnaise: The mayo is the base of this sauce, so choose a flavorful, creamy brand.
    • Forgetting to taste: Always taste your remoulade and adjust the seasoning before serving.
    • Skipping the fresh parsley: This herb adds brightness and should not be omitted.

    How to Store & Reheat

    Storing your remoulade properly ensures it stays fresh and delicious:

    • Transfer the remoulade to an airtight container.
    • Refrigerate for up to one week.
    • For best flavor, remove from the fridge 10 minutes before serving to let it come to room temperature.

    Note: This sauce is best served fresh and does not require reheating.

    Ingredient Substitutions

    Need to make some swaps? Here are some safe substitutions:

    • Mayonnaise: Swap with Greek yogurt for a lighter version.
    • Grainy mustard: Use Dijon mustard for a smoother texture.
    • Dill pickle relish: Finely chopped pickles can be used in a pinch.
    • Prepared horseradish: Substitute with wasabi for a similar heat.
    • Fresh parsley: Cilantro can be used for a different but equally fresh flavor.

    Nutrition Facts

    • Calories: 110 per serving
    • Protein: 0.5 grams
    • Fat: 11 grams
    • Carbs: 1 gram
    • Serving Size: 2 tablespoons

    Frequently Asked Questions

    • Can I make this remoulade ahead of time?
      Yes, it’s actually better if made a few hours in advance to let the flavors meld together.
    • Is this remoulade spicy?
      It has a mild kick, but you can adjust the heat by adding more or less hot sauce and cayenne pepper.
    • What dishes pair well with remoulade?
      It pairs beautifully with seafood, sandwiches, and can even be used as a salad dressing.
    • Can I freeze remoulade?
      Freezing is not recommended as it can affect the texture of the sauce.
    • How long does homemade remoulade last?
      It will keep in the fridge for up to one week when stored properly in an airtight container.

  • LATE NIGHT FUEL: Dive into Filipino Chicken Adobo Tonight!

    LATE NIGHT FUEL: Dive into Filipino Chicken Adobo Tonight!

    Introduction & My Personal Story

    Growing up in a bustling Filipino household, our kitchen was always the heart of the home, especially late at night when the world outside had quieted down. My mother, a true culinary artist, would often prepare a pot of Filipino Chicken Adobo as the clock struck midnight. The aroma of garlic, soy sauce, and vinegar would fill the air, creating a sense of anticipation and comfort. It was during these late-night cooking sessions that I learned the art of creating a dish that was both simple and deeply satisfying. In my 5 years of experience as a professional chef, I’ve come to appreciate the simplicity and depth of flavors this dish offers. It’s not just a meal; it’s an experience that brings people together, even in the wee hours of the night. Today, I’m excited to share this recipe with you, hoping it will become a staple in your own late-night kitchen adventures.

    Why You’ll Love This Recipe

    • Easy to Prepare: Minimal ingredients and straightforward steps.
    • Rich Flavors: Bold and tangy, perfect for a satisfying meal.
    • Versatile: Pairs well with rice or noodles.
    • Great for Meal Prep: Tastes even better the next day.
    • Comfort Food: Brings warmth and nostalgia.

    Detailed Ingredients

    • 1 kg (2.2 lbs) of chicken pieces (thighs and drumsticks work best)
    • 1/2 cup (120 ml) of soy sauce
    • 1/2 cup (120 ml) of white vinegar
    • 2 tablespoons of honey
    • 2 tablespoons of vegetable oil
    • 6 cloves of garlic, minced
    • 3 bay leaves
    • 1 teaspoon of whole black peppercorns
    • Salt to taste (optional)

    Step-by-Step Instructions

    Step 1: Prepare the Marinade
    In a large bowl, whisk together the soy sauce, vinegar, honey, and garlic. Add the bay leaves and peppercorns. This will form the base of the adobo’s signature flavor. Chef’s Tip: For a deeper flavor, let the marinade sit for about 10 minutes before using it.

    Step 2: Marinate the Chicken
    Place the chicken pieces in a large resealable bag or shallow dish. Pour the marinade over the chicken, ensuring each piece is well coated. Seal the bag or cover the dish, then refrigerate for at least 2 hours or overnight for maximum flavor absorption.

    Step 3: Cook the Chicken
    Transfer the marinated chicken with the marinade into a large pot. Add just enough water to cover the chicken. Bring to a boil over medium-high heat, then reduce the heat to low. Cover and simmer for about 30 minutes, or until the chicken is tender and cooked through. Stir occasionally to prevent sticking.

    Step 4: Broil the Chicken
    Preheat your broiler. Transfer the cooked chicken pieces to a broiler pan, reserving the sauce in the pot. Broil the chicken for 5-10 minutes, turning once, until the skin is golden brown and crispy. Chef’s Tip: Keep a close eye on the chicken to prevent burning.

    Step 5: Reduce the Sauce
    While the chicken is broiling, bring the reserved sauce to a boil over medium heat. Let it simmer until it reduces by half, thickening and intensifying in flavor. This will be your glaze.

    Step 6: Glaze the Chicken
    Remove the broiled chicken from the oven and brush generously with the reduced sauce. Alternatively, you can toss the chicken in the sauce to coat it thoroughly.

    Step 7: Serve and Enjoy
    Serve your Filipino Chicken Adobo hot over steamed rice or noodles, letting the sauce soak into the grains for an extra burst of flavor.

    Common Mistakes to Avoid

    • Skipping the Marination: Don’t rush this step; it’s crucial for flavor.
    • Overcooking the Chicken: Keep an eye on the time to ensure the chicken remains juicy.
    • Too Much Vinegar: Balance is key; adjust to your taste preference.
    • Not Reducing the Sauce: This step is essential for a rich, concentrated glaze.

    How to Store & Reheat

    To store leftovers, place the chicken and sauce in an airtight container and refrigerate for up to 3 days. For freezing, store in a freezer-safe container for up to 2 months. To reheat, warm in a skillet over medium heat until heated through, adding a splash of water if necessary to loosen the sauce.

    Ingredient Substitutions

    • Soy Sauce: Use tamari or coconut aminos for a gluten-free option.
    • White Vinegar: Substitute with apple cider vinegar for a milder taste.
    • Honey: Replace with brown sugar or maple syrup for a different sweetness profile.
    • Chicken Pieces: Use boneless chicken thighs for quicker cooking.

    Nutrition Facts

    • Calories: 320 per serving
    • Protein: 28g
    • Fat: 18g
    • Carbs: 8g
    • Serving Size: 1 piece of chicken with sauce

    Frequently Asked Questions

    • Can I use other meats for adobo? Yes, pork or beef can be used, but cooking times will vary.
    • Is chicken adobo spicy? Traditional adobo is not spicy, but you can add chili for heat.
    • What sides go well with adobo? Steamed rice, vegetables, or a fresh salad pair well.
    • Can I skip the broiling step? Yes, but broiling adds a delightful crispiness to the chicken.
    • How can I make the dish less salty? Use low-sodium soy sauce and adjust to taste.

  • GAINS: Easy Chicken Satay for Muscle Growth!

    GAINS: Easy Chicken Satay for Muscle Growth!

    Introduction & My Personal Story

    There’s a dish that has held a special place in my culinary journey, a dish that not only tantalizes the taste buds but also fuels the muscles: Chicken Satay. This isn’t just any Chicken Satay; it’s the Easy Chicken Satay for Muscle Growth. I remember the first time I encountered this dish during a trip to Thailand. The aroma of grilled skewers wafted through the bustling street markets, and I couldn’t resist. As I took my first bite, the flavors of lemongrass, peanuts, and spices danced in harmony, and I was hooked. Fast forward to my own kitchen, I embarked on a mission to recreate this dish with a twist – enhancing its protein content for fitness enthusiasts like myself. In my 5 years of experience as a chef, I’ve learned that food can be both delicious and functional, and this recipe is a testament to that. It’s perfect for those looking to build muscle without compromising on flavor. Join me as I share this personal favorite, guaranteed to become a staple in your muscle-building meal plan!

    Why You’ll Love This Recipe

    • High in **Protein**: Perfect for muscle growth and recovery.
    • Quick and Easy: Ready in under an hour, perfect for busy schedules.
    • Delicious Flavor: A perfect balance of savory, sweet, and spicy.
    • Versatile: Can be grilled, baked, or pan-fried.
    • Meal Prep Friendly: Excellent for preparing in bulk and enjoying throughout the week.

    Detailed Ingredients

    • **500g Chicken Breast**: Skinless and boneless, sliced into thin strips.
    • **1/2 Cup Peanut Butter**: Smooth or crunchy, depending on preference.
    • **1/4 Cup Soy Sauce**: Low sodium is recommended.
    • **2 Tablespoons Brown Sugar**: Adds a subtle sweetness.
    • **2 Tablespoons Lime Juice**: Freshly squeezed for the best flavor.
    • **1 Tablespoon Chili Garlic Sauce**: Adjust according to spice preference.
    • **2 Cloves Garlic**: Minced finely.
    • **1 Tablespoon Ginger**: Minced or grated.
    • **1 Tablespoon Sesame Oil**: Adds a nutty aroma.
    • **2 Tablespoons Vegetable Oil**: For marinating.
    • **Fresh Cilantro**: Chopped, for garnish.

    Step-by-Step Instructions

    Step 1: Prepare the Marinade

    In a medium-sized mixing bowl, combine 1/2 cup of **peanut butter**, 1/4 cup **soy sauce**, 2 tablespoons of **brown sugar**, 2 tablespoons of **lime juice**, 1 tablespoon of **chili garlic sauce**, 2 cloves of minced **garlic**, 1 tablespoon of minced **ginger**, 1 tablespoon of **sesame oil**, and 2 tablespoons of **vegetable oil**. Whisk these ingredients until you achieve a smooth, creamy sauce. Chef’s Tip: If the sauce is too thick, add 3 tablespoons of hot water to reach your desired consistency.

    Step 2: Marinate the Chicken

    Place the sliced **chicken breast** into a large zip-top bag. Reserve 1/2 cup of the marinade for later use. Pour the remaining marinade over the chicken, seal the bag, and massage it to ensure every piece is well-coated. Refrigerate for at least 30 minutes, but for maximum flavor, let it marinate overnight.

    Step 3: Preheat and Prepare

    Preheat your oven to 375°F (190°C). While the oven is heating, arrange the marinated chicken strips on a baking sheet lined with parchment paper. Ensure they are in a single layer for even cooking.

    Step 4: Bake the Chicken

    Place the baking sheet in the preheated oven and bake for 15 minutes. Remove from the oven, brush the chicken with the reserved marinade, and return to the oven for another 15 minutes. Check that the internal temperature of the chicken reaches 165°F (75°C) to ensure it is fully cooked.

    Step 5: Serve and Enjoy

    Remove the chicken from the oven and let it rest for a few minutes. Garnish with freshly chopped **cilantro** and serve with your favorite side dishes. Whether you’re pairing it with rice, noodles, or a fresh salad, this chicken satay will not disappoint!

    Common Mistakes to Avoid

    • **Overcooking the Chicken**: Always check the internal temperature to avoid dry, rubbery chicken.
    • **Skipping the Marination**: This step is crucial for infusing the chicken with flavor. Do not rush it!
    • **Using Low-Quality Ingredients**: Fresh, quality ingredients make a significant difference in taste.
    • **Not Adjusting Spice Levels**: If you’re sensitive to spice, adjust the chili garlic sauce to your liking.

    How to Store & Reheat

    Store any leftover chicken satay in an airtight container in the refrigerator for up to 4 days. To reheat, place the chicken in a skillet over medium heat, adding a splash of water to prevent drying out. Alternatively, microwave on medium power for 2-3 minutes until heated through.

    Ingredient Substitutions

    • **Chicken Breast**: Swap with **chicken thighs** for a juicier option.
    • **Peanut Butter**: Substitute with **almond butter** for a different nutty flavor.
    • **Soy Sauce**: Use **tamari** or **coconut aminos** for a gluten-free version.
    • **Brown Sugar**: Replace with **honey** or **agave syrup** for a natural sweetener.

    Nutrition Facts

    • Calories: 415 kcal
    • Protein: 32g
    • Fat: 22g
    • Carbohydrates: 20g
    • Serving Size: 1 serving (approximately 200g)

    Frequently Asked Questions

    • Q: Can I grill the chicken instead of baking?
    • A: Absolutely! Grilling adds a lovely smoky flavor. Cook over medium heat for about 4-5 minutes per side.

    • Q: Is there a vegetarian version of this dish?
    • A: Yes, you can use firm tofu or tempeh as a protein-rich alternative to chicken.

    • Q: How can I adjust the recipe for a larger group?
    • A: Simply double or triple the ingredients while keeping the same cooking times and temperatures.

    • Q: What can I serve with chicken satay?
    • A: Pair it with jasmine rice, cucumber salad, or a simple peanut dipping sauce for a complete meal.

  • CHEAT DAY: Funfetti Birthday Cake Protein Bliss Balls

    CHEAT DAY: Funfetti Birthday Cake Protein Bliss Balls

    Introduction & My Personal Story

    There’s something about the scent of vanilla and the sight of colorful sprinkles that takes me back to my childhood birthday parties. The excitement of blowing out candles, the laughter of friends, and the joy of indulging in a sweet treat without a care in the world. Fast forward to today, and while my metabolism may not be as forgiving, my love for those nostalgic flavors remains. Enter the Funfetti Birthday Cake Protein Bliss Balls – a delightful twist on a classic indulgence that fits perfectly into a modern, health-conscious lifestyle.

    In my 5 years of experience as a chef and food blogger, I’ve seen countless trends come and go, but the demand for healthy, guilt-free treats has only grown stronger. These protein bliss balls are not just a nod to the past but a testament to how we can enjoy the flavors we love while staying on track with our fitness goals. I remember the first time I made these; the kitchen was filled with the sweet aroma of vanilla, and as I rolled each ball, I couldn’t help but feel a sense of accomplishment. Not only were they delicious, but they were also packed with protein, making them the perfect post-workout snack or a ‘cheat day’ delight.

    Whether you’re looking to satisfy a sweet craving or need a quick energy boost, these Funfetti Bliss Balls have got you covered. Join me on this culinary journey as we recreate a beloved classic with a healthy twist.

    Why You’ll Love This Recipe

    • Quick and easy to make – no baking required!
    • High in protein, perfect for post-workout recovery.
    • Deliciously nostalgic with the flavors of vanilla and sprinkles.
    • Customizable to fit dietary needs and preferences.
    • Perfect for meal prep – make a batch and enjoy all week long.

    Detailed Ingredients

    For this recipe, you’ll need the following ingredients. Make sure to use high-quality products for the best results:

    • **1½ cups old fashioned rolled oats** – Look for oats that are whole and not instant for better texture.
    • **1 cup cashew butter** – Creamy, unsalted, and without added sugar is best.
    • **2 scoops (50-60 grams) vanilla protein powder** – Choose a brand you trust for taste and quality.
    • **¼ cup maple syrup** – Pure maple syrup adds natural sweetness.
    • **½ teaspoon vanilla extract** – Pure extract for authentic flavor.
    • **½ teaspoon almond extract** – Adds a subtle, nutty aroma.
    • **¼ teaspoon salt** – Balances the sweetness.
    • **¼ cup sprinkles** – Go for naturally colored options if possible.

    Step-by-Step Instructions

    Step 1: In a large mixing bowl, combine the **rolled oats**, **cashew butter**, **vanilla protein powder**, **maple syrup**, **vanilla extract**, **almond extract**, and **salt**. Mix thoroughly until a thick, cohesive dough forms. The mixture should be slightly sticky but hold its shape when pressed. Chef’s Tip: If the dough feels too dry, add a teaspoon of water or more maple syrup.

    Step 2: Gently fold in the **sprinkles**. This step is crucial for distributing the colorful bits evenly throughout each ball, ensuring that every bite is a funfetti surprise.

    Step 3: Using a small cookie scoop or your hands, form the dough into bite-sized balls. Aim for uniform size so they chill evenly. If the dough is sticking to your hands, lightly dampen them with water.

    Step 4: Place the formed balls onto a baking sheet lined with parchment paper. Chill in the refrigerator for 15-20 minutes to set. If you’re in a hurry, you can enjoy them immediately, but chilling helps them firm up and enhances the flavors.

    Common Mistakes to Avoid

    • **Too Dry or Crumbly Dough:** Ensure you’re measuring ingredients accurately. If the dough is too dry, a touch more maple syrup or a splash of milk can help.
    • **Overmixing:** Be gentle when folding in the sprinkles to prevent them from bleeding color.
    • **Uneven Sizes:** Use a cookie scoop for consistency to ensure even chilling.

    How to Store & Reheat

    Store these bliss balls in an airtight container in the refrigerator for up to a week. For longer storage, freeze them for up to three months. To enjoy, simply thaw them at room temperature for about 10 minutes. Chef’s Tip: These are best served slightly chilled, which enhances their chewy texture.

    Ingredient Substitutions

    • **Nut Butter:** Swap cashew butter with almond or peanut butter if desired.
    • **Sweetener:** Use honey or agave syrup as alternatives to maple syrup.
    • **Protein Powder:** Choose a plant-based protein powder for a vegan version.

    Nutrition Facts

    • Calories: 120 per ball
    • Protein: 5g
    • Fat: 7g
    • Carbs: 10g
    • Serving Size: 1 ball

    Frequently Asked Questions

    Q1: Can I make these bliss balls vegan?

    A1: Absolutely! Use a plant-based protein powder and ensure your sweetener is vegan-friendly.

    Q2: What if I don’t have almond extract?

    A2: You can omit it or add a little extra vanilla extract for flavor.

    Q3: Can I use quick oats instead of rolled oats?

    A3: Quick oats can be used, but the texture will be softer. Rolled oats provide a chewier consistency.

    Q4: Are there any other toppings I can add?

    A4: Yes! Mini chocolate chips, chopped nuts, or dried fruit can be mixed in for variety.

  • 5-MIN FUEL: Zesty Cauliflower Tabbouleh That’s Easy on the Wallet!

    5-MIN FUEL: Zesty Cauliflower Tabbouleh That’s Easy on the Wallet!

    Introduction & My Personal Story

    Ah, the delightful zing of a fresh tabbouleh. Growing up, I always associated tabbouleh with long, leisurely family lunches. It was a dish my grandmother would prepare with meticulous care, chopping each ingredient with precision. Fast forward to my culinary journey, and I’ve found ways to keep the essence of this classic dish while adapting it to our fast-paced lives. Enter the 5-Minute Zesty Cauliflower Tabbouleh—a modern twist on a traditional favorite. In my 5 years of experience as a chef, I’ve learned that sometimes the best dishes are those that marry convenience with flavor. This recipe does just that, offering a quick, refreshing bite that’s perfect for those days when time is of the essence but quality cannot be compromised. My love for tabbouleh has only grown over the years, and this cauliflower version has become my go-to when I crave a light, nutritious meal that packs a punch of flavor without requiring a lot of time in the kitchen.

    Why You’ll Love This Recipe

    • Quick and easy—ready in just 5 minutes.
    • Healthy and low-calorie, only 71 kcal per serving.
    • Budget-friendly ingredients.
    • Gluten-free, thanks to the cauliflower rice.
    • Full of fresh, vibrant flavors.
    • Perfect for meal prep and busy days.

    Detailed Ingredients

    To create this quick and zesty tabbouleh, you’ll need:

    • 1 small head of cauliflower (about 500g), riced
    • 1 cup (150g) diced Roma tomatoes, seeds removed
    • 1 lemon, juiced (about 2 tablespoons)
    • 1 bunch curly parsley (about 50g), minced
    • 1 bunch mint (about 20g), minced
    • 3 green onions (green parts only), minced
    • 2 tablespoons olive oil
    • Salt and pepper to taste

    When shopping, look for fresh, vibrant greens and firm tomatoes. The cauliflower should be free of brown spots, and the herbs should be fragrant and lush.

    Step-by-Step Instructions

    Creating this dish is as easy as it is rewarding. Here’s how:

    Step 1: Gather and Prep Your Ingredients

    First, ensure all your ingredients are ready to go. Remove the thick stems from the mint, slice the lemon in half, seed and dice your Roma tomatoes, and mince the green parts of your green onions.

    Step 2: Rice the Cauliflower

    Break the cauliflower into florets and pulse them in a food processor until they resemble rice grains. Chef’s Tip: Be careful not to over-process, as you want the pieces to maintain a bit of bite.

    Step 3: Mince the Herbs

    Trim the stems from the parsley and mint, then finely chop them. These herbs are key to the dish’s fresh flavor profile, so take your time to chop them finely.

    Step 4: Combine the Ingredients

    In a large mixing bowl, combine the riced cauliflower, diced tomatoes, minced herbs, and green onions. Give everything a gentle toss to mix.

    Step 5: Season and Dress

    Add salt and pepper to taste, squeeze in the fresh lemon juice, and drizzle with olive oil. Toss the salad gently to ensure the dressing coats all the ingredients evenly.

    Step 6: Serve and Enjoy

    Serve this tabbouleh fresh for the best flavor. It pairs beautifully with grilled meats or can be enjoyed on its own as a light, refreshing meal.

    Common Mistakes to Avoid

    • **Over-processing the cauliflower**: This can lead to a mushy texture. Pulse it gently until it resembles rice.
    • **Using too much lemon juice**: While lemon is essential, too much can overpower the dish. Start with one lemon and adjust to taste.
    • **Skipping the de-seeding step for tomatoes**: Seeds can make the tabbouleh watery. Always remove them before dicing.
    • **Not drying herbs properly**: Ensure your herbs are dry after washing to prevent a soggy salad.

    How to Store & Reheat

    This tabbouleh is best enjoyed fresh, but it can be stored in an airtight container in the refrigerator for up to 2 days. If you need to reheat it, do so gently on low heat in a non-stick pan, but be aware that it’s meant to be a cold salad.

    Ingredient Substitutions

    • **Cauliflower**: Substitute with broccoli rice for a different flavor.
    • **Roma tomatoes**: Use cherry tomatoes for a sweeter taste.
    • **Olive oil**: Avocado oil works well if you’re looking for a different fat.
    • **Mint**: If you’re not a fan, basil can add a unique twist.

    Nutrition Facts

    • Calories: 71 kcal per serving
    • Protein: 2g
    • Fat: 5g
    • Carbohydrates: 6g
    • Serving Size: 1 cup

    Frequently Asked Questions

    Can I make this dish ahead of time?

    Yes, you can prepare the ingredients ahead of time, but it’s best to combine and dress them just before serving to maintain freshness.

    Is this recipe suitable for a keto diet?

    Absolutely! With its low-carb ingredients, this tabbouleh fits well into a keto lifestyle.

    What can I serve with cauliflower tabbouleh?

    It pairs wonderfully with grilled chicken, lamb, or even as a topping for falafel wraps.

    How can I make this dish spicier?

    Add a pinch of red pepper flakes or finely diced jalapeño to bring some heat.

    Can I freeze this tabbouleh?

    Freezing is not recommended as the texture of the cauliflower and herbs will change.

  • Focus Win: Beet Power Salad

    Focus Win: Beet Power Salad

    Introduction & My Personal Story

    There’s something magical about the vibrant colors and earthy sweetness of beets that takes me back to my grandmother’s kitchen. I remember the first time I helped her prepare a beet salad; the kitchen smelled of fresh herbs and the sound of her knife slicing through the beets was rhythmic and soothing. It was a sunny afternoon, and the light streamed in through the window, casting a warm glow over the kitchen table. As we worked, she shared stories of her childhood, weaving tales of family gatherings and festive meals. This Beet Power Salad is a nod to those cherished memories, a modern twist on a classic that nourished my family for generations.

    In my 5 years of experience as a chef, I’ve learned that food isn’t just about sustenance; it’s about connection and joy. This salad is a testament to that philosophy. Packed with nutrient-dense ingredients, it not only fuels the body but also feeds the soul. Whether you’re looking for a quick lunch or a dish to impress your friends, this Beet Power Salad is a winner. It’s easy to make, incredibly satisfying, and a feast for the eyes with its vibrant colors. Join me as we dive into this delightful recipe that combines tradition with a modern twist.

    Why You’ll Love This Recipe

    • Nutritious: Packed with antioxidants, vitamins, and plant-based protein.
    • Convenient: Perfect for meal prep and on-the-go lunches.
    • Versatile: Easy to customize with your favorite ingredients.
    • Delicious: A balance of sweet, savory, and crunchy textures.
    • Visually Stunning: A colorful addition to any meal lineup.

    Detailed Ingredients

    Let’s talk ingredients. For this salad, quality matters. Here’s what you’ll need:

    • Beets: 2 medium-sized beets (about 300g), roasted or steamed. Look for firm, unblemished bulbs.
    • Carrots: 2 large carrots (about 150g), shredded. Choose bright orange, firm carrots.
    • Quinoa: 1 cup (about 185g), cooked. Opt for organic if possible.
    • Brussels Sprouts: 150g, thinly sliced. Fresh, tightly packed sprouts are best.
    • Golden Raisins: 1/4 cup (about 40g). Look for plump, golden raisins.
    • Goat Cheese: 100g, crumbled. Choose fresh, creamy goat cheese.
    • Cashews: 1/2 cup (about 75g), roughly chopped. Raw or roasted, your choice.
    • Spinach: 100g baby spinach. Fresh, crisp leaves are ideal.
    • Garlic Tahini Dressing: Blend 1/4 cup tahini, 2 tablespoons apple cider vinegar, juice of 1 lemon, 1 tablespoon tamari, 1 tablespoon nutritional yeast, and 1 clove garlic, minced.

    Step-by-Step Instructions

    Ready to get cooking? Here’s how to bring this Beet Power Salad to life:

    1. Prepare the Quinoa

    Rinse 1 cup of quinoa under cold water to remove any bitterness. In a medium saucepan, combine quinoa with 2 cups of water and a pinch of salt. Bring to a boil, then reduce heat to low, cover, and simmer for about 15 minutes, or until the water is absorbed and the quinoa is fluffy. Remove from heat and let it cool.

    2. Roast the Beets

    Preheat your oven to 200°C (400°F). Wrap each beet in aluminum foil and place them on a baking sheet. Roast for 45-60 minutes, or until they are tender when pierced with a fork. Allow them to cool, then peel and cut into small cubes.

    3. Prepare the Vegetables

    While the beets are roasting, shred the carrots and thinly slice the Brussels sprouts. Set them aside in separate bowls.

    4. Make the Dressing

    In a blender, combine 1/4 cup tahini, 2 tablespoons apple cider vinegar, the juice of 1 lemon, 1 tablespoon tamari, 1 tablespoon nutritional yeast, and 1 clove of minced garlic. Blend until smooth and creamy. Adjust the seasoning with salt and pepper to taste.

    5. Assemble the Salad

    In a large bowl, combine the cooked quinoa, roasted beet cubes, shredded carrots, sliced Brussels sprouts, golden raisins, and baby spinach. Toss with the dressing until everything is well coated.

    6. Add the Finishing Touches

    Sprinkle the crumbled goat cheese and chopped cashews over the salad. Gently toss to combine. Serve immediately or store in the fridge for later.

    Common Mistakes to Avoid

    • Overcooking Quinoa: Quinoa should be fluffy, not mushy. Make sure to simmer it just until the water is absorbed.
    • Undercooked Beets: Be sure to roast the beets until they are fork-tender to bring out their natural sweetness.
    • Soggy Salad: Avoid adding too much dressing at once. Start with half and add more as needed.
    • Skipping the Rinse: Rinsing quinoa is crucial to remove its natural coating, which can be bitter.

    How to Store & Reheat

    Store any leftover salad in an airtight container in the refrigerator for up to 3 days. If you plan to store it longer, keep the dressing separate and add it just before serving to prevent sogginess. To reheat, simply bring it to room temperature or give it a quick toss in a hot pan to warm through.

    Ingredient Substitutions

    • Quinoa: Swap with couscous or bulgur for a different texture.
    • Goat Cheese: Use feta or omit for a dairy-free version.
    • Cashews: Substitute with almonds or walnuts for a similar crunch.
    • Spinach: Kale or arugula can be used as alternatives.

    Nutrition Facts

    • Calories: 379 kcal (per serving)
    • Protein: 19g
    • Fat: 22g
    • Carbohydrates: 36g
    • Serving Size: 1 large salad

    Frequently Asked Questions

    • Can I prepare this salad ahead of time? Absolutely! It’s perfect for meal prep. Just keep the dressing separate until you’re ready to eat.
    • Is this salad suitable for vegans? Yes, simply omit the goat cheese or replace it with a vegan alternative.
    • How do I make the salad more filling? Add grilled chicken or chickpeas for extra protein.
    • Can I use canned beets? Yes, but fresh roasted beets offer the best flavor and texture.
    • What’s the best way to shred carrots? A box grater or food processor works great for quick shredding.

  • Hustle Fuel: Taco Pasta in a Flash – Your Quick One-Pot Meal!

    Hustle Fuel: Taco Pasta in a Flash – Your Quick One-Pot Meal!

    Introduction & My Personal Story

    Taco Pasta in a Flash – just the name conjures up memories of bustling weeknights and the comforting aroma of spices wafting through my kitchen. I remember the first time I decided to whip up this dish. It was one of those hectic evenings where both my energy and time were running low. With a hungry family to feed and a looming deadline, I needed something quick, satisfying, and packed with flavor. That’s when the idea of merging two beloved comfort foods – tacos and pasta – struck me. The concept was simple: take the robust flavors of taco seasoning, the heartiness of pasta, and the creamy allure of melted cheese, all cooked in one pot to save on time and cleanup. In that moment, Taco Pasta in a Flash was born. In my 5 years of experience as a chef, I’ve learned that the best meals are often the simplest, and this recipe is now a staple in our household. Every time I make it, it brings me back to that first night – the joy on my family’s faces, the relief of a quick meal, and the satisfaction of a dish that feels like a warm hug after a long day.

    Why You’ll Love This Recipe

    • Quick and easy – ready in under 30 minutes.
    • One-pot wonder – minimal cleanup required.
    • Rich in flavor – combines the best of tacos and pasta.
    • Customizable – easily adjust spices and toppings to taste.
    • Family-friendly – a hit with both kids and adults.

    Detailed Ingredients

    • Olive oil: 1 tablespoon – look for extra virgin for added flavor.
    • Onion: 1 medium, diced – choose firm and bright-colored onions.
    • Garlic: 2 cloves, minced – fresh cloves for that authentic aroma.
    • Ground beef: 500 grams (about 1 pound) – opt for lean to avoid excess grease.
    • Taco seasoning: 2 tablespoons – store-bought or homemade.
    • Diced tomatoes: 1 can (400 grams/14 ounces) – with green chiles for extra kick.
    • Pasta: 250 grams (about 2 cups) – choose short pasta like penne or rotini.
    • Beef broth: 2 cups – adds depth to the sauce.
    • Cheddar cheese: 1 cup, shredded – sharp cheddar melts beautifully.
    • Green onions: 2, sliced – for garnish.

    Step-by-Step Instructions

    Step 1: Sauté Aromatics
    Begin by heating the olive oil in a deep skillet over medium heat. Add the diced onion and minced garlic. Sauté for about 2-3 minutes, or until the onion turns translucent and the garlic is fragrant. This forms the flavor base of our dish, so make sure not to rush this step.

    Step 2: Cook Meat
    Increase the heat slightly and add the ground beef to the skillet. Sprinkle the taco seasoning over the meat. Cook, stirring frequently, until the beef is browned and fully cooked through. This should take about 5-7 minutes. Chef’s Tip: Break up the meat with your spatula as it cooks to ensure even browning.

    Step 3: Combine Ingredients
    Stir in the can of diced tomatoes with green chiles, including all the juices. This will help deglaze the pan and infuse the beef with tangy tomato flavors.

    Step 4: Add Pasta
    Pour in the uncooked pasta and beef broth. Stir well to combine, ensuring that the pasta is mostly submerged in the liquid. The pasta will absorb the flavors as it cooks.

    Step 5: Simmer
    Bring the mixture to a gentle boil, then reduce the heat to medium-low, cover the skillet, and let it simmer. Cook for about 10 minutes, stirring occasionally, until the pasta is tender and the liquid has thickened into a sauce.

    Step 6: Cheese It Up
    Remove the skillet from heat and sprinkle the shredded cheddar cheese over the top. Stir until the cheese is fully melted and the dish is creamy. Garnish with sliced green onions before serving for a fresh pop of color and flavor.

    Common Mistakes to Avoid

    • Overcooking the pasta: Make sure to check the pasta a few minutes before the suggested cooking time to prevent it from becoming mushy.
    • Not using enough liquid: The pasta needs sufficient liquid to cook properly. If it looks dry, add a little more broth.
    • Skipping the stirring: Stirring occasionally while simmering ensures even cooking and prevents sticking.

    How to Store & Reheat

    Allow any leftovers to cool completely before transferring them to an airtight container. Store in the refrigerator for up to 3 days. To reheat, place the pasta in a skillet over medium heat, adding a splash of water or broth to loosen the sauce. Stir occasionally until heated through.

    Ingredient Substitutions

    • Ground beef: Can be swapped with ground turkey or chicken for a lighter option.
    • Cheddar cheese: Try Monterey Jack or a Mexican cheese blend for different flavors.
    • Pasta: Whole wheat or gluten-free pasta can be used to suit dietary preferences.

    Nutrition Facts

    • Calories: 376 kcal per serving
    • Protein: 18 g
    • Fat: 20 g
    • Carbohydrates: 28 g
    • Serving Size: Approximately 1.5 cups

    Frequently Asked Questions

    • Can I make this dish ahead of time?
      Yes, you can prepare it a day in advance. Store in the fridge and reheat as needed.
    • Is it possible to freeze Taco Pasta?
      Absolutely! Freeze in a sealed container for up to 2 months. Thaw in the fridge before reheating.
    • What if I don’t have taco seasoning?
      You can make your own by mixing chili powder, cumin, paprika, onion powder, and garlic powder.
    • Can I add vegetables?
      Certainly! Bell peppers or corn can be added for extra texture and flavor.