Blog

  • Moussaka à la Grande Tradition: An Ode to Mediterranean Craftsmanship

    Moussaka à la Grande Tradition: An Ode to Mediterranean Craftsmanship

    Introduction & My Personal Story

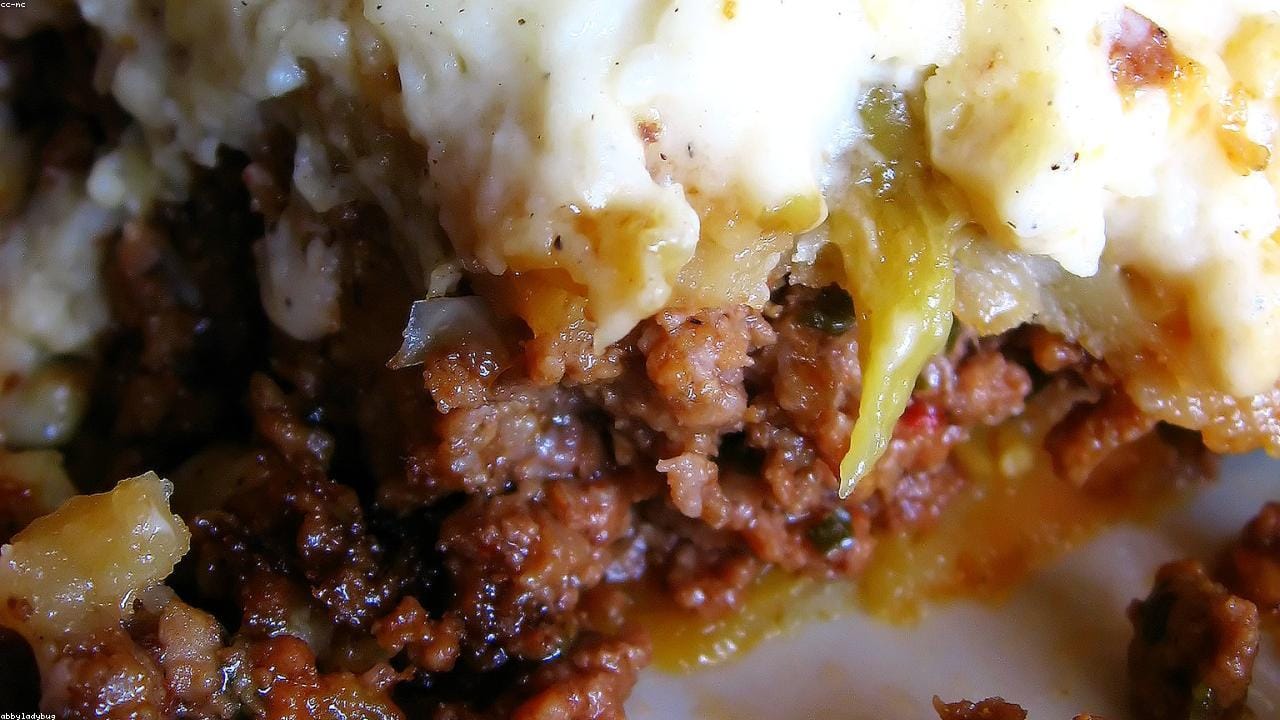
    Ah, Moussaka! Just the mention of it takes me back to my grandmother’s kitchen, nestled in a quaint Mediterranean village. I remember the aroma wafting through the air, as she prepared this hearty dish with a touch of love and a sprinkle of magic. As a child, I would stand on tiptoes, peering over the kitchen counter, captivated by the symphony of sizzling eggplants and bubbling béchamel. In my 5 years of experience as a chef, I’ve learned that Moussaka is more than just a meal; it’s an expression of cultural heritage and family bonds. Each layer tells a story, from the rich lamb ragu infused with aromatic spices to the creamy, nutmeg-scented béchamel that crowns it all. It’s a dish that demands respect and patience, but rewards with profound flavors that linger long after the last bite. Today, I’m excited to share this cherished recipe with you, hoping it brings as much joy to your table as it has to mine.

    Why You’ll Love This Recipe

    • Authentic Mediterranean flavors that transport you to sun-soaked shores.
    • Perfect balance of savory lamb, tender eggplants, and creamy béchamel.
    • Impressive dish for gatherings, showcasing your culinary skills.
    • Make-ahead friendly; flavors deepen beautifully over time.
    • Customizable with ingredient substitutions for dietary preferences.

    Detailed Ingredients

    To create this sumptuous Moussaka, gather the following ingredients:

    • Ground Lamb: 1 kg (approx. 2.2 lbs) – Look for pasture-fed lamb with 15-20% fat content for succulence.
    • Shallots: 3 large, finely diced – Offers a delicate sweetness.
    • Red Onion: 1 medium, finely diced – Adds depth and color.
    • Garlic: 6-8 cloves, minced – Essential for a Mediterranean aromatic backbone.
    • San Marzano Tomatoes: 2 x 400g (14oz) cans – Hand-crushed for a balanced sweetness.
    • Tomato Paste: 2 tablespoons – Intensifies umami and sweetness.
    • Dry Red Wine: 180 ml (¾ cup) – Use a robust, fruit-forward red like Syrah.
    • Fresh Parsley: ½ cup, finely chopped – Adds freshness.
    • Fresh Mint: ¼ cup, finely chopped – Provides a cooling counterpoint.
    • Ground Cinnamon: 1 teaspoon – Crucial for warmth and aroma.
    • Ground Allspice: ½ teaspoon – Adds complexity.
    • Bay Leaves: 2-3 small – For an earthy background note.
    • Olive Oil: 3-4 tablespoons – Choose a robust, fruity oil.
    • Sea Salt & Freshly Ground Black Pepper: To taste.
    • Aubergines (Eggplants): 3-4 large (approx. 1.2-1.5 kg total) – Look for firm, glossy aubergines.
    • Potatoes: 2-3 medium (approx. 400g) – Floury varieties like Russet are best.
    • Unsalted Butter: 120g (½ cup + 2 tablespoons) – High-quality European-style.
    • All-Purpose Flour: 120g (1 cup) – For the roux.
    • Whole Milk: 1 litre (4 cups) – Preferably organic, warmed.
    • Egg Yolks: 3 large – Enriches the béchamel.
    • Gruyère Cheese (aged): 100g (approx. 1 cup, grated) – Provides a nutty flavor.
    • Kefalotyri or Pecorino Romano: 50g (approx. ½ cup, grated) – For a sharp, tangy counterpoint.
    • Freshly Grated Nutmeg: 1 teaspoon – Essential for the béchamel.
    • Sea Salt & White Pepper: To taste.

    Step-by-Step Instructions

    Preparing the Aubergine and Potato Layers

    Step 1: Slice the aubergines lengthwise into 0.5 cm (¼ inch) planks. Salt generously and let sit for 45-60 minutes to draw out moisture. Rinse and pat dry.

    Step 2: Peel and slice potatoes into 0.5 cm rounds. Par-boil for 5-7 minutes, then drain and cool.

    Step 3: Fry or roast aubergine and potatoes until golden brown. For frying, use olive oil in a skillet; for roasting, brush with oil and bake at 200°C (390°F) until tender.

    Crafting the Aromatic Lamb Ragu

    Step 4: In a pot, heat olive oil and sauté shallots and onion until translucent. Add garlic, cinnamon, and allspice; cook until fragrant.

    Step 5: Add lamb, brown thoroughly, and drain excess fat. Stir in tomato paste, followed by wine. Reduce by half.

    Step 6: Add tomatoes, bay leaves, salt, and pepper. Simmer for 1-1.5 hours until thick. Stir in parsley and mint, adjust seasoning.

    Forging the Silken Béchamel

    Step 7: Melt butter in a saucepan, add flour, whisk for 2-3 minutes. Slowly whisk in warm milk. Simmer until thickened.

    Step 8: Off heat, whisk in tempered egg yolks. Stir in cheeses until melted. Season with nutmeg, salt, and white pepper.

    The Art of Assembly: Layer by Layer Perfection

    Step 9: In a greased dish, layer potatoes, half the aubergines, and all the lamb ragu. Top with remaining aubergines.

    Step 10: Pour béchamel over the top, smoothing with a spatula. Sprinkle reserved cheese.

    The Grand Finale: Baking, Resting, and Presentation

    Step 11: Bake at 180°C (350°F) for 45-60 minutes until golden. Rest for 30-45 minutes before slicing.

    Common Mistakes to Avoid

    • Avoid skipping the salting step for aubergines; it prevents a watery dish.
    • Ensure the béchamel is lump-free by whisking thoroughly.
    • Don’t rush the resting period; it allows layers to set.
    • Use quality lamb; lean meat can result in a dry ragu.

    How to Store & Reheat

    Store leftovers in an airtight container in the fridge for up to 3 days. To reheat, cover with foil and warm in a 180°C (350°F) oven until heated through. Moussaka can also be frozen for up to 3 months; thaw overnight in the fridge before reheating.

    Ingredient Substitutions

    • Substitute lamb with ground beef or turkey for a lighter version.
    • Use zucchini instead of eggplant for a different flavor profile.
    • Replace Gruyère with Emmental or a mild cheddar if preferred.
    • For a gluten-free version, use cornstarch instead of flour in the béchamel.

    Nutrition Facts

    • Calories: 550 per serving
    • Protein: 30g
    • Fat: 35g
    • Carbs: 30g
    • Serving Size: 1/8 of the dish

    Frequently Asked Questions

    • Can I make Moussaka in advance? Yes, assemble it a day ahead, refrigerate, and bake before serving.
    • What side dishes pair well with Moussaka? A simple green salad or Greek salad complements it nicely.
    • Is there a vegetarian version? Yes, use lentils or mushrooms instead of meat.
    • How do I prevent the top from burning? Cover with foil if it browns too quickly.

  • The Zenith of Neapolitan Craft: Pizza “La Perfezione”

    The Zenith of Neapolitan Craft: Pizza “La Perfezione”

    Introduction & My Personal Story

    My first encounter with the art of Neapolitan pizza was nothing short of transformative. It was during a trip to Naples, the birthplace of this iconic dish, where I tasted a pizza that changed my culinary perspective forever. The simplicity of the ingredients, the mastery of technique, and the reverence for tradition all combined to create a dish that was both humble and extraordinary. Back home, I was determined to recreate that magic in my own kitchen. In my 5 years of experience experimenting with various recipes, techniques, and ingredients, I’ve come to appreciate the delicate balance required to achieve what I now call Pizza “La Perfezione”. This dish is more than just a meal; it’s a celebration of tradition and craftsmanship. Each bite is a reminder of that sunny afternoon in Naples, where the taste of fresh mozzarella, sweet San Marzano tomatoes, and the crisp, airy crust left an indelible mark on my palate. Today, I share this experience with you, hoping to bring a piece of that Neapolitan magic into your home.

    Why You’ll Love This Recipe

    • Authentic Neapolitan flavor with simple, high-quality ingredients.
    • Perfectly airy and crispy crust thanks to a high hydration dough and long fermentation process.
    • Customizable with various toppings while maintaining the traditional base.
    • Impress your guests with an artisanal pizza experience at home.
    • Learn valuable dough-making techniques that can be applied to other recipes.

    Detailed Ingredients

    To achieve the perfect Neapolitan pizza, the choice of ingredients is crucial. Here’s what you’ll need:

    • “00” Flour (High Protein, e.g., Caputo Pizzeria): 500 grams
    • Cold Water (approximately 10-14°C): 325-350 ml (65-70% hydration)
    • Fine Sea Salt: 15 grams
    • Fresh Yeast (or 0.5g active dry yeast): 0.5 – 1 gram
    • Whole Peeled San Marzano Tomatoes D.O.P. (preferably organic): 1 can (400g / 14 oz)
    • Fresh Fior di Latte or Buffalo Mozzarella: 100-120 grams per pizza
    • Fresh Basil Leaves: 3-4 small leaves per pizza
    • Extra Virgin Olive Oil (high quality): A generous drizzle
    • Parmigiano Reggiano D.O.P. (optional): A light sprinkle

    Step-by-Step Instructions

    Step 1: The Autolyse

    Combine all the **“00” flour** with 300 ml of cold water in a large mixing bowl. Mix until a shaggy dough forms. Cover and let it rest for 30 minutes at room temperature. This process allows the flour to absorb water and start gluten development.

    Step 2: Incorporating Yeast and Salt

    Crumble the fresh yeast over the dough, then add the **fine sea salt**. Gradually incorporate the remaining water while folding the dough until it’s well combined but not sticky.

    Step 3: Kneading the Dough

    Turn the dough onto a lightly floured surface and use the “slap and fold” technique for 15-20 minutes until the dough is smooth and elastic. Test by stretching a small piece to see if it forms a thin membrane without tearing.

    Step 4: Bulk Fermentation

    Shape the dough into a ball and place it in a bowl. Cover and let it rise at room temperature for 2-3 hours until doubled in size.

    Step 5: Cold Proofing

    Divide the dough into 4-5 equal parts, shape into balls, and place in airtight containers. Refrigerate for 24-72 hours to develop flavor.

    Step 6: Preparing the Sauce

    Hand-crush the **San Marzano tomatoes** in a bowl, season with salt, and optionally add torn basil leaves. Do not cook the sauce.

    Step 7: Preparing the Cheese and Toppings

    Drain and tear the **mozzarella** into small pieces, allowing it to dry for 30 minutes. Prepare other toppings as desired, ensuring they complement the pizza’s elegance.

    Step 8: Shaping and Topping the Pizza

    Preheat your pizza oven to 400-450°C or domestic oven to the highest setting with a pizza stone. Stretch the dough into a 28-30 cm round, add sauce, cheese, and a drizzle of olive oil.

    Step 9: Baking

    Transfer the pizza onto the stone and bake for 60-90 seconds in a pizza oven or 5-8 minutes in a domestic oven. Rotate for even cooking.

    Common Mistakes to Avoid

    • Overloading Toppings: Keep it simple to prevent a soggy crust.
    • Underproofing Dough: Ensure full fermentation for flavor and texture.
    • Using Low-Quality Ingredients: Authenticity relies on high-quality, specific ingredients like **San Marzano tomatoes** and **Fior di Latte mozzarella**.
    • Incorrect Oven Temperature: A hot oven is crucial for the perfect crust.

    How to Store & Reheat

    Store leftover pizza in an airtight container in the refrigerator for up to 3 days. To reheat, preheat your oven to 180°C (350°F) and bake on a pizza stone for 5-7 minutes until warm and crispy.

    Ingredient Substitutions

    • Flour: If **“00” flour** is unavailable, use all-purpose flour mixed with bread flour for better texture.
    • Yeast: Substitute fresh yeast with active dry yeast, but adjust the quantity accordingly.
    • Mozzarella: Use burrata for a creamy alternative, ensuring it’s well-drained.

    Nutrition Facts

    • Calories: 270 per slice
    • Protein: 12g
    • Fat: 10g
    • Carbs: 30g
    • Serving Size: 1 slice (1/8 of pizza)

    Frequently Asked Questions

    What is the best flour for Neapolitan pizza?

    **”00″ flour** is ideal due to its fine texture and high protein content, which supports gluten development.

    Can I use a regular oven to make Neapolitan pizza?

    Yes, use a pizza stone and preheat your oven to its highest setting for best results.

    How long should I let the dough ferment?

    A cold proof of at least 24 hours is recommended for flavor development, with 48-72 hours being ideal.

    Why is my pizza soggy?

    This is usually due to excess moisture from toppings or an oven that is not hot enough.

    Is it necessary to use San Marzano tomatoes?

    While not strictly necessary, **San Marzano tomatoes** offer a unique sweetness and low acidity that is unmatched.

  • GAINS: Tuna Power Meals for Muscle Growth

    GAINS: Tuna Power Meals for Muscle Growth

    Introduction & My Personal Story

    Ah, the humble tuna. I remember my college days when I was a budding chef and an avid gym-goer, living on a shoestring budget. Tuna was my go-to protein source. Not only was it affordable, but it was also packed with the nutrients I needed to fuel my workouts and muscle growth. I would often experiment with different combinations, trying to keep my meals exciting and my taste buds entertained. One particular memory stands out: a late-night cooking session after an exhausting day of classes and gym. I opened my pantry to find a few cans of tuna and a couple of ingredients lying around. With a bit of creativity, I whipped up a dish that not only satisfied my hunger but also became a staple in my diet. This dish, which I fondly call “Tuna Power Meals,” is something I’ve perfected over the years. In my 5 years of experience as a chef, I’ve learned that the simplest ingredients can create the most powerful meals. Today, I’m thrilled to share my recipe for GAINS: Tuna Power Meals for Muscle Growth. Let’s dive into the world of flavors and fitness!

    Why You’ll Love This Recipe

    • High Protein Content: Each serving provides approximately 25g of protein, essential for muscle repair and growth.
    • Quick and Easy: Perfect for those who need a nutritious meal in under 30 minutes.
    • Versatile: Can be served in various ways – in wraps, over salads, or as a standalone dish.
    • Budget-Friendly: Uses cost-effective ingredients without compromising on nutrition.
    • Customizable: Easily adapt the recipe with your choice of herbs and spices.

    Detailed Ingredients

    • 2 cans of **tuna** (in water or oil), drained – approx. 280g total
    • 1/2 cup of **Greek yogurt** – about 120g
    • 1 **avocado**, ripe and mashed
    • 1 tablespoon of **lemon juice**
    • 1/4 cup of chopped **celery** – around 30g
    • 1/4 cup of chopped **red onion** – around 30g
    • 2 tablespoons of **fresh parsley**, finely chopped
    • Salt and pepper to taste
    • Optional: **sriracha sauce** for heat, **mustard** for tang

    Step-by-Step Instructions

    Step 1: Prepare the Ingredients
    Start by draining the cans of **tuna**. Use a fork to break the tuna into smaller flakes in a large mixing bowl. This will ensure that the tuna mixes evenly with the other ingredients.

    Step 2: Mix the Base
    Add the **Greek yogurt** and mashed **avocado** to the bowl with the tuna. The yogurt adds creaminess and tang, while the avocado provides healthy fats. Use a spatula to mix these ingredients until well combined.

    Step 3: Add Flavor and Texture
    Stir in the **lemon juice**, **chopped celery**, **red onion**, and **parsley**. These ingredients add crunch and freshness to the dish. Season with salt and pepper. If you like a bit of heat, add a splash of **sriracha sauce**.

    Step 4: Let It Chill
    For the best flavor, cover the bowl with plastic wrap and refrigerate for at least 30 minutes. This allows the flavors to meld together, creating a more cohesive and delicious dish.

    Step 5: Serve and Enjoy
    Once chilled, the Tuna Power Meal is ready to serve. You can enjoy it as a salad, in a wrap, or simply on its own. Chef’s Tip: Pair it with whole-grain bread or a side of quinoa for a complete meal.

    Common Mistakes to Avoid

    • Overmixing: This can make the tuna mushy. Mix just enough to combine the ingredients.
    • Not Draining Tuna Properly: Excess liquid can make the dish watery. Ensure the tuna is well-drained before mixing.
    • Skipping the Chill Time: This step is crucial for flavor development. Give it the 30 minutes it needs in the fridge.
    • Using Overly Ripe Avocados: They can overpower the dish. Choose avocados that are just ripe enough to mash easily.

    How to Store & Reheat

    Store any leftovers in an airtight container in the refrigerator. The Tuna Power Meal will last up to 3 days. When ready to eat, give it a good stir. If you prefer it warm, gently heat it in a pan over low heat, but it’s traditionally served cold.

    Ingredient Substitutions

    • Greek Yogurt: Can be replaced with sour cream or mayonnaise for a different flavor profile.
    • Avocado: If unavailable, try using hummus for a smooth texture.
    • Celery and Red Onion: Swap with bell peppers or scallions for a different crunch.

    Nutrition Facts

    • Calories: 300 kcal per serving
    • Protein: 25g
    • Fat: 15g
    • Carbs: 10g
    • Serving Size: 1 cup

    Frequently Asked Questions

    • Can I use fresh tuna instead of canned?
      Absolutely! Fresh tuna can be grilled or seared before mixing with the other ingredients.
    • Is this recipe suitable for meal prep?
      Yes, it’s perfect for meal prep. Make a batch and store it in the fridge for up to 3 days.
    • What can I serve with the Tuna Power Meal?
      Serve it with whole-grain bread, rice cakes, or a side of mixed greens.
    • Can I freeze this dish?
      Freezing is not recommended as it may change the texture of the yogurt and avocado.
    • How can I adjust the spice level?
      Increase or decrease the **sriracha sauce** according to your preference.


  • Symphony of the Wok: The Grandeur of Pad Thai, Reimagined by a Michelin Hand

    Symphony of the Wok: The Grandeur of Pad Thai, Reimagined by a Michelin Hand

    Introduction & My Personal Story

    Ah, Pad Thai. Just the name alone takes me back to a bustling street corner in Bangkok, where the air is thick with the scent of sizzling noodles and the chatter of eager diners. It was my first visit to Thailand, over a decade ago, and the experience was nothing short of transformative. As a young chef, I was eager to explore the world of flavors beyond my own kitchen. I remember watching a street vendor deftly maneuver a wok over a flickering flame, her hands moving in a dance as she tossed noodles, shrimp, and a vibrant array of vegetables. It was in that moment, amidst the chaos and color of the market, that I understood the true essence of Pad Thai.

    In those early days, I was captivated by the balance of flavors: the tanginess of tamarind, the sweetness of palm sugar, the salty depth of fish sauce, and the subtle heat of chili. Over the years, I have recreated that dish countless times, each attempt bringing me closer to the heart of Thai cuisine. In my 5 years of experience as a professional chef, I’ve learned that a great Pad Thai is not just about the ingredients; it’s about the passion and precision that go into every step. Today, I want to share with you my refined, Michelin-inspired version of this beloved dish, a recipe that honors its roots while elevating it to new culinary heights.

    Why You’ll Love This Recipe

    • Authentic flavors with a touch of sophistication.
    • Perfect balance of sweet, sour, salty, and spicy.
    • Quick and easy to prepare once ingredients are ready.
    • Customizable with your choice of protein.
    • A delightful dish that impresses guests.

    Detailed Ingredients

    For this recipe, sourcing the best ingredients is key. Head to your local Asian market or specialty store to find everything you need.

    • Rice Noodles: 200g, look for fresh or medium-width dried rice noodles.
    • Prawns: 200g, large, deveined, and peeled.
    • Tofu: 150g, firm, cut into cubes.
    • Shallots: 2, finely chopped.
    • Garlic: 3 cloves, minced.
    • Dried Shrimp: 1 tablespoon, rehydrated and chopped.
    • Pickled Radish: 1 tablespoon, finely chopped.
    • Eggs: 2, lightly beaten.
    • Bean Sprouts: 100g, fresh and crisp.
    • Garlic Chives: 50g, cut into 2-inch pieces.
    • Peanut Oil: 3 tablespoons.
    • Peanuts: 3 tablespoons, crushed.
    • Lime: 1, cut into wedges.
    • Chili Flakes: to taste.

    Step-by-Step Instructions

    Step 1: Prepare the Noodles
    Soak the rice noodles in warm water for about 30 minutes until they are pliable but firm. Drain and set aside.

    Step 2: Make the Sauce
    In a small bowl, mix 3 tablespoons of tamarind paste, 3 tablespoons of fish sauce, and 3 tablespoons of palm sugar. Stir until the sugar dissolves completely. Set aside.

    Step 3: Cook the Protein
    Heat 1 tablespoon of peanut oil in a wok over medium-high heat. Add the prawns and cook until they turn pink, about 2 minutes. Remove and set aside. In the same wok, add another tablespoon of oil and fry the tofu cubes until golden brown. Remove and set aside.

    Step 4: Stir-Fry Aromatics
    Add the remaining oil to the wok. Stir-fry the shallots, garlic, dried shrimp, and pickled radish for about 1 minute until fragrant.

    Step 5: Combine Ingredients
    Add the drained noodles to the wok along with the prepared sauce. Toss well to coat the noodles evenly. Add the prawns, tofu, and beaten eggs, stirring constantly until the eggs are cooked and everything is well mixed.

    Step 6: Add Vegetables
    Toss in the bean sprouts and garlic chives. Stir-fry for another 2 minutes until the vegetables are just tender.

    Step 7: Serve
    Transfer the Pad Thai to a serving platter. Sprinkle with crushed peanuts and garnish with lime wedges and chili flakes. Serve immediately.

    Common Mistakes to Avoid

    Overcooking the Noodles: Soak only until pliable; they will cook further in the wok.

    Overloading the Wok: Cook in batches if necessary to maintain high heat.

    Skipping the Sauce: The sauce is the soul of the dish; never skip or skimp on it.

    How to Store & Reheat

    Store leftovers in an airtight container in the refrigerator for up to 3 days. To reheat, add a splash of water and stir-fry over medium heat until warmed through.

    Ingredient Substitutions

    • Rice Noodles: Use soba or glass noodles if unavailable.
    • Prawns: Substitute with chicken or extra tofu for a vegetarian option.
    • Peanut Oil: Can be swapped with canola or vegetable oil.

    Nutrition Facts

    • Calories: 450
    • Protein: 25g
    • Fat: 15g
    • Carbs: 55g
    • Serving Size: 1 plate

    Frequently Asked Questions

    Q: Can I make Pad Thai without fish sauce?
    A: Yes, you can use soy sauce as a substitute for a vegetarian version.

    Q: How do I achieve the best texture for the noodles?
    A: Soak them just until pliable, then cook quickly in the wok.

    Q: Can I freeze Pad Thai?
    A: Freezing is not recommended as it alters the texture of the noodles.

    Q: What can I use instead of tamarind paste?
    A: A mix of lime juice and brown sugar can mimic the tangy sweetness.

  • The Alchemist’s Discernment: A Masterpiece Pizza, Perfected

    The Alchemist’s Discernment: A Masterpiece Pizza, Perfected

    Introduction & My Personal Story

    Pizza has always held a special place in my heart. I remember the first time I tried to make pizza from scratch. It was a chilly evening in my tiny apartment kitchen, armed with nothing more than a basic recipe and a fierce determination to recreate the magic I had tasted on a trip to Naples. The smell of yeast and flour filled the air as I kneaded the dough, my hands working tirelessly to perfect the texture. That night, the pizza was far from perfect—slightly overcooked crust and uneven toppings—but it was a revelation. It was the moment I realized that pizza isn’t just food; it’s an experience, a craft that requires patience and precision. Over the years, through trial and error, and in my 5 years of experience as a chef, I have honed the art of pizza-making, transforming it from a humble dish into a masterpiece. Today, I’m excited to share with you “The Alchemist’s Discernment: A Masterpiece Pizza, Perfected,” a recipe that embodies all the lessons I’ve learned along the way.

    Why You’ll Love This Recipe

    • Authentic Neapolitan-style pizza with a perfectly blistered crust.
    • Uses high-quality, fresh ingredients for maximum flavor.
    • Detailed, step-by-step instructions ensure success even for beginners.
    • Includes tips for achieving restaurant-quality results at home.
    • Versatile recipe with options for ingredient substitutions.

    Detailed Ingredients

    For the Dough

    • 500g “00” Italian Pizza Flour
    • 325-350g Cold Water
    • 10g Fine Sea Salt
    • 1g Fresh Baker’s Yeast (or 0.3g Active Dry Yeast)
    • 10g Extra Virgin Olive Oil (optional)

    For the Sauce

    • 1 x 794g can of Certified D.O.P. San Marzano Tomatoes
    • 1-2 Fresh Basil Leaves
    • Pinch of Fine Sea Salt
    • Extra Virgin Olive Oil (optional)

    For the Cheese

    • 250-300g Fresh Mozzarella (Fior di Latte or Mozzarella di Bufala)

    For the Garnish

    • Fresh Basil Leaves
    • Extra Virgin Olive Oil
    • Freshly Ground Black Pepper (optional)

    Step-by-Step Instructions

    Step 1: Preparing the Dough

    In a large bowl, mix 500g of “00” flour with 300g of cold water until no dry flour remains. Cover and let it rest for 30 minutes. In a separate bowl, dissolve 1g of fresh yeast in the remaining water. After the rest period, add the yeast mixture and 10g of salt to the flour mixture. Knead by hand for 15-20 minutes or use a stand mixer for 8-10 minutes until smooth and elastic. Let it proof at room temperature for 2 hours, then refrigerate for 24-72 hours.

    Step 2: Making the Sauce

    Open the can of San Marzano tomatoes, pour into a bowl, and crush by hand. Add a pinch of salt and basil leaves. Do not cook the sauce; it will cook beautifully in the oven.

    Step 3: Preparing the Cheese

    Drain the mozzarella and tear into pieces. Place on paper towels to remove excess moisture.

    Step 4: Shaping the Dough

    Remove dough from the fridge, divide into 250g portions, and shape into balls. Let them rest for 2-4 hours until puffy. Stretch each ball into a 10-12 inch circle, leaving a raised edge.

    Step 5: Assembling the Pizza

    Preheat your oven with a pizza stone to its highest temperature. Spread 2-3 tablespoons of tomato sauce over the dough, add mozzarella, and finish with basil leaves and a drizzle of olive oil.

    Step 6: Baking

    Slide the pizza onto the stone and bake for 4-8 minutes until the crust is blistered and the cheese is bubbling. Remove, garnish with fresh basil and a drizzle of olive oil, slice, and serve immediately.

    Common Mistakes to Avoid

    • Over-kneading the dough, which can make it tough.
    • Using too much sauce or cheese, leading to a soggy crust.
    • Skipping the long fermentation process, which affects flavor and texture.
    • Not preheating the oven and stone adequately, resulting in uneven cooking.

    How to Store & Reheat

    Store leftover pizza in an airtight container in the fridge for up to 3 days. To reheat, preheat your oven to 180°C (350°F), place the pizza on a baking sheet, and heat for 5-10 minutes until hot and crispy.

    Ingredient Substitutions

    • Use all-purpose flour if “00” flour is unavailable, but adjust water as needed.
    • Substitute canned tomatoes with fresh, ripe tomatoes during peak season.
    • Replace fresh mozzarella with low-moisture mozzarella if necessary.

    Nutrition Facts

    • Calories: 250 per slice
    • Protein: 10g
    • Fat: 8g
    • Carbohydrates: 32g
    • Serving Size: 1 slice of pizza

    Frequently Asked Questions

    • Can I freeze the dough? Yes, after the first rise, portion the dough, wrap tightly, and freeze for up to 3 months.
    • What if I don’t have a pizza stone? Use an inverted baking sheet preheated in the oven as a substitute.
    • How do I prevent the pizza from sticking to the peel? Use a mixture of flour and semolina on the peel, and ensure the dough is not too wet.
    • Can I make the dough without a stand mixer? Absolutely, kneading by hand works just as well with a bit of elbow grease.

  • GAINS: Power-Packed Tuna Wraps

    GAINS: Power-Packed Tuna Wraps

    Introduction & My Personal Story

    When I think back to my early days in the bustling kitchen, there’s one dish that stands out for its simplicity and power: the Power-Packed Tuna Wrap. It was during my first year as a chef, amidst the clatter of pots and the sizzle of pans, that I stumbled upon this nutritional powerhouse. I was always on the lookout for meals that provided a quick, hearty boost, especially during those long shifts. Tuna wraps became my go-to, a perfect blend of protein and flavor wrapped in a convenient package. I remember the first time I made it, the aroma of fresh tuna mixing with the crunch of celery and the tang of lemon—it was a revelation. This dish not only fueled my long hours but also became a staple in my personal cookbook. Over the years, I’ve refined this recipe, ensuring it delivers maximum gains for those seeking a healthy, muscle-building meal. It’s a dish that’s close to my heart and one I’m thrilled to share with you today.

    Why You’ll Love This Recipe

    • High in Protein: Each wrap is packed with over 30g of protein, essential for muscle growth and repair.
    • Quick and Easy: Ready in under 15 minutes, making it perfect for busy schedules.
    • Customizable: Easily adapt the ingredients to fit your taste or dietary needs.
    • Portable: These wraps are great for on-the-go meals or post-workout snacks.
    • Nutritious: Balanced with healthy fats, carbs, and fiber for a complete meal.

    Detailed Ingredients

    • 1 (12 oz) can of **chunk light tuna**, drained
    • ½ cup (about 1 rib) of **celery**, finely diced
    • 2 tablespoons of **walnuts**, chopped
    • 1 **green onion**, sliced
    • ¼ cup of **mayonnaise**
    • ½ tablespoon of **lemon juice**
    • ⅛ teaspoon of **black pepper**
    • ⅛ teaspoon of **salt**
    • 6 leaves of **romaine lettuce**, torn into smaller pieces
    • 1 **Roma tomato**, thinly sliced
    • 3 **extra-large tortillas**

    Step-by-Step Instructions

    Step 1: Prepare Your Ingredients

    Start by gathering all your ingredients. Chef’s Tip: Having everything in place before you start cooking, known as “mise en place,” ensures a smooth cooking process. Drain the tuna thoroughly to avoid a soggy wrap. Finely dice the celery, chop the walnuts, and slice the green onion. These textures add a delightful crunch to your wrap.

    Step 2: Mix the Filling

    In a large bowl, combine the drained tuna, diced celery, chopped walnuts, sliced green onion, mayonnaise, lemon juice, black pepper, and salt. Mix until everything is well incorporated. The lemon juice adds a refreshing zing that complements the rich, creamy mayonnaise.

    Step 3: Prepare the Salad Base

    Take the romaine lettuce leaves and tear them into smaller, bite-sized pieces. Thinly slice the Roma tomato. Chef’s Tip: Thinner slices of tomato help the wrap stay intact and prevent the filling from slipping out.

    Step 4: Warm the Tortillas

    Microwave each extra-large tortilla for 5-10 seconds. This softens them, making it easier to wrap without tearing. Be careful not to overheat, as this can make them brittle.

    Step 5: Assemble the Wrap

    Lay a tortilla flat and place a layer of romaine lettuce on it. Add ⅓ of the tomato slices and then spoon ⅓ of the tuna mixture on top. Spread it evenly to ensure each bite is flavorful.

    Step 6: Roll and Seal

    Begin rolling the tortilla from one side, tucking in the sides as you go to create a sealed edge. Place the wrap seam-side down for a minute. This resting period helps the wrap stay closed.

    Step 7: Repeat and Serve

    Repeat the filling and rolling process with the remaining tortillas. Serve immediately for the best texture and flavor.

    Common Mistakes to Avoid

    Overfilling the Wrap: It’s tempting to add more filling, but this can lead to a messy wrap that falls apart. Stick to the recommended amounts.

    Skipping the Warming Step: Cold tortillas are prone to tearing. A quick warm-up makes them pliable and easy to handle.

    Not Draining Tuna Properly: Excess liquid can make the wrap soggy. Ensure the tuna is well-drained before mixing.

    How to Store & Reheat

    Store any leftover wraps in an airtight container in the refrigerator for up to 2 days. To reheat, unwrap the tortilla slightly and microwave for 20-30 seconds. Chef’s Tip: Reheating in a skillet over low heat can help restore some of the original texture.

    Ingredient Substitutions

    • Tuna: Swap with canned chicken for a different protein option.
    • Mayonnaise: Use Greek yogurt for a lower-calorie, tangy alternative.
    • Walnuts: Substitute with almonds or omit for nut allergies.
    • Tortillas: Opt for whole wheat or gluten-free tortillas based on dietary needs.

    Nutrition Facts

    • Calories: 412 kcal per wrap
    • Protein: 34g
    • Fat: 20g
    • Carbohydrates: 28g
    • Serving Size: 1 wrap

    Frequently Asked Questions

    Q: Can I make these wraps ahead of time?

    A: Yes, you can prepare the filling up to a day in advance. Assemble the wraps just before serving for the best texture.

    Q: Are there vegan alternatives for this recipe?

    A: Certainly! Substitute tuna with chickpeas and use vegan mayonnaise for a plant-based version.

    Q: What other vegetables can I add?

    A: Feel free to add shredded carrots, sliced bell peppers, or cucumbers for extra crunch and nutrients.

    Q: How can I make this recipe spicier?

    A: Add a dash of hot sauce or finely chopped jalapeños to the tuna mixture for a spicy kick.

  • The Elixir of Siam: A Michelin Chef’s Masterpiece Tom Yum Goong

    The Elixir of Siam: A Michelin Chef’s Masterpiece Tom Yum Goong

    Introduction & My Personal Story

    The first time I tasted Tom Yum Goong, I was sitting at a bustling street-side stall in Bangkok. The air was thick with the aroma of sizzling street food, and the sounds of the city buzzed around me. I remember the vendor ladling the soup into a bowl with such care, his movements practiced and fluid. As I took my first sip, I was taken aback by the explosion of flavors — the heat from the chilies, the tang of the lime, and the depth of the prawn-infused broth. It was a revelation.

    Over the years, I’ve honed my skills in recreating this iconic Thai dish, striving to capture that same magic I experienced on the streets of Bangkok. In my 5 years of experience as a chef, I’ve learned that the secret to a great Tom Yum Goong lies in the balance of flavors and the quality of ingredients. This dish is not just food; it’s a journey, a story told through the harmonious blend of sour, spicy, and savory notes. Today, I want to share with you my treasured recipe — a tribute to the vibrant culinary culture of Thailand.

    Why You’ll Love This Recipe

    • Authentic Thai flavors that transport you straight to Bangkok.
    • A perfect balance of spicy, sour, and savory elements.
    • Uses fresh, high-quality ingredients for the best taste.
    • Simple steps that even beginner cooks can follow.
    • Customizable spice levels to suit your palate.

    Detailed Ingredients

    Here’s what you need to prepare this delicious dish:

    • Prawn Heads & Shells: From 12 large prawns (approx. 500g), rinsed and dried.
    • Chicken Carcass/Wings: 500g, for maximum flavor.
    • Galangal: 1-inch piece, thinly sliced.
    • Lemongrass: 1 stalk, bruised and cut into 2-inch pieces.
    • Kaffir Lime Leaves: 3-4 leaves, torn.
    • White Peppercorns: 1 teaspoon, lightly crushed.
    • Garlic Cloves: 3 cloves, smashed.
    • Cilantro Roots: From 3-4 sprigs, scrubbed and bruised.
    • Filtered Water: 2 liters.
    • Large Black Tiger Prawns: 12 pieces (approx. 500g), deveined.
    • Bird’s Eye Chilies: 8-12 pieces, bruised.
    • Straw Mushrooms: 150g, halved if large.
    • Cherry Tomatoes: 100g, halved.
    • Fish Sauce: 3-4 tablespoons.
    • Fresh Lime Juice: 4-5 tablespoons.
    • Palm Sugar: 1 teaspoon, shaved.
    • Chili Jam (Nam Prik Pao): 1-2 tablespoons.
    • Cilantro Leaves: Generous handful, chopped.
    • Vegetable Oil: 1 tablespoon.

    Step-by-Step Instructions

    Step 1: Prepare the Prawn & Chicken Stock

    In a large pot, combine prawn heads, chicken carcass, galangal, lemongrass, kaffir lime leaves, peppercorns, garlic, and cilantro roots with 2 liters of water. Bring to a simmer over medium heat, skimming off any foam. Reduce heat and simmer for 60-90 minutes. Strain the stock, discarding solids.

    Step 2: Build the Aromatics

    In a saucepan, heat vegetable oil over medium heat. Add sliced galangal, lemongrass, and kaffir lime leaves. Sauté for 2-3 minutes until fragrant. Add bird’s eye chilies and sauté for another minute.

    Step 3: Simmer the Broth

    Pour the strained stock into the saucepan. Add mushrooms and tomatoes. Simmer for 3-4 minutes until mushrooms are tender.

    Step 4: Cook the Prawns

    Increase heat to a gentle simmer. Add prawns and cook for 2-3 minutes until opaque. Remove from heat immediately to prevent overcooking.

    Step 5: Season the Soup

    Off the heat, stir in fish sauce, lime juice, palm sugar, and chili jam. Adjust seasoning to taste, aiming for a balanced flavor profile.

    Step 6: Serve

    Ladle soup into bowls, ensuring even distribution of prawns and vegetables. Garnish with cilantro leaves and serve immediately.

    Common Mistakes to Avoid

    • Overcooking Prawns: Cook prawns just until opaque to avoid rubbery texture.
    • Boiling Lime Juice: Add lime juice off the heat to prevent bitterness.
    • Ignoring Stock Quality: A rich, flavorful stock is crucial for an authentic taste.

    How to Store & Reheat

    Store leftover Tom Yum Goong in an airtight container in the refrigerator for up to 3 days. To reheat, gently warm on the stove over low heat to avoid overcooking the prawns.

    Ingredient Substitutions

    • Galangal: Substitute with ginger, though the flavor will differ slightly.
    • Straw Mushrooms: Use oyster or button mushrooms if unavailable.
    • Palm Sugar: Brown sugar can be used in a pinch.

    Nutrition Facts

    • Calories: 250 per serving
    • Protein: 20g
    • Fat: 8g
    • Carbs: 15g
    • Serving Size: 1 bowl (approx. 400ml)

    Frequently Asked Questions

    • Can I make this dish vegetarian? Yes, use vegetable stock and omit prawns. Add more mushrooms for substance.
    • How spicy is this recipe? The spice level can be adjusted by altering the number of chilies used.
    • What can I serve with Tom Yum Goong? Jasmine rice or rice noodles pair well with the soup.
    • Can I freeze Tom Yum Goong? It’s not recommended as the texture of prawns can change upon freezing.

  • Moussaka à la Grand Chef: A Hellenic Culinary Odyssey, Reimagined

    Moussaka à la Grand Chef: A Hellenic Culinary Odyssey, Reimagined

    Introduction & My Personal Story

    Ah, Moussaka! The very mention of it takes me back to my grandmother’s kitchen in the heart of Athens. I remember the warm, inviting aroma of spices wafting through the air, blending seamlessly with the sound of her gentle humming as she prepared this cherished dish. It was a ritual, almost sacred, that began with selecting the freshest ingredients from the local market. As a child, I would accompany her, watching in awe as she picked the perfect aubergines, rich in color and firm to the touch, and lamb that promised tenderness and flavor.

    In my 5 years of experience as a chef, I’ve tried to recreate that magic, that sense of home and warmth. Every time I make Moussaka, I’m transported back to those precious moments, to the love and care that went into every layer of aubergine, every spoonful of lamb ragu. It’s more than just a dish; it’s a connection to my roots, a celebration of the culinary heritage that has shaped me. Today, I invite you to join me on this journey, to experience the joy and satisfaction of creating a Moussaka that would make even my grandmother proud.

    Why You’ll Love This Recipe

    • Authentic Greek flavors that transport you to the Mediterranean.
    • Rich, savory layers with a creamy béchamel topping.
    • Perfect for family gatherings or special occasions.
    • Can be made ahead and tastes even better the next day.
    • Customizable with ingredient substitutions to suit dietary needs.

    Detailed Ingredients

    For the best Moussaka, quality ingredients are key. Here’s what you’ll need:

    • 4 large aubergines (about 2 kg), firm and shiny, with no blemishes.
    • 1 kg ground lamb, preferably from a reputable butcher.
    • 2 large onions, finely chopped.
    • 3 cloves garlic, minced.
    • 800g canned tomatoes, preferably San Marzano, crushed.
    • 2 tablespoons tomato paste.
    • 1 cinnamon stick.
    • 3 whole cloves.
    • 2 bay leaves.
    • 1 teaspoon ground nutmeg.
    • 1/2 teaspoon allspice.
    • 100ml red wine.
    • 100ml beef stock, unsalted.
    • 100g butter.
    • 100g flour.
    • 1 litre milk.
    • 100g Parmesan cheese, grated.
    • 2 egg yolks.
    • Sea salt and black pepper to taste.
    • Olive oil for frying.

    Step-by-Step Instructions

    Step 1: Prepare the Aubergines

    Slice the aubergines into 1 cm thick rounds. Sprinkle with salt and let them sit for 30 minutes to draw out moisture. Rinse and pat dry.

    Step 2: Cook the Lamb Ragu

    Heat olive oil in a pot over medium heat. Add onions and garlic, sauté until translucent. Add the lamb, cooking until browned. Stir in the tomato paste, canned tomatoes, red wine, and spices. Simmer for 45 minutes.

    Step 3: Make the Béchamel Sauce

    Melt butter in a saucepan over medium heat. Stir in flour to create a roux, cooking for 2 minutes. Gradually whisk in milk until smooth. Cook until thickened, then stir in nutmeg, Parmesan, and egg yolks.

    Step 4: Assemble the Moussaka

    Preheat oven to 180°C (350°F). Layer aubergines in a baking dish, top with lamb ragu, and repeat. Pour béchamel over the top, spreading evenly. Bake for 45 minutes until golden.

    Step 5: Rest and Serve

    Let the Moussaka rest for at least 30 minutes before serving to allow the layers to set.

    Common Mistakes to Avoid

    • Not salting the aubergines: This step is crucial to remove bitterness.
    • Overcrowding the pan when browning lamb: It prevents proper caramelization.
    • Skipping the resting period: The dish will fall apart if not rested.

    How to Store & Reheat

    Store leftovers in an airtight container in the refrigerator for up to 3 days. Reheat in a preheated oven at 180°C (350°F) for 15-20 minutes.

    Ingredient Substitutions

    • Ground beef can replace lamb for a milder flavor.
    • Gluten-free flour can be used for the béchamel.
    • Vegetable stock can substitute beef stock for a vegetarian version.

    Nutrition Facts

    • Calories: 450 per serving
    • Protein: 20g
    • Fat: 30g
    • Carbohydrates: 25g
    • Serving Size: 1 slice (1/8 of the dish)

    Frequently Asked Questions

    • Can I make Moussaka ahead of time? Yes, prepare it a day in advance and bake before serving.
    • What wine pairs well with Moussaka? A robust red wine like Xinomavro complements the flavors.
    • Can I freeze Moussaka? Yes, freeze after baking and cooling. Reheat in the oven.
    • How do I prevent the béchamel from curdling? Gradually add milk to the roux and whisk continuously.
    • Is there a vegetarian version? Substitute lentils for lamb and vegetable stock for beef stock.

  • The Zenith of Georgian Comfort: Khachapuri – A Masterclass in Dough, Cheese, and Culinary Heritage

    The Zenith of Georgian Comfort: Khachapuri – A Masterclass in Dough, Cheese, and Culinary Heritage

    Introduction & My Personal Story

    Ah, the humble yet extraordinary Khachapuri. My journey with this Georgian delight began five years ago, during a culinary expedition through the vibrant streets of Tbilisi. It was a cold, misty morning, and the aroma of freshly baked bread wafted through the air as I stumbled upon a small, bustling bakery. There, I was introduced to the Adjaruli Khachapuri, a boat-shaped bread filled with molten cheese and topped with a golden egg. It was love at first bite.

    In my five years of experience as a chef, few dishes have captured my heart like Khachapuri. Its simplicity belies a depth of flavor that speaks to the soul. The memory of tearing off a piece of that warm, cheesy bread to dip into the runny yolk remains vivid. Each bite was a comforting embrace, a reminder of the universal joy found in good food shared with friends and family. Today, I am thrilled to share this recipe with you, so you too can create and savor the magic of Khachapuri in your own kitchen.

    Why You’ll Love This Recipe

    • Authentic taste of Georgia with ingredients easily found at your local market.
    • Perfect for breakfast, brunch, or a cozy dinner.
    • Customizable cheese filling to suit your taste preferences.
    • A fun, interactive dish to make with family and friends.
    • Impressive comfort food that looks as good as it tastes.

    Detailed Ingredients

    • **Flour**: 3.5 cups (420g) premium all-purpose or bread flour.
    • **Yeast**: 2 teaspoons (7g) instant dry yeast.
    • **Water**: 1 to 1.5 cups (240-360ml) lukewarm filtered water.
    • **Sea Salt**: 1.5 teaspoons (9g) fine sea salt.
    • **Sugar**: 1 tablespoon granulated sugar.
    • **Olive Oil**: 2 tablespoons (30ml) high-quality extra virgin olive oil.
    • **Cheese**: 1.5 cups (200g) low-moisture mozzarella, 1/4 cup (50g) feta, 1/4 cup (50g) ricotta or farmer’s cheese.
    • **Eggs**: 1 large egg yolk for the cheese mixture, plus additional eggs for topping Adjaruli.
    • **Butter**: Unsalted, for finishing.

    Step-by-Step Instructions

    Step 1: Activate the Yeast

    In a small bowl, combine 1 cup (240ml) of lukewarm water, 2 teaspoons (7g) of instant dry yeast, and 1 teaspoon of sugar. Stir and let sit for 5-10 minutes until frothy. This ensures the yeast is active and ready.

    Step 2: Mix the Dry Ingredients

    In a large bowl, whisk together 3.5 cups (420g) of flour, 1.5 teaspoons (9g) of sea salt, and the remaining sugar. Make sure everything is well combined before proceeding.

    Step 3: Combine Wet and Dry Ingredients

    Create a well in the center of the dry mixture. Add the yeast mixture and 2 tablespoons (30ml) of olive oil. Gradually add more water as needed, mixing until a shaggy dough forms. The dough should be soft but not sticky.

    Step 4: Knead the Dough

    Knead the dough on a lightly floured surface for 8-10 minutes until smooth and elastic. Alternatively, use a stand mixer with a dough hook. The dough should pass the “windowpane test” to ensure proper gluten development.

    Step 5: First Rise

    Place the dough in a lightly oiled bowl, cover with a damp towel, and let it rise in a warm place for 1 to 1.5 hours, or until doubled in size.

    Step 6: Prepare the Cheese Filling

    In a bowl, mix 1.5 cups mozzarella, 1/4 cup feta, 1/4 cup ricotta, and 1 egg yolk. Add a pinch of black pepper. Mix gently to combine.

    Step 7: Shape the Khachapuri

    Divide the risen dough into 4-6 pieces. Roll each piece into a ball, then flatten into a disc for Imeruli or an oval for Adjaruli. Fill with cheese mixture, shape accordingly, and seal edges.

    Step 8: Second Rise

    Let the shaped dough rest for 15-20 minutes, covered, to relax the gluten.

    Step 9: Bake

    Preheat the oven to 450°F (230°C). For Adjaruli, bake until golden, then add an egg and bake for a few more minutes until the white is set. For Imeruli, bake until golden brown.

    Common Mistakes to Avoid

    • **Inactive Yeast**: Always check the expiration date and proof the yeast.
    • **Overkneading or Underkneading**: Ensure you knead just until the dough is smooth and elastic.
    • **Soggy Crust**: Use low-moisture mozzarella to prevent excess liquid.
    • **Overbaking Eggs**: For Adjaruli, watch the egg closely to keep the yolk runny.

    How to Store & Reheat

    • **Storage**: Keep in an airtight container at room temperature for up to one day, or refrigerate for up to two days.
    • **Reheating**: Preheat the oven to 350°F (175°C) and reheat for 8-10 minutes. Avoid the microwave as it can make the crust soggy.

    Ingredient Substitutions

    • **Flour**: Substitute with gluten-free bread flour for a gluten-free option.
    • **Cheese**: Use a mix of cheddar and gouda if you can’t find mozzarella.
    • **Olive Oil**: Replace with melted butter for a richer flavor.

    Nutrition Facts

    • **Calories**: 450 per serving
    • **Protein**: 18g
    • **Fat**: 22g
    • **Carbs**: 45g
    • **Serving Size**: 1/6 of the recipe

    Frequently Asked Questions

    • Can I make the dough ahead of time?
      Yes, prepare the dough and let it rise overnight in the refrigerator.
    • What if I don’t have a stand mixer?
      You can knead the dough by hand; it just takes a bit more elbow grease.
    • Can I freeze Khachapuri?
      Yes, freeze before baking. Thaw overnight in the fridge before baking.
    • What other fillings can I use?
      Spinach and cheese make a great alternative filling.
    • Is Khachapuri always served with an egg?
      Not always, the Imeruli version is typically egg-free.

  • The Elixir of Thailand: Crafting the Perfect Tom Yum Goong

    The Elixir of Thailand: Crafting the Perfect Tom Yum Goong

    Introduction & My Personal Story

    There’s something magical about the first spoonful of Tom Yum Goong that transports me back to my travels through Thailand. In my 5 years of experience as a chef, few dishes have captivated me as much as this iconic Thai soup. I remember wandering through the bustling streets of Bangkok, where the aroma of lemongrass and lime leaves wafted through the air, inviting me to explore every food stall. It was at a small, unassuming eatery that I first encountered the vibrant, fiery bowl of Tom Yum Goong. The chef, with a knowing smile, served me a steaming bowl filled with plump shrimp, mushrooms, and a broth that promised an explosion of flavors. That first taste was a revelation – a perfect harmony of spicy, sour, salty, and sweet. It was an experience that ignited my passion for Thai cuisine and inspired me to recreate this dish with the same authenticity and love that I experienced that day.

    Why You’ll Love This Recipe

    • Authentic Thai flavors straight from your kitchen.
    • A perfect balance of spicy, sour, salty, and sweet.
    • Quick and easy to make, ideal for weeknight dinners.
    • Customizable to your spice preference.
    • Rich in protein and low in calories.

    Detailed Ingredients

    • Fresh Prawns: 500g, large, head-on preferred for stock, peeled and deveined.
    • Straw Mushrooms: 200g, quartered or sliced.
    • Shrimp Stock: 4 cups (1 liter), homemade from prawn shells.
    • Evaporated Milk: 1/2 cup (120ml) for a creamy texture.
    • Lemongrass: 2 stalks, bruised and sliced.
    • Galangal: 1.5-inch piece, thinly sliced.
    • Kaffir Lime Leaves: 5-6 leaves, torn.
    • Bird’s Eye Chilies: 5-8, bruised or sliced.
    • Fish Sauce: 3-4 tablespoons.
    • Fresh Lime Juice: 3-4 tablespoons.
    • Roasted Chili Paste: 2-3 tablespoons.
    • Palm Sugar: 1-2 teaspoons, dissolved in hot water.
    • Coriander Leaves: A handful, for garnish.

    Step-by-Step Instructions

    Step 1: Prepare the shrimp stock. Sauté prawn heads and shells in a tablespoon of oil until pink. Add 4 cups of water, bring to a simmer, and cook for 20 minutes. Strain and discard solids.

    Step 2: In a pot, bring the shrimp stock to a boil. Add bruised lemongrass, galangal, and torn kaffir lime leaves. Simmer for 5-7 minutes to infuse flavors.

    Step 3: Add mushrooms to the broth and cook for 2-3 minutes until they soften.

    Step 4: Increase heat slightly, add prawns, and cook for 2-3 minutes until opaque. Remove prawns temporarily to prevent overcooking.

    Step 5: Lower the heat and stir in roasted chili paste. Add evaporated milk, stirring constantly to prevent curdling.

    Step 6: Remove from heat. Add fish sauce, lime juice, and palm sugar. Stir well.

    Step 7: Taste and adjust seasoning. More lime juice for sourness, fish sauce for saltiness, sugar for sweetness, or chilies for heat.

    Step 8: Return prawns to the pot. Ladle soup into bowls and garnish with fresh coriander leaves. Serve immediately.

    Common Mistakes to Avoid

    • Overcooking prawns, which makes them rubbery.
    • Boiling lime juice, which turns it bitter.
    • Using low-quality fish sauce, which affects overall taste.
    • Skipping homemade shrimp stock, losing depth of flavor.

    How to Store & Reheat

    Store leftovers in an airtight container in the refrigerator for up to 2 days. Reheat gently on the stovetop, avoiding vigorous boiling, especially with milk.

    Ingredient Substitutions

    • Vegetarian/Vegan: Use vegetable stock and tofu instead of prawns. Replace fish sauce with soy sauce.
    • Coconut Milk: Can replace evaporated milk for a richer flavor.
    • Button Mushrooms: Can substitute straw mushrooms.

    Nutrition Facts

    • Calories: 200 kcal
    • Protein: 18 g
    • Fat: 10 g
    • Carbs: 12 g
    • Serving Size: 1 bowl

    Frequently Asked Questions

    • Q: Can I use frozen shrimp? A: Yes, thaw completely and pat dry before use.
    • Q: Is this dish very spicy? A: You can adjust the spice level by reducing the number of chilies.
    • Q: Can I make it ahead? A: Best served fresh, but can be made a day ahead and reheated gently.
    • Q: What can I serve with it? A: Serve with steamed jasmine rice for a complete meal.