Introduction & My Personal Story
Ah, the memories of late-night study sessions and work marathons. In my 5 years of experience as a chef, few things have been as comforting and energizing as a plate of Grilled Teriyaki Chicken Kebabs. I remember my college days vividly, burning the midnight oil with a group of friends in a cramped apartment. We needed something quick, easy, and delicious to keep us going, and these kebabs were the answer. The smell of chicken grilling and the sweet, sticky aroma of teriyaki sauce wafting through the kitchen was all it took to lift our spirits.
Not only did these kebabs provide the sustenance we needed, but they also became a symbol of camaraderie. Each skewer was a burst of flavor, a perfect mix of juicy chicken and sweet teriyaki glaze, providing the right balance of protein and carbs to fuel our brains. It was a dish that turned mundane study nights into memorable gatherings. Even now, whenever I grill these kebabs, I’m transported back to those nights filled with laughter, friendship, and the promise of future success.
Why You’ll Love This Recipe
- Quick and easy to prepare, perfect for late-night cravings.
- Packed with protein to keep energy levels high.
- The perfect balance of sweet, savory, and umami flavors.
- Minimal cleanup with simple ingredients.
- Customizable to suit different tastes and dietary needs.
Detailed Ingredients
Here’s what you’ll need to make these irresistible kebabs:
- 2 lbs boneless, skinless chicken breasts, diced into 1-inch cubes
- ½ cup soy sauce – Look for low-sodium options if preferred.
- ⅓ cup brown sugar – Packed tightly for sweetness.
- 2 cloves garlic, minced
- 2 teaspoons fresh ginger, grated
- 1 cup water
- 2 tablespoons cornstarch
- Wooden skewers, soaked in water for 30 minutes
Step-by-Step Instructions
Step 1: Preheat the Grill
Set your grill to 375°F. This moderate heat ensures the chicken cooks evenly without burning. If you’re using wooden skewers, remember to soak them in water for at least 30 minutes to prevent them from catching fire.
Step 2: Make the Teriyaki Sauce
In a small saucepan, combine ½ cup soy sauce, ⅓ cup brown sugar, 2 cloves minced garlic, and 2 teaspoons grated ginger. Bring the mixture to a simmer over medium heat. In a separate bowl, mix 1 cup water with 2 tablespoons cornstarch to create a slurry. Slowly whisk the slurry into the simmering sauce until it thickens and turns glossy, about 2-3 minutes. Allow it to cool.
Step 3: Marinate the Chicken
Place the diced chicken in a large ziplock bag. Pour in two-thirds of your cooled teriyaki sauce, seal the bag, and massage the chicken to ensure all pieces are coated. Marinate for at least 30 minutes in the refrigerator. Reserve the remaining sauce for basting later.
Step 4: Prepare the Skewers
Thread the marinated chicken onto the soaked wooden skewers, leaving a small gap between each piece to ensure even cooking.
Step 5: Grill the Kebabs
Place the skewers on the preheated grill. Cook each side for about 4-5 minutes, basting with the reserved sauce as you turn them. The chicken is done when it reaches an internal temperature of 165°F and the juices run clear.
Step 6: Cook the Rice
While the chicken is grilling, prepare 1 cup of rice according to the package instructions. Fluff with a fork before serving.
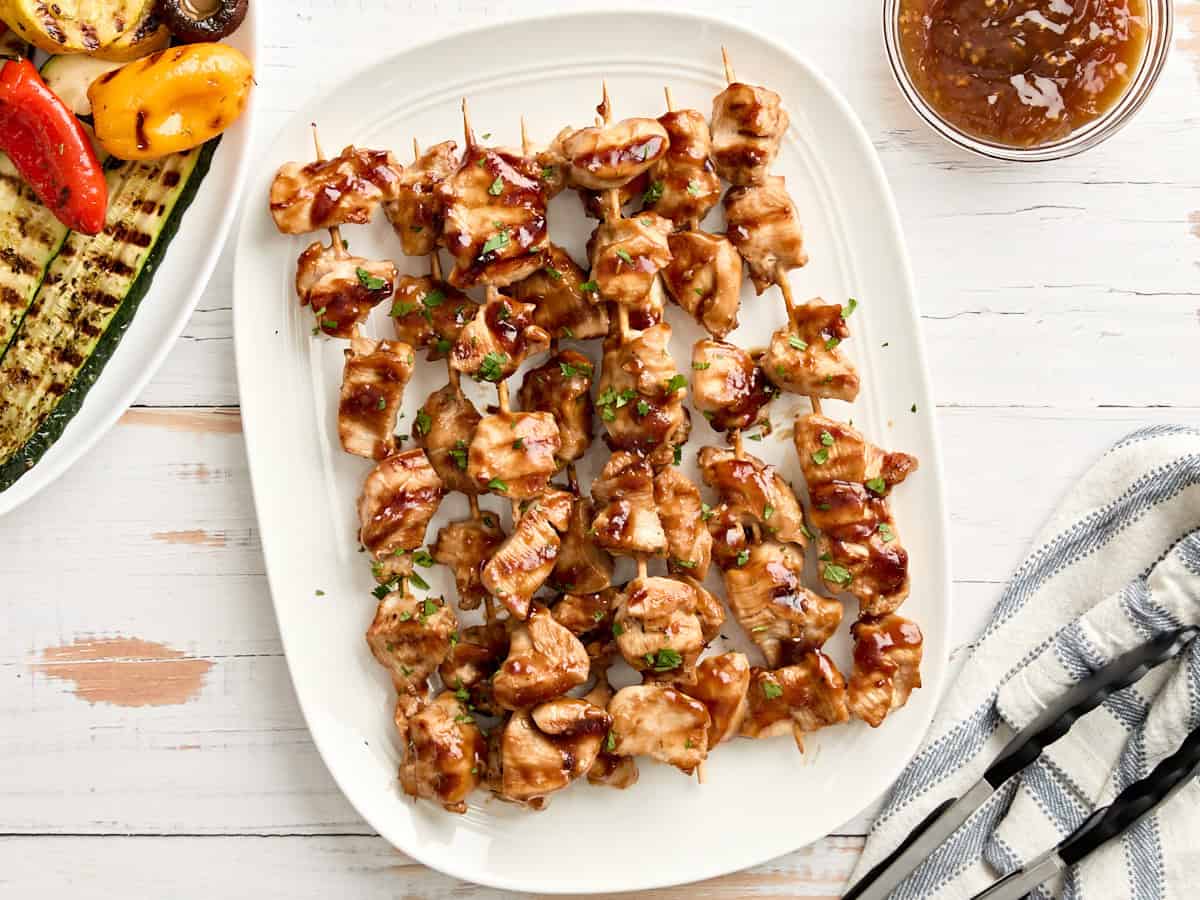
Step 7: Serve and Enjoy
Plate the grilled teriyaki chicken skewers alongside the rice. Chef’s Tip: Garnish with chopped green onions or sesame seeds for an added pop of flavor and color.
Common Mistakes to Avoid
- Overcooking the Chicken: Keep an eye on your grill temperature and use a meat thermometer to ensure the chicken doesn’t dry out.
- Skipping the Skewer Soak: If you forget to soak your skewers, they might burn. Always soak them in water for at least 30 minutes.
- Not Marinating Long Enough: The longer the chicken marinates, the more flavorful it becomes. Aim for at least 30 minutes.
How to Store & Reheat
Store any leftover kebabs in an airtight container in the refrigerator for up to 3 days. To reheat, place them in a preheated oven at 350°F for 10-12 minutes or until warmed through. Alternatively, you can reheat them in a microwave, but be aware this may slightly change the texture.
Ingredient Substitutions
- Soy Sauce: For a gluten-free option, use tamari or coconut aminos.
- Brown Sugar: Substitute with honey or maple syrup for a different sweetness profile.
- Chicken Breasts: Thighs can be used for a juicier texture.
Nutrition Facts
- Calories: 250 per skewer
- Protein: 26g
- Fat: 5g
- Carbohydrates: 25g
- Serving Size: 2 skewers
Frequently Asked Questions
Q: Can I make these kebabs in advance?
A: Yes, you can marinate the chicken and prepare the skewers a day in advance. Grill them just before serving for best results.
Q: Can I use a different protein?
A: Absolutely! These kebabs can be made with beef, pork, or even tofu for a vegetarian option.
Q: How can I make the sauce thicker?
A: If you prefer a thicker sauce, add more cornstarch to the slurry until you reach your desired consistency.
Q: What sides go well with these kebabs?
A: Steamed vegetables or a simple green salad make excellent accompaniments.