Blog

  • Murgh Makhani: The Quintessence of Indian Culinary Artistry – A Michelin Chef’s Homage to Butter Chicken

    Murgh Makhani: The Quintessence of Indian Culinary Artistry – A Michelin Chef’s Homage to Butter Chicken

    Introduction & My Personal Story

    There’s something magical about the first bite of a well-made Murgh Makhani. I remember the first time I tasted this dish as if it were yesterday. It was a chilly evening, and I was in the heart of New Delhi, sitting at a small family-run restaurant known for its traditional North Indian cuisine. The aroma of spices wafted through the air, creating an inviting warmth. When the Murgh Makhani arrived at our table, it was love at first sight. The vibrant orange sauce, creamy and rich, enveloped tender pieces of chicken, promising a burst of flavors. As I took my first bite, the silky sauce and the smoky, juicy chicken melded in my mouth, creating a harmony of tastes that was both comforting and exhilarating. That meal ignited a passion in me to recreate this dish, a quest that led me to explore and refine my own version of Butter Chicken over the years. Now, with over 5 years of experience, I’m excited to share this recipe with you.

    Why You’ll Love This Recipe

    • Authentic taste that captures the essence of traditional Indian cuisine.
    • Rich and creamy texture with a perfect balance of spices.
    • Easy-to-follow steps suitable for home cooks and chefs alike.
    • Uses readily available ingredients without compromising on flavor.
    • Perfect for impressing guests or for a comforting family meal.

    Detailed Ingredients

    For the Chicken Marinade:

    • Chicken: 1 kg (2.2 lbs) boneless, skinless chicken thighs, cut into 1.5-inch pieces.
    • Yogurt: 1/2 cup (120 ml) full-fat plain yogurt.
    • Ginger-Garlic Paste: 1 tablespoon, freshly made.
    • Lemon Juice: 1 tablespoon, freshly squeezed.
    • Spices:
      • 1 teaspoon Kashmiri Red Chilli Powder
      • 1/2 teaspoon Turmeric Powder
      • 1 teaspoon Cumin Powder
      • 1 teaspoon Coriander Powder
      • 1/2 teaspoon Garam Masala
      • 1 teaspoon Salt

    For the Makhani Sauce:

    • Tomatoes: 800g (28 oz) can of crushed San Marzano tomatoes.
    • Onion: 1 medium-sized, finely chopped.
    • Ginger-Garlic Paste: 1.5 tablespoons, freshly prepared.
    • Cashews: 1/2 cup (60g) raw unsalted cashews, soaked.
    • Butter: 1/2 cup (113g) unsalted butter, divided.
    • Heavy Cream: 1/2 cup (120ml) full-fat heavy cream.
    • Spices:
      • 2 tablespoons Kashmiri Red Chilli Powder
      • 1/2 teaspoon Turmeric Powder
      • 1 teaspoon Cumin Powder
      • 1 teaspoon Coriander Powder
      • 1 teaspoon Garam Masala
      • 1 teaspoon Kasuri Methi, crushed
      • 1-2 teaspoons Sugar
      • 1 teaspoon Salt
    • Whole Spices:
      • 3-4 green cardamom pods
      • 1-inch cinnamon stick
      • 2-3 bay leaves
    • Green Chillies: 1-2, slit lengthwise (optional).
    • Water or Chicken Stock: As needed.

    Step-by-Step Instructions

    Part 1: Preparing and Cooking the Chicken

    Marinate the Chicken: Combine chicken with yogurt, ginger-garlic paste, lemon juice, and spices. Mix well, cover, and refrigerate for at least 4 hours or overnight for best results.

    Cook the Chicken: Preheat oven to 200°C (400°F). Skewer the chicken and bake for 15-20 minutes until cooked with charred edges. Alternatively, grill or pan-fry the chicken until golden brown. Set aside.

    Part 2: Crafting the Makhani Sauce

    Aromatic Foundation: Melt half the butter in a pot over medium heat. Add whole spices and green chillies, sauté for 30-60 seconds.

    Build the Base: Add onions, cook until soft. Stir in ginger-garlic paste, then add tomatoes and cashews. Mix in spices and simmer for 15-20 minutes.

    Blend for Smoothness: Transfer to a blender and blend until smooth. Strain back into the pot for a silky texture.

    Refine the Sauce: Simmer, adding Kasuri Methi and sugar. Adjust seasoning. Stir in cream and remaining butter, simmer for 2-3 minutes.

    Part 3: Combining and Serving

    Combine Flavors: Add cooked chicken to sauce, simmer for 5-7 minutes.

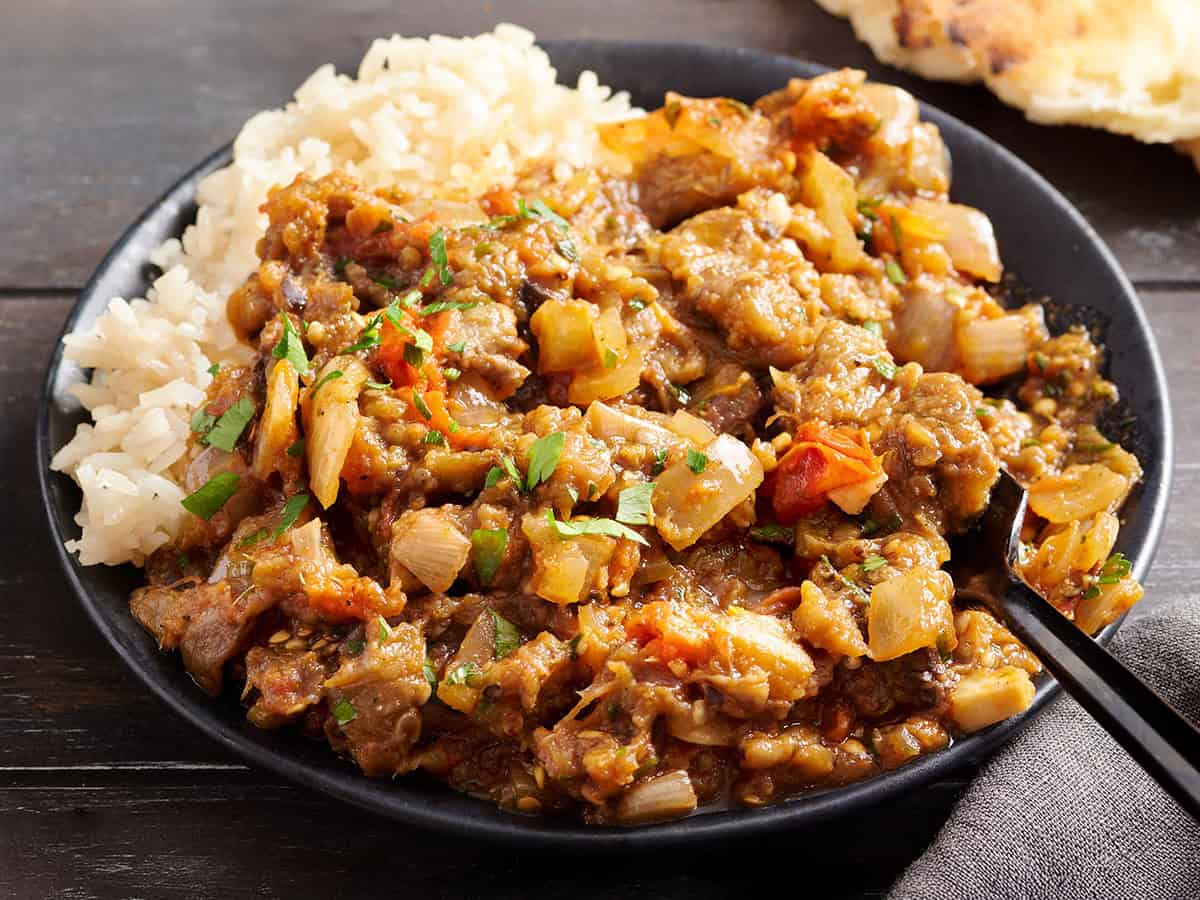
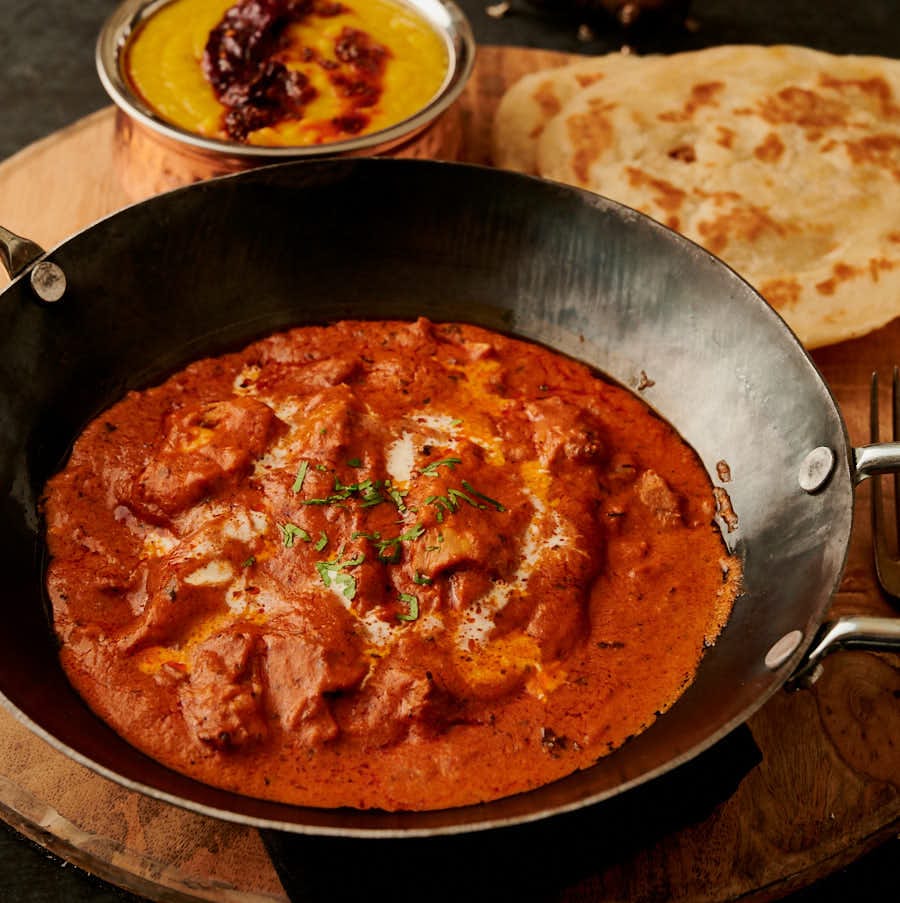
    Serve: Garnish with coriander, cream, and butter. Serve hot with naan or basmati rice.

    Common Mistakes to Avoid

    Overcooking Chicken: Keep a close eye on the chicken to prevent it from drying out. Aim for slightly charred edges.

    Skipping the Strain: Straining the sauce is crucial for a smooth texture. Don’t skip this step.

    Not Balancing Flavors: Taste as you go. Adjust salt, sugar, and acidity to achieve the perfect balance.

    How to Store & Reheat

    Store leftovers in an airtight container in the fridge for up to 3-4 days. Reheat gently on the stovetop, adding a splash of water if needed. Avoid high heat to prevent splitting. Freeze for up to 2-3 months, thaw overnight in the fridge before reheating.

    Ingredient Substitutions

    • Chicken: Use paneer or tofu for a vegetarian version.
    • Cashews: Substitute with blanched almonds or sunflower seeds for a nut-free option.
    • Heavy Cream: Use coconut cream for a different flavor profile.

    Nutrition Facts

    • Calories: 650-750 kcal
    • Protein: 40-50 g
    • Total Fat: 45-55 g
    • Carbohydrates: 25-35 g
    • Serving Size: 1.5 cups (350g)

    Frequently Asked Questions

    • Can I make this less spicy? Reduce Kashmiri chilli powder or omit green chillies.
    • Can I prepare this dish in advance? Yes, it often tastes better the next day.
    • Is this recipe gluten-free? Yes, ensure spices are pure without fillers.
    • What do I serve with Butter Chicken? Pair with naan or basmati rice for a complete meal.

  • The Art of Neapolitan Pizza: A Michelin Chef’s Masterclass to Perfect Homemade Perfection

    The Art of Neapolitan Pizza: A Michelin Chef’s Masterclass to Perfect Homemade Perfection

    Introduction & My Personal Story

    Ah, the Neapolitan pizza. This dish holds a special place in my heart and is the crown jewel of my culinary journey. It was years ago, during my first visit to Naples, that I truly discovered the magic of this humble yet profound dish. Walking through the bustling streets, I was drawn by the aroma of freshly baked pizza wafting through the air. I stumbled upon a small, unassuming pizzeria, where the pizzaiolo worked with a mesmerizing rhythm, stretching and tossing dough with the finesse of a seasoned artist. It was there, seated on a rickety wooden chair, that I tasted my first authentic Neapolitan pizza. The experience was nothing short of transformative.

    In my 5 years of experience as a chef, I’ve had the privilege of crafting countless dishes, but the simplicity and elegance of Neapolitan pizza continually captivate me. It’s a dish that embodies the essence of Italian cuisine – using minimal, high-quality ingredients to create something extraordinary. Every time I prepare this pizza, I’m transported back to that first bite in Naples, the delicate balance of flavors dancing on my palate, the crisp yet tender crust, the vibrant tomato sauce, the creamy mozzarella, and the aromatic basil. It’s a dish that tells a story, one of tradition and passion, and I’m thrilled to share this recipe with you, hoping it brings as much joy to your table as it has to mine.

    Why You’ll Love This Recipe

    • Authentic taste that transports you to the streets of Naples.
    • Simple ingredients that highlight the quality of each component.
    • Perfect for both novice and experienced cooks.
    • Customizable with your favorite toppings while maintaining its traditional roots.
    • A fun and rewarding cooking experience that brings people together.

    Detailed Ingredients

    For the Dough

    • “00” Flour: 500 grams (approximately 4 cups) – Look for Italian “00” flour for its fine texture and low protein content.
    • Water: 300 ml (1 ¼ cups) – Use cold, filtered water for best results.
    • Fine Sea Salt: 15 grams (1 tablespoon) – Enhances flavor and controls yeast activity.
    • Fresh Brewer’s Yeast: 1-3 grams (¼ to ½ teaspoon) – Alternatively, use 0.5-1 gram (⅛ to ¼ teaspoon) active dry yeast, rehydrated.

    For the Sauce

    • San Marzano D.O.P. Crushed Tomatoes: 400 grams (14 oz can) – Seek out these specific tomatoes for their perfect balance of sweetness and acidity.
    • Fresh Basil Leaves: 6-8 leaves – Hand-torn to release their natural oils.
    • Extra Virgin Olive Oil: 2 tablespoons – Use the highest quality you can find.
    • Pinch of Sea Salt: To taste – Complements the natural sweetness of the tomatoes.

    For the Topping

    • Fresh Mozzarella: 200-250 grams (7-9 oz) – Choose Fior di Latte or Mozzarella di Bufala, well-drained and torn into small pieces.
    • Parmigiano-Reggiano (Optional): 20 grams (2 tablespoons) – Freshly grated for an extra layer of umami.
    • Extra Virgin Olive Oil: Drizzle for finishing.
    • Fresh Basil Leaves: For garnish after baking.

    Step-by-Step Instructions

    Crafting the Perfect Dough

    The dough is the soul of your pizza. Patience and precision are key here.

    Step 1: If using dry yeast, dissolve it in 50ml (3 tablespoons) of the cold water and let it sit for 5-10 minutes until foamy. If using fresh yeast, you can dissolve it directly into the water.

    Step 2: In a large mixing bowl, combine the remaining cold water with the sea salt. Stir until the salt is fully dissolved.

    Step 3: Gradually add about two-thirds of the “00” flour to the water-salt mixture, stirring with a wooden spoon or your hand until a shaggy dough forms.

    Step 4: Pour in the activated yeast mixture (or the dissolved fresh yeast). Mix until incorporated.

    Step 5: Transfer the dough to a lightly floured surface. Gradually incorporate the remaining flour, kneading for 15-20 minutes. The dough should be smooth, elastic, and no longer sticky. It’s a workout, but crucial for gluten development. Push, fold, turn. Your goal is a smooth, satiny ball.

    Step 6: Place the dough in a lightly oiled bowl, cover tightly with plastic wrap or a damp cloth, and let it rest at room temperature (around 20-22°C or 68-72°F) for 2 hours. The dough should visibly increase in size.

    Step 7: After 2 hours, transfer the bowl to the refrigerator for 16-22 hours. This slow, cold fermentation develops incredible flavor and makes the dough much easier to handle and digest.

    Preparing the Sauce

    Neapolitan pizza sauce is minimalist for a reason – to let the quality of the tomatoes shine.

    Step 1: Open the can of San Marzano tomatoes. Gently crush them by hand or with a fork in a bowl. Do not blend or process; you want some texture.

    Step 2: Add a pinch of sea salt, two tablespoons of good extra virgin olive oil, and the hand-torn fresh basil leaves to the crushed tomatoes. Gently mix. That’s it. No cooking necessary. The heat of the oven will meld the flavors beautifully.

    Preparing the Mozzarella

    This step is often overlooked but critical for preventing a watery pizza.

    Step 1: Remove your fresh mozzarella from its brine at least 1-2 hours before use. Tear it into small, bite-sized pieces.

    Step 2: Place the torn mozzarella on a paper towel-lined plate and pat it dry with more paper towels. This removes excess moisture that would otherwise make your pizza soggy.

    Shaping the Dough Balls

    After cold fermentation, it’s time to divide and shape.

    Step 1: Take the dough out of the refrigerator 2-3 hours before you plan to bake. Let it come to room temperature, still covered, to relax the gluten.

    Step 2: Gently turn the dough out onto a lightly floured surface. Divide it into four equal portions, about 200-220 grams (7-7.7 oz) each.

    Step 3: For each portion, create a smooth, tight ball by folding the edges underneath and gently rotating it against the surface. The goal is to create tension on the surface.

    Step 4: Place the dough balls on a lightly floured tray or proofing box, leaving ample space between them. Cover loosely with plastic wrap or a damp cloth and let them proof at room temperature for another 1-2 hours. They should feel airy and slightly expanded.

    Stretching the Dough

    This is where the artistry begins. NO ROLLING PIN for Neapolitan pizza!

    Step 1: Lightly flour your hands and your work surface.

    Step 2: Take one dough ball. Gently press it from the center outwards with your fingertips, pushing the air to the edges to form the cornicione (crust).

    Step 3: Pick up the dough disc and gently stretch it over your knuckles or by rotating it between your hands, letting gravity do some of the work. Aim for a 25-30 cm (10-12 inch) disc, keeping the edge slightly thicker than the center. Avoid tearing the dough.

    Step 4: Carefully transfer the stretched dough to a well-floured pizza peel (or parchment paper if you don’t have a peel). Ensure it can slide easily.

    Topping and Baking

    Speed and heat are your allies.

    Step 1: Preheat your oven to its maximum temperature (usually 250-280°C / 480-550°F) for at least 60 minutes, preferably 90 minutes, with a pizza stone or steel on the top rack.

    Step 2: Spoon 2-3 tablespoons of your prepared San Marzano sauce onto the center of the stretched dough. Using the back of the spoon, gently spread it in a spiral motion, leaving a 1-2 cm (½-¾ inch) border for the crust.

    Step 3: Distribute the drained mozzarella pieces evenly over the sauce. Add a light dusting of Parmigiano-Reggiano if using.

    Step 4: With a swift, confident motion, slide the pizza from the peel onto the preheated pizza stone/steel.

    Step 5: Bake for 3-5 minutes, or until the crust is beautifully puffed, blistered, and lightly charred, and the cheese is melted and bubbling with some golden spots.

    Step 6: Carefully remove the pizza from the oven using the peel. Drizzle with a little more extra virgin olive oil and scatter a few fresh basil leaves. Slice and serve immediately.

    Common Mistakes to Avoid

    • Over-kneading: This can make the dough tough. Knead just until smooth and elastic.
    • Not preheating the stone/steel: A cold stone will lead to uneven cooking. Preheat for at least an hour.
    • Using too much sauce: This can lead to a soggy pizza. Use sparingly.
    • Skipping the cold fermentation: This step is crucial for flavor development.

    How to Store & Reheat

    Store any leftover pizza slices in an airtight container in the refrigerator for up to 3 days. To reheat, preheat your oven to 180°C (350°F) and warm the slices for about 5-7 minutes. For a quicker option, you can use a skillet on medium heat to bring back some crispiness to the crust.

    Ingredient Substitutions

    • Flour: If you can’t find “00” flour, use all-purpose flour, but be aware the texture may differ slightly.
    • Yeast: Active dry yeast can be used in place of fresh yeast. Just ensure it’s properly rehydrated.
    • Tomatoes: If San Marzano tomatoes aren’t available, use the best quality canned tomatoes you can find.
    • Mozzarella: While fresh is best, a high-moisture, low-moisture mozzarella can be used if necessary, but expect a different texture and flavor.

    Nutrition Facts

    • Calories: 380 kcal
    • Protein: 17 g
    • Total Fat: 14 g
    • Carbohydrates: 47 g
    • Serving Size: 1/4 of a 25cm pizza

    Frequently Asked Questions

    Q1: Why is my pizza crust so chewy and tough, not light and airy?

    A: This is usually due to insufficient kneading or too short a fermentation time. Ensure you’re developing enough gluten and allowing the dough to ferment properly.

    Q2: My pizza is always soggy in the middle. How can I prevent this?

    A: Make sure your mozzarella is well-drained and avoid overloading the pizza with sauce and toppings. Preheat your oven and stone/steel thoroughly.

    Q3: Can I make the dough ahead of time and freeze it?

    A: Yes, you can freeze the dough after the initial proof. Thaw in the refrigerator overnight before using.

    Q4: What if I don’t have a pizza stone or steel?

    A: Use an inverted baking sheet preheated in the oven as an alternative.

    Q5: How can I achieve the perfect crust char at home?

    A: Preheat your oven as high as possible and use a pizza stone or steel to ensure even, high heat.

  • NIGHT GRIND: Easy Eggplant Curry Inspired by Baingan Bharta

    NIGHT GRIND: Easy Eggplant Curry Inspired by Baingan Bharta

    Introduction & My Personal Story

    There’s something uniquely comforting about an eggplant curry, especially when it brings back memories of my late-night culinary escapades. Picture this: a dimly lit kitchen, the gentle hum of the night, and the rich aroma of roasted eggplant mingling with spices in the air. This particular dish, inspired by the traditional Baingan Bharta, has been my go-to for those long nights when creativity strikes and hunger calls. In my 5 years of experience as a chef, I’ve come to appreciate the versatility and depth of flavor that eggplant can bring to a dish.

    I remember the first time I attempted this curry; it was a spontaneous decision after a long day. I had just returned from the market with fresh eggplants and tomatoes, and the idea of a simple yet flavorful curry seemed perfect. As the eggplants roasted, their skin blistering and flesh softening, I found a moment of peace and anticipation. The dish came together seamlessly, and the first bite was nothing short of magical. It was a perfect blend of smoky, spicy, and savory that kept me energized and focused throughout the night.

    This Easy Eggplant Curry is more than just a recipe; it’s a testament to the power of simplicity and the joy of cooking. Whether you’re grinding through a project or simply seeking a comforting meal, this dish is sure to become a staple in your kitchen repertoire.

    Why You’ll Love This Recipe

    • Simple to make with minimal ingredients.
    • Quick prep time, perfect for late-night cooking.
    • Packed with flavors that will keep you energized.
    • Versatile – enjoy it with rice, naan, or on its own.
    • Vegetarian and can easily be made vegan.

    Detailed Ingredients

    For this recipe, you’ll need the following:

    • 2 medium eggplants (about 600 grams) – Look for firm, shiny eggplants with no soft spots.
    • 3 Roma tomatoes (about 300 grams) – Choose ripe tomatoes for the best flavor.
    • 2 garlic cloves – Fresh and firm.
    • 1 small onion (about 100 grams) – Any variety will work.
    • 1 tablespoon olive oil
    • ½ teaspoon salt
    • ½ tablespoon garam masala
    • 1 teaspoon cumin
    • ¼ teaspoon black pepper
    • 1 tablespoon butter – Optional; use plant-based for vegan.
    • ½ tablespoon red curry paste
    • 1 tablespoon grated ginger
    • ¼ cup parsley – Freshly chopped for garnish.

    Step-by-Step Instructions

    Step 1: Preheat and Prep

    Preheat your oven to 450°F (230°C). Quarter the eggplants and tomatoes. Peel the garlic cloves and dice the onion.

    Step 2: Roast the Veggies

    Toss the eggplant and tomatoes with olive oil and salt. Spread them evenly on a baking sheet and roast for 35 minutes until the eggplants are tender and the tomatoes are slightly blistered.

    Step 3: Toast the Spices

    In a dry skillet, toast the garam masala, cumin, and black pepper over medium heat for about 3 minutes. This will release the aromatic oils and enhance their flavor.

    Step 4: Build the Base

    Add butter and remaining olive oil to the skillet. Sauté the onions and red curry paste over medium heat until the onions are soft and translucent, about 5-7 minutes.

    Step 5: Add Aromatics

    Stir in the minced garlic and grated ginger. Cook for another 3-4 minutes. If your veggies have a few minutes left, switch the oven to broil to add a bit of char.

    Step 6: Combine and Mash

    Add the roasted veggies and parsley to the skillet. Use a spoon to mash everything until it’s mixed and saucy.

    Step 7: Simmer and Serve

    Let the mixture simmer for 10 minutes to marry the flavors. Serve hot with rice or naan for a complete meal.

    Common Mistakes to Avoid

    Over-roasting Eggplants: Be careful not to over-roast the eggplants as they can become mushy. Keep an eye on them towards the end of the roasting time.

    Skipping the Spice Toasting: Toasting spices might seem optional, but it really enhances the flavor of the dish.

    Using Too Much Oil: Stick to the recommended amount of oil to avoid a greasy curry.

    How to Store & Reheat

    Store any leftovers in an airtight container in the refrigerator for up to 3 days. To reheat, gently warm the curry on the stove over medium heat or in the microwave, adding a splash of water if necessary to loosen the sauce.

    Ingredient Substitutions

    • Butter: Can be replaced with a plant-based alternative for a vegan version.
    • Red Curry Paste: Use yellow or green curry paste if you prefer a different flavor profile.
    • Parsley: Substitute with cilantro for a more traditional touch.

    Nutrition Facts

    • Calories: 250 per serving
    • Protein: 4g
    • Fat: 14g
    • Carbohydrates: 30g
    • Serving Size: 1 cup

    Frequently Asked Questions

    Q: Can I make this curry in advance?

    A: Absolutely! This curry tastes even better the next day as the flavors meld together.

    Q: What can I serve with this eggplant curry?

    A: It pairs wonderfully with steamed rice, naan, or even quinoa for a healthier option.

    Q: Is this curry spicy?

    A: The level of spice is mild, but you can adjust it by adding more or less red curry paste to suit your taste.

    Q: Can I freeze this curry?

    A: Yes, you can freeze it in an airtight container for up to 2 months. Thaw overnight in the refrigerator before reheating.

  • 5-MIN FUEL: High-Protein Tortilla Quiche for a Quick Bite!

    5-MIN FUEL: High-Protein Tortilla Quiche for a Quick Bite!

    Introduction & My Personal Story

    Ah, the aroma of a freshly baked quiche. It takes me back to my early days as a budding chef, when I stumbled upon the idea of creating quick, nutritious meals that didn’t skimp on flavor. You see, in my 5 years of experience in the culinary world, I’ve learned that time is of the essence, especially for those of us with bustling schedules. This is where the 5-Minute Fuel: High-Protein Tortilla Quiche comes into play.

    I remember the first time I whipped this dish up in my tiny apartment kitchen. I was running late for a meeting and needed something that wouldn’t just fill me up, but also fuel me for the rest of the day. I had a few staple ingredients on hand—eggs, a large tortilla, and some veggies. With a flick of the wrist and a dash of creativity, this quiche was born. The result was a delightful blend of fluffy eggs, creamy cheese, and a crisp tortilla crust that had me hooked from the first bite. Now, it’s a staple in my meal prep routine, and I’m thrilled to share it with you.

    Why You’ll Love This Recipe

    • **Quick and Easy:** Ready in just 5 minutes of prep time.
    • **High in Protein:** Packed with eggs and cottage cheese.
    • **Customizable:** Add your favorite veggies or proteins.
    • **Minimal Cleanup:** One bowl and a pie pan are all you need.
    • **Portable:** Perfect for on-the-go meals or meal prep.

    Detailed Ingredients

    Here’s what you’ll need to create this high-protein delight:

    • 1 large tortilla: Look for whole wheat or multigrain for added fiber.
    • 2 large eggs: Fresh, free-range eggs offer the best flavor.
    • ½ cup egg whites: You can use liquid egg whites from a carton or separate them yourself.
    • ⅓ cup cottage cheese: Full-fat or low-fat, depending on your dietary preference.
    • 1 cup fresh spinach: Washed and roughly chopped.
    • ½ cup red bell pepper: Finely chopped for a sweet crunch.
    • ½ cup shredded cheese: Cheddar or mozzarella work great here.
    • Salt and pepper: To taste.

    Step-by-Step Instructions

    Creating this quiche is as easy as pie, literally!

    Step 1: Preheat and Prepare

    Preheat your oven to 350°F (175°C). Lightly grease a 9-inch pie pan with cooking spray or a bit of butter to prevent sticking.

    Step 2: Form the Crust

    Press the large tortilla into the pie pan, making sure it covers the bottom and sides. The edges should slightly overlap the rim of the pan.

    Step 3: Whisk the Eggs

    In a medium bowl, whisk together the 2 large eggs, ½ cup of egg whites, and ⅓ cup of cottage cheese. Season with a pinch of salt and pepper. Whisk until well combined and slightly frothy.

    Step 4: Assemble the Quiche

    Sprinkle the chopped spinach and red bell pepper evenly over the tortilla. Pour the egg mixture over the veggies, ensuring even distribution. Top with the shredded cheese.

    Step 5: Bake to Perfection

    Place the quiche in the preheated oven and bake for 20–25 minutes, or until the eggs are set and the cheese is golden brown. You’ll know it’s done when the center is firm and doesn’t jiggle when you gently shake the pan.

    Step 6: Cool and Serve

    Allow the quiche to cool for 5–10 minutes before slicing. This helps it set further and makes slicing easier. Serve warm or at room temperature.

    Common Mistakes to Avoid

    • Overcooking: Keep an eye on the quiche in the last few minutes to prevent it from drying out.
    • Under-seasoning: Don’t be shy with salt and pepper; they enhance the flavors of the eggs and veggies.
    • Skipping the Grease: Make sure to grease the pan well to avoid sticking.
    • Using a Small Tortilla: Ensure the tortilla is large enough to line the pan completely.

    How to Store & Reheat

    Storing this quiche is a breeze. Once cooled, wrap it tightly in plastic wrap or aluminum foil and store in the refrigerator for up to 3 days. To reheat, place a slice in the microwave for about 30 seconds or until warmed through. Alternatively, reheat in a preheated oven at 350°F for 5–7 minutes for a crispier result.

    Ingredient Substitutions

    • Egg Whites: If you prefer, use an additional egg instead.
    • Spinach: Kale or arugula make great substitutes.
    • Red Bell Pepper: Try diced tomatoes or mushrooms for a different flavor.
    • Cottage Cheese: Ricotta cheese can be used for a creamier texture.

    Nutrition Facts

    • Calories: 300 kcal
    • Protein: 27g
    • Fat: 12g
    • Carbs: 24g
    • Serving Size: 1/4 of the quiche

    Frequently Asked Questions

    Can I make this quiche ahead of time?

    Absolutely! This quiche is perfect for meal prep. Simply bake it, cool, and store in the fridge. Reheat before serving.

    What if I don’t have a pie pan?

    No worries! A square baking dish or even a cast-iron skillet works just as well.

    Can I freeze the quiche?

    Yes, you can freeze it. Wrap tightly in plastic wrap and foil, then freeze for up to a month. Thaw overnight in the fridge before reheating.

    What other veggies can I add?

    Feel free to experiment with zucchini, onions, or even broccoli. Just ensure they’re chopped finely for even cooking.

    Is this quiche gluten-free?

    If you use a gluten-free tortilla, then yes, it can be made gluten-free.

  • GAINS: Love-Infused Protein Meatballs

    GAINS: Love-Infused Protein Meatballs

    Introduction & My Personal Story

    Ah, the humble meatball! Let me take you back a few years to when I first stumbled upon the magic of protein-packed meals. It was a chilly afternoon, and I was dead-set on finding a recipe that would not only satisfy my hunger but also support my fitness goals. Enter: the High-Protein Marry Me Chicken Meatballs. I remember standing in my tiny kitchen, surrounded by the aroma of fresh herbs and sizzling chicken, eagerly awaiting the first taste. These meatballs were more than just a meal; they were a revelation. Over the years, I’ve tinkered and adjusted, striving to perfect this recipe that brings together flavor, nutrition, and a touch of nostalgia. Now, it’s a staple in my meal prep routine, and I can’t wait to share it with you. This dish is more than just food; it’s a love letter to the art of cooking and the pursuit of gains!

    Why You’ll Love This Recipe

    • High in Protein: Each serving packs a whopping 32g of protein.
    • Flavorful: Sun-dried tomatoes and fresh herbs make every bite burst with flavor.
    • Easy to Make: Straightforward steps that even beginners can follow.
    • Perfect for Meal Prep: Make a big batch and enjoy all week long.
    • Family-Friendly: A dish that pleases even the pickiest eaters.

    Detailed Ingredients

    Before you start, gather the following ingredients:

    • **1 lb. ground chicken**
    • **2 tablespoons sun-dried tomatoes**, minced
    • **1 tablespoon fresh basil**, minced
    • **½ tablespoon fresh parsley**, minced
    • **½ cup breadcrumbs**
    • **2 tablespoons salted butter**
    • **1 large egg**
    • **¼ teaspoon garlic powder**
    • **¼ teaspoon dried oregano**
    • **1 teaspoon dried basil**
    • **¼ teaspoon salt**
    • **¼ teaspoon black pepper**
    • **1 tablespoon mayonnaise**
    • **1 teaspoon soy sauce**
    • **2 tablespoons vegetable oil**
    • **3 cloves garlic**, minced
    • **⅛ teaspoon chili flakes**
    • **1 cup chicken broth**
    • **1 cup heavy cream**, room temperature
    • **14.5 oz can diced tomatoes**, strained
    • **⅓ cup frozen spinach**
    • **½ cup grated Parmesan cheese**

    When shopping, look for fresh, vibrant herbs and high-quality ground chicken for the best results.

    Step-by-Step Instructions

    Let’s get cooking! Follow these steps for perfect meatballs:

    Step 1: Toast the Breadcrumbs

    In a sauté pan, melt the 2 tablespoons of salted butter over medium heat. Add the ½ cup breadcrumbs and stir continuously until they turn golden brown. This should take about 3-5 minutes. Remove from heat and let them cool.

    Step 2: Mix the Meatball Ingredients

    In a large bowl, combine the toasted breadcrumbs with 1 lb. ground chicken, 1 large egg, ¼ teaspoon garlic powder, ¼ teaspoon dried oregano, 1 teaspoon dried basil, minced sun-dried tomatoes, ¼ teaspoon salt, ¼ teaspoon black pepper, 1 tablespoon mayonnaise, and 1 teaspoon soy sauce. Gently mix using a fork or your hands until everything is evenly combined. Chef’s Tip: Avoid over-mixing to keep the meatballs tender.

    Step 3: Shape and Cook the Meatballs

    Wipe the sauté pan clean and add 2 tablespoons of vegetable oil. Heat over medium. Use a 4-oz ice cream scoop to portion the meat mixture into the hot oil. Sear until browned on at least two sides, approximately 5 minutes per side. Transfer browned meatballs to a plate and repeat with the remaining mixture.

    Step 4: Prepare the Sauce

    In the same pan, melt 2 tablespoons of butter. Add 3 minced garlic cloves and ⅛ teaspoon chili flakes. Cook until fragrant, about 2 minutes. Pour in the 1 cup of chicken broth and simmer for 3-4 minutes, scraping up any browned bits from the pan’s bottom.

    Step 5: Finish the Sauce

    Lower the heat to medium-low and stir in 1 cup of room-temperature heavy cream. Add the 14.5 oz can of strained diced tomatoes, ⅓ cup frozen spinach, and ½ cup grated Parmesan. Stir and bring to a gentle simmer.

    Step 6: Cook the Meatballs in Sauce

    Return the browned chicken meatballs to the pan, spooning sauce over them as they cook. The meatballs are ready when they reach an internal temperature of at least 165°F, which should take about 15-20 minutes.

    Common Mistakes to Avoid

    Here’s what to watch out for:

    • **Over-mixing:** This can make the meatballs tough. Mix just until ingredients are combined.
    • **Skipping the browning step:** Searing the meatballs adds flavor and texture.
    • **Using cold cream:** Make sure the cream is at room temperature to prevent curdling.
    • **Not checking internal temperature:** Always ensure meatballs reach at least 165°F for safe consumption.

    How to Store & Reheat

    To store, place cooled meatballs in an airtight container in the refrigerator for up to 4 days. For longer storage, freeze them for up to 3 months. To reheat, use a microwave or stovetop. If frozen, thaw overnight in the fridge before reheating.

    Ingredient Substitutions

    If you need to make swaps, consider these options:

    • **Ground Turkey:** A lean alternative to chicken.
    • **Gluten-Free Breadcrumbs:** For a gluten-free version.
    • **Coconut Cream:** A dairy-free substitute for heavy cream.
    • **Fresh Spinach:** Can replace frozen, just chop and add directly to the sauce.

    Nutrition Facts

    • Calories: 726 kcal per serving
    • Protein: 32g
    • Fat: 52g
    • Carbohydrates: 20g
    • Serving Size: 4 meatballs

    Frequently Asked Questions

    Can I use a different type of ground meat? Absolutely! Ground turkey or beef are great alternatives.

    How can I make this dish spicier? Add more chili flakes or use spicy Italian sausage instead of ground chicken.

    Can I prepare the meatballs in advance? Yes, you can make them a day ahead and refrigerate until ready to cook.

    Is it okay to skip the sauce? You can, but the sauce adds moisture and flavor, enhancing the overall dish.

    What sides pair well with this dish? Consider serving with pasta, rice, or a simple green salad.

  • Brain Fuel: Beet & Arugula Salad

    Brain Fuel: Beet & Arugula Salad

    Introduction & My Personal Story

    There’s something magical about a dish that transports you back to a cherished moment in time. For me, this Beet & Arugula Salad does just that. I remember the first time I tasted this delightful combination. It was a sunny afternoon in the heart of Tuscany, where I was invited to a local family’s vineyard. The air was filled with the sweet aroma of ripe grapes, and the table was adorned with an array of vibrant dishes. However, it was the salad that stole the show.

    As I took my first bite, the earthy sweetness of the beets paired with the peppery arugula and the tangy balsamic vinaigrette was a revelation. It was as if each ingredient was a note in a harmonious melody, perfectly balanced and utterly satisfying. This experience left a lasting impression on me, and I’ve been recreating this salad ever since, tweaking it here and there to suit my taste.

    In my 5 years of experience as a chef, I’ve learned that food is more than just nourishment; it’s a way to connect with others, to share stories and create memories. This Beet & Arugula Salad is not just a recipe; it’s a piece of my culinary journey, and I’m excited to share it with you. Whether you’re looking for a healthy meal option or a dish to impress your guests, this salad is sure to become a favorite in your kitchen.

    Why You’ll Love This Recipe

    • Quick and easy to prepare, perfect for busy weeknights.
    • Loaded with nutrients to boost your brainpower and energy levels.
    • Versatile and adaptable to suit various dietary preferences.
    • A vibrant, colorful dish that will impress your dinner guests.
    • Perfect balance of flavors and textures, from earthy beets to creamy cheese.

    Detailed Ingredients

    • Beets: 500 grams, choose firm and smooth beets for best quality.
    • Lemon Juice: 2 tablespoons, or substitute with white vinegar.
    • Raw Pecans: 100 grams, look for whole pecans for optimal crunch.
    • Baby Arugula: 150 grams, vibrant green leaves with a peppery taste.
    • Gorgonzola or Feta Cheese: 100 grams, choose based on your preference for creaminess.
    • Balsamic Vinaigrette: 60 ml, a high-quality balsamic will enhance the flavor.

    Step-by-Step Instructions

    1. Boil the Beets

    Start by washing the beets thoroughly under running water to remove any dirt. Place them in a large saucepan, cover with water, and add 2 tablespoons of lemon juice. This will help retain their vibrant color. Bring the water to a boil over high heat, then reduce to a simmer. Allow the beets to cook until they’re tender when pierced with a fork, approximately 45 minutes to 1 hour. Once done, drain the water and let them cool under cold running water. This makes peeling the beets much easier. Peel them gently with your hands and cut them into quarters.

    2. Toast the Pecans

    While the beets are cooking, take your raw pecans and place them in a dry skillet over medium-low heat. Stir occasionally and let them toast for about 2 to 5 minutes. You’ll know they’re ready when they release a fragrant nutty aroma. Be cautious not to burn them. Once toasted, remove from heat and let them cool.

    3. Assemble the Salad

    On a large serving platter or in a salad bowl, spread the baby arugula evenly as your base. Layer the quartered beets on top, followed by the toasted pecans. Crumble your choice of cheese—be it Gorgonzola or Feta—over the salad. Each component should be visible and well-distributed for an appealing presentation.

    4. Dress & Serve

    Finally, drizzle the balsamic vinaigrette over the assembled salad. Toss gently to ensure everything is coated just right. Serve immediately and watch as your guests enjoy every bite.

    Common Mistakes to Avoid

    One common mistake is overcooking the beets, which can lead to a mushy texture. Keep a close eye on them and test for doneness with a fork. Another pitfall is burning the pecans; always toast them on medium-low heat and stir frequently. Lastly, using a low-quality balsamic vinaigrette can dull the flavors of the salad. Opt for a good quality balsamic for the best result.

    How to Store & Reheat

    Store any leftovers in an airtight container in the refrigerator. This salad is best consumed within 2 days to maintain freshness. If you need to reheat it, do so gently in a skillet over low heat, just enough to take the chill off without wilting the arugula.

    Ingredient Substitutions

    If you need to make substitutions, here are some safe swaps:

    • Beets: Swap with roasted sweet potatoes for a different sweet flavor profile.
    • Pecans: Use walnuts or almonds if you prefer or have them on hand.
    • Gorgonzola or Feta Cheese: Goat cheese can be a great alternative for a tangy twist.
    • Balsamic Vinaigrette: A simple olive oil and lemon dressing can be used if you’re out of balsamic.

    Nutrition Facts

    • Calories: 370 kcal
    • Protein: 11g
    • Fat: 22g
    • Carbohydrates: 35g
    • Serving Size: 1 plate (approximately 200g)

    Frequently Asked Questions

    Can I use canned beets instead of fresh?

    Yes, canned beets can be a convenient substitute. Just be sure to drain and rinse them thoroughly before using.

    Is this salad suitable for vegans?

    To make it vegan, simply omit the cheese or replace it with a vegan cheese alternative.

    What can I serve this salad with?

    This salad pairs beautifully with grilled chicken or fish for a complete meal.

    Can I prepare this salad in advance?

    You can prepare the components ahead of time, but it’s best to assemble the salad just before serving to keep the arugula fresh and crisp.

    How can I enhance the flavor of the vinaigrette?

    Add a teaspoon of Dijon mustard or a splash of honey to the balsamic vinaigrette for extra depth and sweetness.

  • NIGHT GRIND: Satisfy Your Cravings with This Easy Egg Roll Bowl!

    NIGHT GRIND: Satisfy Your Cravings with This Easy Egg Roll Bowl!

    Introduction & My Personal Story

    There’s something magical about those late-night cooking sessions. The world is quiet, the distractions are minimal, and it’s just you and your culinary creativity. One night, about five years ago, I stumbled upon the idea of creating an egg roll without the roll—an “Egg Roll Bowl,” if you will. I was craving the flavors of a classic egg roll but wanted something that wouldn’t leave me in a food coma, especially since I had a deadline looming. This was the start of my “Night Grind” Egg Roll Bowl journey.

    As someone who’s been in the culinary world for over a decade, I’ve always believed that great flavors don’t have to be complicated. This dish is a testament to that belief. It’s quick to prepare, bursting with flavor, and provides that perfect balance of protein and veggies to keep you energized and focused. I remember the first time I made it; the aroma of ginger and garlic filled the kitchen, and the sizzle of ground turkey hitting the hot skillet was music to my ears. When I finally sat down to eat, it was everything I hoped for and more. Since then, this dish has become my go-to for those nights when I need to power through work without feeling sluggish.

    Why You’ll Love This Recipe

    • Quick and Easy: Ready in under 30 minutes.
    • High Protein: Keeps you full and focused.
    • Low Carb: Perfect for a light, late-night meal.
    • Customizable: Easily adapt to your taste preferences.
    • Minimal Clean-Up: One skillet does it all.

    Detailed Ingredients

    • 1 lb ground turkey: Look for lean turkey to keep it healthy.
    • 2 tbsp vegetable oil: Canola or sunflower oil works well too.
    • 1 onion, diced: A medium-sized yellow onion is ideal.
    • 8 oz mushrooms, minced: Cremini or button mushrooms for earthy flavor.
    • 2 garlic cloves, minced: Fresh garlic for maximum aroma.
    • 1 tbsp fresh ginger, minced: Adds a spicy kick.
    • 1 can water chestnuts, chopped: Around 8 oz for crunch.
    • 2 green onions, sliced: For garnish and fresh taste.
    • 4 cups coleslaw mix: A blend of shredded cabbage and carrots.
    • ¼ cup soy sauce: Opt for low-sodium to control salt levels.
    • 1 tbsp rice vinegar: Adds a tangy touch.
    • 2 tbsp brown sugar: Balances the savory elements.
    • 1 tsp sesame oil: For nutty aroma.
    • ½ tsp black pepper: Freshly ground for best flavor.
    • ⅛ tsp red pepper flakes: Adjust to your spice preference.
    • Sesame seeds: For garnish.

    Step-by-Step Instructions

    Step 1: Prep Ingredients

    Begin by dicing your onion and mincing the mushrooms, garlic, and ginger. Chop the water chestnuts and slice the green onions. This prep work ensures a smooth cooking process. Chef’s Tip: Use a microplane for the ginger to get it really fine.

    Step 2: Cook Turkey

    Heat 2 tablespoons of vegetable oil in a large skillet over medium-high heat. Add the ground turkey, breaking it apart with a spatula. Cook for 8-10 minutes until it’s mostly cooked through, seasoning with salt and pepper as you go. You’ll notice the turkey turning a light golden brown.

    Step 3: Add Aromatics

    Stir in the diced onion, minced garlic, ginger, and mushrooms. Cook these aromatic ingredients for 3-4 minutes, or until the mushrooms have softened and the onions are translucent. The kitchen will start to smell amazing at this point.

    Step 4: Mix in Veggies

    Add the coleslaw mix to the skillet. Toss everything well and let it cook for 6-8 minutes. You’re looking for the cabbage to be tender but still have a slight crispness. This texture is key to the dish’s success.

    Step 5: Prepare Sauce

    In a small bowl, whisk together the soy sauce, rice vinegar, brown sugar, sesame oil, black pepper, and red pepper flakes. This sauce is the heart of your egg roll bowl, bringing all the flavors together.

    Step 6: Combine Everything

    Pour the sauce over the mixture in the skillet, add the chopped water chestnuts, and toss everything to combine. Cook for another 2-3 minutes until everything is evenly coated and warmed through.

    Step 7: Serve

    Stir in the sliced green onions just before serving. Garnish with sesame seeds and a drizzle of sesame oil for a final touch. Enjoy your egg roll bowl as is, or serve it over rice for a more filling meal.

    Common Mistakes to Avoid

    One common mistake is overcooking the cabbage, which can make it soggy. To avoid this, keep an eye on the texture and cook it until it’s just tender. Another pitfall is not seasoning the turkey enough; remember that the sauce will add flavor, but the turkey needs its seasoning too. Lastly, be careful not to burn the garlic and ginger, as they can turn bitter.

    How to Store & Reheat

    Store any leftovers in an airtight container in the refrigerator for up to 3 days. To reheat, simply warm the egg roll bowl in a skillet over medium heat until heated through. Alternatively, you can use a microwave, heating in 30-second intervals and stirring in between to ensure even heating.

    Ingredient Substitutions

    • Ground Turkey: Swap with ground chicken or pork for a different flavor.
    • Vegetable Oil: Olive oil or avocado oil can be used instead.
    • Coleslaw Mix: Use fresh shredded cabbage and carrots if you prefer.
    • Soy Sauce: Tamari or coconut aminos for a gluten-free option.

    Nutrition Facts

    • Calories: 350 per serving
    • Protein: 28g per serving
    • Fat: 18g per serving
    • Carbs: 20g per serving
    • Serving Size: 1 bowl

    Frequently Asked Questions

    • Can I make this dish vegetarian? Yes, substitute the turkey with crumbled tofu or tempeh.
    • What can I use instead of water chestnuts? Try jicama or omit them if you can’t find any.
    • Is this dish spicy? It’s mildly spicy from the red pepper flakes, but you can adjust the heat to your liking.
    • Can I freeze the leftovers? It’s best to enjoy this dish fresh or refrigerated, as freezing can alter the texture of the vegetables.

  • Fast Fuel: Healthy Applesauce Muffins for a Quick Boost!

    Fast Fuel: Healthy Applesauce Muffins for a Quick Boost!

    Introduction & My Personal Story

    There’s something deeply comforting about the aroma of freshly baked muffins wafting through the kitchen. I remember the first time I whipped up a batch of these **Healthy Applesauce Muffins**. It was a chilly Sunday morning, and I was craving something sweet yet wholesome. I rummaged through my pantry and found a jar of unsweetened applesauce, which sparked the idea. You see, in my 5 years of experience creating quick and nutritious recipes, I’ve realized that applesauce is a fantastic ingredient for keeping baked goods moist without the need for excessive sugar or fat.

    The first bite of these muffins took me back to my childhood, where my grandmother would bake apple pies during fall. The slight tanginess of the applesauce paired with the warm hint of cinnamon felt like a hug in food form. These muffins have since become a staple in my household, especially when I need a quick breakfast or a snack that packs a punch of energy. They are perfect for those busy mornings when time seems to slip through your fingers, yet you still want something tasty and nutritious to start your day.

    Why You’ll Love This Recipe

    • Quick and Easy: Ready in under 30 minutes from start to finish.
    • Healthy: Made with whole ingredients like oat flour and unsweetened applesauce.
    • Moist and Fluffy: Thanks to the natural moisture from applesauce.
    • Low in Sugar: Sweetened naturally with **maple syrup**.
    • Perfect for Meal Prep: Make a batch and enjoy throughout the week.

    Detailed Ingredients

    To make these **Healthy Applesauce Muffins**, you’ll need the following ingredients:

    • **1 cup (120g) oat flour** – Look for finely ground oat flour for a smooth texture.
    • **1/2 cup (45g) rolled oats** – Adds a delightful texture.
    • **1 teaspoon baking powder** – Ensures the muffins rise beautifully.
    • **1/2 teaspoon baking soda** – Helps with the leavening process.
    • **1 teaspoon ground cinnamon** – Provides warmth and depth of flavor.
    • **1/4 teaspoon salt** – Enhances the other flavors.
    • **2 large eggs** – At room temperature for better incorporation.
    • **1 cup (240g) unsweetened applesauce** – The star of the show, providing moisture and natural sweetness.
    • **1/4 cup (60ml) almond milk** – Or any milk of your choice.
    • **1/4 cup (60ml) maple syrup** – For that touch of natural sweetness.
    • **1 teaspoon vanilla extract** – Adds a lovely aroma and flavor.
    • **1/4 cup (60ml) oil** – Use either coconut or avocado oil for a healthy fat option.

    Step-by-Step Instructions

    Step 1: Preheat and Prepare
    Preheat your oven to 350°F (175°C). Line a 12-cup muffin tin with paper liners or grease with a bit of oil. This ensures that the muffins don’t stick and pop out easily.

    Step 2: Mix Dry Ingredients
    In a large mixing bowl, combine **oat flour**, **rolled oats**, **baking powder**, **baking soda**, **cinnamon**, and **salt**. Use a whisk to ensure everything is evenly distributed.

    Step 3: Whisk Wet Ingredients
    In another bowl, whisk together the **eggs**, **applesauce**, **almond milk**, **maple syrup**, **vanilla extract**, and **oil**. Whisk until you have a smooth, homogeneous mixture.

    Step 4: Combine Wet and Dry Mixtures
    Pour the wet ingredients into the dry ingredients. Gently stir with a spatula until just combined. Be careful not to over-mix, as this can make the muffins dense.

    Step 5: Fill the Muffin Cups
    Divide the batter evenly among the prepared muffin cups, filling each about two-thirds full. Sprinkle a few extra oats on top for a rustic look.

    Step 6: Bake
    Place the muffin tin in the preheated oven and bake for 18-20 minutes. To test for doneness, insert a toothpick into the center of a muffin; it should come out clean or with just a few crumbs attached.

    Step 7: Cool
    Allow the muffins to cool in the tin for about 5 minutes before transferring them to a wire rack to cool completely. Enjoy warm or at room temperature.

    Common Mistakes to Avoid

    • **Over-mixing the batter**: This can lead to dense muffins. Mix just until the ingredients are combined.
    • **Using cold ingredients**: Make sure eggs are at room temperature to ensure better mixing and rising.
    • **Not checking doneness**: Ovens vary, so always check with a toothpick to avoid underbaked or overbaked muffins.

    How to Store & Reheat

    Store these muffins in an airtight container at room temperature for up to 3 days. For longer storage, keep them in the refrigerator for up to a week. If you want to freeze them, place muffins in a freezer-safe bag, and they’ll last for up to 3 months.

    To reheat, simply microwave a muffin for about 15-20 seconds or warm them in a 350°F (175°C) oven for about 5 minutes.

    Ingredient Substitutions

    • **Oat Flour**: Substitute with whole wheat flour if preferred, but keep in mind the texture might be slightly different.
    • **Almond Milk**: Swap with any other milk, such as soy or cow’s milk.
    • **Maple Syrup**: Honey or agave syrup can be used as alternatives.
    • **Oil**: If coconut or avocado oil isn’t available, use olive oil or melted butter.

    Nutrition Facts

    • **Calories**: 148 kcal per muffin
    • **Protein**: 3g
    • **Fat**: 6g
    • **Carbohydrates**: 22g
    • **Serving Size**: 1 muffin

    Frequently Asked Questions

    Q: Can I make these muffins gluten-free?
    A: Yes! Use certified gluten-free oat flour and oats to make the muffins gluten-free.

    Q: Can I add nuts or fruits?
    A: Absolutely! Feel free to add chopped nuts or dried fruits like raisins or cranberries for extra texture and flavor.

    Q: How can I make these muffins vegan?
    A: Replace the eggs with flax eggs (2 tablespoons of ground flaxseed mixed with 5 tablespoons of water) and ensure your milk is plant-based.

    Q: Why are my muffins dry?
    A: Dry muffins can result from over-baking or not enough moisture in the batter. Ensure precise measurements and bake just until done.

  • 5-MIN FUEL: Delicious Cottage Cheese Banana Bread to Power Your Day!

    5-MIN FUEL: Delicious Cottage Cheese Banana Bread to Power Your Day!

    Introduction & My Personal Story

    Imagine the aroma of freshly baked banana bread wafting through your kitchen. For me, this comforting scent evokes memories of lazy Sunday mornings spent in my grandmother’s kitchen. She had a knack for transforming simple ingredients into something magical. As a child, I would watch her mash ripe bananas with the utmost care, combining them with love and a touch of cottage cheese for a moist, protein-packed loaf. Fast forward to today, and I’ve adopted her recipe, adding my own twist to create a 5-Minute Fuel: Delicious Cottage Cheese Banana Bread that’s perfect for busy lives. In my 5 years of experience as a chef, I’ve found this recipe to be a lifesaver when I need a quick breakfast or snack that doesn’t compromise on taste or nutrition.

    Why You’ll Love This Recipe

    • Quick Prep: Ready to bake in just 5 minutes.
    • Nutritious: Packed with protein, fiber, and potassium.
    • Delicious: Moist and flavorful with a hint of sweetness.
    • Perfect for On-the-Go: Great for breakfast or a midday snack.

    Detailed Ingredients

    • 3 ripe bananas (about 350g), mashed
    • 1 cup (240g) of full-fat cottage cheese
    • 2 cups (250g) of whole wheat flour
    • 1/2 cup (120g) of honey or maple syrup
    • 2 large eggs
    • 1 teaspoon (5g) of baking soda
    • 1/2 teaspoon (2.5g) of salt
    • 1 teaspoon (5g) of vanilla extract
    • 1/2 cup (60g) of chopped walnuts (optional)

    Chef’s Tip: When selecting bananas, opt for those with speckled skins. They’re at their sweetest and perfect for baking.

    Step-by-Step Instructions

    Step 1: Preheat your oven to 350°F (175°C). Grease a 9×5 inch loaf pan with butter or line it with parchment paper.

    Step 2: In a large mixing bowl, mash the ripe bananas until smooth. Add in the cottage cheese, honey or maple syrup, eggs, and vanilla extract. Mix until well combined.

    Step 3: In another bowl, whisk together the whole wheat flour, baking soda, and salt. Gradually add the dry ingredients to the wet mixture, stirring until just combined. Avoid overmixing to keep the bread tender.

    Step 4: Fold in the chopped walnuts if using. Pour the batter into the prepared loaf pan and smooth the top with a spatula.

    Step 5: Bake for 45-50 minutes, or until a toothpick inserted into the center comes out clean. The top should be golden brown and slightly firm to the touch.

    Step 6: Allow the bread to cool in the pan for 10 minutes before transferring it to a wire rack to cool completely.

    Common Mistakes to Avoid

    • Overmixing the Batter: This can lead to a dense loaf. Mix just until the ingredients are combined.
    • Using Under-ripe Bananas: They lack sweetness and can affect the texture.
    • Skipping the Cooling Time: Cutting into the bread too soon can result in a crumbly texture.

    How to Store & Reheat

    Store any leftover banana bread in an airtight container at room temperature for up to 3 days. For longer storage, refrigerate for up to a week. To freeze, wrap individual slices in plastic wrap and place them in a freezer-safe bag for up to 3 months. To reheat, simply warm slices in the microwave for 20-30 seconds or toast them for a few minutes.

    Ingredient Substitutions

    • Honey/Maple Syrup: Substitute with agave syrup or brown sugar for a different sweetness profile.
    • Whole Wheat Flour: Use all-purpose flour or a gluten-free blend if needed.
    • Walnuts: Swap with pecans or omit for a nut-free version.

    Nutrition Facts

    • Calories: 220 per slice
    • Protein: 6g
    • Fat: 7g
    • Carbs: 35g
    • Serving Size: 1 slice (1/10 of the loaf)

    Frequently Asked Questions

    • Can I make this bread vegan? Yes, replace eggs with flax eggs and use a plant-based yogurt instead of cottage cheese.
    • Can I add chocolate chips? Absolutely! Fold in 1/2 cup of chocolate chips for a sweeter treat.
    • What if I don’t have ripe bananas? Ripen bananas quickly by baking them in the oven at 300°F (150°C) for 15-20 minutes.
    • Can I use almond flour? Almond flour can be used, but the texture will be denser. Consider mixing it with oat flour for better results.

  • 5-MIN FUEL: High-Protein Cottage Cheese Waffles for a Quick Breakfast!

    5-MIN FUEL: High-Protein Cottage Cheese Waffles for a Quick Breakfast!

    Introduction & My Personal Story

    Ah, the aroma of freshly made waffles wafting through the kitchen. It takes me back to those busy mornings when I needed something quick yet satisfying. In my 5 years of experience as a chef, I’ve learned that breakfast can truly set the tone for the day. I remember one particular morning, my schedule was jam-packed with meetings and errands, and I needed something to fuel me up without spending hours in the kitchen. That’s when I stumbled upon the idea of incorporating cottage cheese into my waffle recipe. The result? A delightful, high-protein breakfast that was ready in just five minutes! These High-Protein Cottage Cheese Waffles became my go-to for a quick, nutritious, and delicious start to the day. They’re not just waffles; they’re little powerhouses of energy that keep me going strong.

    Why You’ll Love This Recipe

    • Quick Prep: Ready in just 5 minutes, perfect for busy mornings.
    • High-Protein: Thanks to the cottage cheese, each serving is packed with protein.
    • Versatile Toppings: Pair with your favorite fruits, syrups, or nut butters.
    • Simple Ingredients: Uses pantry staples and fresh ingredients.
    • Deliciously Nutritious: A healthy option that doesn’t compromise on taste.

    Detailed Ingredients

    For this recipe, you’ll need the following:

    • 1 cup All-Purpose Flour (120g): Provides structure and softness to the waffles.
    • 2 teaspoons Baking Powder: Ensures the waffles are light and fluffy.
    • ½ teaspoon Cinnamon: Adds a hint of warmth and spice.
    • 1 cup Cottage Cheese (240g): The star ingredient, adding protein and moisture.
    • 2 large Eggs: Binds the batter for perfect shape.
    • 2 tablespoons Melted Butter or Oil: Gives richness and crisp edges.
    • 2 tablespoons Maple Syrup: Adds a light sweetness.
    • 1 teaspoon Vanilla Extract: Enhances the overall flavor.

    When shopping, look for fresh, high-quality cottage cheese without added sugars or preservatives. This will ensure that your waffles are both nutritious and delicious.

    Step-by-Step Instructions

    Let’s dive into the process of making these delectable waffles:

    Step 1: Preheat the Waffle Iron
    Begin by preheating your waffle iron to a medium-high heat. This ensures that the waffles cook evenly and achieve that perfect golden-brown color. Chef’s Tip: Preheating your waffle iron is crucial for achieving crispy edges.

    Step 2: Mix the Dry Ingredients
    In a large mixing bowl, whisk together 1 cup of all-purpose flour, 2 teaspoons of baking powder, and ½ teaspoon of cinnamon. Set this aside. The dry mixture should be well combined and free of lumps.

    Step 3: Blend the Wet Ingredients
    In a blender, combine 1 cup of cottage cheese, 2 large eggs, 2 tablespoons of melted butter or oil, 2 tablespoons of maple syrup, and 1 teaspoon of vanilla extract. Blend until smooth. This step ensures that the cottage cheese is fully incorporated, creating a smooth batter.

    Step 4: Combine Wet and Dry Ingredients
    Pour the blended wet ingredients into the bowl with the dry ingredients. Gently mix until just combined. Be careful not to overmix, as this can lead to tough waffles.

    Step 5: Cook the Waffles
    Pour approximately ¾ cup of batter onto the preheated waffle iron. Close the lid and cook for about 3-4 minutes, or until the waffles are golden brown and crisp. Chef’s Tip: Resist the urge to open the waffle iron too early, as this can cause the waffles to stick.

    Step 6: Serve and Enjoy
    Once cooked, carefully remove the waffles from the iron and serve warm. Top with your choice of syrup, fresh berries, or a drizzle of nut butter for an extra boost of flavor.

    Common Mistakes to Avoid

    • Not Preheating the Waffle Iron: This can result in undercooked waffles that lack crispness.
    • Overmixing the Batter: Leads to tough waffles. Mix until ingredients are just combined.
    • Opening the Waffle Iron Early: Causes the waffles to stick and break apart.
    • Using Low-Quality Cottage Cheese: Can affect the texture and flavor of the waffles.

    How to Store & Reheat

    To store leftover waffles, allow them to cool completely before placing them in an airtight container. They can be stored in the refrigerator for up to 3 days. For longer storage, place them in a freezer-safe bag and freeze for up to 2 months. To reheat, simply pop them in a toaster or toaster oven until warmed through. This will help maintain their crisp texture.

    Ingredient Substitutions

    • Gluten-Free Flour: Substitute all-purpose flour with a gluten-free blend for a gluten-free version.
    • Oat Flour: For a healthier alternative, use oat flour instead of all-purpose flour.
    • Honey: Swap maple syrup with honey for a different natural sweetener.
    • Greek Yogurt: If cottage cheese is not available, use Greek yogurt as a protein-rich substitute.

    Nutrition Facts

    • Calories: 455 kcal
    • Protein: 25g
    • Fat: 20g
    • Carbs: 45g
    • Serving Size: 2 waffles

    Frequently Asked Questions

    • Can I make the batter ahead of time?
      Yes, you can prepare the batter the night before and store it in the refrigerator. Just give it a quick stir before using.
    • Are these waffles suitable for kids?
      Absolutely! They’re packed with protein and nutrients, making them a great breakfast option for kids.
    • Can I use almond flour instead of all-purpose flour?
      Yes, but the texture will be slightly different. You may need to adjust the liquid ingredients to achieve the right consistency.
    • How can I make these waffles dairy-free?
      Use a plant-based yogurt instead of cottage cheese and replace butter with coconut oil.
    • What other toppings work well with these waffles?
      Try adding sliced bananas, chopped nuts, or a sprinkle of chia seeds for variety.