Tag: Walnuts

  • Brain Fuel: Sweet Potato Blueberry Cookies

    Brain Fuel: Sweet Potato Blueberry Cookies

    Introduction & My Personal Story

    Ah, sweet memories of my grandmother’s kitchen, where the aroma of freshly baked cookies filled the air. It was a sanctuary of warmth and love, and among the many treats she baked, one stood out—her Sweet Potato Blueberry Cookies. These weren’t just any cookies; they were little bites of nostalgia, packed with the goodness of sweet potatoes and the burst of blueberries. As a child, I would watch in awe as she mashed the sweet potatoes, carefully folded in the blueberries, and worked her magic. Fast forward to today, and I’ve put my own spin on this classic, adding a modern twist with oatmeal for an extra boost of fiber and heartiness.

    In my 5 years of experience as a chef, I’ve learned that food is not just about taste; it’s about the memories and emotions it evokes. These cookies are a perfect example. They’re the kind of treat that takes me back to those carefree days, where a cookie could solve any problem. Now, I share this recipe with you, hoping it brings a bit of comfort and joy to your kitchen, just as it did in mine.

    Why You’ll Love This Recipe

    • Nutrient-packed: Loaded with **sweet potatoes** and **blueberries**, these cookies are a powerhouse of vitamins and antioxidants.
    • Easy to make: Simple steps and common ingredients make this a go-to recipe for any skill level.
    • Diet-friendly: Naturally gluten-free and can be made vegan by swapping a few ingredients.
    • Great for meal prep: Make a batch and enjoy throughout the week as a quick snack or breakfast option.

    Detailed Ingredients

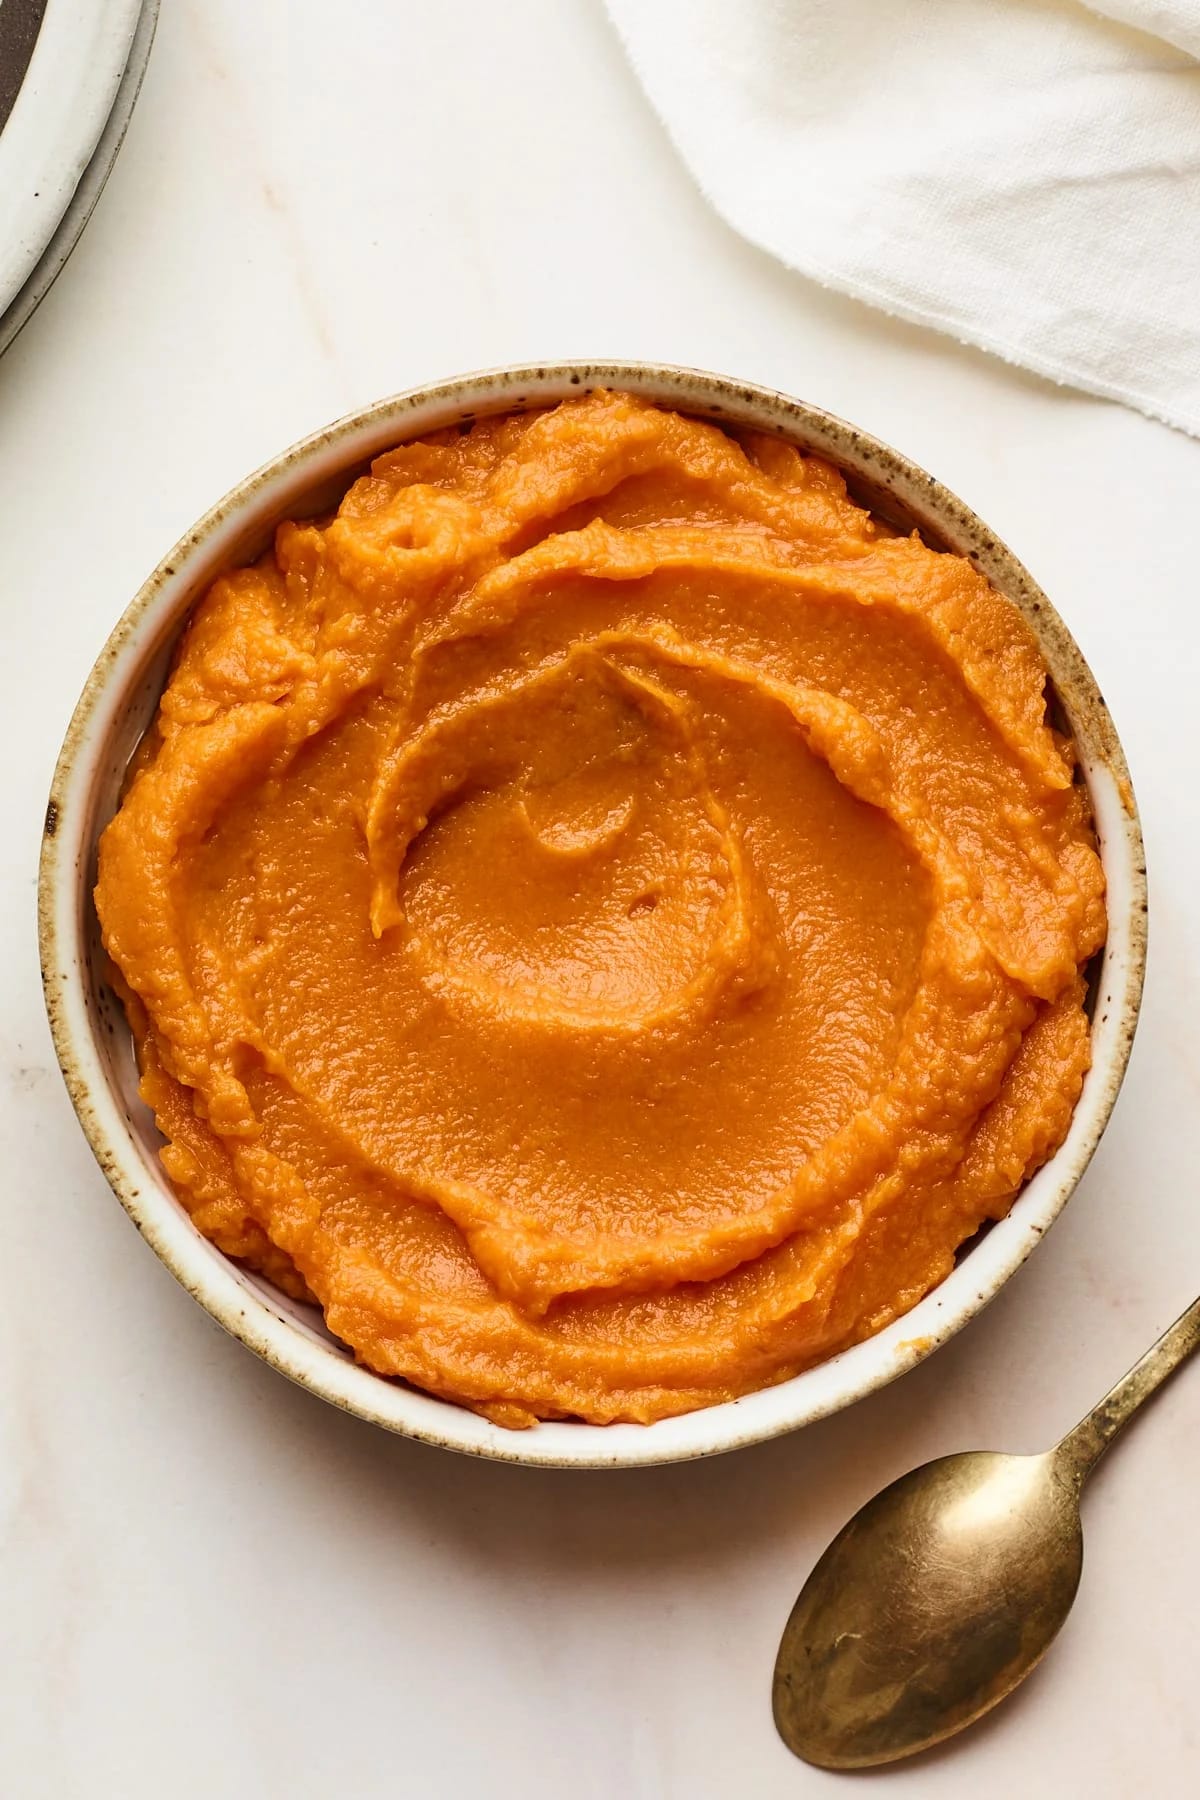
    • 1 cup mashed **sweet potato** (approx. 200g) – Look for firm and smooth sweet potatoes at the market.
    • 1/2 cup **maple syrup** (120ml) – Opt for pure maple syrup for the best flavor.
    • 1/4 cup melted **coconut oil** (60ml) – Provides a subtle coconut flavor; can be replaced with another oil.
    • 1 teaspoon **vanilla extract** – Enhances the overall flavor profile of the cookies.
    • 1 cup rolled **oats** (90g) – For making oat flour, choose old-fashioned oats for a better texture.
    • 1/2 cup **almond flour** (50g) – Adds a nutty flavor and light texture.
    • 1 teaspoon **cinnamon** – Adds warmth and spice to the cookies.
    • 1 teaspoon **baking powder** – Helps the cookies rise slightly.
    • 1/2 teaspoon **sea salt** – Balances the sweetness.
    • 1/4 teaspoon ground **ginger** – Optional, for a hint of spice.
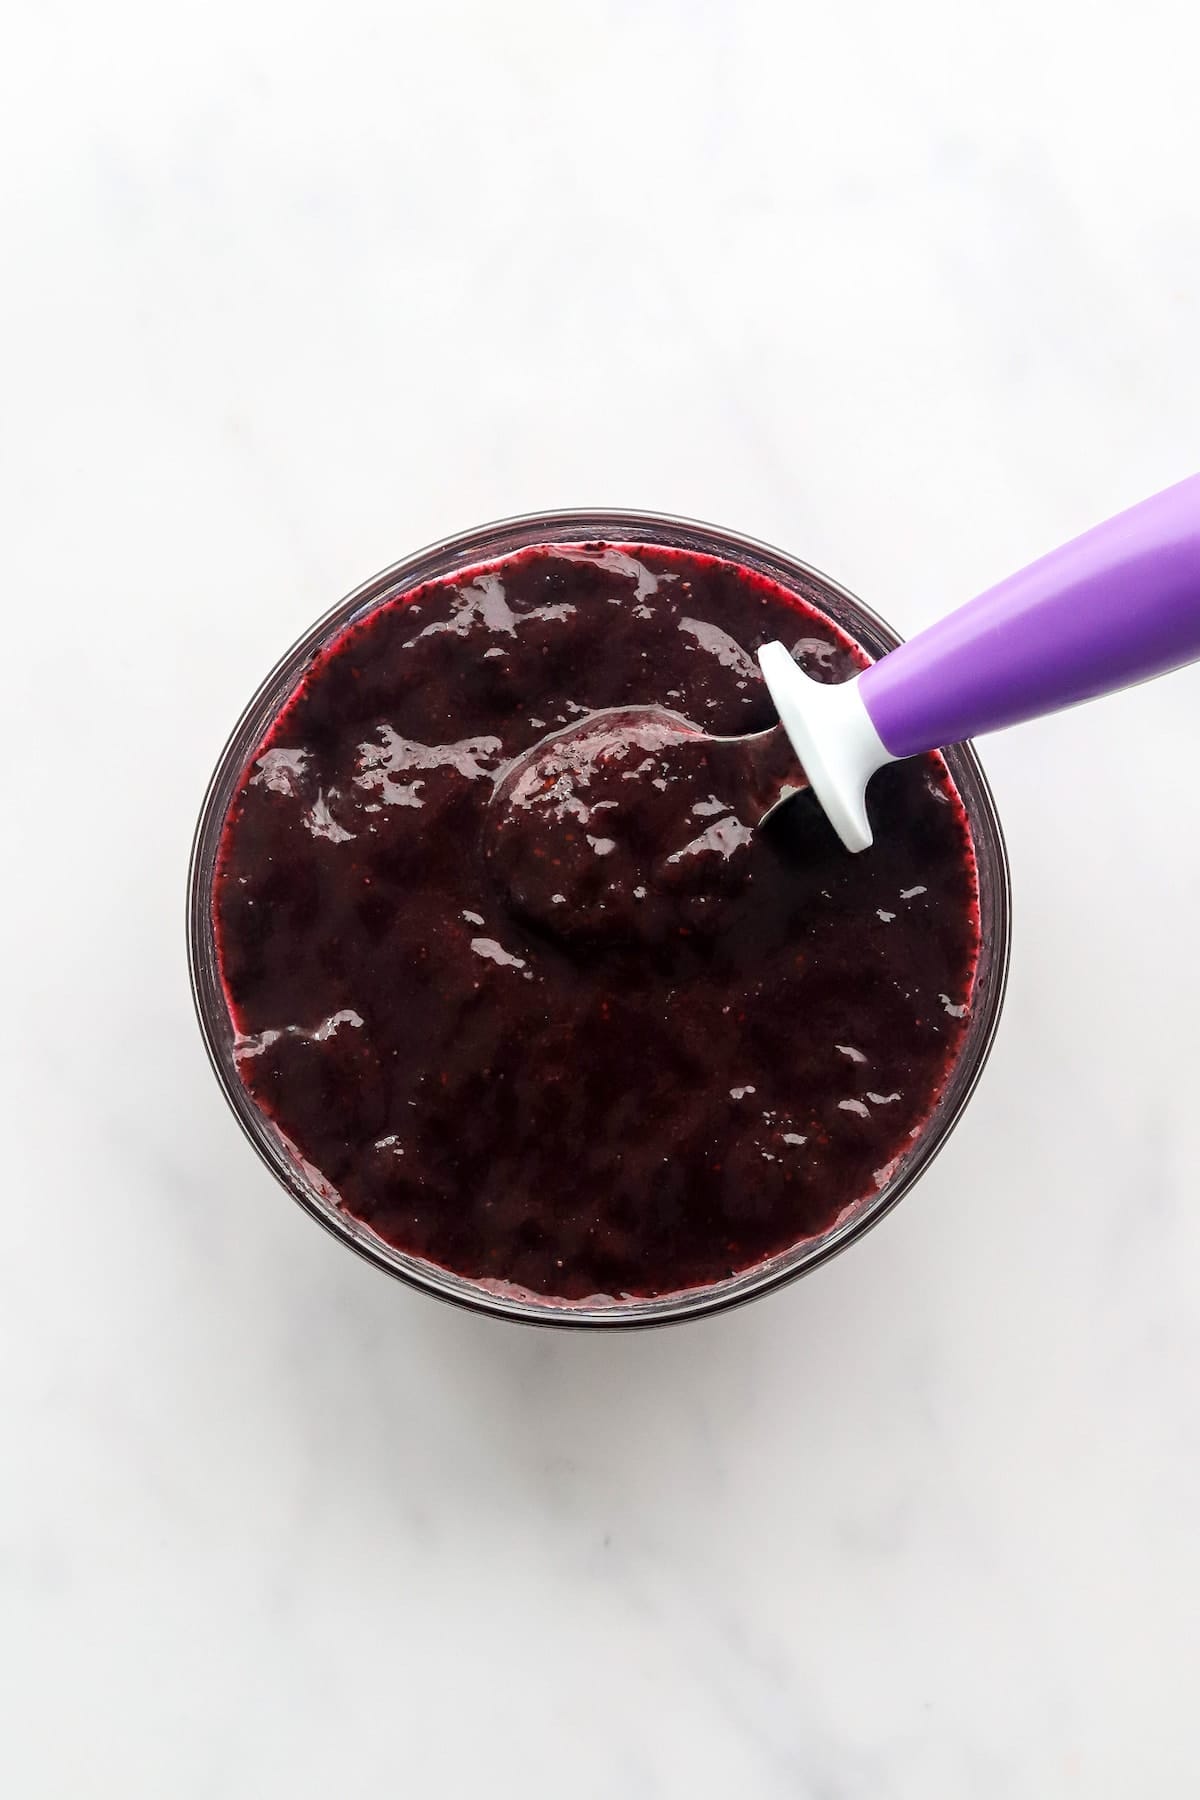
    • 1 cup frozen **blueberries** (150g) – Frozen berries help maintain their shape during baking.

    Step-by-Step Instructions

    Step 1: Preheat your oven to 350°F (175°C). Line a baking tray with parchment paper to prevent sticking.

    Step 2: Make Oat Flour by blending 1 cup of rolled oats in a food processor until it resembles a fine flour. This will be the base for your cookie dough.

    Step 3: Mix Wet Ingredients in a large bowl. Combine 1 cup of mashed sweet potato, 1/2 cup of maple syrup, 1/4 cup of melted coconut oil, and 1 teaspoon of vanilla extract. Whisk until smooth and well combined.

    Step 4: Combine Dry Ingredients by adding the oat flour, remaining rolled oats, 1/2 cup of almond flour, 1 teaspoon of cinnamon, 1 teaspoon of baking powder, 1/2 teaspoon of sea salt, and 1/4 teaspoon of ground ginger. Stir into the wet mixture until just combined. Be careful not to overmix.

    Step 5: Fold in Blueberries gently to maintain their shape. This ensures that you get a burst of blueberry goodness in every bite.

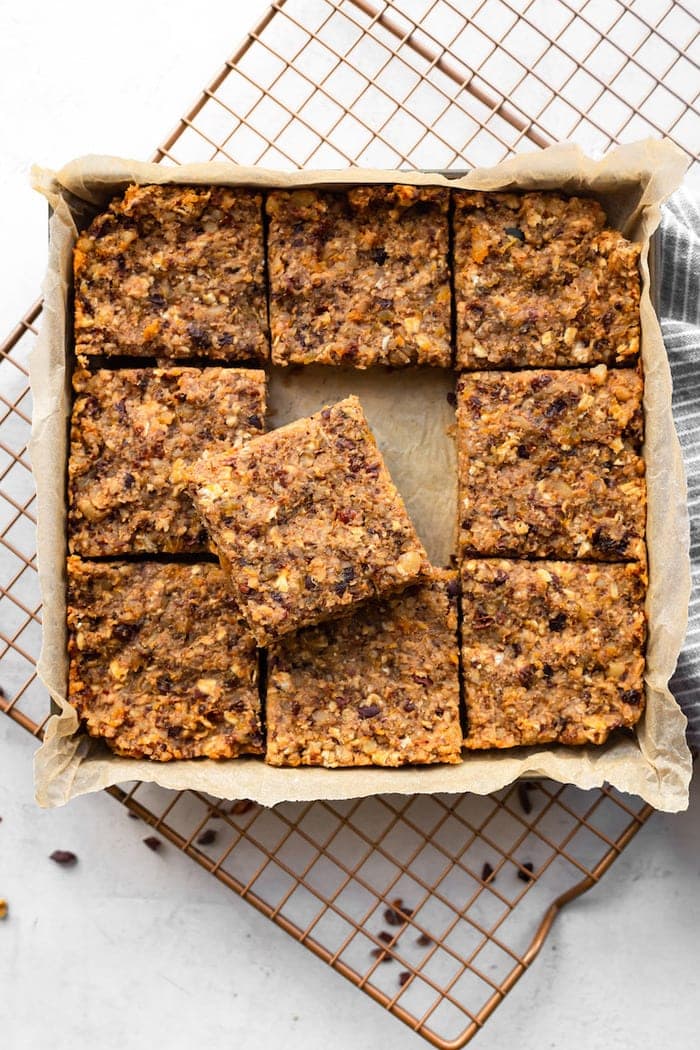
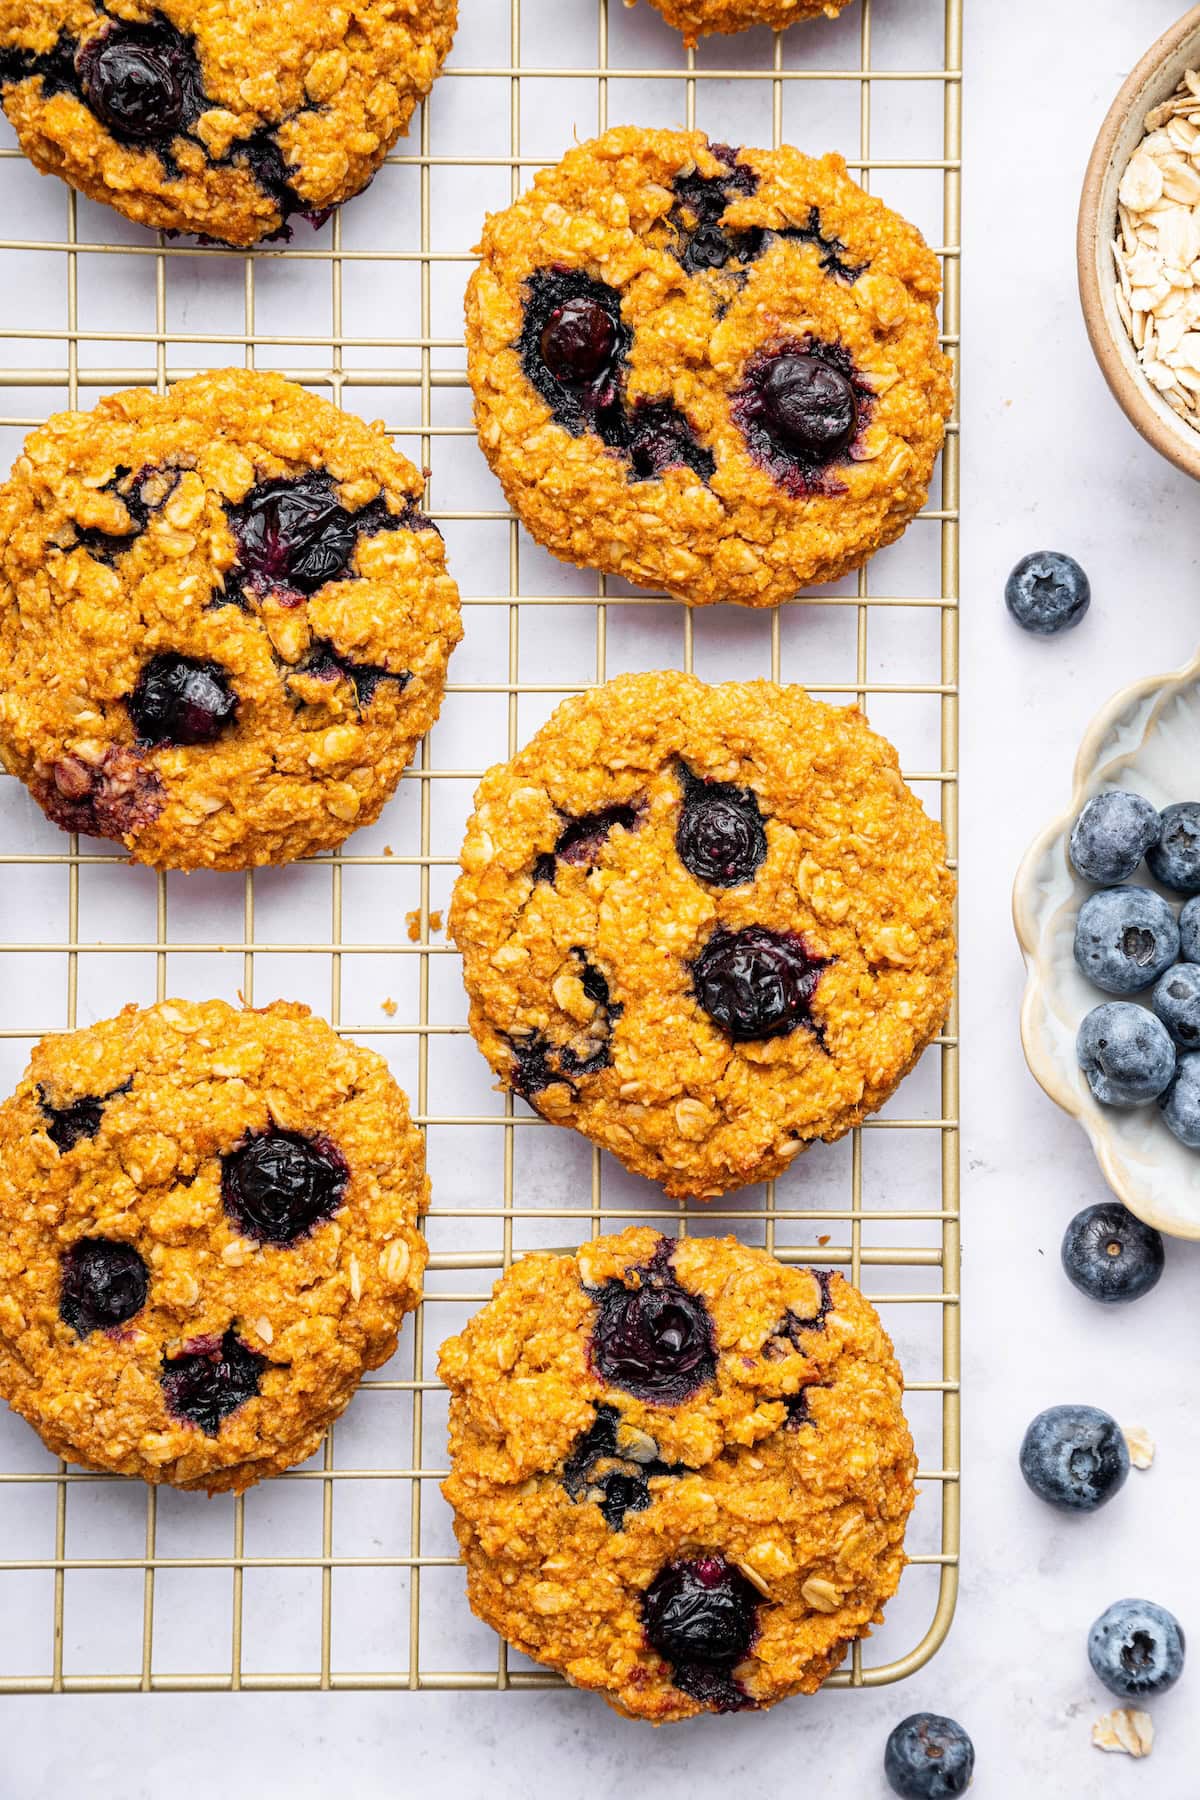
    Step 6: Scoop & Shape the dough onto the prepared baking tray using a cookie scoop or tablespoon. Flatten each dough ball slightly with your fingers, making sure some blueberries are visible on the surface.

    Step 7: Bake for 25-30 minutes, or until the cookies are golden brown and firm around the edges. Allow them to cool on the baking sheet for a few minutes before transferring to a wire rack to cool completely.

    Common Mistakes to Avoid

    Overmixing the dough is a common mistake, leading to tough cookies. Mix until just combined. Another issue is using fresh blueberries, which can release too much moisture, making the cookies soggy. Always opt for frozen blueberries. Lastly, ensure your sweet potatoes are fully mashed to prevent chunks, which can affect the cookie’s texture.

    How to Store & Reheat

    Store these cookies in an airtight container in the refrigerator for up to 5 days. For longer storage, freeze them for up to 3 months. To reheat, simply let them thaw overnight in the fridge or at room temperature. Enjoy them slightly warm by microwaving for 10-15 seconds.

    Ingredient Substitutions

    • If you’re out of **almond flour**, use all-purpose gluten-free flour for a similar result.
    • **Coconut oil** can be replaced with vegetable oil or unsalted butter for a richer flavor.
    • For a vegan version, swap **maple syrup** with agave nectar.

    Nutrition Facts

    • Calories: 116 kcal per cookie
    • Protein: 2g
    • Fat: 4g
    • Carbohydrates: 18g
    • Serving Size: 1 cookie

    Frequently Asked Questions

    Q: Can I use fresh blueberries instead of frozen?
    A: Fresh blueberries can release more moisture, making the cookies soggy. It’s best to stick with frozen berries.

    Q: Are these cookies gluten-free?
    A: Yes, they are naturally gluten-free, as long as you use certified gluten-free oats and almond flour.

    Q: How can I make these cookies vegan?
    A: Use agave nectar instead of honey and ensure all other ingredients are vegan-friendly.

    Q: Can I add nuts to the recipe?
    A: Absolutely! Chopped walnuts or pecans would add a nice crunch and complement the flavors well.

  • Brain Fuel: Sweet Potato Bliss Bites

    Brain Fuel: Sweet Potato Bliss Bites

    Introduction & My Personal Story

    There’s something magical about the way a simple sweet potato can transform into a delightful snack that not only satisfies your sweet tooth but also fuels your brain. I remember the first time I stumbled upon the idea of combining sweet potatoes with a hint of sweetness and the creamy texture of almond flour. It was during a weekend when I was experimenting in the kitchen, looking for a snack that was both nutritious and delicious. My goal was to create a treat that would not only taste good but also provide my family with a boost of energy and mental clarity. After a few trials and errors, the Sweet Potato Bliss Bites were born, and they quickly became a household favorite.

    In my 5 years of experience as a chef, I’ve learned that the best recipes often come from a place of love and necessity. These bliss bites are no exception. They remind me of cozy autumn days, with the aroma of cinnamon wafting through the house, and the satisfaction of knowing that each bite is packed with ingredients that are good for the body and the mind. Sharing this recipe with you feels like sharing a piece of my kitchen and my passion for creating food that nourishes both the body and the soul.

    Why You’ll Love This Recipe

    • Quick and easy to make, perfect for busy schedules.
    • Packed with nutrients to boost brain health.
    • Gluten-free and refined sugar-free options available.
    • Perfect for meal prep and on-the-go snacking.
    • Kid-friendly and great for lunchboxes.

    Detailed Ingredients

    • 2 cups of cooked and mashed **sweet potatoes** (around 450 grams).
    • 1/2 cup of **almond flour** (about 60 grams).
    • 1/2 cup of **oat flour** (60 grams) – you can blend oats to make your own.
    • 1/4 cup of pure **maple syrup** (60 ml) for natural sweetness.
    • 1/4 cup of **coconut oil**, melted (60 ml).
    • 1/2 cup of unsweetened **almond milk** (120 ml).
    • 2 large **eggs**.
    • 1 teaspoon of pure **vanilla extract**.
    • 1 teaspoon of **cinnamon**.
    • 1 teaspoon of **baking powder**.
    • 1/2 teaspoon of **baking soda**.
    • 1/4 teaspoon of **sea salt**.

    Step-by-Step Instructions

    Step 1: Preheat your oven to 350°F (175°C) and line a baking sheet with parchment paper or a silicone mat. This will ensure your bites don’t stick and makes for easy cleanup.

    Step 2: In a large bowl, combine the mashed **sweet potatoes**, **almond milk**, **eggs**, **maple syrup**, melted **coconut oil**, and **vanilla extract**. Whisk these ingredients until they are well combined and the mixture is smooth.

    Step 3: In another bowl, mix the **oat flour**, **almond flour**, **cinnamon**, **baking powder**, **baking soda**, and **sea salt**. Make sure there are no lumps in your dry ingredients.

    Step 4: Gradually add the dry ingredients to the wet ingredients. Stir gently until just combined. Chef’s Tip: Avoid overmixing to prevent the bites from becoming dense. A few lumps are perfectly fine.

    Step 5: Using a spoon or a small ice cream scoop, portion out the batter onto the prepared baking sheet. Aim for each bite to be about a tablespoon in size.

    Step 6: Bake in the preheated oven for 15-18 minutes, or until the bites are golden brown and a toothpick inserted into the center comes out clean.

    Step 7: Allow the bites to cool on the baking sheet for a few minutes before transferring them to a wire rack to cool completely.

    Common Mistakes to Avoid

    One common mistake is overbaking, which can result in dry bites. Keep an eye on them and start checking for doneness at the 15-minute mark. Another mistake is not mashing the sweet potatoes thoroughly, which can lead to an uneven texture. Ensure they’re smooth before incorporating them into the batter.

    How to Store & Reheat

    Store the Sweet Potato Bliss Bites in an airtight container at room temperature for up to 3 days. For longer storage, keep them in the refrigerator for up to a week. To reheat, simply pop them in a microwave for about 10-15 seconds or enjoy them at room temperature.

    Ingredient Substitutions

    • For a nut-free version, replace **almond flour** with additional **oat flour**.
    • Swap **maple syrup** with honey or agave nectar for a different sweetness profile.
    • Use **flax eggs** (1 tablespoon flaxseed meal + 2.5 tablespoons water, per egg) to make the recipe vegan.
    • Substitute **coconut oil** with melted butter or any neutral oil if preferred.

    Nutrition Facts

    • Calories: 120 per bite
    • Protein: 3g
    • Fat: 6g
    • Carbs: 15g
    • Serving Size: 1 bite

    Frequently Asked Questions

    • Q: Can I freeze these bites? A: Yes, you can freeze them for up to 2 months. Thaw overnight in the fridge before enjoying.
    • Q: Can I add nuts or chocolate chips? A: Absolutely! Feel free to fold in 1/2 cup of your favorite nuts or chocolate chips before baking.
    • Q: How can I make them sweeter? A: Increase the **maple syrup** to 1/3 cup or add a tablespoon of brown sugar to the dry ingredients.
    • Q: Are these bites gluten-free? A: Yes, as long as you use certified gluten-free oats for the **oat flour**.
    • Q: What’s the best way to mash sweet potatoes? A: Boil or bake them until soft, then use a potato masher or fork to mash until smooth.

  • Brain Fuel: Sweet Potato Bliss Hummus

    Brain Fuel: Sweet Potato Bliss Hummus

    Introduction & My Personal Story

    There’s something magical about the first time you taste a dish that feels both nourishing and indulgent. My journey with Sweet Potato Bliss Hummus began in a small, sunlit kitchen in my grandmother’s home. She had a knack for turning humble ingredients into culinary masterpieces, and her sweet potato hummus was no exception. I remember the aroma of sweet potatoes steaming, mingling with the earthy scent of cumin and the sharp tang of freshly squeezed lemon juice. As a child, I would eagerly watch her blend everything into a velvety hummus, my mouth watering in anticipation.

    Fast forward to my adult life, and this dish remains a staple in my kitchen. In my 5 years of experience as a chef, I’ve learned that food is not just about sustenance; it’s about experience, memories, and sometimes, a little bit of magic. Sweet Potato Bliss Hummus is my go-to when I need a brain boost or a comforting snack that feels like a warm hug. It’s a dish that not only nourishes the body but also fuels the soul, reminding me of those cherished moments in my grandmother’s kitchen.

    Why You’ll Love This Recipe

    • Rich in Omega-3 fatty acids, perfect for enhancing cognitive function.
    • Low in calories, making it a guilt-free snack.
    • Simple ingredients that are easy to find and budget-friendly.
    • Versatile dish that pairs well with a variety of dippers like veggies, pita chips, or crackers.
    • Can be made ahead of time, perfect for meal prep and busy weeks.

    Detailed Ingredients

    • Sweet Potato – 1 medium (about 200g), peeled and cubed. Look for firm, unblemished potatoes.
    • Tahini – ¼ cup (60g). Opt for a smooth, creamy variety.
    • Lemon Juice – 2 tablespoons (30ml), freshly squeezed for the best flavor.
    • Salt – ½ teaspoon.
    • Garlic – 1 clove, minced. Fresh garlic provides the best punch.
    • Cumin – ½ teaspoon. Adds warmth and depth.
    • Cayenne Pepper – Optional, for a spicy kick.
    • Olive Oil – For drizzling. Use extra virgin for a rich flavor.
    • Paprika – For garnish, adds a pop of color and flavor.

    Step-by-Step Instructions

    Step 1: Steam the Sweet Potatoes

    Place the cubed sweet potatoes in a steamer basket over boiling water. Cover and let them steam for about 15 minutes. You’ll know they’re ready when a fork easily pierces through them. This step is crucial as it ensures the sweet potatoes are soft enough to blend smoothly.

    Step 2: Blend the Ingredients

    Transfer the steamed sweet potatoes to a food processor. Add the tahini, lemon juice, salt, minced garlic, cumin, and cayenne pepper if you’re using it. Blend on high for 3-4 minutes. You’re aiming for a smooth, creamy consistency, so scrape down the sides of the processor as needed.

    Step 3: Serve

    Spoon the hummus into a serving bowl. Drizzle with a bit of olive oil and sprinkle with paprika. This not only enhances the flavor but also makes your dish visually appealing.

    Step 4: Enjoy

    Pair your hummus with fresh veggies, pita chips, or crackers. It’s a perfect snack for any time of the day, offering a delicious way to boost your energy and focus.

    Common Mistakes to Avoid

    • Overcooking the Sweet Potatoes: Steaming them for too long can make them mushy and waterlogged, affecting the texture of the hummus.
    • Using Bottled Lemon Juice: Freshly squeezed lemon juice provides a much brighter and fresher flavor.
    • Not Blending Long Enough: To achieve that creamy texture, ensure you blend for the full 3-4 minutes, scraping down the sides as needed.
    • Skipping the Olive Oil Drizzle: It adds a richness and depth to the final dish that shouldn’t be missed.

    How to Store & Reheat

    Transfer any leftover hummus to an airtight container. Store it in the refrigerator for up to 7 days. When you’re ready to enjoy it again, let it sit at room temperature for a few minutes and give it a good stir. If you prefer warm hummus, gently reheat it in a microwave-safe bowl for about 20 seconds, but be cautious not to overheat as it can alter the texture.

    Ingredient Substitutions

    • Sweet Potatoes: You can substitute with butternut squash for a slightly different flavor profile.
    • Tahini: If you’re out of tahini, almond butter can be used, though it will alter the taste.
    • Lemon Juice: Lime juice can be used in a pinch, offering a unique twist.
    • Garlic: Garlic powder can be substituted, but use sparingly as it’s more concentrated.

    Nutrition Facts

    • Calories: 114 kcal per ¼ cup
    • Protein: 2 g
    • Fat: 6 g
    • Carbs: 14 g
    • Serving Size: ¼ cup

    Frequently Asked Questions

    • Can I freeze sweet potato hummus? Yes, you can freeze it in an airtight container for up to 3 months. Thaw in the refrigerator before serving.
    • How can I make the hummus spicier? Add more cayenne pepper or a dash of hot sauce to increase the heat.
    • Is this recipe vegan? Absolutely, it’s completely plant-based and vegan-friendly.
    • What can I pair with sweet potato hummus? It’s great with fresh vegetables like carrots and bell peppers, or with pita chips and whole-grain crackers.
    • Can I make this hummus without a food processor? A high-powered blender can work as an alternative, though you may need to process in batches.

  • Brain Fuel: Protein Muddy Buddies!

    Brain Fuel: Protein Muddy Buddies!

    Introduction & My Personal Story

    Ah, Protein Muddy Buddies! Just saying the name takes me back to my college days when late-night study sessions were fueled by nothing more than a cup of coffee and whatever snack I could get my hands on. It was during one of these marathon study nights that I stumbled upon the idea of turning a classic snack into something a bit more brain-boosting. I was knee-deep in biochemistry textbooks, and I needed something that would not only satisfy my sweet tooth but also keep me focused and energized. That’s when I decided to experiment with adding protein and healthy fats to the traditional Muddy Buddies recipe.

    In my 5 years of experience as a chef, I’ve learned that snacks can be both delicious and nutritious. This recipe is a testament to that belief. The first time I made these Protein Muddy Buddies, they were an instant hit. My friends and I devoured them between pages of notes, and I knew I had created something special. The rich chocolate, creamy peanut butter, and crunchy cereal came together in a way that was nothing short of magical. These days, I make sure to have a batch ready for those moments when I need a quick pick-me-up. This is more than just a snack; it’s a powerhouse of flavor and nutrition that keeps you going when you need it most.

    Why You’ll Love This Recipe

    • Quick and easy to prepare – ready in just 15 minutes.
    • Packed with protein to keep you full and focused.
    • Uses simple ingredients you probably already have at home.
    • Perfect for meal prep and stays fresh in the fridge.
    • Great for both kids and adults – a family favorite!

    Detailed Ingredients

    • Rice Chex Cereal: 6 cups. Look for a mix of Rice Chex and Catalina Crunch for added protein.
    • Dark Chocolate Chips: 1 cup. Opt for brands like Lily’s to cut down on sugar.
    • Natural Peanut Butter: 1/3 cup. Choose one without added sugar for a healthier option.
    • Coconut Oil: 2 tablespoons. This helps to smooth out the chocolate mixture.
    • Powdered Sugar: 1 cup. Use powdered erythritol for a low-sugar alternative.
    • Vanilla Protein Powder: 1/4 cup. Nuzest is a great choice for this recipe.

    Step-by-Step Instructions

    Step 1: Prepare the Cereal
    Measure out 6 cups of Rice Chex and place them in a large mixing bowl. This will be the base of your Protein Muddy Buddies. Set the bowl aside while you prepare the rest of the ingredients.

    Step 2: Mix Dry Ingredients
    In a large 2-gallon resealable zip-lock bag, combine 1 cup of powdered sugar or erythritol with 1/4 cup of vanilla protein powder. This will be used later to coat the cereal, giving it a sweet finish.

    Step 3: Melt the Mixture
    In a saucepan over low-medium heat, combine 1/3 cup of natural peanut butter, 1 cup of dark chocolate chips, and 2 tablespoons of coconut oil. Stir continuously until the mixture is smooth and well combined. Alternatively, you can microwave the mixture in 30-second bursts, stirring after each interval, until smooth.

    Step 4: Coat the Cereal
    Pour the melted chocolate mixture over the bowl of cereal. Use a spatula to gently toss the cereal until every piece is evenly coated with the chocolate mixture. Make sure to work quickly so the chocolate doesn’t harden before the cereal is fully coated.

    Step 5: Shake and Chill
    Transfer the chocolate-coated cereal into the zip-lock bag with the dry ingredients. Seal the bag and shake it vigorously until all the cereal is coated with the powdered sugar mixture. Spread the mixture out on parchment paper to cool completely. Avoid placing it in an airtight container until it’s completely cool to prevent sogginess.

    Step 6: Store
    Once cooled, place the Protein Muddy Buddies in an airtight container and store them in the refrigerator. This will help maintain their freshness and crunchiness, making them ready to enjoy whenever you need a quick snack.

    Common Mistakes to Avoid

    Overheating the Chocolate Mixture: If the chocolate gets too hot, it can seize up and become grainy. Always melt on low-medium heat and stir continuously.

    Not Cooling Completely: Placing the mixture in an airtight container before it’s fully cooled can make the cereal soggy. Let it cool on parchment paper first.

    Uneven Coating: Be sure to thoroughly mix the cereal with the chocolate mixture to ensure every piece is coated. This helps the powdered sugar stick properly.

    How to Store & Reheat

    Store your Protein Muddy Buddies in an airtight container in the refrigerator. They will stay fresh and crunchy for up to 2 weeks. If you prefer them at room temperature, simply take them out of the fridge 10 minutes before serving. There’s no need to reheat; they’re perfect as is!

    Ingredient Substitutions

    If you need to make some swaps, here are a few safe substitutions:

    • Rice Chex: Use any gluten-free cereal or a mix with other high-protein cereals.
    • Dark Chocolate Chips: Substitute with milk or white chocolate chips, though this will alter the sugar content.
    • Peanut Butter: Almond butter or sunflower seed butter work as great alternatives.
    • Powdered Sugar: Powdered monk fruit sweetener can be used for a zero-calorie option.

    Nutrition Facts

    • Calories: 122 kcal per serving
    • Protein: 4g per serving
    • Fat: 8g per serving
    • Carbohydrates: 15g per serving
    • Serving Size: Approximately 1/2 cup

    Frequently Asked Questions

    Can I make this recipe vegan?
    Yes! Simply use a vegan protein powder and ensure your chocolate chips are dairy-free.

    How can I make this recipe more kid-friendly?
    Kids love sweet treats, so consider using milk chocolate chips and adding colorful sprinkles for fun!

    What if I don’t have coconut oil?
    You can substitute with unsalted butter or a neutral cooking oil like canola.

    Can I freeze Protein Muddy Buddies?
    Yes, they freeze well! Just place them in a freezer-safe bag or container and freeze for up to 3 months.

    Do I have to use a zip-lock bag for coating?
    While it’s convenient, you can also use a large bowl with a lid to shake the cereal and powdered mix.

  • Brain Fuel: 6 Stage 2 Baby Food Swaps!

    Brain Fuel: 6 Stage 2 Baby Food Swaps!

    Introduction & My Personal Story

    When it comes to introducing solid foods to your baby, it can be both an exciting and daunting task. I remember when my little one was ready to transition to stage 2 baby foods. It was a thrilling milestone in our household. I was determined to provide the best nutrition possible, and that meant getting creative in the kitchen. I recall the first time I combined sweet potatoes with apples and a hint of cinnamon – the aroma that filled the kitchen was delightful. My baby’s eyes lit up with each spoonful, and it became an instant favorite. Over time, I developed a repertoire of combinations that not only fueled my child’s growth but also helped enhance cognitive development. In my 5 years of experience as a chef and a parent, I’ve learned that the right ingredients can make a world of difference in a baby’s diet.

    Why You’ll Love This Recipe

    • Provides essential nutrients for brain development
    • Easy to prepare and customize
    • Uses fresh, wholesome ingredients
    • Perfect for introducing new flavors and textures
    • Can be stored and used over several days

    Detailed Ingredients

    Here’s what you’ll need for these powerful baby food combinations:

    • 1 avocado – Look for ripe, soft avocados.
    • 1 bunch of kale – Choose dark green, crisp leaves.
    • 1 sweet potato – Medium-sized, firm to touch.
    • 1 bunch asparagus – Fresh, firm stalks.
    • 1 banana – Ripe, with a few brown spots.
    • 2 apples – Sweet variety like Gala or Fuji.
    • 2 pears – Ripe but firm.
    • 4 peaches – Ripe, fragrant, slightly soft.
    • 1 pint blueberries – Firm, deep blue color.
    • 1 pineapple – Sweet smell, slight give when pressed.
    • 1 mango – Ripe, slight give when pressed.
    • Quinoa – Pre-rinsed or rinse before using.
    • Ground flax – Look for finely ground flaxseed.

    Step-by-Step Instructions

    Let’s get started on making these delicious baby food combinations:

    Step 1: Ingredient Prep

    Gather all your ingredients. Wash fruits and vegetables thoroughly. Peel and core the apples and pears. Pit and peel the peaches and mango. Trim the asparagus and kale.

    Step 2: Steam Fruits and Vegetables

    Steaming helps preserve nutrients. Here are the times:

    • Sweet potato: 12-15 minutes
    • Apple: 10-12 minutes
    • Asparagus: 7-13 minutes
    • Blueberries: 5-10 minutes
    • Peach: 2-4 minutes
    • Pear: 10-12 minutes
    • Pineapple: 5-10 minutes
    • Mango: 5-10 minutes

    Step 3: Blend

    Once steamed, transfer fruits and vegetables to a high-powered blender. Add a splash of water, breast milk, or formula to achieve your desired consistency. Blend until smooth.

    Step 4: Combine

    Mix the ingredients according to the combinations below:

    • Peach Pear: 2 steamed pears, 3 steamed peaches.
    • Asparagus Apple: 1 bunch steamed asparagus, 1 steamed apple.
    • Sweet Potato Apple Cinnamon: 1 steamed sweet potato, 1 steamed apple, pinch of cinnamon.
    • Avocado Peach Pineapple Kale: 1 avocado, 1 steamed peach, ½ cup steamed pineapple, ½ cup steamed kale.
    • Pineapple Mango: 1 cup steamed pineapple, 1 cup steamed mango.
    • Blueberry Banana Quinoa Flax: 1 pint steamed blueberries, ½ cup cooked quinoa, 1 ripe banana, 2 tbsp ground flax.

    Step 5: Store

    Allow purees to cool. Transfer to BPA-free containers or silicone ice cube trays. Label for easy identification and store in the refrigerator or freezer.

    Common Mistakes to Avoid

    Here’s what to watch out for:

    • Over-steaming: This can make fruits and vegetables lose nutrients. Stick to recommended times.
    • Not blending enough: Ensure a smooth consistency to avoid choking hazards.
    • Improper storage: Always use airtight containers and label them.

    How to Store & Reheat

    For best results, store purees in the fridge for up to 3 days or freeze for up to 3 months. To reheat, place in a bowl over warm water or microwave in short intervals, stirring in between.

    Ingredient Substitutions

    • Sweet potato: Swap with butternut squash for a similar texture.
    • Pears: Apples can be a substitute if pears are unavailable.
    • Quinoa: Replace with millet or rice for a different grain.

    Nutrition Facts

    • Calories: Approximately 60 kcal per serving
    • Protein: 1.5g
    • Fat: 2g
    • Carbs: 12g
    • Serving Size: 1/4 cup

    Frequently Asked Questions

    • Can I freeze these purees? Yes, they freeze well for up to 3 months.
    • What age are these recipes suitable for? These are ideal for babies around 6-8 months old.
    • Can I add spices? A pinch of cinnamon or nutmeg can be added for flavor.
    • Is it safe to use raw avocado? Yes, raw avocado is safe and nutritious for babies.
    • How do I know if my baby is allergic? Introduce one new food at a time and watch for any reactions.

  • Brain Fuel: Sweet Potato Bliss!

    Brain Fuel: Sweet Potato Bliss!

    Introduction & My Personal Story

    Ah, sweet potatoes! Just saying the name takes me back to my childhood kitchen, where the aroma of these starchy jewels roasting in the oven would fill the air with warmth and comfort. My grandmother, a culinary wizard in her own right, had a knack for transforming simple ingredients into something extraordinary. It was in her cozy kitchen that I first learned the art of making the perfect sweet potato puree, a dish that not only nourishes the body but also fuels the mind.

    In my 5 years of experience as a chef, I’ve come to appreciate the versatility of sweet potatoes. They’re not just a side dish; they’re a powerhouse of nutrition, especially when it comes to brain health. I vividly remember one particular Sunday afternoon, standing beside my grandmother, as she explained how the natural sugars in sweet potatoes release slowly, providing sustained energy and focus. “A chef’s secret weapon,” she whispered, winking as she mashed the tender flesh into a creamy puree.

    Fast forward to today, and sweet potatoes remain a staple in my kitchen. Whether I’m whipping up a quick snack or preparing a gourmet meal, I often turn to my trusty sweet potato puree recipe. It’s not just about the taste; it’s about the feeling of being grounded, connected to my roots, and knowing I’m putting something wholesome and beneficial on the table. Let’s dive into how you can recreate this sweet potato bliss in your own kitchen!

    Why You’ll Love This Recipe

    • Boosts brain power with essential nutrients.
    • Provides sustained energy without sugar crashes.
    • Easy to prepare with minimal ingredients.
    • Versatile: perfect as a side dish or ingredient in other recipes.
    • Kid-friendly and packed with natural sweetness.

    Detailed Ingredients

    • Sweet Potatoes: 2 large, approximately 600 grams (look for firm, smooth skin without blemishes).
    • Olive Oil: 1 tablespoon, for baking (optional).
    • Salt: 1/2 teaspoon, to taste.
    • Butter: 2 tablespoons, unsalted, for added creaminess (optional).
    • Cinnamon: 1/2 teaspoon, for a warm, spicy note (optional).

    Step-by-Step Instructions

    Step 1: Preheat the Oven

    Set your oven to 400°F (200°C). This temperature is perfect for roasting sweet potatoes, ensuring they become tender and caramelized.

    Step 2: Prepare the Sweet Potatoes

    Wash the sweet potatoes thoroughly under running water to remove any dirt. Dry them with a clean towel. Using a fork, poke about 4-5 holes in each potato. This allows steam to escape during baking, preventing them from bursting.

    Step 3: Bake the Sweet Potatoes

    Place the sweet potatoes directly on a baking sheet lined with parchment paper. For added flavor, you can brush them lightly with olive oil and sprinkle a pinch of salt. Bake for about 60 minutes, or until the skins are wrinkled and a fork easily pierces the flesh. Chef’s Tip: The longer you bake, the sweeter they become, as the natural sugars caramelize beautifully.

    Step 4: Cool Down

    Once baked, remove the sweet potatoes from the oven and let them cool on the baking sheet for about 10-15 minutes. This makes them easier to handle and peel.

    Step 5: Peel the Sweet Potatoes

    Gently peel away the skin using your hands or a small knife. The skin should come off easily. If you’re feeling adventurous, save the skins—they’re nutrient-rich and can be crisped up in the oven for a tasty snack!

    Step 6: Puree the Sweet Potatoes

    Transfer the peeled sweet potatoes to a food processor or blender. Add the butter and cinnamon, if using, and blend until smooth. You can also use an immersion blender in a large bowl. For a chunkier texture, mash the potatoes with a fork or potato masher.

    Step 7: Serve

    Transfer the smooth puree to a serving bowl. Taste and adjust the seasoning with salt if needed. Serve immediately, or store in the refrigerator for up to 3 days.

    Common Mistakes to Avoid

    Undercooking: Ensure the sweet potatoes are fully cooked before mashing. They should be soft and tender.

    Over-blending: While a smooth puree is desirable, over-blending can make it gummy. Blend just until smooth.

    Skipping the cooling step: Peeling hot sweet potatoes can be a painful experience. Allow them to cool slightly first.

    How to Store & Reheat

    Store any leftover sweet potato puree in an airtight container in the refrigerator. It will keep for up to 3 days. To reheat, place the puree in a saucepan over low heat, stirring occasionally until warmed through. You can also reheat in the microwave for 1-2 minutes, stirring halfway through. Chef’s Tip: Add a splash of milk or water when reheating to restore the creamy texture.

    Ingredient Substitutions

    If you’re missing some ingredients, don’t worry! Here are a few substitutions:

    • Olive Oil: Substitute with coconut oil for a hint of tropical flavor.
    • Butter: Use ghee or margarine for a dairy-free option.
    • Cinnamon: Nutmeg or pumpkin spice can offer a similar warmth.

    Nutrition Facts

    • Calories: 150 per serving
    • Protein: 2g per serving
    • Fat: 5g per serving
    • Carbohydrates: 27g per serving
    • Serving Size: 1/2 cup

    Frequently Asked Questions

    Q: Can I use sweet potato puree in other recipes?

    A: Absolutely! It’s fantastic in soups, stews, baked goods, or mixed into oatmeal.

    Q: Can I freeze sweet potato puree?

    A: Yes, freeze it in an airtight container for up to 3 months. Thaw overnight in the fridge before using.

    Q: What can I add for extra flavor?

    A: Try adding ginger, nutmeg, or a splash of vanilla extract for a unique twist.

    Q: Is this recipe vegan?

    A: It can be! Simply omit the butter or use a vegan substitute.

  • Focus Win: Ultimate Smoothie Bowl

    Focus Win: Ultimate Smoothie Bowl

    Introduction & My Personal Story

    Ah, the smoothie bowl. Is there anything more satisfying than diving into a bowl of vibrant, creamy goodness that’s packed with nutrition? My love affair with the smoothie bowl began about five years ago when I was searching for a quick breakfast that could keep up with my hectic mornings. I remember the first time I blended up a concoction of frozen bananas, berries, and a splash of almond milk. It was a revelation. The texture was creamy, almost like soft-serve ice cream, and it was so refreshing. But what truly sold me was how energized and focused I felt afterward.

    In my 5 years of experience as a chef and food blogger, I’ve dabbled in various recipes, but this one remains my go-to for a nourishing start to the day. It’s not just food; it’s a ritual. I love experimenting with different toppings and flavors, but the core ingredients remain the same. This smoothie bowl has seen me through countless early mornings, post-workout refuels, and even as a guilt-free dessert. It’s a bowl of comfort, energy, and pure joy. Let me guide you through creating your own ultimate smoothie bowl that’s not only delicious but also boosts your focus and vitality.

    Why You’ll Love This Recipe

    • Quick and easy to prepare, perfect for busy mornings.
    • Packed with Omega-3s for enhanced cognitive function.
    • Customizable with your favorite toppings.
    • Naturally sweetened with fruits, no added sugars.
    • Vegan and dairy-free, suitable for various dietary needs.

    Detailed Ingredients

    • 1 frozen banana (approximately 120g): Adds creaminess and natural sweetness.
    • 1 scoop protein powder (about 30g): Choose vanilla or chocolate for an extra nutrient boost.
    • 1 cup frozen mixed berries (150g): A mix of strawberries, blueberries, and raspberries works well.
    • 1/4 cup unsweetened almond milk (60ml): Provides a smooth consistency; any plant-based milk can be used.
    • 1 tablespoon nut butter (15g): Almond or peanut butter adds healthy fats and richness.

    Step-by-Step Instructions

    Step 1: Prepare Your Ingredients
    Gather all your ingredients on the counter. Make sure the banana and berries are frozen, as this is key to achieving the right texture. Chef’s Tip: Slice the banana before freezing for easier blending.

    Step 2: Blend It Up
    In a high-powered blender, combine the frozen banana, protein powder, frozen berries, and almond milk. Start with just 2 tablespoons of almond milk to keep the mixture thick. Blend on high speed until smooth. If the mixture is too thick, add more almond milk, one tablespoon at a time. The goal is a thick, creamy consistency similar to soft-serve ice cream.

    Step 3: Pour and Top
    Transfer the blended mixture into a bowl. This is where you can get creative. Top with your favorite ingredients like granola, fresh fruits, or a drizzle of nut butter. Chef’s Tip: Add a sprinkle of chia seeds or flaxseeds for an extra boost of Omega-3s.

    Step 4: Enjoy Immediately
    Smoothie bowls are best enjoyed fresh. The texture and flavors are most vibrant when consumed right away. Dig in and savor each spoonful of your ultimate smoothie bowl.

    Common Mistakes to Avoid

    • Using room temperature fruit: Always use frozen fruit for the right consistency.
    • Over-blending: Blend just until smooth to avoid a runny texture.
    • Too much liquid: Add almond milk gradually to keep it thick.
    • Skipping the protein powder: It’s crucial for maintaining energy and focus throughout the day.

    How to Store & Reheat

    If you have leftovers, cover the smoothie bowl with plastic wrap and store it in the freezer for up to 2 days. To enjoy again, let it sit at room temperature for about 10 minutes before eating. Note that the texture will be more like a sorbet than a fresh smoothie bowl.

    Ingredient Substitutions

    • Frozen banana: Substitute with frozen avocado or zucchini for a lower-sugar option.
    • Protein powder: If you prefer, skip it or use a plant-based option to keep it vegan.
    • Almond milk: Swap with oat, soy, or coconut milk as per preference.
    • Nut butter: Use sunflower seed butter for a nut-free alternative.

    Nutrition Facts

    • Calories: 291 kcal
    • Protein: 21g
    • Carbohydrates: 24g
    • Fat: 6g
    • Fiber: 6g
    • Serving Size: 1 bowl

    Frequently Asked Questions

    • Can I make this smoothie bowl ahead of time? It’s best enjoyed fresh, but you can freeze it and thaw slightly before eating.
    • What toppings work best? Fresh fruits, nuts, seeds, and granola are great options.
    • Is this recipe suitable for kids? Absolutely! It’s a fun and healthy way to get kids to eat more fruits.
    • How can I increase the protein content? Add more protein powder or a scoop of Greek yogurt.
    • Can I use fresh berries instead of frozen? Fresh berries can be used but ensure the banana is frozen for the right texture.

  • Brain Fuel: Blueberry Bliss!

    Brain Fuel: Blueberry Bliss!

    Introduction & My Personal Story

    There’s something magical about blueberries that takes me back to my childhood summers, spent wandering through my grandmother’s garden. She had these sprawling blueberry bushes that seemed to stretch on forever, and I would spend hours plucking the plump, indigo berries straight from the branch. Those sun-drenched afternoons are etched in my memory, the sweet-tart burst of each berry a reminder of simpler times.

    Fast forward to my culinary career, and blueberries have remained a staple in my kitchen. In my 5 years of experience as a chef, I’ve learned to appreciate their versatility and nutritional powerhouse status. This led me to create a recipe that harnesses their brain-boosting potential: the Blueberry Power Puree. Perfect for a quick snack or an addition to your morning routine, this puree is a nod to my childhood nostalgia while catering to the modern need for quick, healthy, and delicious brain fuel.

    Whether you’re a busy professional, a parent trying to sneak more nutrients into your child’s diet, or simply someone who loves the taste of fresh blueberries, this recipe is sure to become a favorite. Join me as we dive into the wonders of this simple yet profound dish.

    Why You’ll Love This Recipe

    • Quick and easy to prepare, ready in just 10 minutes.
    • Packed with antioxidants and Omega-3s for enhanced brain function.
    • Versatile: Enjoy it on its own or as a topping for various dishes.
    • Kid-friendly and a great way to introduce fruits to little ones.
    • Stores well, making it perfect for meal prep and busy weeks.

    Detailed Ingredients

    Here’s what you’ll need to whip up this brain-boosting puree:

    • Blueberries: 500 grams (about 3 cups). Look for firm, plump berries with a deep blue color. Avoid berries that are soft or have a dull appearance.
    • Water: 60 ml (1/4 cup). Adjust the amount based on your desired puree consistency.

    Step-by-Step Instructions

    Creating the perfect Blueberry Power Puree is all about simplicity and technique. Follow these steps for a flawless result:

    Step 1: Sort & Rinse

    Begin by carefully sorting through your blueberries. Discard any that are underripe, soft, or moldy. This step is crucial as it ensures only the best berries make it into your puree. Rinse them thoroughly under cold running water to remove any dirt or pesticides.

    Step 2: Blend

    Transfer the rinsed blueberries to a high-powered blender or food processor. Add a splash of water—about 60 ml (1/4 cup)—to facilitate blending. Blend the mixture until completely smooth. If you prefer a thinner consistency, add more water gradually. For a silky texture, strain the puree through a fine-mesh sieve to remove any remaining skins.

    Step 3: Serve

    Once blended to your desired consistency, the puree is ready to serve. It can be enjoyed on its own, especially by little ones, or used as a delicious topping for yogurt, oatmeal, or chia pudding. The vibrant color and refreshing taste are sure to brighten any dish.

    Step 4: Store

    Transfer the puree to an airtight container and store it in the refrigerator for up to 3-4 days. For longer storage, freeze the puree in silicone ice cube trays or small jars. This method allows for easy portioning and can keep the puree fresh for up to 3 months.

    Step 5: Thaw

    When you’re ready to use your stored puree, thaw it in the refrigerator overnight. Alternatively, you can quickly defrost it by placing the container in a warm water bath. Ensure the puree is fully thawed before serving.

    Common Mistakes to Avoid

    Even simple recipes like this one can have pitfalls. Here are some common mistakes and how to avoid them:

    • Using low-quality blueberries: Always choose fresh, firm berries. Soft or moldy berries will affect the taste and texture of your puree.
    • Not rinsing thoroughly: Skipping this step can lead to a gritty texture and possible contamination. Rinse well!
    • Over-blending: While you want a smooth puree, over-blending can cause the mixture to become too thin. Adjust water content gradually.
    • Improper storage: Ensure containers are airtight to prevent spoilage and maintain freshness.

    How to Store & Reheat

    Proper storage is key to maintaining the freshness and nutritional value of your puree:

    • Refrigeration: Store in an airtight container in the fridge for up to 3-4 days.
    • Freezing: Use silicone ice cube trays or small jars to freeze portions. This method keeps the puree fresh for up to 3 months.
    • Reheating: For frozen puree, thaw in the refrigerator overnight or use a warm water bath for quick defrosting.

    Ingredient Substitutions

    If you need to swap ingredients, here are some safe alternatives:

    • Blueberries: Substitute with raspberries or blackberries for a similar antioxidant boost.
    • Water: Use coconut water for added flavor and electrolytes.

    Nutrition Facts

    Here’s the nutritional breakdown per serving (approx. 100g):

    • Calories: 43 kcal
    • Protein: 1 g
    • Fat: 0.5 g
    • Carbohydrates: 11 g
    • Serving Size: 100 g

    Frequently Asked Questions

    Here are some questions I often receive about this recipe:

    • Can I use frozen blueberries? Yes, frozen blueberries work well. Thaw them before blending for best results.
    • Is this recipe suitable for babies? Absolutely! It’s a great way to introduce fruits to infants. Just ensure the puree is smooth and free of any skins.
    • How can I enhance the flavor? Add a splash of lemon juice or a pinch of cinnamon for an extra kick.
    • Can I sweeten the puree? If you prefer a sweeter taste, consider adding a bit of honey or maple syrup, but remember that blueberries are naturally sweet.

  • Brain Fuel: Fruity Nut Bars

    Brain Fuel: Fruity Nut Bars

    Introduction & My Personal Story

    There’s something magical about the combination of fruits and nuts that transports me back to my grandmother’s kitchen. She was the type of woman who could whip up a feast without breaking a sweat, and her fruity nut bars were legendary in our family. I remember sitting on the counter, watching her mix and measure, the kitchen filled with the sweet aroma of dried fruits and the earthy scent of nuts. It was her secret weapon for family gatherings, hiking trips, and those days when we just needed an extra boost of energy.

    In my 5 years of experience as a chef, I’ve come to appreciate the simplicity and nutritional power packed into these bars. They’re a perfect balance of chewy and crunchy, sweet and nutty. Over the years, I’ve tweaked the recipe to enhance its brain-boosting capabilities, and now I’m excited to share my version of these Fruity Nut Bars with you. Whether you’re a busy professional, a student, or just someone who loves a good snack, these bars are sure to become a staple in your kitchen.

    Why You’ll Love This Recipe

    Detailed Ingredients

    • 1 cup (120g) Oat Flour: Look for whole grain oat flour or make your own by blending oats.
    • 1 cup (90g) Old Fashioned Rolled Oats: Choose organic for the best quality.
    • 1 cup (180g) Medjool Dates or Prunes: Ensure they are pitted and fresh.
    • 1/2 cup (80g) Raisins: Plump and juicy raisins add natural sweetness.
    • 1/2 cup (75g) Dried Apricots: Look for unsulfured apricots for a healthier option.
    • 1/2 cup (60g) Walnuts: Fresh, crunchy walnuts are key for texture and Omega-3s.
    • 1/4 cup (30g) Cacao Nibs: Offers a rich chocolate flavor and antioxidants.
    • 2/3 cup (160ml) Water

    Step-by-Step Instructions

    Step 1: Preheat and Prepare

    Start by preheating your oven to 325°F (160°C). Line an 8-inch x 8-inch baking pan with parchment paper, allowing some overhang for easy removal later. This step ensures that your bars won’t stick and will come out in perfect squares.

    Step 2: Chop the Fruits

    Using a food processor, chop the Medjool dates, raisins, and dried apricots until they are finely combined. The mixture should be sticky and hold together when pressed. This forms the sweet base of your bars.

    Step 3: Mix the Dry Ingredients

    In a large mixing bowl, combine the oat flour and rolled oats. Stir in the chopped fruit mixture, walnuts, and cacao nibs. Gradually add 2/3 cup of water and knead the mixture until a cohesive dough forms. The dough should be slightly sticky but manageable.

    Step 4: Shape and Cut

    Press the dough firmly into the prepared baking pan, ensuring an even thickness. Use a sharp knife to score the dough into squares before baking. This makes it easier to portion the bars once they’re baked.

    Step 5: Bake

    Bake the bars in the preheated oven for 20-25 minutes. Look for a firm yet slightly soft texture. Avoid overbaking, as this can dry out the bars. Chef’s Tip: If the edges start to brown too quickly, cover the pan loosely with aluminum foil.

    Common Mistakes to Avoid

    Overprocessing the Fruits: If the fruit mixture becomes too paste-like, the bars will be overly sticky. Pulse the fruits just until combined.

    Skipping the Scoring: Cutting the bars after baking can cause them to crumble. Score them beforehand for clean edges.

    Ignoring Oven Hot Spots: Rotate the baking pan halfway through to ensure even baking.

    How to Store & Reheat

    Store the bars in an airtight container in the refrigerator. They will remain fresh for 1-2 weeks. For longer storage, freeze the bars in a single layer on a baking sheet, then transfer to a freezer-safe bag. Thaw at room temperature or reheat in a microwave for 10-15 seconds for a warm treat.

    Ingredient Substitutions

    Oat Flour: Substitute with almond flour for a nutty flavor.

    Medjool Dates: Use dried figs for a different taste profile.

    Walnuts: Swap with pecans or almonds for varied textures.

    Cacao Nibs: Chocolate chips can be used for a sweeter bar.

    Nutrition Facts

    • Calories: 323 kcal per bar
    • Protein: 4g per bar
    • Fat: 12g per bar
    • Carbohydrates: 48g per bar
    • Serving Size: 1 bar

    Frequently Asked Questions

    Can I use fresh fruits instead of dried? Fresh fruits contain more moisture and could alter the texture of the bars. Stick to dried fruits for best results.

    Are these bars gluten-free? Yes, if you use certified gluten-free oats and oat flour.

    What’s a good nut-free alternative? Sunflower seeds can replace nuts for a similar crunch.

    Can I add spices? Absolutely! A pinch of cinnamon or nutmeg can add warmth and depth to the flavor.

    How do I make these vegan? The recipe is already vegan-friendly as it contains no animal products.

  • Focus Win: Macro Mastery 101

    Focus Win: Macro Mastery 101

    Introduction & My Personal Story

    Welcome to the world of culinary delight and cognitive enhancement with our Omega-3 rich recipe, “Focus Win: Macro Mastery 101.” This dish isn’t just a meal; it’s a journey back to my early days as a chef, when I first learned the power of nutrition in enhancing mental focus and clarity. Picture me, a budding chef with a thirst for knowledge, discovering the profound impact that food has on our brain health. It was during a particularly intense culinary competition that I realized the importance of fueling my body and mind with the right nutrients.

    Back then, I was juggling late nights and early mornings, just like any other chef striving for excellence. Amidst the hustle, I stumbled upon a recipe that changed everything. It was a simple, yet powerful dish brimming with Omega-3s, known for their brain-boosting properties. As I prepared and savored each bite, I felt a surge of energy and focus that I had never experienced before. This recipe became my secret weapon, giving me the clarity and concentration needed to excel in my culinary pursuits.

    Fast forward to today, and I’m thrilled to share this recipe with you. Whether you’re a busy professional, a student, or simply someone who values mental acuity, this dish is your ticket to enhanced focus and performance. It’s a testament to the transformative power of food, and I can’t wait for you to experience it too.

    Why You’ll Love This Recipe

    • Boosts brain power with Omega-3 rich ingredients.
    • Quick and easy to prepare, perfect for busy schedules.
    • Packed with protein to keep you full and energized.
    • Versatile and customizable to suit dietary preferences.
    • Deliciously satisfying, making healthy eating enjoyable.

    Detailed Ingredients

    • **Salmon Fillets** – 500g (approximately 2 fillets), look for wild-caught for the highest Omega-3 content.
    • **Quinoa** – 1 cup (185g), a great source of protein and fiber.
    • **Spinach** – 2 cups (60g), fresh and vibrant green leaves.
    • **Cherry Tomatoes** – 1 cup (150g), juicy and ripe.
    • **Avocado** – 1 large, ripe but firm.
    • **Olive Oil** – 2 tablespoons, extra virgin for the best flavor.
    • **Lemon Juice** – 2 tablespoons, freshly squeezed.
    • **Garlic** – 2 cloves, minced.
    • **Salt and Pepper** – to taste.
    • **Fresh Dill** – 1 tablespoon, chopped, for garnish.

    Step-by-Step Instructions

    Step 1: Prepare the Quinoa

    Rinse 1 cup of quinoa under cold water to remove its natural coating, which can make it taste bitter. In a medium saucepan, combine the quinoa with 2 cups of water and a pinch of salt. Bring to a boil over high heat, then reduce the heat to low, cover, and simmer for about 15 minutes, or until the quinoa is tender and the water is absorbed. You’ll know it’s done when you see tiny spirals (germ) separating from and curling around the quinoa seeds.

    Step 2: Cook the Salmon

    Heat 1 tablespoon of olive oil in a large non-stick skillet over medium heat. Season the **salmon fillets** with salt and pepper on both sides. Place the fillets skin-side down in the pan and cook for about 4-5 minutes, or until the skin is crispy and the flesh is opaque about halfway up the sides. Flip the fillets and cook for another 3-4 minutes, until the salmon is opaque throughout and flakes easily with a fork. Remove from the pan and set aside.

    Step 3: Sauté the Vegetables

    In the same skillet, add another tablespoon of olive oil. Add the minced **garlic** and sauté for about 30 seconds, until fragrant. Toss in the **spinach** and **cherry tomatoes**, cooking for about 2-3 minutes until the spinach is wilted and the tomatoes are just starting to blister. Season with a pinch of salt and pepper.

    Step 4: Assemble the Dish

    In a large bowl, combine the cooked quinoa, sautéed vegetables, and half of the **lemon juice**. Slice the **avocado** and arrange it on top, along with the cooked salmon fillets. Drizzle with the remaining lemon juice and garnish with chopped **fresh dill**. Serve warm and enjoy the brain-boosting benefits!

    Common Mistakes to Avoid

    • **Overcooking the Salmon**: Keep an eye on the salmon as it cooks. Overcooking can result in dry, tough fish. Aim for a flaky texture.
    • **Skipping the Quinoa Rinse**: Make sure to rinse the quinoa to remove its bitter coating. This step is crucial for the best flavor.
    • **Using Low-Quality Olive Oil**: Opt for extra virgin olive oil for its superior flavor and health benefits.
    • **Neglecting Seasoning**: Proper seasoning at each step enhances the overall flavor of the dish.

    How to Store & Reheat

    To store leftovers, place the salmon and quinoa mixture in airtight containers in the refrigerator. It will keep for up to 3 days. When reheating, use a skillet to gently warm the salmon over low heat, or microwave on a low setting to avoid drying out the fish. The quinoa can be microwaved or reheated on the stove with a splash of water to restore moisture.

    Ingredient Substitutions

    • **Salmon**: Swap with trout or mackerel for similar Omega-3 benefits.
    • **Quinoa**: Use brown rice or farro if preferred.
    • **Spinach**: Kale or arugula can be used as alternatives.
    • **Avocado**: Substitute with sliced almonds or walnuts for a nutty crunch.

    Nutrition Facts

    • Calories: 550 per serving
    • Protein: 35g
    • Fat: 30g
    • Carbohydrates: 40g
    • Serving Size: 1 plate

    Frequently Asked Questions

    Can I make this recipe vegan?

    Yes, you can substitute the salmon with tofu or tempeh for a vegan version. Ensure you season and cook them well to enhance flavor.

    What if I don’t have fresh dill?

    You can use dried dill instead, though fresh is preferred for its vibrant flavor. Alternatively, fresh parsley or cilantro work well too.

    Is this dish suitable for meal prep?

    Absolutely! This dish is ideal for meal prep as it stores well in the fridge and can be easily reheated.

    Can I add more vegetables?

    Of course! Feel free to add any vegetables you like, such as bell peppers or zucchini, to increase the nutrient content.

    What’s the best way to ensure my salmon is perfectly cooked?

    Chef’s Tip: Use a meat thermometer to check that the internal temperature reaches 145°F (63°C) for perfectly cooked salmon.