Tag: Protein

  • 5-MIN FUEL: Decadent Chocolate Cherry Cheesecake Yogurt Bowl Packed with 30g Protein!

    5-MIN FUEL: Decadent Chocolate Cherry Cheesecake Yogurt Bowl Packed with 30g Protein!

    Introduction & My Personal Story

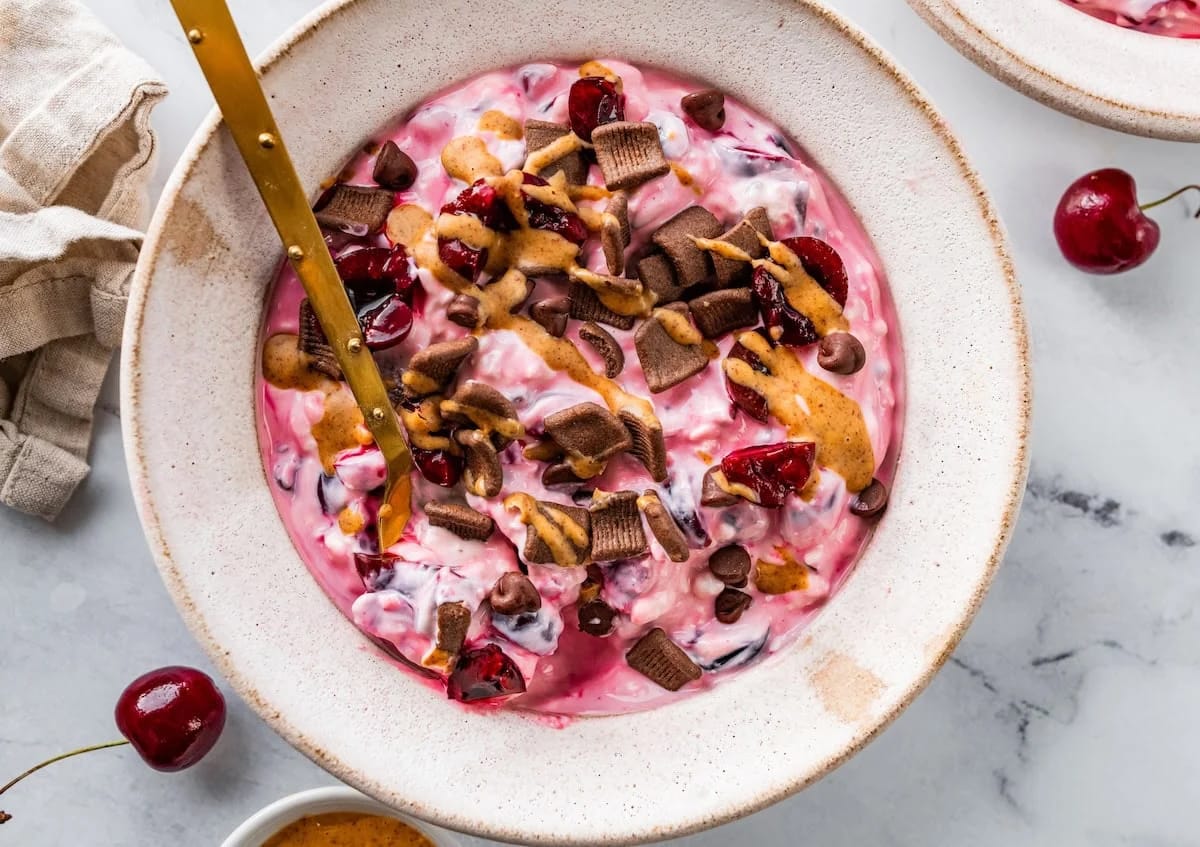
    There’s something special about a dish that can be whipped up in just five minutes yet feels like a treat worthy of a leisurely Sunday brunch. My journey with the Decadent Chocolate Cherry Cheesecake Yogurt Bowl started on a particularly hectic morning. As a chef with a bustling schedule, finding time for a nutritious breakfast can be challenging. One day, as I rummaged through my fridge, I stumbled upon some frozen cherries, Greek yogurt, and a bar of chocolate staring back at me. The idea struck like lightning—I could combine these humble ingredients into something spectacular.

    In my 5 years of experience, I’ve learned that the simplest ingredients can create the most profound flavors. That morning, as I took my first bite of this chocolate cherry concoction, I was transported back to childhood summers spent picking cherries with my grandmother. The rich creaminess of the yogurt paired with the tartness of the cherries and the indulgent chocolate undertones made for an unforgettable experience. This bowl is not just about taste; it’s a powerhouse of protein, perfect for anyone who wants to fuel their day without sacrificing flavor. Whether you’re a busy professional or a fitness enthusiast, this dish is designed to fit seamlessly into your lifestyle.

    Why You’ll Love This Recipe

    • Quick and Easy: Ready in just 5 minutes—perfect for those rushed mornings.
    • High in Protein: Packed with over 30g of protein to keep you satiated and energized.
    • Decadent Flavor: Combines the richness of chocolate with the tartness of cherries.
    • Healthy Ingredients: Uses natural, wholesome ingredients without any guilt.
    • Versatile: Enjoy it as a quick breakfast, post-workout snack, or even a dessert.

    Detailed Ingredients

    To craft this Chocolate Cherry Cheesecake Yogurt Bowl, you’ll need:

    • 1 cup (245g) Greek yogurt: Look for unsweetened, full-fat for creaminess.
    • 1/2 cup (120g) cottage cheese: Choose small curd for a smoother texture.
    • 1 cup (150g) frozen cherries: Opt for pitted and unsweetened.
    • 1 teaspoon vanilla extract: Pure extract enhances the cheesecake flavor.
    • 1/4 cup (30g) chocolate cereal: Adds crunch and chocolate goodness.
    • 2 tablespoons chocolate chips: Dark chocolate for a richer taste.
    • 1 tablespoon almond butter: Creamy almond butter for a nutty finish.

    Step-by-Step Instructions

    Step 1: Combine Ingredients
    In a medium-sized bowl, mix together the Greek yogurt and cottage cheese until well combined. This mixture forms the creamy base of your bowl, reminiscent of a cheesecake texture. Chef’s Tip: If you prefer a smoother consistency, blend the cottage cheese before mixing it with the yogurt.

    Step 2: Add Cherries and Vanilla
    Stir in the frozen cherries and vanilla extract. Allow the cherries to sit for a minute or two. The cold cherries will start to thaw slightly, releasing their juices and infusing the yogurt with a sweet-tart flavor. The vanilla adds a subtle depth that ties the flavors together.

    Step 3: Top with Cereal and Chocolate
    Sprinkle the chocolate cereal and chocolate chips on top. The cereal provides a delightful crunch, while the chocolate chips melt slightly, creating pockets of rich chocolatey flavor.

    Step 4: Drizzle with Almond Butter
    Using a spoon, drizzle the almond butter over the top. This step not only adds a nutty flavor but also increases the dish’s protein content, making it even more satisfying.

    Step 5: Mix and Enjoy
    Gently mix all the ingredients together until you have a beautiful, marbled effect. Enjoy immediately for the best texture and flavor.

    Common Mistakes to Avoid

    Even a simple dish like this can have its pitfalls. Here’s how to steer clear of them:

    • Overmixing: Mixing too vigorously can break down the cherries too much, leading to a mushy texture. Stir gently to maintain a pleasant consistency.
    • Using sweetened yogurt: Opting for sweetened yogurt can make the dish overly sweet. Stick to unsweetened to control the sugar levels.
    • Skipping the almond butter: This ingredient is crucial for the protein content and flavor balance. If nut allergies are a concern, consider using sunflower seed butter instead.

    How to Store & Reheat

    While this dish is best enjoyed fresh, you can prepare it in advance. Store any leftovers in an airtight container in the refrigerator for up to 2 days. Before consuming, give it a quick stir to redistribute the ingredients. If the yogurt has thickened too much, add a splash of milk or water to loosen it up.

    Ingredient Substitutions

    Need to make some swaps? Here’s how:

    • Greek yogurt: Substitute with any plant-based yogurt for a vegan version.
    • Frozen cherries: Fresh cherries or berries like strawberries or raspberries work well.
    • Almond butter: Peanut butter or sunflower seed butter can be used as alternatives.
    • Chocolate cereal: Granola or crushed nuts make excellent crunchy substitutes.

    Nutrition Facts

    • Calories: 393 kcal
    • Protein: 30g
    • Fat: 18g
    • Carbohydrates: 35g
    • Serving Size: 1 bowl

    Frequently Asked Questions

    • Can I use fresh cherries instead of frozen?
      Yes, fresh cherries can be used, but the texture will be slightly different. Frozen cherries provide a nice chill and juiciness when they thaw.
    • Is this recipe suitable for vegans?
      With a few substitutions like plant-based yogurt and omitting cottage cheese, you can easily make it vegan.
    • How can I add more protein?
      Consider adding a scoop of protein powder to the yogurt mixture or increasing the amount of cottage cheese.
    • What if I don’t have chocolate cereal?
      You can use granola or any crunchy cereal you have on hand as a substitute.

  • CHEAT DAY: Decadent Chocolate Peppermint Protein Delights!

    CHEAT DAY: Decadent Chocolate Peppermint Protein Delights!

    Introduction & My Personal Story

    Let me take you back to a crisp winter’s afternoon, the kind that demands a cozy sweater and a warm mug of cocoa. I was browsing through a local market when the festive scents of peppermint and chocolate wafted through the air, instantly evoking memories of holidays past. This was the moment the idea for my Decadent Chocolate Peppermint Protein Delights was born. In my 5 years of experience as a chef, I’ve always believed that indulgence and nutrition can coexist harmoniously, and these protein balls are a testament to that belief. They remind me of the joy of sneaking a piece of peppermint bark from the holiday cookie tray, but with a nutritious twist that aligns with my fitness goals. What started as a simple experiment in my kitchen has evolved into a beloved cheat day indulgence, offering the perfect balance of rich chocolate, refreshing peppermint, and a protein punch. These little delights have become a staple in my home, especially during the festive season, and I’m thrilled to share the recipe with you.

    Why You’ll Love This Recipe

    • No-Bake: No oven required, making it a quick and easy treat.
    • High-Protein: Each ball is packed with protein to fuel your day.
    • Festive Flavor: Chocolate and peppermint create a classic holiday taste.
    • Healthy Indulgence: Satisfies sweet cravings without derailing your diet.
    • Make-Ahead: Perfect for preparing in advance and storing for a quick snack.

    Detailed Ingredients

    • 1 cup (150g) **Medjool dates**, pitted
    • 1/2 cup (60g) **oat flour**
    • 1/4 cup (25g) **cacao powder**
    • 1/2 cup (50g) **chocolate protein powder**
    • 2 tablespoons **maple syrup**
    • 1/4 cup (60g) **nut butter** (almond or peanut)
    • 1/4 teaspoon **sea salt**
    • 1 teaspoon **peppermint extract**
    • 1/2 cup (90g) **dark chocolate chips**
    • 1 tablespoon **coconut oil**
    • 2 tablespoons **crushed candy canes** or **flaky sea salt** for topping

    Step-by-Step Instructions

    Step 1: Begin by gathering your ingredients. Ensure your **Medjool dates** are pitted and soft. If they feel a bit dry, soak them in warm water for about 10 minutes to rehydrate.

    Step 2: In a food processor, combine the **dates**, **oat flour**, **cacao powder**, **chocolate protein powder**, **maple syrup**, **nut butter**, **sea salt**, and **peppermint extract**. Blend the mixture until it forms a thick, sticky dough. Chef’s Tip: If your dough seems too dry, add a splash of water and pulse again until the desired consistency is achieved.

    Step 3: Using your hands, scoop out portions of the mixture and roll them into evenly sized balls. Place each ball onto a parchment-lined plate or tray. This should yield approximately 12-15 balls, depending on size.

    Step 4: In a microwave-safe bowl, combine the **dark chocolate chips** and **coconut oil**. Microwave in 30-second intervals, stirring between each, until the chocolate is fully melted and smooth. Stir in the **peppermint extract** to enhance the flavor.

    Step 5: Dip each protein ball into the melted chocolate, allowing any excess to drip off before placing it back on the parchment. Immediately sprinkle with **crushed candy canes** or **flaky sea salt** for a festive touch.

    Step 6: Refrigerate the chocolate-coated balls for about 15-20 minutes, or until the chocolate has set and hardened.

    Common Mistakes to Avoid

    • Dry Dough: If the dough is too dry, it won’t hold together. Add a bit more water or syrup to achieve the right consistency.
    • Over-Melting Chocolate: Be cautious not to overheat the chocolate as it can seize. Use short intervals in the microwave and stir often.
    • Uneven Balls: For uniform balls, use a small cookie scoop to portion the dough evenly.

    How to Store & Reheat

    Store these protein delights in an airtight container in the refrigerator for up to one week. For longer storage, you can freeze them for up to three months. To enjoy, simply take them out of the freezer and let them sit at room temperature for a few minutes before eating.

    Ingredient Substitutions

    • Dates: If you don’t have Medjool dates, use regular dates or dried figs, but ensure they’re soft.
    • Nut Butter: Swap almond or peanut butter with sunflower seed butter for a nut-free option.
    • Oat Flour: You can substitute with almond flour for a gluten-free version.

    Nutrition Facts

    • Calories: 150 per ball
    • Protein: 6g
    • Fat: 7g
    • Carbohydrates: 20g
    • Serving Size: 1 ball

    Frequently Asked Questions

    • Can I make these vegan? Yes, ensure all ingredients, including chocolate chips and protein powder, are vegan-friendly.
    • What if I don’t have a food processor? You can try using a blender, but you may need to work in smaller batches.
    • How do I make the balls firmer? Refrigerate them for longer before dipping in chocolate.
    • Can I add other flavors? Absolutely! Try adding a dash of vanilla extract or a pinch of cinnamon for variation.

  • CHEAT DAY: Sinfully Delicious Snickerdoodle Protein Balls!

    CHEAT DAY: Sinfully Delicious Snickerdoodle Protein Balls!

    Introduction & My Personal Story

    Ah, the blissful aroma of cinnamon and sugar wafting through the kitchen. If there’s one cheat day indulgence that never fails to bring a smile to my face, it’s **Snickerdoodle Protein Balls**. My journey with these little bites of heaven began a few years ago when I was trying to find a way to satisfy my sweet tooth without completely derailing my fitness goals. In my 5 years of experience as a chef, I’ve learned that the key to enjoying your food is all about balance and creativity. So, I set out to craft a recipe that offers the best of both worlds: the nostalgic taste of a classic snickerdoodle cookie paired with the nutritious boost of a protein-packed snack.

    I remember my first attempt at these delightful treats. I was skeptical, unsure if I could truly capture the essence of a snickerdoodle in a healthy form. But as I rolled the dough into perfect little spheres and coated them in a cinnamon-sugar mix, I knew I was onto something special. The first bite was a revelation—a delightful, chewy texture with just the right amount of sweetness. These **Snickerdoodle Protein Balls** became an instant hit not only with me but with everyone I shared them with. Now, they’re a staple in my kitchen, especially when I need a quick, satisfying treat that doesn’t compromise my health goals.

    Why You’ll Love This Recipe

    • Quick and easy: No baking required, ready in under 30 minutes.
    • Nutritious: Packed with protein to fuel your day.
    • Customizable: Easily adjust ingredients to suit dietary needs.
    • Convenient: Perfect for meal prep and on-the-go snacking.
    • Delicious: All the flavors of a classic snickerdoodle in a guilt-free form.

    Detailed Ingredients

    • 1 cup rolled oats (100g) – Look for gluten-free if needed.
    • 1/2 cup oat flour (60g) – Provides a smooth texture.
    • 1/2 cup vanilla protein powder (60g) – Choose your favorite brand for best results.
    • 1/2 cup cashew butter (120g) – Creamy and rich, or swap with almond butter.
    • 1/4 cup maple syrup (60ml) – Adds natural sweetness.
    • 1 tsp vanilla extract – For that classic snickerdoodle flavor.
    • 1 tsp ground cinnamon – Essential for the snickerdoodle taste.
    • 1/4 tsp salt – Enhances all the flavors.
    • 2-3 tbsp almond milk – To adjust the dough consistency.
    • 1/4 cup coconut sugar (50g) – For the coating.

    Step-by-Step Instructions

    Step 1: Gather and Measure – Before you begin, gather all your ingredients and measure them out precisely. This will make the process smooth and ensure consistency in your protein balls.

    Step 2: Mix the Base – In a medium bowl, combine **rolled oats**, **oat flour**, **vanilla protein powder**, **cashew butter**, **maple syrup**, **vanilla extract**, **cinnamon**, and **salt**. Stir with a sturdy spoon until a thick dough forms. If the mixture feels too dry, gradually add **almond milk** until it comes together. The dough should be pliable but not sticky.

    Step 3: Form the Balls – Using a small cookie scoop or tablespoon, portion out the dough and roll it between your hands to form smooth balls, about 1 inch in diameter. This recipe should yield approximately 12-15 balls.

    Step 4: Prepare the Coating – In a shallow bowl, mix together **coconut sugar** and an extra dash of **cinnamon**. This will give your protein balls that iconic snickerdoodle finish.

    Step 5: Coat the Balls – Roll each **protein ball** in the cinnamon sugar mixture until fully coated. Ensure an even coating for the best flavor and texture.

    Step 6: Chill and Enjoy – Place the coated balls in the fridge for 15-20 minutes to firm up. This step is crucial for the flavors to meld together and for the balls to hold their shape.

    Common Mistakes to Avoid

    • Overmixing the dough: This can lead to a tough texture. Mix just until combined.
    • Skipping the chilling step: Without chilling, the balls may fall apart.
    • Using dry ingredients: Ensure your nut butter is creamy and fresh for the best consistency.

    How to Store & Reheat

    Refrigerate: Store your **Snickerdoodle Protein Balls** in an airtight container in the fridge for up to one week. This keeps them fresh and chewy.

    Freeze: For longer storage, place the balls in a freezer-safe container. They can be frozen for up to three months. To enjoy, simply thaw them in the fridge overnight or at room temperature for about 30 minutes.

    Ingredient Substitutions

    • Nut Butter: Swap cashew butter with almond or peanut butter for a different flavor profile.
    • Sweetener: Replace maple syrup with honey or agave for a different sweetness level.
    • Flour: Use almond flour instead of oat flour for a grain-free option.

    Nutrition Facts

    • Calories: 150 per ball
    • Protein: 5g
    • Fat: 7g
    • Carbohydrates: 18g
    • Serving Size: 1 ball

    Frequently Asked Questions

    • Can I make these vegan? Yes, use a plant-based protein powder and ensure your sweeteners are vegan-friendly.
    • How can I make this recipe gluten-free? Use certified gluten-free oats and oat flour.
    • What if I don’t have coconut sugar? Regular granulated sugar or brown sugar can be used for the coating.
    • Are these suitable for kids? Absolutely! They’re a great healthy snack option for children.
    • Can I double the recipe? Yes, this recipe scales well. Just ensure you have a large enough bowl for mixing.

  • CHEAT DAY: Sugar Cookie Protein Balls that Delight!

    CHEAT DAY: Sugar Cookie Protein Balls that Delight!

    Introduction & My Personal Story

    Ah, sugar cookies! They take me back to the comforting aroma of my grandmother’s kitchen. Every Sunday after church, she’d bake a batch of the most delightful sugar cookies, filling the house with a sweet, buttery fragrance that could only be described as pure joy. Fast forward a few decades, and as a professional chef with a passion for health-conscious cooking, I’ve found a way to enjoy the nostalgia of those sugar cookies while keeping my fitness goals in check. Enter the **Sugar Cookie Protein Balls**! These little delights are the perfect cheat day treat that won’t derail your health journey. In my 5 years of experience crafting protein-packed snacks, these protein balls are a standout. They offer the same satisfying sweetness and buttery flavor of traditional sugar cookies, but with the added benefit of muscle-building protein. Whether you’re a fitness enthusiast or just someone who loves a guilt-free treat, these no-bake wonders are sure to become a staple in your kitchen.

    Why You’ll Love This Recipe

    • Quick and easy – no oven required!
    • Packed with protein to support muscle recovery.
    • Perfect for a cheat day without the guilt.
    • Customizable with your favorite add-ins.
    • Kid-friendly and great for on-the-go snacking.

    Detailed Ingredients

    For the best **Sugar Cookie Protein Balls**, you’ll need the following ingredients:

    • 1 cup of sugar cookie protein powder: Look for a high-quality protein powder that mimics the taste of sugar cookies.
    • 1/2 cup of almond flour: Provides a nutty flavor and a nice texture. Ensure it’s finely ground.
    • 1/4 cup of natural sweetener: Options include stevia, monk fruit, or erythritol.
    • 1/4 cup of almond butter: Choose a creamy variety for smooth consistency.
    • 1/4 cup of unsweetened almond milk: Adds moisture and helps bind the ingredients together.
    • 1/4 cup of mini chocolate chips: For a touch of indulgence. Dark chocolate works best.

    Step-by-Step Instructions

    Step 1: Start by grabbing a large mixing bowl. Add **1 cup of sugar cookie protein powder**, **1/2 cup of almond flour**, and **1/4 cup of natural sweetener**. Mix these dry ingredients together until they are evenly combined.

    Step 2: Next, incorporate the wet ingredients. Add **1/4 cup of almond butter** and **1/4 cup of unsweetened almond milk** into the bowl. Using a spatula or your hands, mix everything together until a dough begins to form. The consistency should be slightly sticky but firm enough to hold its shape.

    Step 3: Time to add a bit of fun! Gently fold in **1/4 cup of mini chocolate chips**. Make sure they’re evenly distributed throughout the dough for a bite of chocolate in every ball.

    Step 4: Roll the dough into small balls, about 1 inch in diameter. Chef’s Tip: Lightly dampen your hands with water to prevent the dough from sticking.

    Step 5: Place the rolled balls onto a parchment-lined tray. Ensure they are not touching, as this will help them chill evenly.

    Step 6: Refrigerate the protein balls for at least 30 minutes. This allows them to firm up and enhances the flavors.

    Common Mistakes to Avoid

    • Using the wrong protein powder: Not all protein powders are created equal. Make sure to use one specifically flavored like sugar cookies for the best taste.
    • Skipping the chilling step: This is crucial for the balls to hold their shape and achieve the right texture.
    • Overmixing: Mixing too vigorously can make the dough too dense. Stir just until combined.
    • Inadequate binding: If the dough is too crumbly, add a touch more almond milk.

    How to Store & Reheat

    These protein balls are best stored in an airtight container in the refrigerator. They will stay fresh for up to a week. If you want to keep them longer, they can be frozen for up to 3 months. Just thaw them in the fridge overnight before enjoying. Since these are no-bake treats, there’s no need to reheat them. Simply grab and enjoy!

    Ingredient Substitutions

    • Almond flour: Can be replaced with oat flour for a different texture.
    • Almond butter: Swap with peanut butter or sunflower seed butter if you have allergies.
    • Almond milk: Any plant-based milk like soy or coconut milk will work.
    • Chocolate chips: Use white chocolate chips or dried fruit for variation.

    Nutrition Facts

    • Calories: 150 per ball
    • Protein: 10g
    • Fat: 7g
    • Carbs: 12g
    • Serving Size: 1 ball

    Frequently Asked Questions

    Q: Can I make these protein balls vegan?

    A: Absolutely! Just ensure your protein powder is plant-based and use vegan chocolate chips.

    Q: How many protein balls should I eat for a snack?

    A: One to two balls make for a satisfying snack that can help curb hunger between meals.

    Q: Can I use a different type of flour?

    A: Yes, just keep in mind that the texture and taste might vary slightly with different flours.

    Q: What if my dough is too sticky?

    A: Add a bit more almond flour until the desired consistency is achieved.

  • CHEAT DAY: Holiday Cookie-Inspired Gingerbread Protein Balls!

    CHEAT DAY: Holiday Cookie-Inspired Gingerbread Protein Balls!

    Introduction & My Personal Story

    Ah, the holidays — a time when the air is filled with the comforting aroma of gingerbread and every corner of my kitchen seems to beckon with the promise of sweet indulgence. My journey with gingerbread protein balls started quite by accident during a particularly hectic December, about five years ago. The festive season was in full swing, and I was knee-deep in cookie dough, trying to balance a healthy lifestyle with the irresistible allure of holiday treats.

    One snowy afternoon, as I was preparing a batch of gingerbread cookies, it struck me — why not create a healthier, protein-packed version of these beloved treats? And just like that, the idea for these gingerbread protein balls was born. In my 5 years of experience, I’ve found that these little delights perfectly encapsulate the cozy, spicy flavors of traditional gingerbread, but with an added boost of protein to keep me energized through the holiday hustle. Every time I make them, I’m transported back to that snowy day, the kitchen filled with the warm, spicy scent of ginger and cinnamon. It’s a smell that feels like a hug from the past, reminding me of the joy of creating something both delicious and nourishing.

    Why You’ll Love This Recipe

    • Quick and easy to prepare — no baking required.
    • Packed with protein to keep you full and satisfied.
    • Perfect for a post-workout snack or a midday energy boost.
    • Combines the nostalgic flavors of gingerbread with a healthy twist.
    • Great for meal prep — make a batch and enjoy throughout the week.

    Detailed Ingredients

    Here’s everything you’ll need to whip up these festive gingerbread protein balls:

    • 1 cup (100 grams) rolled oats
    • 1/2 cup (60 grams) **vanilla protein powder**
    • 1/2 cup (125 grams) **cashew butter**
    • 1/4 cup (60 ml) **maple syrup**
    • 2 tablespoons (30 ml) **molasses**
    • 1 teaspoon **vanilla extract**
    • 1 teaspoon ground **ginger**
    • 1 teaspoon ground **cinnamon**
    • 1/4 teaspoon ground **nutmeg**
    • 1/4 teaspoon ground **cloves**
    • 1/4 teaspoon **salt**
    • 1/2 cup (90 grams) **white chocolate chips**
    • 1 tablespoon (15 ml) **coconut oil**

    When shopping, look for fresh spices and high-quality protein powder to ensure the best flavor and texture.

    Step-by-Step Instructions

    Let’s dive into the process of creating these delightful gingerbread protein balls, step by step.

    Step 1: Mix Ingredients

    In a medium bowl, combine 1 cup of rolled oats, 1/2 cup of vanilla protein powder, 1/2 cup of cashew butter, 1/4 cup of maple syrup, 2 tablespoons of molasses, and 1 teaspoon of vanilla extract. Add in the spices: 1 teaspoon each of ground ginger and cinnamon, along with 1/4 teaspoon each of ground nutmeg and cloves. Don’t forget the 1/4 teaspoon of salt to balance the sweetness. Stir these ingredients together until they form a cohesive, soft dough. It should have a sticky texture but be firm enough to hold its shape. If the dough feels too dry, add a splash more of maple syrup or water.

    Step 2: Form Balls

    With the dough ready, use a small cookie scoop or a tablespoon to portion it out. Roll each portion between your palms to form smooth, round balls. Aim for uniformity to ensure even chilling and a consistent bite. Place the formed balls on a plate or baking sheet lined with parchment paper to prevent sticking.

    Step 3: Melt Chocolate

    In a microwave-safe bowl, combine 1/2 cup of white chocolate chips with 1 tablespoon of coconut oil. Microwave in 15-second intervals, stirring in between, until the chocolate is fully melted and smooth. Be cautious not to overheat, as white chocolate can scorch easily.

    Step 4: Drizzle & Chill

    Drizzle the melted chocolate over the protein balls using a spoon for an artistic touch. If you’re feeling fancy, use a piping bag for precision. Once drizzled, transfer the plate to the refrigerator and allow the balls to chill for at least 30 minutes. This step is crucial for the chocolate to set and the flavors to meld together. Once firm, they’re ready to enjoy!

    Common Mistakes to Avoid

    Even the simplest recipes can have their pitfalls. Here are some common mistakes to watch out for:

    • Dry Dough: If your dough is too dry, add a bit more maple syrup or water to reach the right consistency.
    • Overheating Chocolate: Melt the chocolate slowly to avoid scorching. Stir frequently to ensure even melting.
    • Skipping Chill Time: Chilling is essential for the balls to hold their shape and for the chocolate to set properly.

    How to Store & Reheat

    To store your gingerbread protein balls, place them in an airtight container. They will keep well in the refrigerator for up to a week. If you’d like to enjoy them later, they can also be frozen for up to a month. To thaw, simply transfer them to the fridge overnight. There’s no need to reheat these treats — they’re best enjoyed chilled or at room temperature.

    Ingredient Substitutions

    Need to make a swap? Here are some safe substitutions:

    • Cashew Butter: Swap with almond butter or peanut butter for a different flavor profile.
    • Maple Syrup: Use honey or agave syrup as an alternative sweetener.
    • White Chocolate Chips: Dark chocolate or milk chocolate chips can be used if you prefer a less sweet option.

    Nutrition Facts

    Here’s a breakdown of the nutritional content per serving (based on a batch of 20 balls):

    • Calories: 120
    • Protein: 5 grams
    • Fat: 7 grams
    • Carbohydrates: 10 grams
    • Serving Size: 1 ball

    Frequently Asked Questions

    • Can I use another type of protein powder? Yes, any protein powder should work, but it may alter the flavor slightly.
    • Are these gluten-free? If you use certified gluten-free oats and protein powder, they can be.
    • Can I add extras like nuts or seeds? Certainly! Chopped nuts or seeds can add texture and extra nutrition.
    • How long can I store them? Up to a week in the fridge, or a month in the freezer.
    • What if I don’t like gingerbread spices? You can adjust the spice levels to your taste or try a different flavor combination.


  • CHEAT DAY: Irresistible Cranberry Orange Protein Delights

    CHEAT DAY: Irresistible Cranberry Orange Protein Delights

    Introduction & My Personal Story

    Let me take you back to a crisp autumn afternoon when I first stumbled upon the magical combination of cranberries and oranges. I was visiting a local farmer’s market, enjoying the vibrant array of fresh produce when I was struck by a wave of nostalgia. The sweet-tart scent of cranberries mingling with the citrusy aroma of fresh oranges immediately transported me back to my grandmother’s kitchen. She used to make a delightful cranberry-orange bread that would fill the house with warmth and joy. Those memories inspired me to create a modern twist on her classic recipe, but with a healthy, protein-packed spin. Enter the Cranberry Orange Protein Delights – a no-bake treat that satisfies both your sweet tooth and your nutritional needs. In my 5 years of experience as a chef, I’ve found that these little delights are perfect for a cheat day, a quick snack, or even a post-workout boost. They’re easy to make, require no baking, and are infused with the nostalgic flavors of cranberries and oranges. So, join me in this culinary journey and let’s create some delicious memories together.

    Why You’ll Love This Recipe

    • Quick and Easy: No baking required, ready in under 30 minutes.
    • Nutritious and Delicious: Packed with protein and healthy fats.
    • Customizable: Easily swap ingredients to suit dietary preferences.
    • Perfect for On-The-Go: A convenient snack for busy days.
    • Great for Meal Prep: Make a batch and enjoy throughout the week.

    Detailed Ingredients

    To make these Irresistible Cranberry Orange Protein Delights, gather the following ingredients:

    • 1 cup (90g) rolled oats
    • 1/2 cup (60g) vanilla protein powder
    • 1/2 cup (125g) cashew butter
    • 1/4 cup (60ml) maple syrup
    • Zest of 1 large orange
    • 1 teaspoon vanilla extract
    • 1/2 teaspoon ground ginger
    • 1/4 teaspoon sea salt
    • 1/3 cup (50g) chopped dried cranberries
    • 1/3 cup (60g) white chocolate chips
    • Optional: Splash of almond milk, if needed

    When shopping, look for fresh, plump cranberries and a bright, fragrant orange for the best zest. Quality cashew butter and vanilla protein powder will elevate the flavor and texture of these delights.

    Step-by-Step Instructions

    Step 1: Mix the Base
    In a large mixing bowl, combine the rolled oats, vanilla protein powder, cashew butter, maple syrup, orange zest, vanilla extract, ground ginger, and sea salt. Use a spatula or your hands to mix until the ingredients form a dough. It might feel thick at first, but keep mixing until everything is well integrated.

    Step 2: Add Festive Elements
    Fold in the chopped dried cranberries and white chocolate chips to the dough. Ensure they are evenly distributed for a consistent burst of flavor in each bite.

    Step 3: Adjust Consistency
    If the mixture seems too dry, add a splash of almond milk and mix again. The dough should be moist enough to hold together when pressed but not sticky.

    Step 4: Shape the Balls
    Using a cookie scoop, portion out the dough and roll each piece into a ball with your hands. Aim for uniform sizes to ensure even chilling.

    Step 5: Chill and Enjoy
    Place the rolled balls on a tray lined with parchment paper. Chill them in the refrigerator for 15-20 minutes to set. Once chilled, enjoy these protein delights as a quick snack or a guilt-free dessert.

    Common Mistakes to Avoid

    One common mistake is not mixing the dough thoroughly, which can result in uneven flavors. Make sure to mix until all ingredients are well incorporated. Another issue could be dryness in the mixture; if this happens, don’t hesitate to add a bit more almond milk to reach the desired consistency. Lastly, avoid using low-quality protein powder as it can affect both the taste and texture of the protein balls.

    How to Store & Reheat

    Store these protein balls in an airtight container in the refrigerator for up to 1 week. If you want to keep them longer, freeze them for up to 3 months. To enjoy, simply remove from the fridge and let them sit at room temperature for a few minutes, or if frozen, thaw in the fridge overnight.

    Ingredient Substitutions

    If you’re looking to change things up, here are some substitutions:

    • Swap cashew butter with almond butter or peanut butter for a different nutty flavor.
    • Use honey or agave syrup instead of maple syrup for a different sweetness profile.
    • Try dark chocolate chips in place of white chocolate chips for a richer taste.
    • For a gluten-free version, ensure your rolled oats are certified gluten-free.

    Nutrition Facts

    Here’s the nutritional breakdown for one serving (1 ball):

    • Calories: 120
    • Protein: 5g
    • Fat: 6g
    • Carbohydrates: 14g
    • Serving Size: 1 ball

    Frequently Asked Questions

    Q: Can I use a different type of protein powder?
    A: Yes, feel free to use your favorite protein powder, whether it’s whey, pea, or hemp. Just keep in mind that the flavor and texture might vary slightly.

    Q: Are these protein balls suitable for vegans?
    A: Absolutely! Just ensure your protein powder and chocolate chips are vegan-friendly.

    Q: How can I make these balls nut-free?
    A: Substitute the cashew butter with sunflower seed butter or tahini for a nut-free option.

    Q: Can I add other ingredients to the mix?
    A: Of course! Feel free to incorporate chia seeds, flaxseeds, or even a handful of nuts for added texture and nutrition.

  • CHEAT DAY: Funfetti Birthday Cake Protein Bliss Balls

    CHEAT DAY: Funfetti Birthday Cake Protein Bliss Balls

    Introduction & My Personal Story

    There’s something about the scent of vanilla and the sight of colorful sprinkles that takes me back to my childhood birthday parties. The excitement of blowing out candles, the laughter of friends, and the joy of indulging in a sweet treat without a care in the world. Fast forward to today, and while my metabolism may not be as forgiving, my love for those nostalgic flavors remains. Enter the Funfetti Birthday Cake Protein Bliss Balls – a delightful twist on a classic indulgence that fits perfectly into a modern, health-conscious lifestyle.

    In my 5 years of experience as a chef and food blogger, I’ve seen countless trends come and go, but the demand for healthy, guilt-free treats has only grown stronger. These protein bliss balls are not just a nod to the past but a testament to how we can enjoy the flavors we love while staying on track with our fitness goals. I remember the first time I made these; the kitchen was filled with the sweet aroma of vanilla, and as I rolled each ball, I couldn’t help but feel a sense of accomplishment. Not only were they delicious, but they were also packed with protein, making them the perfect post-workout snack or a ‘cheat day’ delight.

    Whether you’re looking to satisfy a sweet craving or need a quick energy boost, these Funfetti Bliss Balls have got you covered. Join me on this culinary journey as we recreate a beloved classic with a healthy twist.

    Why You’ll Love This Recipe

    • Quick and easy to make – no baking required!
    • High in protein, perfect for post-workout recovery.
    • Deliciously nostalgic with the flavors of vanilla and sprinkles.
    • Customizable to fit dietary needs and preferences.
    • Perfect for meal prep – make a batch and enjoy all week long.

    Detailed Ingredients

    For this recipe, you’ll need the following ingredients. Make sure to use high-quality products for the best results:

    • **1½ cups old fashioned rolled oats** – Look for oats that are whole and not instant for better texture.
    • **1 cup cashew butter** – Creamy, unsalted, and without added sugar is best.
    • **2 scoops (50-60 grams) vanilla protein powder** – Choose a brand you trust for taste and quality.
    • **¼ cup maple syrup** – Pure maple syrup adds natural sweetness.
    • **½ teaspoon vanilla extract** – Pure extract for authentic flavor.
    • **½ teaspoon almond extract** – Adds a subtle, nutty aroma.
    • **¼ teaspoon salt** – Balances the sweetness.
    • **¼ cup sprinkles** – Go for naturally colored options if possible.

    Step-by-Step Instructions

    Step 1: In a large mixing bowl, combine the **rolled oats**, **cashew butter**, **vanilla protein powder**, **maple syrup**, **vanilla extract**, **almond extract**, and **salt**. Mix thoroughly until a thick, cohesive dough forms. The mixture should be slightly sticky but hold its shape when pressed. Chef’s Tip: If the dough feels too dry, add a teaspoon of water or more maple syrup.

    Step 2: Gently fold in the **sprinkles**. This step is crucial for distributing the colorful bits evenly throughout each ball, ensuring that every bite is a funfetti surprise.

    Step 3: Using a small cookie scoop or your hands, form the dough into bite-sized balls. Aim for uniform size so they chill evenly. If the dough is sticking to your hands, lightly dampen them with water.

    Step 4: Place the formed balls onto a baking sheet lined with parchment paper. Chill in the refrigerator for 15-20 minutes to set. If you’re in a hurry, you can enjoy them immediately, but chilling helps them firm up and enhances the flavors.

    Common Mistakes to Avoid

    • **Too Dry or Crumbly Dough:** Ensure you’re measuring ingredients accurately. If the dough is too dry, a touch more maple syrup or a splash of milk can help.
    • **Overmixing:** Be gentle when folding in the sprinkles to prevent them from bleeding color.
    • **Uneven Sizes:** Use a cookie scoop for consistency to ensure even chilling.

    How to Store & Reheat

    Store these bliss balls in an airtight container in the refrigerator for up to a week. For longer storage, freeze them for up to three months. To enjoy, simply thaw them at room temperature for about 10 minutes. Chef’s Tip: These are best served slightly chilled, which enhances their chewy texture.

    Ingredient Substitutions

    • **Nut Butter:** Swap cashew butter with almond or peanut butter if desired.
    • **Sweetener:** Use honey or agave syrup as alternatives to maple syrup.
    • **Protein Powder:** Choose a plant-based protein powder for a vegan version.

    Nutrition Facts

    • Calories: 120 per ball
    • Protein: 5g
    • Fat: 7g
    • Carbs: 10g
    • Serving Size: 1 ball

    Frequently Asked Questions

    Q1: Can I make these bliss balls vegan?

    A1: Absolutely! Use a plant-based protein powder and ensure your sweetener is vegan-friendly.

    Q2: What if I don’t have almond extract?

    A2: You can omit it or add a little extra vanilla extract for flavor.

    Q3: Can I use quick oats instead of rolled oats?

    A3: Quick oats can be used, but the texture will be softer. Rolled oats provide a chewier consistency.

    Q4: Are there any other toppings I can add?

    A4: Yes! Mini chocolate chips, chopped nuts, or dried fruit can be mixed in for variety.