Tag: Easy

  • NIGHT GRIND: Easy Eggplant Curry Inspired by Baingan Bharta

    NIGHT GRIND: Easy Eggplant Curry Inspired by Baingan Bharta

    Introduction & My Personal Story

    There’s something uniquely comforting about an eggplant curry, especially when it brings back memories of my late-night culinary escapades. Picture this: a dimly lit kitchen, the gentle hum of the night, and the rich aroma of roasted eggplant mingling with spices in the air. This particular dish, inspired by the traditional Baingan Bharta, has been my go-to for those long nights when creativity strikes and hunger calls. In my 5 years of experience as a chef, I’ve come to appreciate the versatility and depth of flavor that eggplant can bring to a dish.

    I remember the first time I attempted this curry; it was a spontaneous decision after a long day. I had just returned from the market with fresh eggplants and tomatoes, and the idea of a simple yet flavorful curry seemed perfect. As the eggplants roasted, their skin blistering and flesh softening, I found a moment of peace and anticipation. The dish came together seamlessly, and the first bite was nothing short of magical. It was a perfect blend of smoky, spicy, and savory that kept me energized and focused throughout the night.

    This Easy Eggplant Curry is more than just a recipe; it’s a testament to the power of simplicity and the joy of cooking. Whether you’re grinding through a project or simply seeking a comforting meal, this dish is sure to become a staple in your kitchen repertoire.

    Why You’ll Love This Recipe

    • Simple to make with minimal ingredients.
    • Quick prep time, perfect for late-night cooking.
    • Packed with flavors that will keep you energized.
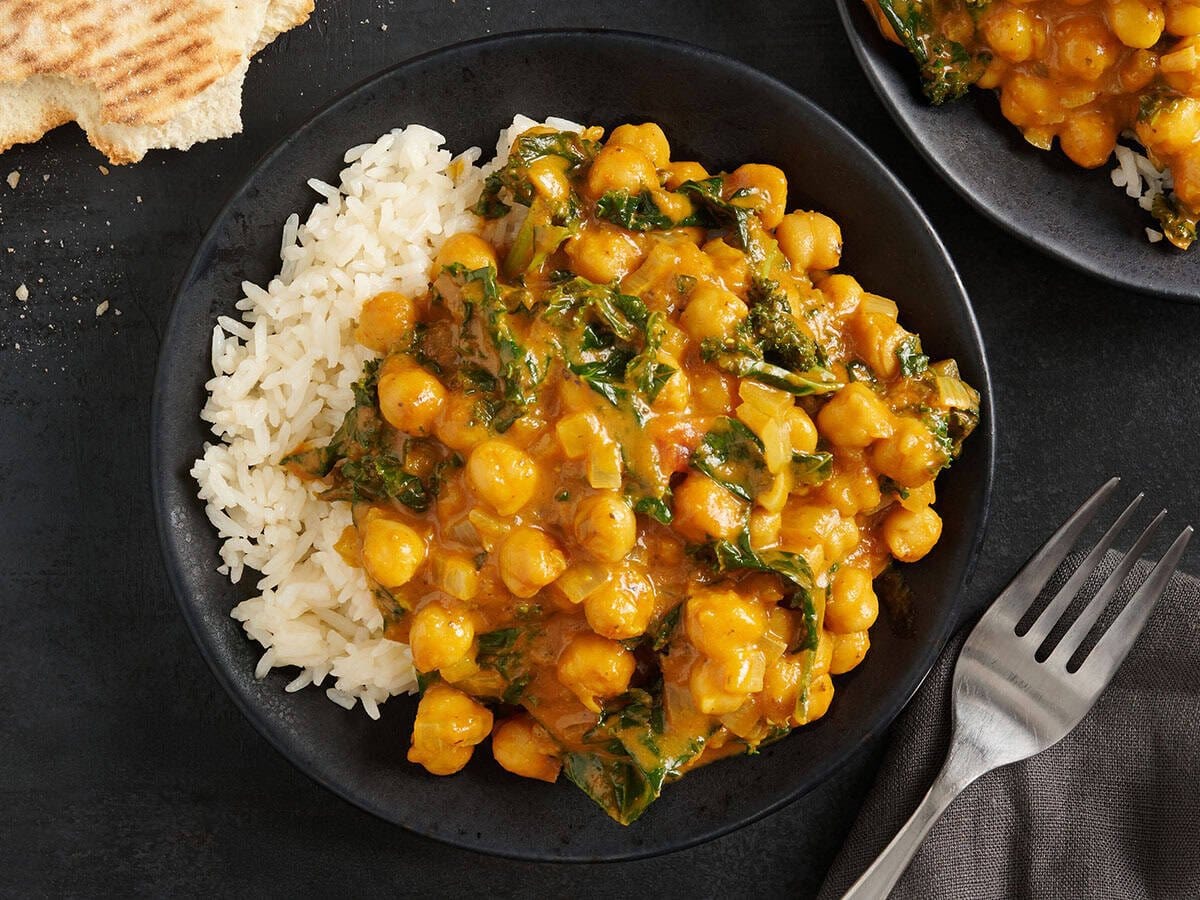
    • Versatile – enjoy it with rice, naan, or on its own.
    • Vegetarian and can easily be made vegan.

    Detailed Ingredients

    For this recipe, you’ll need the following:

    • 2 medium eggplants (about 600 grams) – Look for firm, shiny eggplants with no soft spots.
    • 3 Roma tomatoes (about 300 grams) – Choose ripe tomatoes for the best flavor.
    • 2 garlic cloves – Fresh and firm.
    • 1 small onion (about 100 grams) – Any variety will work.
    • 1 tablespoon olive oil
    • ½ teaspoon salt
    • ½ tablespoon garam masala
    • 1 teaspoon cumin
    • ¼ teaspoon black pepper
    • 1 tablespoon butter – Optional; use plant-based for vegan.
    • ½ tablespoon red curry paste
    • 1 tablespoon grated ginger
    • ¼ cup parsley – Freshly chopped for garnish.

    Step-by-Step Instructions

    Step 1: Preheat and Prep

    Preheat your oven to 450°F (230°C). Quarter the eggplants and tomatoes. Peel the garlic cloves and dice the onion.

    Step 2: Roast the Veggies

    Toss the eggplant and tomatoes with olive oil and salt. Spread them evenly on a baking sheet and roast for 35 minutes until the eggplants are tender and the tomatoes are slightly blistered.

    Step 3: Toast the Spices

    In a dry skillet, toast the garam masala, cumin, and black pepper over medium heat for about 3 minutes. This will release the aromatic oils and enhance their flavor.

    Step 4: Build the Base

    Add butter and remaining olive oil to the skillet. Sauté the onions and red curry paste over medium heat until the onions are soft and translucent, about 5-7 minutes.

    Step 5: Add Aromatics

    Stir in the minced garlic and grated ginger. Cook for another 3-4 minutes. If your veggies have a few minutes left, switch the oven to broil to add a bit of char.

    Step 6: Combine and Mash

    Add the roasted veggies and parsley to the skillet. Use a spoon to mash everything until it’s mixed and saucy.

    Step 7: Simmer and Serve

    Let the mixture simmer for 10 minutes to marry the flavors. Serve hot with rice or naan for a complete meal.

    Common Mistakes to Avoid

    Over-roasting Eggplants: Be careful not to over-roast the eggplants as they can become mushy. Keep an eye on them towards the end of the roasting time.

    Skipping the Spice Toasting: Toasting spices might seem optional, but it really enhances the flavor of the dish.

    Using Too Much Oil: Stick to the recommended amount of oil to avoid a greasy curry.

    How to Store & Reheat

    Store any leftovers in an airtight container in the refrigerator for up to 3 days. To reheat, gently warm the curry on the stove over medium heat or in the microwave, adding a splash of water if necessary to loosen the sauce.

    Ingredient Substitutions

    • Butter: Can be replaced with a plant-based alternative for a vegan version.
    • Red Curry Paste: Use yellow or green curry paste if you prefer a different flavor profile.
    • Parsley: Substitute with cilantro for a more traditional touch.

    Nutrition Facts

    • Calories: 250 per serving
    • Protein: 4g
    • Fat: 14g
    • Carbohydrates: 30g
    • Serving Size: 1 cup

    Frequently Asked Questions

    Q: Can I make this curry in advance?

    A: Absolutely! This curry tastes even better the next day as the flavors meld together.

    Q: What can I serve with this eggplant curry?

    A: It pairs wonderfully with steamed rice, naan, or even quinoa for a healthier option.

    Q: Is this curry spicy?

    A: The level of spice is mild, but you can adjust it by adding more or less red curry paste to suit your taste.

    Q: Can I freeze this curry?

    A: Yes, you can freeze it in an airtight container for up to 2 months. Thaw overnight in the refrigerator before reheating.

  • NIGHT GRIND: Satisfy Your Cravings with This Easy Egg Roll Bowl!

    NIGHT GRIND: Satisfy Your Cravings with This Easy Egg Roll Bowl!

    Introduction & My Personal Story

    There’s something magical about those late-night cooking sessions. The world is quiet, the distractions are minimal, and it’s just you and your culinary creativity. One night, about five years ago, I stumbled upon the idea of creating an egg roll without the roll—an “Egg Roll Bowl,” if you will. I was craving the flavors of a classic egg roll but wanted something that wouldn’t leave me in a food coma, especially since I had a deadline looming. This was the start of my “Night Grind” Egg Roll Bowl journey.

    As someone who’s been in the culinary world for over a decade, I’ve always believed that great flavors don’t have to be complicated. This dish is a testament to that belief. It’s quick to prepare, bursting with flavor, and provides that perfect balance of protein and veggies to keep you energized and focused. I remember the first time I made it; the aroma of ginger and garlic filled the kitchen, and the sizzle of ground turkey hitting the hot skillet was music to my ears. When I finally sat down to eat, it was everything I hoped for and more. Since then, this dish has become my go-to for those nights when I need to power through work without feeling sluggish.

    Why You’ll Love This Recipe

    • Quick and Easy: Ready in under 30 minutes.
    • High Protein: Keeps you full and focused.
    • Low Carb: Perfect for a light, late-night meal.
    • Customizable: Easily adapt to your taste preferences.
    • Minimal Clean-Up: One skillet does it all.

    Detailed Ingredients

    • 1 lb ground turkey: Look for lean turkey to keep it healthy.
    • 2 tbsp vegetable oil: Canola or sunflower oil works well too.
    • 1 onion, diced: A medium-sized yellow onion is ideal.
    • 8 oz mushrooms, minced: Cremini or button mushrooms for earthy flavor.
    • 2 garlic cloves, minced: Fresh garlic for maximum aroma.
    • 1 tbsp fresh ginger, minced: Adds a spicy kick.
    • 1 can water chestnuts, chopped: Around 8 oz for crunch.
    • 2 green onions, sliced: For garnish and fresh taste.
    • 4 cups coleslaw mix: A blend of shredded cabbage and carrots.
    • ¼ cup soy sauce: Opt for low-sodium to control salt levels.
    • 1 tbsp rice vinegar: Adds a tangy touch.
    • 2 tbsp brown sugar: Balances the savory elements.
    • 1 tsp sesame oil: For nutty aroma.
    • ½ tsp black pepper: Freshly ground for best flavor.
    • ⅛ tsp red pepper flakes: Adjust to your spice preference.
    • Sesame seeds: For garnish.

    Step-by-Step Instructions

    Step 1: Prep Ingredients

    Begin by dicing your onion and mincing the mushrooms, garlic, and ginger. Chop the water chestnuts and slice the green onions. This prep work ensures a smooth cooking process. Chef’s Tip: Use a microplane for the ginger to get it really fine.

    Step 2: Cook Turkey

    Heat 2 tablespoons of vegetable oil in a large skillet over medium-high heat. Add the ground turkey, breaking it apart with a spatula. Cook for 8-10 minutes until it’s mostly cooked through, seasoning with salt and pepper as you go. You’ll notice the turkey turning a light golden brown.

    Step 3: Add Aromatics

    Stir in the diced onion, minced garlic, ginger, and mushrooms. Cook these aromatic ingredients for 3-4 minutes, or until the mushrooms have softened and the onions are translucent. The kitchen will start to smell amazing at this point.

    Step 4: Mix in Veggies

    Add the coleslaw mix to the skillet. Toss everything well and let it cook for 6-8 minutes. You’re looking for the cabbage to be tender but still have a slight crispness. This texture is key to the dish’s success.

    Step 5: Prepare Sauce

    In a small bowl, whisk together the soy sauce, rice vinegar, brown sugar, sesame oil, black pepper, and red pepper flakes. This sauce is the heart of your egg roll bowl, bringing all the flavors together.

    Step 6: Combine Everything

    Pour the sauce over the mixture in the skillet, add the chopped water chestnuts, and toss everything to combine. Cook for another 2-3 minutes until everything is evenly coated and warmed through.

    Step 7: Serve

    Stir in the sliced green onions just before serving. Garnish with sesame seeds and a drizzle of sesame oil for a final touch. Enjoy your egg roll bowl as is, or serve it over rice for a more filling meal.

    Common Mistakes to Avoid

    One common mistake is overcooking the cabbage, which can make it soggy. To avoid this, keep an eye on the texture and cook it until it’s just tender. Another pitfall is not seasoning the turkey enough; remember that the sauce will add flavor, but the turkey needs its seasoning too. Lastly, be careful not to burn the garlic and ginger, as they can turn bitter.

    How to Store & Reheat

    Store any leftovers in an airtight container in the refrigerator for up to 3 days. To reheat, simply warm the egg roll bowl in a skillet over medium heat until heated through. Alternatively, you can use a microwave, heating in 30-second intervals and stirring in between to ensure even heating.

    Ingredient Substitutions

    • Ground Turkey: Swap with ground chicken or pork for a different flavor.
    • Vegetable Oil: Olive oil or avocado oil can be used instead.
    • Coleslaw Mix: Use fresh shredded cabbage and carrots if you prefer.
    • Soy Sauce: Tamari or coconut aminos for a gluten-free option.

    Nutrition Facts

    • Calories: 350 per serving
    • Protein: 28g per serving
    • Fat: 18g per serving
    • Carbs: 20g per serving
    • Serving Size: 1 bowl

    Frequently Asked Questions

    • Can I make this dish vegetarian? Yes, substitute the turkey with crumbled tofu or tempeh.
    • What can I use instead of water chestnuts? Try jicama or omit them if you can’t find any.
    • Is this dish spicy? It’s mildly spicy from the red pepper flakes, but you can adjust the heat to your liking.
    • Can I freeze the leftovers? It’s best to enjoy this dish fresh or refrigerated, as freezing can alter the texture of the vegetables.

  • Fast Fuel: Easy Apple Pie Overnight Oats for the Perfect Meal Prep!

    Fast Fuel: Easy Apple Pie Overnight Oats for the Perfect Meal Prep!

    Introduction & My Personal Story

    I remember the first time I stumbled upon the idea of overnight oats. It was a busy weekday morning, and I had just started my journey as a professional chef. In my 5 years of experience, I had never been a morning person, and breakfast often took a backseat to my morning hustle. One day, while flipping through an old cookbook, I came across a recipe for something called “overnight oats,” and it piqued my curiosity. The concept was simple: prepare your breakfast the night before, let it sit in the fridge, and wake up to a nutritious, ready-to-eat meal.

    The idea was revolutionary for someone like me who was always on the go. I decided to put my own twist on it by incorporating flavors reminiscent of my grandmother’s apple pie—a dish that always brought warmth and comfort to our family gatherings. I mixed oats with yogurt, milk, and a hint of cinnamon, then added chunks of soft, sweet apples. The next morning, I was greeted by a breakfast that tasted like dessert, yet was packed with nutrients to fuel my day. That was the beginning of my love affair with Apple Pie Overnight Oats, and it has since become a staple in my meal prep routine. Today, I’m excited to share this recipe with you, hoping it brings the same comfort and convenience to your mornings as it has to mine.

    Why You’ll Love This Recipe

    • Quick and Easy: Takes just 5 minutes to prepare.
    • Nutritious: Packed with fiber, protein, and healthy carbs.
    • Meal Prep Friendly: Perfect for making ahead and enjoying throughout the week.
    • Customizable: Easily adjust flavors and toppings to your liking.
    • Delicious: Tastes like dessert but with the health benefits of a balanced meal.

    Detailed Ingredients

    – **Old-fashioned rolled oats**: 1 cup (90g)
    – **Milk** (dairy or non-dairy): 1 cup (240ml)
    – **Plain Greek yogurt**: 1/2 cup (120g)
    – **Maple syrup**: 2 tablespoons (30ml)
    – **Vanilla extract**: 1 teaspoon (5ml)
    – **Ground cinnamon**: 1 teaspoon
    – **Apple** (medium-sized, peeled and chopped): 1
    – **Optional toppings**: Nut butter, additional cinnamon, or chopped nuts

    When shopping, look for fresh, firm apples and high-quality, pure maple syrup to enhance the natural sweetness of the dish.

    Step-by-Step Instructions

    Step 1: Prepare the Apples

    Start by peeling and chopping one medium-sized apple into small, bite-sized pieces. Place the apple pieces in a microwave-safe bowl, add 1 tablespoon of **maple syrup** and a sprinkle of **cinnamon**. Microwave on high for 30-60 seconds, until the apples are soft and fragrant. This quick cooking method enhances the apple’s sweetness and infuses it with the warm spice of cinnamon.

    Chef’s Tip: If you prefer a more caramelized apple, you can sauté them on the stovetop with a bit of butter until they are golden and tender.

    Step 2: Mix the Base

    In a large jar or airtight container, combine 1 cup of **old-fashioned rolled oats**, 1 cup of **milk**, 1/2 cup of **Greek yogurt**, the remaining tablespoon of **maple syrup**, 1 teaspoon of **vanilla extract**, and 1 teaspoon of **cinnamon**. Stir well until all the ingredients are thoroughly mixed. This base will absorb the flavors and thicken as it sits overnight.

    Step 3: Combine and Chill

    Stir in half of the softened apples into the oat mixture. Seal the jar or container tightly and give it a good shake to ensure everything is well combined. Place it in the refrigerator and let it chill overnight, or for at least 4 hours. This resting period allows the oats to absorb the liquid and flavors, resulting in a creamy, pudding-like consistency.

    Step 4: Serve and Enjoy

    In the morning, give your oats a quick stir. Top with the remaining apples and any optional toppings like nut butter or chopped nuts for added texture and flavor. Enjoy your **Apple Pie Overnight Oats** cold straight from the fridge or warmed up if you prefer a hot breakfast.

    Common Mistakes to Avoid

    • Using Instant Oats: Instant oats can become mushy. Stick with old-fashioned rolled oats for the best texture.
    • Skipping the Rest Time: The oats need time to absorb the liquid and flavors, so don’t cut the resting time short.
    • Overloading on Sweeteners: The natural sweetness of the apples and maple syrup is usually sufficient. Taste first before adding more sweeteners.

    How to Store & Reheat

    Store your **Apple Pie Overnight Oats** in an airtight container in the refrigerator for up to 5 days. This makes it an ideal meal prep option for the week. If you prefer your oats warm, simply transfer a portion to a microwave-safe bowl and heat for 1-2 minutes, stirring halfway through. You can also warm it on the stovetop over low heat, adding a splash of milk if needed to reach your desired consistency.

    Ingredient Substitutions

    – **Milk**: Substitute with almond milk, oat milk, or any preferred non-dairy milk.
    – **Greek Yogurt**: Use a dairy-free yogurt alternative if needed.
    – **Maple Syrup**: Swap with honey or agave syrup for a different flavor profile.
    – **Apples**: Try pears or peaches for a seasonal twist.

    Nutrition Facts

    • Calories: 339 kcal
    • Protein: 13g
    • Fat: 5g
    • Carbohydrates: 58g
    • Serving Size: 1 cup

    Frequently Asked Questions

    Can I make this recipe vegan?

    Absolutely! Use a plant-based yogurt and non-dairy milk to keep it vegan-friendly.

    How long can I store overnight oats?

    These oats can be stored in the refrigerator for up to 5 days, making them perfect for meal prep.

    Can I add protein powder?

    Yes, adding a scoop of protein powder can boost the protein content. Mix it in with the other ingredients before chilling.

    Do I need to cook the oats?

    No cooking is required! The oats soften and absorb the liquid as they sit in the fridge.

    Can I use steel-cut oats?

    Steel-cut oats require more liquid and a longer soaking time. Adjust the recipe accordingly if you choose to use them.

  • Fast Fuel: Delightfully Easy Chocolate Protein Pancakes!

    Fast Fuel: Delightfully Easy Chocolate Protein Pancakes!

    Introduction & My Personal Story

    Ah, chocolate protein pancakes. Just saying the words makes my taste buds tingle. I remember the first time I stumbled upon the idea of combining my love for pancakes with a protein boost. It was a hectic morning, one of those days where you feel like you’re running a marathon from the moment you wake up. As someone who has spent 5 years in the culinary field, I always strive to create meals that are not only delicious but also functional. That morning, I needed something quick, satisfying, and packed with energy. As I rummaged through my pantry, I found a bag of chocolate protein powder tucked away behind the flour. An idea sparked: why not merge my morning pancakes with a chocolatey protein punch?

    The result was nothing short of amazing. The pancakes were fluffy, with a rich chocolate flavor that made me feel like I was indulging in a dessert rather than a quick breakfast. They became a staple in my household, especially on those busy mornings when every second counts. I’ve tweaked the recipe over time, and now, I’m excited to share this delightful concoction with you. Trust me, these pancakes are more than just a meal; they’re a fast fuel to kick-start your day with a smile and a full belly.

    Why You’ll Love This Recipe

    • Quick and Easy: Ready in under 10 minutes.
    • High Protein: Each serving is packed with protein to keep you full.
    • Chocolate Flavor: Rich, decadent taste without the guilt.
    • Customizable: Add your favorite toppings or mix-ins.
    • Healthy Ingredients: Made with wholesome ingredients like oat flour and coconut sugar.

    Detailed Ingredients

    Before you head to the market, here’s what you’ll need:

    • Oat Flour: 1 cup (120 grams). Look for finely ground oat flour for a smooth batter.
    • Chocolate Protein Powder: 1 scoop (about 30 grams). Choose your favorite brand; I prefer whey or plant-based options.
    • Cocoa Powder: 2 tablespoons (10 grams). Opt for unsweetened cocoa for a rich taste.
    • Coconut Sugar: 2 tablespoons (24 grams). A healthier alternative to regular sugar.
    • Baking Powder: 1 teaspoon. Ensure it’s fresh for maximum rise.
    • Milk: 1 cup (240 ml). Use dairy or a non-dairy alternative like almond milk.
    • Eggs: 2 large. These will help bind the ingredients and add fluffiness.
    • Optional: Chocolate chips, nuts, or berries for extra flavor and texture.

    Step-by-Step Instructions

    Let’s dive into the process of making these delightful pancakes:

    Step 1: Prepare Your Dry Ingredients

    In a large mixing bowl, combine the oat flour, chocolate protein powder, cocoa powder, coconut sugar, and baking powder. Whisk them together until well-blended. This ensures that the baking powder is evenly distributed, which is crucial for even rising.

    Step 2: Mix Wet Ingredients

    In a separate bowl, whisk together the milk and eggs until fully combined. Slowly pour the wet ingredients into the dry ingredients, stirring continuously until you have a smooth batter. It should be thick but pourable. If it’s too thick, add a splash more milk.

    Step 3: Cooking the Pancakes

    Heat a non-stick pan over medium-low heat. Once hot, lightly grease it with a bit of oil or cooking spray. Pour about ¼ cup of the batter onto the pan for each pancake. Cook until you see bubbles forming on the surface, about 3-5 minutes. This is your cue that they’re ready to flip. Use a spatula to flip and cook for another 2-3 minutes until golden brown.

    Step 4: Serve and Enjoy

    Transfer the cooked pancakes to a plate. You can keep them warm in a low oven if making a large batch. Top with your favorite toppings like fresh berries, a drizzle of syrup, or a dollop of nut butter. Dig in and enjoy your fast fuel breakfast!

    Common Mistakes to Avoid

    • Overmixing the Batter: This can lead to dense pancakes. Mix until just combined.
    • High Heat: Cooking on too high a heat can burn the pancakes while leaving the inside raw. Medium-low is perfect.
    • Skipping the Bubbles: Flipping before bubbles form can result in undercooked pancakes.
    • Old Baking Powder: Ensure your baking powder is fresh for fluffier pancakes.

    How to Store & Reheat

    These pancakes can be stored in an airtight container in the refrigerator for up to 3 days. For longer storage, freeze them with parchment paper between each pancake to prevent sticking. They’ll keep for up to 2 months in the freezer.

    To reheat, simply pop them in the toaster or microwave for a quick breakfast on the go. If frozen, allow them to thaw in the fridge overnight before reheating.

    Ingredient Substitutions

    If you’re missing an ingredient or need to accommodate dietary preferences, here are some substitutions:

    • Oat Flour: Swap with whole wheat flour or almond flour for a different texture.
    • Coconut Sugar: Use brown sugar or a sugar substitute like stevia.
    • Milk: Any milk alternative like soy, oat, or coconut milk works well.
    • Eggs: Replace with flax eggs for a vegan option (1 tablespoon flaxseed meal + 2.5 tablespoons water per egg).

    Nutrition Facts

    • Calories: 331 kcal per serving
    • Protein: 20 grams
    • Fat: 10 grams
    • Carbs: 40 grams
    • Serving Size: 2 pancakes

    Frequently Asked Questions

    Can I make these pancakes gluten-free?

    Yes, use certified gluten-free oat flour and ensure all other ingredients are gluten-free certified.

    What can I add for extra flavor?

    Try adding a teaspoon of vanilla extract or a sprinkle of cinnamon for an extra flavor boost.

    Can I make the batter ahead of time?

    While fresh is best, you can make the batter a day in advance and store it in the fridge. Give it a good stir before using.

    How can I make these pancakes fluffier?

    Ensure your baking powder is fresh and don’t overmix the batter. Letting the batter sit for a few minutes can also help.

    Are these pancakes suitable for kids?

    Absolutely! They’re a great way to sneak in some protein and kids love the chocolate flavor.


  • 5-MIN FUEL: Easy Copycat Starbucks Pumpkin Bread Recipe!

    5-MIN FUEL: Easy Copycat Starbucks Pumpkin Bread Recipe!

    Introduction & My Personal Story

    Ah, the aroma of freshly baked pumpkin bread. It takes me back to my first autumn in Seattle, where every street corner seemed to boast a Starbucks. The crisp air was filled with the scent of pumpkin spice, and I found myself drawn into the cozy embrace of the local coffee shop. One bite of their pumpkin bread and I was hooked. It was moist, perfectly spiced, and had just the right amount of sweetness. In my 5 years of experience as a chef, I’ve recreated countless dishes, but this one holds a special place in my heart.

    The beauty of this Starbucks Pumpkin Bread recipe is in its simplicity and speed. You don’t need to be a master baker to whip up this delightful treat. It’s become a staple in my kitchen, especially during the busy months when time is of the essence. I often find myself baking this quick bread for gatherings or as a comforting treat on a lazy Sunday morning. The joy of sharing it with family and friends is an added bonus. Let me guide you through this easy, copycat recipe that tastes just like the original, perhaps even better!

    Why You’ll Love This Recipe

    • Ready in under 10 minutes prep time.
    • Uses simple, pantry-friendly ingredients.
    • Delivers that classic pumpkin spice flavor.
    • Moist, tender texture with a delightful crunch from pepitas.
    • Perfect for breakfast, a snack, or dessert.

    Detailed Ingredients

    For this recipe, you’ll need the following ingredients:

    • 1 cup (240g) pumpkin puree – Look for 100% pure pumpkin, not the pie filling.
    • 3/4 cup (150g) coconut sugar – Adds a rich, caramel-like sweetness.
    • 2 large eggs – Ensure they’re at room temperature for better mixing.
    • 1/2 cup (120ml) olive oil – Provides a moist crumb.
    • 1 teaspoon vanilla extract – Opt for pure vanilla for the best flavor.
    • 1 and 3/4 cups (220g) all-purpose flour – Gives structure to the bread.
    • 1 teaspoon baking soda – Helps the bread rise.
    • 1/2 teaspoon baking powder – Adds lightness.
    • 1/2 teaspoon salt – Balances the sweetness.
    • 2 teaspoons pumpkin pie spice – A blend of cinnamon, nutmeg, ginger, and cloves.
    • 1/4 cup (30g) pepitas – For a nutty topping.

    Step-by-Step Instructions

    Step 1: Preheat and Prepare

    Start by preheating your oven to 350°F (175°C). Grease a 9×5-inch loaf pan or line it with parchment paper for easy removal. Chef’s Tip: A properly preheated oven ensures even baking.

    Step 2: Mix Wet Ingredients

    In a large mixing bowl, combine the pumpkin puree, coconut sugar, eggs, olive oil, and vanilla extract. Whisk until the mixture is smooth and well combined. The olive oil gives the bread its tender crumb, so make sure it’s thoroughly mixed.

    Step 3: Combine Dry Ingredients

    In another bowl, whisk together the flour, baking soda, baking powder, salt, and pumpkin pie spice. Gradually add the dry ingredients to the wet mixture, stirring until just combined. Be careful not to overmix, as this can lead to a dense loaf.

    Step 4: Pour and Sprinkle

    Pour the batter into the prepared loaf pan, using a spatula to smooth the top. Sprinkle the pepitas evenly over the surface. These seeds add a delightful crunch and a bit of visual flair.

    Step 5: Bake

    Bake in the preheated oven for 50 to 60 minutes. To check if the bread is done, insert a toothpick into the center; it should come out clean. If the top is browning too quickly, cover it loosely with foil. Chef’s Tip: Every oven is different, so keep an eye on it during the last 10 minutes of baking.

    Step 6: Cool and Slice

    Allow the bread to cool in the pan for 10 to 15 minutes before transferring it to a wire rack to cool completely. This step is crucial to prevent the bread from becoming soggy. Once cooled, slice and serve.

    Common Mistakes to Avoid

    • Overmixing the batter: This can result in a tough, dense loaf. Mix just until the ingredients are combined.
    • Skipping the parchment paper: Makes removal clean and easy, preventing breakage.
    • Not checking the doneness: Ovens vary, so always use a toothpick to ensure it’s fully baked.

    How to Store & Reheat

    Store your pumpkin bread in an airtight container at room temperature for up to 3 days. To extend its freshness, you can refrigerate it for up to a week. For longer storage, wrap it tightly in plastic wrap and freeze for up to 3 months. When ready to enjoy, thaw at room temperature or reheat slices in the microwave for 15-20 seconds for that fresh-baked feel.

    Ingredient Substitutions

    • Flour: Substitute with whole wheat flour for a denser texture.
    • Sugar: Swap coconut sugar with brown sugar for a similar flavor.
    • Oil: Use melted coconut oil or vegetable oil if preferred.
    • Pepitas: Replace with chopped walnuts or pecans for a nutty variation.

    Nutrition Facts

    • Calories: 206 kcal per slice
    • Protein: 3g
    • Fat: 10g
    • Carbs: 28g
    • Serving Size: 1 slice (1/10 of the loaf)

    Frequently Asked Questions

    Can I use fresh pumpkin instead of canned?

    Yes, you can use fresh pumpkin puree. Just ensure it’s well-cooked and drained to achieve a similar consistency to canned.

    How can I make this bread gluten-free?

    Substitute the all-purpose flour with a 1:1 gluten-free baking blend. Ensure it contains xanthan gum for best results.

    Can I add chocolate chips?

    Absolutely! Stir in 1/2 cup of chocolate chips into the batter for a sweet twist.

    What if I don’t have pumpkin pie spice?

    You can make your own by combining 1 teaspoon cinnamon, 1/2 teaspoon nutmeg, 1/4 teaspoon ginger, and a pinch of cloves.

    Is this recipe suitable for vegans?

    You can make it vegan by replacing the eggs with flax eggs (2 tablespoons flaxseed meal + 5 tablespoons water) and using a plant-based oil.

  • GAINS: Easy Slow Cooker Jambalaya Power Meal

    GAINS: Easy Slow Cooker Jambalaya Power Meal

    Introduction & My Personal Story

    Picture this: a bustling kitchen, the warm aroma of spices wafting through the air, and a pot of jambalaya simmering away. That was my childhood. Growing up in Louisiana, jambalaya was more than just a dish; it was a tradition. My grandmother, a culinary genius in her own right, would often have us gathered around her kitchen island, each of us assigned a task—chopping, seasoning, stirring. I remember the way she would say, “Jambalaya is like life; it’s all about the balance.” Fast forward to my early years as a chef, and her words still ring true. In my 5 years of experience, I’ve learned that a well-prepared jambalaya can be both a comfort food and a powerhouse meal.

    When I decided to create a high-protein version of this beloved dish, I wanted to keep the essence of the original while giving it a modern twist. The slow cooker became my secret weapon, allowing the flavors to meld together effortlessly while I went about my day. This recipe is my homage to those childhood memories, a way to fuel my body and soul simultaneously. Whether you’re a seasoned athlete or just someone looking to enjoy a hearty meal, this Easy Slow Cooker Jambalaya Power Meal is sure to become a staple in your kitchen.

    Why You’ll Love This Recipe

    • High Protein: Packed with 25g of protein per serving, it’s perfect for muscle recovery.
    • Easy to Prepare: Let the slow cooker do the work while you go about your day.
    • Flavorful: A rich combination of spices and ingredients for a taste explosion.
    • Versatile: Can be customized with different proteins or vegetables.
    • Meal Prep Friendly: Makes enough for leftovers, saving you time during the week.

    Detailed Ingredients

    Here’s what you’ll need to make this delicious High-Protein Slow Cooker Jambalaya:

    • 3 ribs of **celery**, finely diced (about 150g)
    • 1 **yellow onion**, finely diced (about 200g)
    • 1 **green bell pepper**, finely diced (about 150g)
    • 2 cloves **garlic**, minced
    • 12-16 oz. of sliced smoked **sausage** (about 340-450g)
    • 2 **boneless, skinless chicken thighs**, cubed (about 300g)
    • 1 tsp **dried oregano**
    • 1 tsp **dried thyme**
    • ½ Tbsp **smoked paprika**
    • ½ tsp **cayenne pepper**
    • Freshly cracked **black pepper** to taste
    • 1 can (28 oz.) **diced tomatoes** with juices (about 790g)
    • 2 cups **chicken broth** (about 480ml)
    • ¼ bunch of chopped fresh **parsley**
    • 2 cups **uncooked long-grain white rice** (about 370g)
    • Sliced green onions for garnish

    Step-by-Step Instructions

    Step 1: Prep Ingredients

    Start by gathering all your ingredients. Finely dice the celery, onion, and bell pepper. Mince the garlic. Chef’s Tip: Keep your knife sharp for precise cuts, ensuring even cooking.

    Step 2: Layer Veggies

    In a 5-quart slow cooker, add the diced celery, onion, bell pepper, and minced garlic. These veggies form the aromatic base of your jambalaya, infusing the dish with flavor as they cook.

    Step 3: Add Meat and Spices

    Layer the sliced smoked sausage and cubed chicken thighs on top of the veggies. Sprinkle with dried oregano, thyme, smoked paprika, cayenne pepper, and a generous amount of freshly cracked black pepper. The spices will penetrate the meat, adding depth to the dish.

    Step 4: Pour Liquids

    Add the diced tomatoes with their juices, chicken broth, and chopped parsley. Stir briefly to combine, ensuring the spices and liquids are evenly distributed.

    Step 5: Cook

    Place the lid on the slow cooker and set it to high. Allow it to cook for 4 hours. During this time, the flavors will meld together, and the chicken will become tender.

    Step 6: Add Rice

    Once the liquid reaches a boil, quickly add the uncooked rice, ensuring it’s fully submerged. Replace the lid and continue cooking on high. Chef’s Tip: Avoid opening the lid too often to keep the heat consistent.

    Step 7: Finish Cooking

    Allow the jambalaya to cook for an additional 20-25 minutes, or until the rice has absorbed the liquid and is tender. Stir occasionally to prevent sticking.

    Step 8: Fluff and Serve

    Open the lid, check the rice for tenderness, and gently fluff the contents with a fork. Top with sliced green onions before serving. Enjoy your hearty, protein-packed meal!

    Common Mistakes to Avoid

    • Overcooking the Chicken: Keep an eye on the cooking time to prevent dry, overcooked chicken.
    • Not Fully Submerging the Rice: Ensure the rice is completely covered in liquid to cook evenly.
    • Using the Wrong Rice: Stick to long-grain white rice for the best texture.
    • Opening the Lid Too Often: Resist the urge to peek too frequently, as this can disrupt the cooking process.

    How to Store & Reheat

    Once cooled, transfer the jambalaya to an airtight container. Store in the refrigerator for up to 4 days. To reheat, place a portion in a microwave-safe dish and cover with a damp paper towel to retain moisture. Heat for 2-3 minutes, stirring halfway through.

    Ingredient Substitutions

    • Smoked Sausage: Use turkey sausage for a leaner option.
    • Chicken Thighs: Substitute with chicken breast if preferred.
    • Chicken Broth: Vegetable broth works well for a different flavor profile.
    • Long-Grain White Rice: Brown rice can be used, but adjust cooking time accordingly.

    Nutrition Facts

    • Calories: 420 kcal
    • Protein: 25g
    • Fat: 12g
    • Carbs: 45g
    • Serving Size: 1 bowl (approximately 1 1/2 cups)

    Frequently Asked Questions

    Q: Can I make this recipe spicier?

    A: Absolutely! Add more cayenne pepper or a splash of hot sauce for extra heat.

    Q: Can I freeze jambalaya?

    A: Yes, you can freeze it for up to 3 months. Thaw in the refrigerator overnight before reheating.

    Q: What can I serve with jambalaya?

    A: A simple green salad or crusty bread pairs well with this dish.

    Q: Can I use a different type of sausage?

    A: Definitely! Andouille sausage adds a traditional Cajun flair, but feel free to experiment.

  • LATE NIGHT FUEL: Skip Takeout—This Easy Egg Drop Soup Always Delivers!

    LATE NIGHT FUEL: Skip Takeout—This Easy Egg Drop Soup Always Delivers!

    Introduction & My Personal Story

    There’s something magical about a bowl of **Egg Drop Soup** at midnight. I remember the first time I made this comforting dish was during my college days. It was one of those late nights when the library was my second home, and takeout was my best friend. But one evening, craving something warm and homemade, I ventured into the kitchen to whip up a simple yet satisfying bowl of soup. It was love at first slurp.

    In my 5 years of experience as a chef, I’ve come to realize that this dish is the perfect blend of simplicity and flavor. The delicate ribbons of eggs, the aromatic ginger, and the subtle umami of soy sauce create a harmony that’s hard to resist. It’s become a staple in my late-night routine, not just for its taste, but also for how it fuels my creativity without the dreaded food coma. Whether you’re burning the midnight oil or simply seeking a quick meal, this **Easy Egg Drop Soup** is your ticket to culinary satisfaction.

    Why You’ll Love This Recipe

    • Quick and easy to prepare, perfect for late-night cravings.
    • Light yet satisfying, keeping you focused and energized.
    • Uses simple, readily available ingredients.
    • Customizable to suit your taste preferences.
    • Low in calories, making it a guilt-free indulgence.

    Detailed Ingredients

    • **8 oz mushrooms**, sliced – Look for firm and fresh mushrooms with no dark spots.
    • **3 green onions**, sliced – Choose bright green stalks that are crisp.
    • **1 Tbsp fresh ginger**, grated – Pick ginger that is firm and smooth.
    • **4 cups chicken broth** – Opt for low-sodium broth for better control over seasoning.
    • **2 cups water**
    • **1 Tbsp soy sauce** – Use a good quality soy sauce for richer flavor.
    • **1 Tbsp cornstarch + 1 Tbsp water** – This will help thicken the soup.
    • **2 large eggs**, whisked
    • **2 cups fresh spinach** – Look for vibrant green leaves, free from wilting.

    Step-by-Step Instructions

    Start by heating a tablespoon of oil in a pot over medium heat. Add in the **sliced mushrooms**, **green onions**, and **grated ginger**. Sauté these ingredients for about 3-5 minutes until the mushrooms soften and release their moisture. The aroma of ginger should fill your kitchen, signaling it’s time for the next step.

    Pour in the **chicken broth**, **water**, and **soy sauce**. Stir everything together, then prepare your cornstarch slurry by mixing **1 tablespoon of cornstarch** with **1 tablespoon of water**. Slowly add this to the pot, stirring constantly to avoid any lumps. Increase the heat and bring the mixture to a gentle boil.

    Once boiling, reduce the heat to low. Now comes the exciting part—creating those iconic egg ribbons. Gently swirl the soup with a spoon, then slowly drizzle the **whisked eggs** into the pot. Allow the eggs to set without stirring for 1-2 minutes. You’ll see beautiful, silky strands forming in the broth.

    Finally, add the **fresh spinach** to the soup. Stir until the spinach wilts, which should take about a minute. Taste and adjust the seasoning with more soy sauce if needed. Serve the soup hot, and enjoy its comforting warmth.

    Common Mistakes to Avoid

    • **Overcooking the eggs**: Make sure to reduce the heat and let the eggs set undisturbed for perfect ribbons.
    • **Lumpy soup**: Always mix cornstarch with water before adding to avoid clumps.
    • **Too salty**: Use low-sodium broth and add soy sauce gradually to control the saltiness.
    • **Watery soup**: Ensure your cornstarch slurry is well-mixed to thicken the broth adequately.

    How to Store & Reheat

    Store any leftover soup in an airtight container in the refrigerator. It will keep well for up to 3 days. To reheat, pour the soup into a pot over medium heat, stirring occasionally until heated through. Avoid boiling to prevent the eggs from overcooking.

    Ingredient Substitutions

    • **Vegetable broth** can replace chicken broth for a vegetarian option.
    • **Tamari** can be used instead of soy sauce for a gluten-free version.
    • **Tofu** cubes can be added for extra protein.
    • **Kale** can replace spinach for a different leafy green flavor.

    Nutrition Facts

    • Calories: 150 per serving
    • Protein: 10g
    • Fat: 5g
    • Carbohydrates: 15g
    • Serving Size: 1 cup

    Frequently Asked Questions

    • Can I make this soup in advance? Yes, the flavors meld beautifully when made a day ahead. Just store it properly and reheat gently.
    • What can I serve with Egg Drop Soup? It’s perfect on its own or alongside some steamed rice or dumplings.
    • Is there a vegan option? Absolutely, swap the chicken broth for vegetable broth and skip the eggs.
    • How can I make the soup spicier? Add a dash of chili oil or some sliced chili peppers for heat.

  • LATE NIGHT FUEL: The Easy Curry You’ll Crave!

    LATE NIGHT FUEL: The Easy Curry You’ll Crave!

    Introduction & My Personal Story

    Ah, the sweet aroma of a late-night curry simmering on the stove—there’s nothing quite like it. The first time I whipped up this easy curry, it was during my college years. Picture this: I was deep into a study session, notes scattered everywhere, and the clock striking midnight. My stomach growled louder than the thunderstorm raging outside. I needed something quick, something satisfying, and, most importantly, something that wouldn’t lull me into a food coma.

    I rummaged through my pantry and found a can of chickpeas, a can of coconut milk, and some spices. In my 5 years of experience as a chef, I’ve learned that the best recipes often come together when necessity meets creativity. With a little bit of this and a dash of that, my first late-night curry was born. It was a revelation—a dish that not only filled my belly but also fueled my brain for the long hours ahead. Since then, this curry has been my go-to recipe for those nights when work or creativity keeps me burning the midnight oil. Let me share this late-night gem with you.

    Why You’ll Love This Recipe

    • Quick and Easy: Ready in under 30 minutes.
    • Budget-Friendly: Uses pantry staples like **chickpeas** and **coconut milk**.
    • Vegan and Gluten-Free: Suitable for various dietary preferences.
    • Customizable: Swap out vegetables or adjust spices to suit your taste.
    • Perfect Late-Night Snack: Light yet satisfying enough to keep you energized.

    Detailed Ingredients

    Here’s what you’ll need to make this delicious late-night curry:

    • 1 onion (about 150g), diced
    • 2 garlic cloves, minced
    • 1 teaspoon fresh ginger, grated
    • 2 tablespoons olive oil
    • 1½ tablespoons curry powder
    • 1 teaspoon ground cumin
    • 2 cans (15 oz each) chickpeas, drained and rinsed
    • 8 oz tomato sauce
    • 1 can (13.5 oz) coconut milk
    • 4 oz kale (about 3 cups), chopped
    • Salt to taste (about ½ teaspoon)

    When selecting ingredients, look for fresh and firm **kale** leaves. For the **coconut milk**, opt for a full-fat version for a creamier texture.

    Step-by-Step Instructions

    Follow these steps to make the perfect late-night curry:

    Step 1: Prepare Your Ingredients

    Start by preparing your ingredients. Dice the **onion**, mince the **garlic**, and grate the **ginger**. If you haven’t already, chop the **kale** into bite-sized pieces. This prep work will make the cooking process smooth and quick.

    Step 2: Toast the Spices

    Heat a large skillet over medium heat. Add **1½ tablespoons of curry powder** and **1 teaspoon of cumin**. Toast the spices for about one minute, stirring frequently. You’ll know they’re ready when they release a fragrant aroma.

    Step 3: Sauté the Aromatics

    To the toasted spices, add **2 tablespoons of olive oil**, the diced **onion**, minced **garlic**, and grated **ginger**. Sauté for about 5 minutes or until the onion becomes soft and translucent. This forms the flavorful base of your curry.

    Step 4: Add Main Ingredients

    Once the aromatics are ready, add the drained **chickpeas**, **tomato sauce**, and **coconut milk** to the skillet. Stir everything together until well combined.

    Step 5: Simmer the Curry

    Increase the heat to medium-high to bring the curry to a simmer. Once simmering, reduce the heat to medium-low and let it cook for about 15 minutes. Stir occasionally to prevent sticking. You’re looking for a slightly thickened sauce.

    Step 6: Incorporate the Greens

    Finally, add the chopped **kale** to the skillet. Cook for an additional 5 minutes or until the kale has wilted. Season the curry with **salt** to taste, starting with about ½ teaspoon.

    Step 7: Serve Hot

    Your late-night curry is ready to serve! It’s best enjoyed over rice, with bread, or even as a dip with tortillas. This dish is versatile and pairs well with many sides.

    Common Mistakes to Avoid

    Even the simplest recipes can go awry. Here are some common pitfalls to watch out for:

    • Not Toasting Spices: Skipping this step can result in a less flavorful curry.
    • Overcooking the Chickpeas: They should be tender but not mushy.
    • Adding Kale Too Early: It can become too soft; add it towards the end.
    • Skipping the Stirring: Stir occasionally to prevent sticking and ensure even cooking.

    How to Store & Reheat

    Storing and reheating this curry is a breeze:

    • Allow the curry to cool completely before transferring it to an airtight container.
    • Store in the refrigerator for up to 3 days.
    • For longer storage, freeze the curry for up to 2 months.
    • To reheat, warm on the stove over medium heat or microwave until heated through.

    Ingredient Substitutions

    Need to make a swap? Here are some safe substitutions:

    • Chickpeas: Use lentils or white beans for a different texture.
    • Coconut Milk: Substitute with almond milk for a lighter version.
    • Kale: Spinach or Swiss chard works well as a replacement.
    • Olive Oil: Coconut oil or vegetable oil can be used instead.

    Nutrition Facts

    • Calories: 320 per serving
    • Protein: 10g
    • Fat: 18g
    • Carbohydrates: 32g
    • Serving Size: 1 cup

    Frequently Asked Questions

    • Can I make this curry spicier?
      Add a pinch of red pepper flakes or a chopped chili for extra heat.
    • Is it okay to use canned tomatoes?
      Yes, canned tomatoes can be used in place of tomato sauce.
    • How can I thicken the curry?
      Simmer longer to reduce the liquid or add a slurry of cornstarch and water.
    • Can I double the recipe?
      Absolutely! Just make sure you have a large enough skillet.
    • What can I serve with this curry?
      Rice, naan bread, or quinoa are great options.

  • GAINS: Easy Chicken Satay for Muscle Growth!

    GAINS: Easy Chicken Satay for Muscle Growth!

    Introduction & My Personal Story

    There’s a dish that has held a special place in my culinary journey, a dish that not only tantalizes the taste buds but also fuels the muscles: Chicken Satay. This isn’t just any Chicken Satay; it’s the Easy Chicken Satay for Muscle Growth. I remember the first time I encountered this dish during a trip to Thailand. The aroma of grilled skewers wafted through the bustling street markets, and I couldn’t resist. As I took my first bite, the flavors of lemongrass, peanuts, and spices danced in harmony, and I was hooked. Fast forward to my own kitchen, I embarked on a mission to recreate this dish with a twist – enhancing its protein content for fitness enthusiasts like myself. In my 5 years of experience as a chef, I’ve learned that food can be both delicious and functional, and this recipe is a testament to that. It’s perfect for those looking to build muscle without compromising on flavor. Join me as I share this personal favorite, guaranteed to become a staple in your muscle-building meal plan!

    Why You’ll Love This Recipe

    • High in **Protein**: Perfect for muscle growth and recovery.
    • Quick and Easy: Ready in under an hour, perfect for busy schedules.
    • Delicious Flavor: A perfect balance of savory, sweet, and spicy.
    • Versatile: Can be grilled, baked, or pan-fried.
    • Meal Prep Friendly: Excellent for preparing in bulk and enjoying throughout the week.

    Detailed Ingredients

    • **500g Chicken Breast**: Skinless and boneless, sliced into thin strips.
    • **1/2 Cup Peanut Butter**: Smooth or crunchy, depending on preference.
    • **1/4 Cup Soy Sauce**: Low sodium is recommended.
    • **2 Tablespoons Brown Sugar**: Adds a subtle sweetness.
    • **2 Tablespoons Lime Juice**: Freshly squeezed for the best flavor.
    • **1 Tablespoon Chili Garlic Sauce**: Adjust according to spice preference.
    • **2 Cloves Garlic**: Minced finely.
    • **1 Tablespoon Ginger**: Minced or grated.
    • **1 Tablespoon Sesame Oil**: Adds a nutty aroma.
    • **2 Tablespoons Vegetable Oil**: For marinating.
    • **Fresh Cilantro**: Chopped, for garnish.

    Step-by-Step Instructions

    Step 1: Prepare the Marinade

    In a medium-sized mixing bowl, combine 1/2 cup of **peanut butter**, 1/4 cup **soy sauce**, 2 tablespoons of **brown sugar**, 2 tablespoons of **lime juice**, 1 tablespoon of **chili garlic sauce**, 2 cloves of minced **garlic**, 1 tablespoon of minced **ginger**, 1 tablespoon of **sesame oil**, and 2 tablespoons of **vegetable oil**. Whisk these ingredients until you achieve a smooth, creamy sauce. Chef’s Tip: If the sauce is too thick, add 3 tablespoons of hot water to reach your desired consistency.

    Step 2: Marinate the Chicken

    Place the sliced **chicken breast** into a large zip-top bag. Reserve 1/2 cup of the marinade for later use. Pour the remaining marinade over the chicken, seal the bag, and massage it to ensure every piece is well-coated. Refrigerate for at least 30 minutes, but for maximum flavor, let it marinate overnight.

    Step 3: Preheat and Prepare

    Preheat your oven to 375°F (190°C). While the oven is heating, arrange the marinated chicken strips on a baking sheet lined with parchment paper. Ensure they are in a single layer for even cooking.

    Step 4: Bake the Chicken

    Place the baking sheet in the preheated oven and bake for 15 minutes. Remove from the oven, brush the chicken with the reserved marinade, and return to the oven for another 15 minutes. Check that the internal temperature of the chicken reaches 165°F (75°C) to ensure it is fully cooked.

    Step 5: Serve and Enjoy

    Remove the chicken from the oven and let it rest for a few minutes. Garnish with freshly chopped **cilantro** and serve with your favorite side dishes. Whether you’re pairing it with rice, noodles, or a fresh salad, this chicken satay will not disappoint!

    Common Mistakes to Avoid

    • **Overcooking the Chicken**: Always check the internal temperature to avoid dry, rubbery chicken.
    • **Skipping the Marination**: This step is crucial for infusing the chicken with flavor. Do not rush it!
    • **Using Low-Quality Ingredients**: Fresh, quality ingredients make a significant difference in taste.
    • **Not Adjusting Spice Levels**: If you’re sensitive to spice, adjust the chili garlic sauce to your liking.

    How to Store & Reheat

    Store any leftover chicken satay in an airtight container in the refrigerator for up to 4 days. To reheat, place the chicken in a skillet over medium heat, adding a splash of water to prevent drying out. Alternatively, microwave on medium power for 2-3 minutes until heated through.

    Ingredient Substitutions

    • **Chicken Breast**: Swap with **chicken thighs** for a juicier option.
    • **Peanut Butter**: Substitute with **almond butter** for a different nutty flavor.
    • **Soy Sauce**: Use **tamari** or **coconut aminos** for a gluten-free version.
    • **Brown Sugar**: Replace with **honey** or **agave syrup** for a natural sweetener.

    Nutrition Facts

    • Calories: 415 kcal
    • Protein: 32g
    • Fat: 22g
    • Carbohydrates: 20g
    • Serving Size: 1 serving (approximately 200g)

    Frequently Asked Questions

    • Q: Can I grill the chicken instead of baking?
    • A: Absolutely! Grilling adds a lovely smoky flavor. Cook over medium heat for about 4-5 minutes per side.

    • Q: Is there a vegetarian version of this dish?
    • A: Yes, you can use firm tofu or tempeh as a protein-rich alternative to chicken.

    • Q: How can I adjust the recipe for a larger group?
    • A: Simply double or triple the ingredients while keeping the same cooking times and temperatures.

    • Q: What can I serve with chicken satay?
    • A: Pair it with jasmine rice, cucumber salad, or a simple peanut dipping sauce for a complete meal.

  • 5-MIN FUEL: Zesty Cauliflower Tabbouleh That’s Easy on the Wallet!

    5-MIN FUEL: Zesty Cauliflower Tabbouleh That’s Easy on the Wallet!

    Introduction & My Personal Story

    Ah, the delightful zing of a fresh tabbouleh. Growing up, I always associated tabbouleh with long, leisurely family lunches. It was a dish my grandmother would prepare with meticulous care, chopping each ingredient with precision. Fast forward to my culinary journey, and I’ve found ways to keep the essence of this classic dish while adapting it to our fast-paced lives. Enter the 5-Minute Zesty Cauliflower Tabbouleh—a modern twist on a traditional favorite. In my 5 years of experience as a chef, I’ve learned that sometimes the best dishes are those that marry convenience with flavor. This recipe does just that, offering a quick, refreshing bite that’s perfect for those days when time is of the essence but quality cannot be compromised. My love for tabbouleh has only grown over the years, and this cauliflower version has become my go-to when I crave a light, nutritious meal that packs a punch of flavor without requiring a lot of time in the kitchen.

    Why You’ll Love This Recipe

    • Quick and easy—ready in just 5 minutes.
    • Healthy and low-calorie, only 71 kcal per serving.
    • Budget-friendly ingredients.
    • Gluten-free, thanks to the cauliflower rice.
    • Full of fresh, vibrant flavors.
    • Perfect for meal prep and busy days.

    Detailed Ingredients

    To create this quick and zesty tabbouleh, you’ll need:

    • 1 small head of cauliflower (about 500g), riced
    • 1 cup (150g) diced Roma tomatoes, seeds removed
    • 1 lemon, juiced (about 2 tablespoons)
    • 1 bunch curly parsley (about 50g), minced
    • 1 bunch mint (about 20g), minced
    • 3 green onions (green parts only), minced
    • 2 tablespoons olive oil
    • Salt and pepper to taste

    When shopping, look for fresh, vibrant greens and firm tomatoes. The cauliflower should be free of brown spots, and the herbs should be fragrant and lush.

    Step-by-Step Instructions

    Creating this dish is as easy as it is rewarding. Here’s how:

    Step 1: Gather and Prep Your Ingredients

    First, ensure all your ingredients are ready to go. Remove the thick stems from the mint, slice the lemon in half, seed and dice your Roma tomatoes, and mince the green parts of your green onions.

    Step 2: Rice the Cauliflower

    Break the cauliflower into florets and pulse them in a food processor until they resemble rice grains. Chef’s Tip: Be careful not to over-process, as you want the pieces to maintain a bit of bite.

    Step 3: Mince the Herbs

    Trim the stems from the parsley and mint, then finely chop them. These herbs are key to the dish’s fresh flavor profile, so take your time to chop them finely.

    Step 4: Combine the Ingredients

    In a large mixing bowl, combine the riced cauliflower, diced tomatoes, minced herbs, and green onions. Give everything a gentle toss to mix.

    Step 5: Season and Dress

    Add salt and pepper to taste, squeeze in the fresh lemon juice, and drizzle with olive oil. Toss the salad gently to ensure the dressing coats all the ingredients evenly.

    Step 6: Serve and Enjoy

    Serve this tabbouleh fresh for the best flavor. It pairs beautifully with grilled meats or can be enjoyed on its own as a light, refreshing meal.

    Common Mistakes to Avoid

    • **Over-processing the cauliflower**: This can lead to a mushy texture. Pulse it gently until it resembles rice.
    • **Using too much lemon juice**: While lemon is essential, too much can overpower the dish. Start with one lemon and adjust to taste.
    • **Skipping the de-seeding step for tomatoes**: Seeds can make the tabbouleh watery. Always remove them before dicing.
    • **Not drying herbs properly**: Ensure your herbs are dry after washing to prevent a soggy salad.

    How to Store & Reheat

    This tabbouleh is best enjoyed fresh, but it can be stored in an airtight container in the refrigerator for up to 2 days. If you need to reheat it, do so gently on low heat in a non-stick pan, but be aware that it’s meant to be a cold salad.

    Ingredient Substitutions

    • **Cauliflower**: Substitute with broccoli rice for a different flavor.
    • **Roma tomatoes**: Use cherry tomatoes for a sweeter taste.
    • **Olive oil**: Avocado oil works well if you’re looking for a different fat.
    • **Mint**: If you’re not a fan, basil can add a unique twist.

    Nutrition Facts

    • Calories: 71 kcal per serving
    • Protein: 2g
    • Fat: 5g
    • Carbohydrates: 6g
    • Serving Size: 1 cup

    Frequently Asked Questions

    Can I make this dish ahead of time?

    Yes, you can prepare the ingredients ahead of time, but it’s best to combine and dress them just before serving to maintain freshness.

    Is this recipe suitable for a keto diet?

    Absolutely! With its low-carb ingredients, this tabbouleh fits well into a keto lifestyle.

    What can I serve with cauliflower tabbouleh?

    It pairs wonderfully with grilled chicken, lamb, or even as a topping for falafel wraps.

    How can I make this dish spicier?

    Add a pinch of red pepper flakes or finely diced jalapeño to bring some heat.

    Can I freeze this tabbouleh?

    Freezing is not recommended as the texture of the cauliflower and herbs will change.