Introduction & My Personal Story
Imagine the aroma of freshly baked banana bread wafting through your kitchen. For me, this comforting scent evokes memories of lazy Sunday mornings spent in my grandmother’s kitchen. She had a knack for transforming simple ingredients into something magical. As a child, I would watch her mash ripe bananas with the utmost care, combining them with love and a touch of cottage cheese for a moist, protein-packed loaf. Fast forward to today, and I’ve adopted her recipe, adding my own twist to create a 5-Minute Fuel: Delicious Cottage Cheese Banana Bread that’s perfect for busy lives. In my 5 years of experience as a chef, I’ve found this recipe to be a lifesaver when I need a quick breakfast or snack that doesn’t compromise on taste or nutrition.
Why You’ll Love This Recipe
- Quick Prep: Ready to bake in just 5 minutes.
- Nutritious: Packed with protein, fiber, and potassium.
- Delicious: Moist and flavorful with a hint of sweetness.
- Perfect for On-the-Go: Great for breakfast or a midday snack.
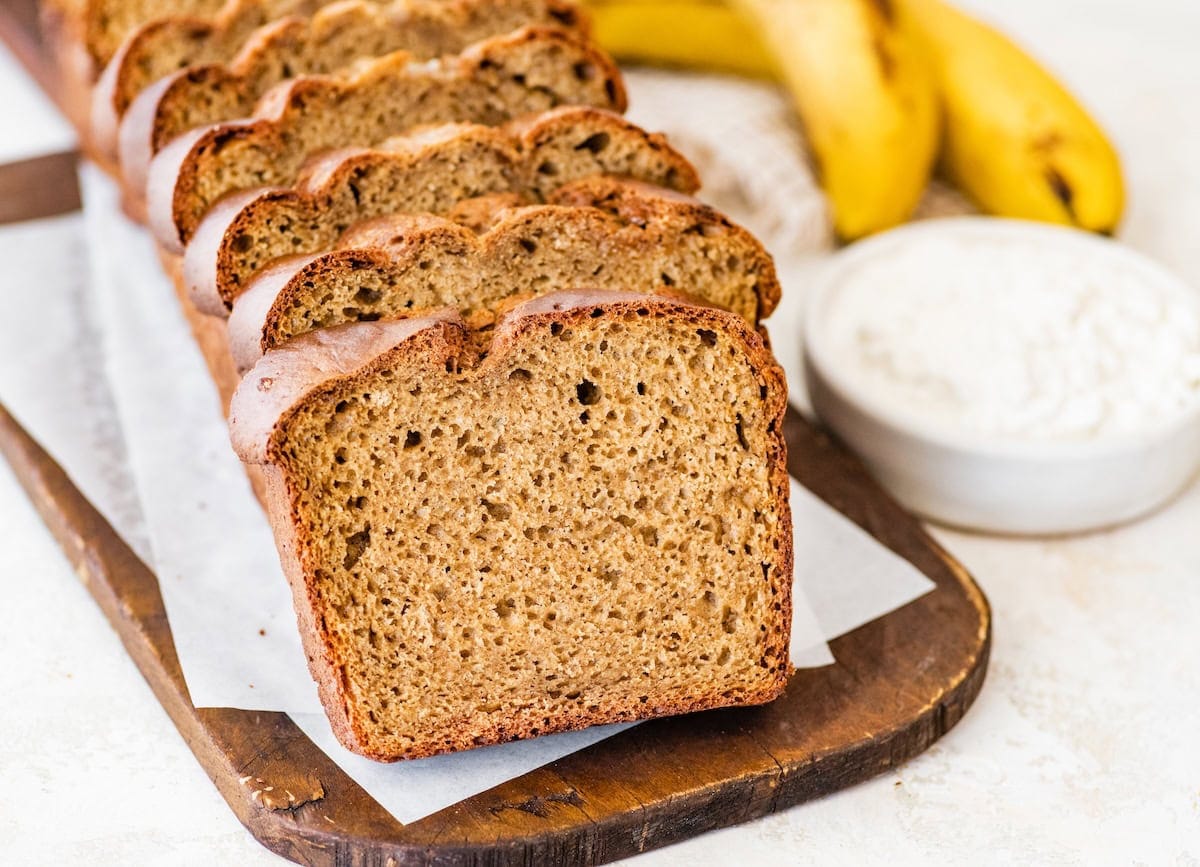
Detailed Ingredients
- 3 ripe bananas (about 350g), mashed
- 1 cup (240g) of full-fat cottage cheese
- 2 cups (250g) of whole wheat flour
- 1/2 cup (120g) of honey or maple syrup
- 2 large eggs
- 1 teaspoon (5g) of baking soda
- 1/2 teaspoon (2.5g) of salt
- 1 teaspoon (5g) of vanilla extract
- 1/2 cup (60g) of chopped walnuts (optional)
Chef’s Tip: When selecting bananas, opt for those with speckled skins. They’re at their sweetest and perfect for baking.
Step-by-Step Instructions
Step 1: Preheat your oven to 350°F (175°C). Grease a 9×5 inch loaf pan with butter or line it with parchment paper.
Step 2: In a large mixing bowl, mash the ripe bananas until smooth. Add in the cottage cheese, honey or maple syrup, eggs, and vanilla extract. Mix until well combined.
Step 3: In another bowl, whisk together the whole wheat flour, baking soda, and salt. Gradually add the dry ingredients to the wet mixture, stirring until just combined. Avoid overmixing to keep the bread tender.
Step 4: Fold in the chopped walnuts if using. Pour the batter into the prepared loaf pan and smooth the top with a spatula.
Step 5: Bake for 45-50 minutes, or until a toothpick inserted into the center comes out clean. The top should be golden brown and slightly firm to the touch.
Step 6: Allow the bread to cool in the pan for 10 minutes before transferring it to a wire rack to cool completely.
Common Mistakes to Avoid
- Overmixing the Batter: This can lead to a dense loaf. Mix just until the ingredients are combined.
- Using Under-ripe Bananas: They lack sweetness and can affect the texture.
- Skipping the Cooling Time: Cutting into the bread too soon can result in a crumbly texture.
How to Store & Reheat
Store any leftover banana bread in an airtight container at room temperature for up to 3 days. For longer storage, refrigerate for up to a week. To freeze, wrap individual slices in plastic wrap and place them in a freezer-safe bag for up to 3 months. To reheat, simply warm slices in the microwave for 20-30 seconds or toast them for a few minutes.
Ingredient Substitutions
- Honey/Maple Syrup: Substitute with agave syrup or brown sugar for a different sweetness profile.
- Whole Wheat Flour: Use all-purpose flour or a gluten-free blend if needed.
- Walnuts: Swap with pecans or omit for a nut-free version.
Nutrition Facts
- Calories: 220 per slice
- Protein: 6g
- Fat: 7g
- Carbs: 35g
- Serving Size: 1 slice (1/10 of the loaf)
Frequently Asked Questions
- Can I make this bread vegan? Yes, replace eggs with flax eggs and use a plant-based yogurt instead of cottage cheese.
- Can I add chocolate chips? Absolutely! Fold in 1/2 cup of chocolate chips for a sweeter treat.
- What if I don’t have ripe bananas? Ripen bananas quickly by baking them in the oven at 300°F (150°C) for 15-20 minutes.
- Can I use almond flour? Almond flour can be used, but the texture will be denser. Consider mixing it with oat flour for better results.