Tag: REWARD

  • NO-BAKE REWARD: Decadent High-Protein Banana Delight

    NO-BAKE REWARD: Decadent High-Protein Banana Delight

    Introduction & My Personal Story

    The kitchen has always been my sanctuary, a place where I could create something special from simple ingredients. My journey into the world of high-protein snacks began about five years ago when I was looking for healthier options that didn’t compromise on taste. One lazy Sunday afternoon, I stumbled upon a few overripe bananas in my fruit basket and a half-eaten tub of cottage cheese in the fridge. A light bulb went off, and the idea for a no-bake, high-protein banana delight was born.

    Back then, I was focused on finding delicious ways to increase my protein intake without resorting to bland or overly processed options. I wanted something quick, easy, and satisfying, a recipe that would become a staple in my cheat day repertoire. This banana delight, with its creamy texture and natural sweetness, was the perfect answer. Every spoonful reminded me of banana pudding from my childhood, but with a modern, health-conscious twist.

    In my 5 years of experience, this dish has evolved, but its core remains the same: simplicity, flavor, and a touch of nostalgia. It’s the kind of recipe that makes you feel rewarded for making healthier choices without feeling deprived. Whether you’re a fitness enthusiast or just someone who loves a good dessert, this high-protein banana delight is bound to become a favorite in your household.

    Why You’ll Love This Recipe

    • Quick and easy to prepare with no baking required.
    • Packed with protein from both **cottage cheese** and **Greek yogurt**.
    • Naturally sweetened with ripe **bananas** and **honey**.
    • Customizable with your favorite toppings like nuts or granola.
    • Perfect for a healthy cheat day treat or post-workout snack.

    Detailed Ingredients

    To make this no-bake high-protein banana delight, you’ll need:

    • **2 cups (450g) of cottage cheese** – Opt for low-fat or full-fat based on your dietary preferences.
    • **1 cup (245g) of Greek yogurt** – Choose plain, unsweetened for the best results.
    • **1 ripe banana** – Look for bananas with a few brown spots for optimal sweetness.
    • **2 tablespoons (30ml) of honey** – You can substitute with **maple syrup** if desired.
    • **1 teaspoon (5ml) of vanilla extract** – Pure vanilla extract adds the best flavor.
    • **A pinch of salt** – Enhances the flavors of the other ingredients.
    • **Additional sliced bananas** – For layering and garnishing.
    • **Crushed nuts or granola** – Optional, for added texture and crunch.

    Step-by-Step Instructions

    Step 1: Start by combining the **cottage cheese** and **Greek yogurt** in a large mixing bowl. Using a whisk or an electric mixer, blend the two until you achieve a smooth and creamy consistency. This mixture forms the base of your banana delight.

    Step 2: Mash the **ripe banana** using a fork or potato masher. Add the mashed banana to the cottage cheese and yogurt mixture, and mix thoroughly. The banana should be fully integrated, leaving no large chunks.

    Step 3: Stir in **2 tablespoons of honey** and **1 teaspoon of vanilla extract**. Add a pinch of salt to balance the sweetness and enhance the overall flavor. Mix until all ingredients are well combined.

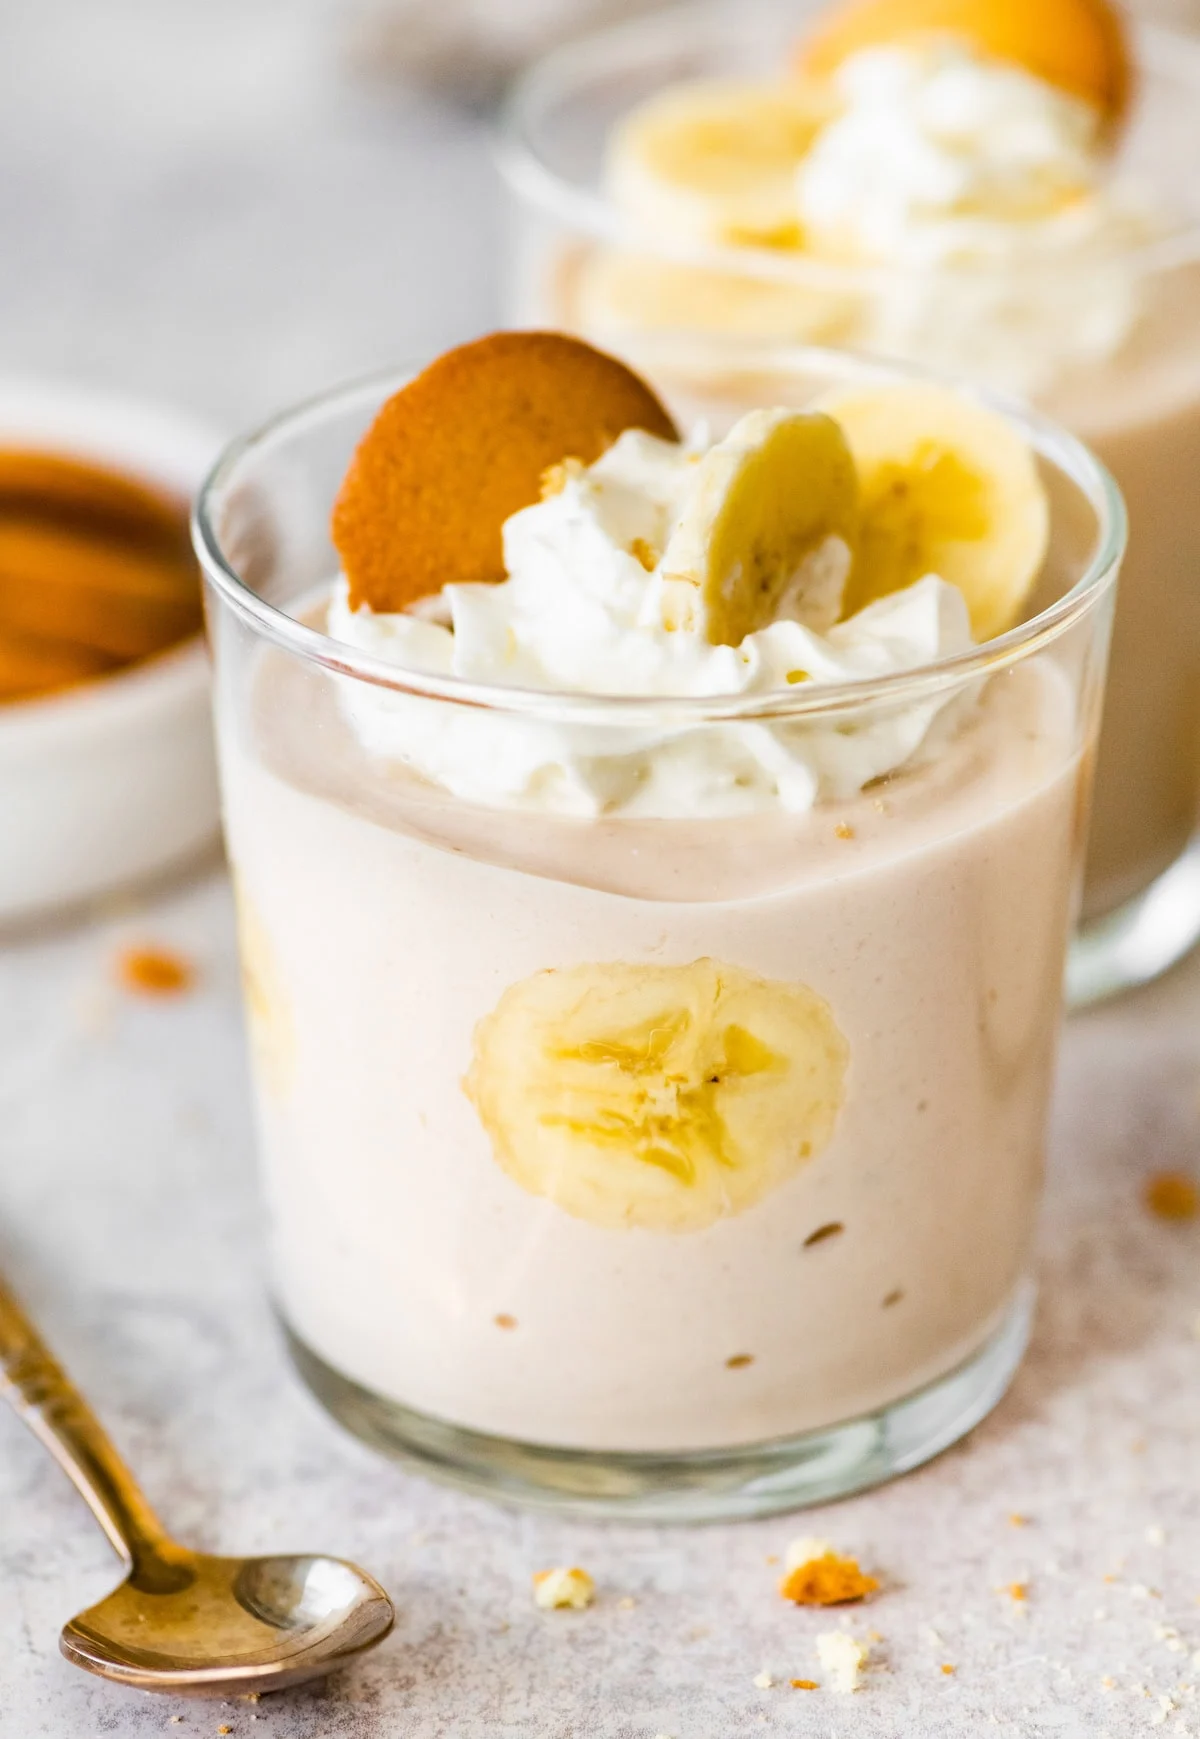
    Step 4: In a serving dish, begin layering the mixture with **sliced bananas**. Start with a layer of the creamy mixture, followed by a layer of banana slices. Repeat the process until all the mixture is used up, ending with a layer of banana slices on top.

    Step 5: Refrigerate the layered delight for at least 30 minutes. This chilling time allows the flavors to meld together and the texture to firm up slightly.

    Step 6: Before serving, top the banana delight with **crushed nuts or granola** for an added crunch. This step is optional but highly recommended for texture contrast.

    Common Mistakes to Avoid

    Over-mixing: While it’s crucial to have a smooth mixture, over-mixing can lead to a runny texture. Mix just until the ingredients are combined.

    Using underripe bananas: Make sure your bananas are ripe. Underripe bananas won’t provide the natural sweetness needed for this dish.

    Skipping the chill time: The dessert needs time in the fridge to set. Don’t cut this step short, or you may end up with a soupy dessert.

    How to Store & Reheat

    Store any leftovers in an airtight container in the refrigerator. This banana delight will keep well for up to 3 days, though it’s best enjoyed fresh. If you’re adding toppings like granola, consider storing them separately to maintain their crunch.

    Ingredient Substitutions

    • Cottage Cheese: If you’re not a fan, you can substitute with ricotta cheese for a similar texture.
    • Greek Yogurt: Regular yogurt can be used, but it may result in a slightly less creamy texture.
    • Honey: Swap with **maple syrup** or agave syrup for a different flavor profile.
    • Bananas: For a different fruit twist, try using mashed mangoes or peaches.

    Nutrition Facts

    • Calories: 250 per serving
    • Protein: 18g
    • Fat: 5g
    • Carbs: 35g
    • Serving Size: 1 cup

    Frequently Asked Questions

    • Can I make this ahead of time? Yes, this dessert can be made a day in advance. Just be sure to store it properly in the fridge.
    • What other toppings can I use? Consider adding chocolate chips, coconut flakes, or even a dollop of whipped cream.
    • Is this recipe suitable for vegans? Substitute the dairy products with vegan alternatives like almond yogurt and tofu-based cheese.
    • Can I freeze this dessert? Freezing is not recommended as it can alter the texture upon thawing.


  • NO-BAKE REWARD: Indulge in Creamy Vegan Protein Ice Cream!

    NO-BAKE REWARD: Indulge in Creamy Vegan Protein Ice Cream!

    Introduction & My Personal Story

    There’s something magical about making a dessert that doesn’t require an oven. My journey with **vegan protein ice cream** began five years ago when I was looking for a guilt-free indulgence that could satisfy my sweet tooth without compromising my health goals. During a particularly hot summer, I was inspired to create a creamy, luscious treat that even my non-vegan friends would love. The first time I made this no-bake ice cream, it was like a revelation. I remember the delight on my friends’ faces as they tasted the rich, chocolaty flavors, complemented by the smooth, velvety texture. It quickly became a staple in my household, especially on those days when I wanted something sweet without the hassle. This recipe is a testament to the fact that indulgence and health can go hand in hand. So, join me as we dive into the world of creamy, dreamy vegan protein ice cream, a treat that’s as satisfying to make as it is to eat!

    Why You’ll Love This Recipe

    • Quick and easy to make, with no baking required.
    • Packed with protein to support fitness goals.
    • Vegan-friendly and dairy-free.
    • Customizable flavors to suit any palate.
    • Perfect for a refreshing treat on hot days.

    Detailed Ingredients

    To ensure the best results, it’s important to use high-quality ingredients. Here’s what you’ll need:

    • **4 ripe bananas**, sliced and frozen
    • **1 cup almond milk** (or any plant-based milk)
    • **2 tablespoons almond butter** (look for unsweetened)
    • **3 tablespoons cocoa powder** for the chocolate version
    • **1 scoop chocolate protein powder** (about 30g)
    • **1 teaspoon vanilla extract** for the vanilla version
    • **1 teaspoon ground cinnamon** for a hint of spice
    • Optional: **Cacao nibs or chocolate chips** for added texture

    Step-by-Step Instructions

    Chocolate Version

    Step 1: Start by placing your **frozen banana chunks** into a food processor or high-speed blender. Add in the **almond milk**, **almond butter**, **cocoa powder**, and **chocolate protein powder**.

    Step 2: Blend the ingredients on high until the mixture becomes smooth and creamy. This typically takes about 3-4 minutes. Be sure to pause occasionally to scrape down the sides of the blender to ensure everything is well-mixed.

    Step 3: If you like a bit of crunch, stir in some **cacao nibs** or **chocolate chips**. Pulse the blender a couple of times to incorporate them into the mixture.

    Step 4: You can enjoy the ice cream right away by spooning it into bowls. For a firmer texture, pour the mixture into a loaf pan lined with parchment paper and freeze for at least 2 hours before scooping.

    Vanilla Version

    Step 1: Place your **frozen banana chunks** into the blender, along with **almond milk**, **vanilla extract**, **ground cinnamon**, and **protein powder**.

    Step 2: Blend until smooth and creamy, again stopping to scrape down the sides as needed. This should take 3-4 minutes.

    Step 3: Spoon the mixture into bowls for immediate enjoyment, or pour it into a loaf pan lined with parchment paper. Freeze for at least 2 hours for a scoopable consistency.

    Common Mistakes to Avoid

    Even a simple recipe can have its pitfalls. Here’s how to avoid common mistakes:

    • **Not using ripe bananas**: Ensure your bananas are ripe before freezing them. This adds natural sweetness and a creamier texture.
    • **Over-blending**: Be careful not to over-blend the mixture, as it can become too runny. If this happens, simply freeze it longer.
    • **Skipping scraping**: Not scraping down the sides of the blender can lead to uneven mixing.

    How to Store & Reheat

    Store your vegan protein ice cream in an airtight container in the freezer. It can last for up to a week, but for the best texture, consume it within a few days. To serve, let it sit at room temperature for about 10 minutes to soften slightly before scooping.

    Ingredient Substitutions

    If you need to make substitutions, here are some safe swaps:

    • **Almond milk** can be replaced with any plant-based milk, such as soy or oat milk.
    • **Almond butter** can be swapped with peanut butter or sunflower seed butter for a nut-free option.
    • For a different flavor, try using **vanilla protein powder** instead of chocolate.

    Nutrition Facts

    • Calories: 250 per serving
    • Protein: 10g
    • Fat: 8g
    • Carbs: 35g
    • Serving Size: 1 cup

    Frequently Asked Questions

    Q: Can I use fresh bananas instead of frozen?

    A: For the best texture, use frozen bananas. Fresh bananas won’t give the same creamy consistency.

    Q: How can I make this recipe nut-free?

    A: Swap almond milk for oat milk and use sunflower seed butter instead of almond butter.

    Q: Can I add other flavors to the ice cream?

    A: Absolutely! Try adding a teaspoon of instant coffee for a mocha flavor or a handful of berries for a fruity twist.

    Q: What type of blender is best for this recipe?

    A: A high-speed blender or food processor works best to achieve a smooth, creamy texture.


  • NO-BAKE REWARD: Irresistibly Creamy Frozen Delight for Summer!

    NO-BAKE REWARD: Irresistibly Creamy Frozen Delight for Summer!

    Introduction & My Personal Story

    Ah, summer! The season of sun, fun, and frozen treats. One of my fondest memories as a child was spending lazy afternoons at my grandmother’s house, where she would whip up the most delightful, no-bake desserts. Her kitchen was a haven of creativity, and while she had a treasure trove of recipes, there was one that stood out – the frozen s’mores. These weren’t your ordinary s’mores. They were a creamy, chocolatey, and irresistibly cool version that required no fire or fuss. Just layers of crunchy graham crackers, rich chocolate, and a creamy filling that melted in your mouth. Fast forward to today, in my 5 years of experience as a chef, I’ve managed to recreate that magic with a modern twist. My version, the **No-Bake Protein Frozen S’mores**, is not only a nod to those nostalgic days but also a perfect treat for those who crave something sweet yet nutritious. This treat is perfect for a cheat day or just a sunny afternoon indulgence, offering a balance of flavor and protein-packed goodness.

    Why You’ll Love This Recipe

    • **No-Bake**: Perfect for hot days when you don’t want to turn on the oven.
    • **Protein-Packed**: A guilt-free indulgence that supports your fitness goals.
    • **Quick to Make**: Minimal preparation time with maximum reward.
    • **Customizable**: Easily adapt with your favorite flavors and add-ins.
    • **Kid-Friendly**: A fun and easy recipe to make with the little ones.

    Detailed Ingredients

    • **Graham Crackers**: 200g (about 20 crackers). Look for whole grain options for added fiber.
    • **Chocolate Chips**: 150g (about 1 cup). Choose high-quality dark chocolate for a richer taste.
    • **Coco Whip**: 250ml (1 cup), thawed. Opt for the unsweetened version if watching sugar intake.
    • **Vanilla Protein Powder**: 50g (about 1/2 cup). Use a brand with a creamy texture for best results.

    Step-by-Step Instructions

    Step 1: Prepare Your Pan

    Line an 8×8-inch baking dish with parchment paper, ensuring there’s enough overhang on the sides. This will make it easier to lift out the frozen bars later. Chef’s Tip: Secure the parchment with binder clips to keep it in place while assembling.

    Step 2: Layer the Graham Crackers

    Arrange your **graham crackers** in a single layer, upside down, to cover the bottom of the pan completely. Some slight overlapping is fine, but aim for a snug fit.

    Step 3: Melt the Chocolate

    In a microwave-safe bowl, melt the **chocolate chips** in 30-second intervals, stirring in between, until smooth. Alternatively, you can use a double boiler over low heat. Pour the melted chocolate over the graham crackers and spread evenly with a spatula.

    Step 4: Prepare the Filling

    In a medium bowl, combine the thawed **coco whip** and **vanilla protein powder**. Stir until smooth and fully incorporated. Gently spread this mixture over the chocolate layer, ensuring even coverage.

    Step 5: Add the Top Layer

    Place the remaining graham crackers over the filling, pressing down lightly to secure them in place. This will form the top layer of your frozen s’mores.

    Step 6: Freeze

    Freeze the assembled dish for at least 2 hours, or until firm. Chef’s Tip: For the best texture, allow it to freeze overnight.

    Step 7: Serve and Enjoy

    Use the parchment overhang to lift the bars out of the dish. Slice into squares and serve immediately. Store any leftovers in an airtight container in the freezer.

    Common Mistakes to Avoid

    • Skipping the Parchment Paper: This makes removing the bars a hassle. Always line your dish.
    • Overcooking Chocolate: Chocolate can seize if overheated. Use low heat and stir frequently.
    • Uneven Layers: Spread each layer evenly to ensure every bite has a balance of flavors.

    How to Store & Reheat

    Store the frozen s’mores in an airtight container, using parchment paper between layers to prevent sticking. They are best consumed within 2 weeks. If they become too firm, let them sit at room temperature for 2–5 minutes before enjoying.

    Ingredient Substitutions

    • Graham Crackers: Substitute with digestive biscuits for a similar texture.
    • Chocolate Chips: Use white or milk chocolate for a sweeter version.
    • Coco Whip: Replace with regular whipped cream if dairy is not a concern.
    • Vanilla Protein Powder: Choose chocolate or peanut butter flavored protein for a different twist.

    Nutrition Facts

    • Calories: 250 per serving
    • Protein: 8g
    • Fat: 12g
    • Carbs: 30g
    • Serving Size: 1 square (based on 16 servings)

    Frequently Asked Questions

    Q: Can I make these in advance?

    A: Absolutely! These can be made a day ahead and stored in the freezer until you’re ready to serve.

    Q: What if I don’t have protein powder?

    A: You can omit it, though the protein content will be lower. Consider adding a tablespoon of peanut butter for flavor and some protein.

    Q: Can I add nuts or other toppings?

    A: Yes! Chopped nuts, shredded coconut, or sprinkles can be added between layers for extra texture.

    Q: Is there a vegan option?

    A: Use vegan graham crackers, chocolate, and protein powder to make this recipe completely plant-based.

  • NO-BAKE REWARD: Irresistibly Creamy Pumpkin Delight!

    NO-BAKE REWARD: Irresistibly Creamy Pumpkin Delight!

    Introduction & My Personal Story

    Ah, the magic of autumn! There’s something undeniably comforting about this time of year, with its crisp air and vibrant foliage. It’s a season that calls for cozy gatherings and indulgent treats. One of my all-time favorites is the No-Bake Reward: Irresistibly Creamy Pumpkin Delight. This dessert isn’t just a recipe; it’s a cherished tradition that takes me back to my childhood kitchen, where my grandmother would whip up the most delightful pumpkin creations. I remember the warmth of the kitchen, the aromatic scent of spices, and the joy of sneaking a spoonful of the creamy filling when she wasn’t looking.

    In my 5 years of experience as a chef, I’ve come to appreciate the beauty of no-bake desserts. They’re perfect for those days when you crave something sweet but don’t want to spend hours in the kitchen. This pumpkin delight has become a staple in my repertoire, especially during the holiday season. It’s the kind of dessert that brings people together, sparking conversations and creating memories. Every time I make it, I’m reminded of those cherished moments with my grandmother, and I hope it brings the same warmth and joy to your home.

    Why You’ll Love This Recipe

    • Quick and easy to prepare, with no baking required.
    • Rich, creamy texture that melts in your mouth.
    • Packed with the warm flavors of autumn spices.
    • Perfect for holiday gatherings or a cozy night in.
    • Can be made ahead of time, saving you stress on busy days.

    Detailed Ingredients

    • 1 cup (240g) of **pumpkin puree** – Look for canned puree with no added sugar.
    • 1 cup (240g) of **cream cheese**, softened – Opt for full-fat for the creamiest texture.
    • 1 cup (240g) of **whipped topping** – Make sure it’s thawed if using frozen.
    • 1 teaspoon of **vanilla extract** – Pure extract for the best flavor.
    • 1 teaspoon of **pumpkin pie spice** – A blend of cinnamon, nutmeg, ginger, and cloves.
    • 1 package of **graham crackers** – Approximately 200g, for layering.
    • 1 cup (240ml) of **milk** – For dipping the graham crackers.
    • Additional whipped topping and crushed graham crackers for garnish (optional).

    Step-by-Step Instructions

    Step 1: Begin by preparing your pumpkin filling. In a large mixing bowl, combine 1 cup of **pumpkin puree**, 1 cup of **cream cheese**, and 1 cup of **whipped topping**. Use an electric mixer on medium speed to blend until the mixture is smooth and creamy. Chef’s Tip: Ensure your cream cheese is at room temperature to avoid lumps.

    Step 2: Add 1 teaspoon of **vanilla extract** and 1 teaspoon of **pumpkin pie spice** to the mixture. Blend again until the spices are well incorporated, and the filling is fragrant and evenly spiced.

    Step 3: In a shallow bowl, pour 1 cup of **milk**. Dip each **graham cracker** quickly into the milk, just enough to moisten but not soggy. Line the bottom of a 9×13-inch dish with a layer of these dipped crackers.

    Step 4: Spread half of the pumpkin mixture over the graham cracker layer. Use a spatula to evenly distribute and smooth the filling.

    Step 5: Repeat the process with another layer of dipped **graham crackers**, followed by the remaining pumpkin mixture. Smooth out the top layer with a spatula.

    Step 6: For a finishing touch, spread additional **whipped topping** over the top. If desired, sprinkle with crushed graham crackers for added texture and visual appeal.

    Step 7: Cover the dish with plastic wrap and refrigerate for at least 4 hours, or until the dessert is set and the flavors have melded together. Chef’s Tip: This dessert tastes even better when left overnight, allowing the crackers to soften and the spices to deepen.

    Step 8: Slice, serve, and savor each creamy, spiced bite!

    Common Mistakes to Avoid

    • **Over-soaking the graham crackers**: A quick dip is all that’s needed. Too much milk can make them mushy.
    • **Lumpy filling**: Ensure the cream cheese is fully softened before mixing to achieve a smooth consistency.
    • **Skipping chill time**: The dessert needs at least 4 hours to set properly and develop flavors.

    How to Store & Reheat

    To store the Pumpkin Delight, cover it tightly with plastic wrap or transfer to an airtight container. It will keep in the refrigerator for up to 3 days. While this dessert is best enjoyed cold, if you prefer a slightly warmer treat, allow it to sit at room temperature for about 15 minutes before serving.

    Ingredient Substitutions

    • **Dairy-free**: Substitute cream cheese and whipped topping with plant-based alternatives.
    • **Gluten-free**: Use gluten-free graham crackers for those with dietary restrictions.
    • **Low-sugar**: Opt for a sugar-free whipped topping and check the label on your pumpkin puree for added sugars.

    Nutrition Facts

    • Calories: 250 per serving
    • Protein: 3g
    • Fat: 15g
    • Carbs: 28g
    • Serving Size: 1 slice (approx. 1/12 of the recipe)

    Frequently Asked Questions

    • Can I use fresh pumpkin instead of canned? Yes, simply roast and puree fresh pumpkin for a homemade touch.
    • How far in advance can I make this? It’s best made a day ahead to allow flavors to meld and the dessert to set.
    • Can I freeze this dessert? Freezing is not recommended as it may alter the texture.
    • What can I use instead of graham crackers? Vanilla wafers or digestive biscuits work well as substitutes.