Tag: pstrongZERO

  • ZERO PREP: Budget-Friendly Pesto Hack for Big Flavor!

    ZERO PREP: Budget-Friendly Pesto Hack for Big Flavor!

    Introduction & My Personal Story

    There’s a certain magic in the air when I reminisce about the first time I stumbled upon this Budget-Friendly Pesto Hack. Picture this: I was fresh out of culinary school, strapped for cash, yet eager to whip up something that would dazzle my friends at our monthly potluck. The challenge was real—how to create big flavor with minimal resources. In my 5 years of experience as a chef, I’ve learned that necessity truly is the mother of invention, and often, the simplest dishes turn out to be the most memorable.

    One lazy Sunday, I found myself staring blankly into my pantry. I had some fresh basil, a handful of baby spinach, a few cloves of garlic, and some sunflower seeds that had been languishing in a jar. Parmesan cheese was a staple in my fridge, and I always kept a bottle of good olive oil on hand. With a dash of imagination and a squeeze of lemon juice, I dared to craft my very own pesto without the traditional pine nuts and expensive Parmesan. The result? A pesto that was not only budget-friendly but required zero prep and was bursting with flavor. It was a hit at the potluck, and to this day, it’s my go-to recipe when I need something quick, delicious, and satisfying.

    Why You’ll Love This Recipe

    • Quick and easy to make with zero prep time required.
    • Uses affordable and accessible ingredients.
    • Packed with fresh, vibrant flavors.
    • Versatile and can be used in a variety of dishes.
    • Minimal cleanup, perfect for busy days.

    Detailed Ingredients

    Let’s dive into the components that make this pesto shine. Here’s what you’ll need:

    • Fresh basil: 2 cups, loosely packed. Look for bright green leaves without any brown spots.
    • Baby spinach: 1 cup, loosely packed. Opt for fresh, crisp leaves.
    • Garlic: 2 cloves, peeled. Choose firm cloves for the best flavor.
    • Sunflower seeds: 1/4 cup. Toast them lightly for added depth.
    • Parmesan cheese: 1/2 cup, grated. Aged Parmesan will give the best results.
    • Olive oil: 1/2 cup. Use extra virgin for its rich taste.
    • Lemon juice: 1 tablespoon, freshly squeezed. Adds brightness and acidity.
    • Salt: 1/2 teaspoon, or to taste.

    Step-by-Step Instructions

    Ready to whip up this delightful pesto? Follow these steps:

    Step 1: Prepare Your Ingredients

    First, gather all your ingredients. Make sure to wash and dry the basil and spinach thoroughly. A salad spinner works wonders here, ensuring no excess water dilutes your pesto.

    Step 2: Toast the Sunflower Seeds

    Chef’s Tip: Toasting sunflower seeds enhances their nutty flavor. Simply heat them in a dry skillet over medium heat for 3-4 minutes, stirring frequently. They’ll be ready when they’re golden brown and fragrant.

    Step 3: Blend the Dry Ingredients

    Add the prepared garlic, toasted sunflower seeds, and Parmesan cheese to a food processor. Pulse until everything is finely chopped, forming a coarse mixture.

    Step 4: Incorporate the Greens

    Add the basil and spinach to the processor. Pulse again until the greens are roughly chopped and well combined with the other ingredients.

    Step 5: Add the Liquid Ingredients

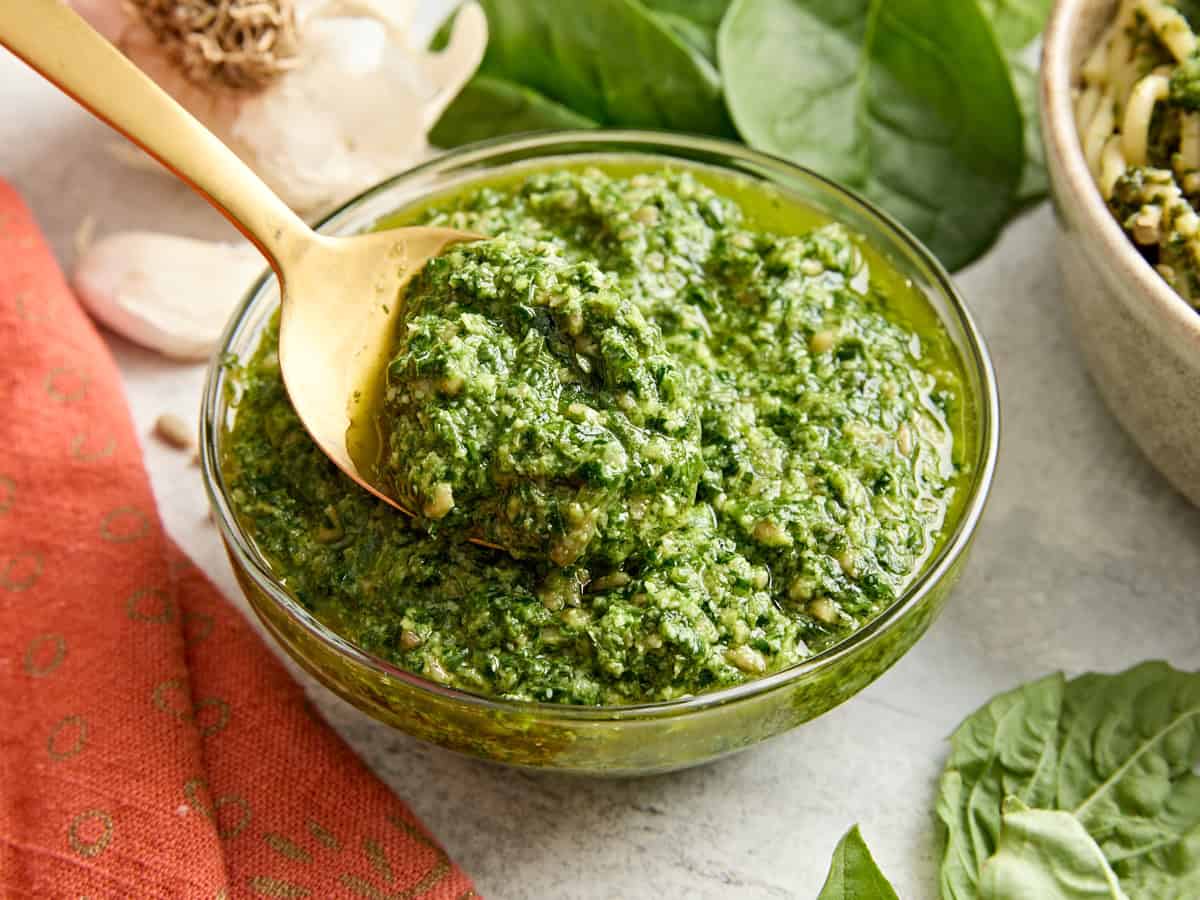
    With the processor running, drizzle in the lemon juice and olive oil. Blend until the mixture is smooth and creamy. Season with salt to taste.

    Step 6: Serve and Enjoy

    Your pesto is ready to go! Use it immediately as a sauce for pasta, a spread for sandwiches, or a topping for grilled proteins. Store leftovers in an airtight container in the fridge.

    Common Mistakes to Avoid

    • Skipping the toasting step: This is crucial for intensifying the flavor of the sunflower seeds.
    • Over-processing: Blend just until smooth. Over-processing can lead to a greasy pesto.
    • Not drying the greens: Excess water can make your pesto watery.

    How to Store & Reheat

    Store your pesto in an airtight container in the refrigerator for up to a week. For longer storage, freeze it in ice cube trays and transfer the cubes to a freezer bag. This way, you can thaw just what you need. To reheat, simply let it come to room temperature or gently warm it in a saucepan over low heat.

    Ingredient Substitutions

    • Basil and spinach: Swap with arugula or kale for a peppery twist.
    • Sunflower seeds: Replace with almonds or walnuts if preferred.
    • Parmesan cheese: Use nutritional yeast for a vegan option.

    Nutrition Facts

    • Calories: 180 per serving
    • Protein: 4g
    • Fat: 18g
    • Carbs: 3g
    • Serving Size: 2 tablespoons

    Frequently Asked Questions

    • Can I make this pesto vegan? Absolutely! Substitute the Parmesan cheese with nutritional yeast for a cheesy flavor without the dairy.
    • How can I make the pesto spicier? Add a pinch of red pepper flakes for a bit of heat.
    • Is it necessary to use a food processor? While a food processor is ideal, a blender or mortar and pestle can work in a pinch.
    • What dishes pair well with this pesto? It’s perfect for pasta, pizza, sandwiches, or as a dip for veggies.
    • Can I use dried basil instead of fresh? Fresh basil is recommended for the best flavor, but in a pinch, you can use dried—just reduce the quantity significantly.

  • ZERO PREP: Zesty Homemade Cocktail Sauce for Instant Party Fun!

    ZERO PREP: Zesty Homemade Cocktail Sauce for Instant Party Fun!

    Introduction & My Personal Story

    There’s something magical about a sauce that can elevate a dish and bring people together. My journey with this Zesty Homemade Cocktail Sauce dates back to a summer when I was just starting out in my culinary career. It was my first big family gathering after I took the leap into the world of cooking. I was tasked with preparing shrimp cocktail for a party of twenty, and I knew the real star would be the sauce. I remember standing in the kitchen, surrounded by the hustle and bustle of family chatter, as I meticulously mixed ingredients, tasting and adjusting until it was just right. The first bite was a revelation—a perfect balance of tangy, spicy, and savory. It was a hit, and from that moment, I knew I had a secret weapon in my culinary arsenal. In my 5 years of experience, I’ve learned that sometimes the simplest recipes, like this cocktail sauce, can make the biggest impact. It’s a quick, no-cook solution for any party or quick snack, and it’s been a staple in my kitchen ever since.

    Why You’ll Love This Recipe

    • Quick and Easy: Ready in under 5 minutes with zero cooking required.
    • Minimal Ingredients: Only 7 pantry staples needed.
    • Customizable: Adjust the heat and tang to your liking.
    • Versatile: Perfect for shrimp, oysters, fries, and more.
    • Party Favorite: A guaranteed hit at any gathering.

    Detailed Ingredients

    • ½ cup ketchup: Look for a brand with natural ingredients for the best base flavor.
    • 2 tbsp prepared horseradish: Fresh and pungent, this adds the signature kick.
    • Juice of ½ lemon: Freshly squeezed for that bright, zesty flavor.
    • ½ tbsp Worcestershire sauce: Adds depth and umami.
    • ¼ tsp hot sauce: Choose your favorite brand to control the heat level.
    • ⅛ tsp salt: Enhances all the flavors.
    • ⅛ tsp black pepper: Freshly ground for a subtle spice.

    Step-by-Step Instructions

    Step 1: Gather Your Ingredients
    Before you start, ensure all your ingredients are measured and ready. This makes the process smooth and stress-free, which is ideal when you’re in a rush. Chef’s Tip: Use fresh lemon juice for the best flavor burst.

    Step 2: Combine the Ingredients
    In a medium-sized mixing bowl, add the ½ cup ketchup, 2 tbsp prepared horseradish, and the juice of ½ lemon. Stir gently with a spoon until the mixture is smooth and the ketchup and horseradish are well blended.

    Step 3: Add the Flavor Boosters
    Pour in the ½ tbsp Worcestershire sauce and ¼ tsp hot sauce. These two ingredients will add depth and a slight heat to your sauce. Mix thoroughly until everything is well incorporated.

    Step 4: Season to Perfection
    Finally, sprinkle in ⅛ tsp salt and ⅛ tsp black pepper. Stir again, ensuring that the seasoning is evenly distributed. Taste and adjust any flavors if necessary. Chef’s Tip: Let it sit for a few minutes to allow the flavors to meld.

    Step 5: Serve or Store
    Your cocktail sauce is now ready to enjoy! Serve it immediately with your favorite seafood or store it in an airtight container in the refrigerator for later use. It’s best consumed within a week for optimal freshness.

    Common Mistakes to Avoid

    • Overpowering Heat: Be cautious with the hot sauce. Start with a small amount and adjust to taste.
    • Skipping Fresh Lemon Juice: Bottled lemon juice lacks the vibrant flavor of fresh. Always opt for fresh.
    • Not Mixing Well: Ensure all ingredients are thoroughly combined to avoid uneven flavor distribution.

    How to Store & Reheat

    Store your cocktail sauce in an airtight container in the refrigerator. It will keep for up to one week. If you find the sauce has thickened after refrigeration, let it sit at room temperature for a few minutes and stir before serving. This sauce is not suitable for freezing as it can alter the texture and flavor.

    Ingredient Substitutions

    • Ketchup: Substitute with tomato paste and a pinch of sugar for a thicker, less sweet version.
    • Prepared Horseradish: If unavailable, mix freshly grated horseradish with a touch of vinegar.
    • Worcestershire Sauce: Soy sauce with a dash of vinegar can be a quick alternative.
    • Hot Sauce: Use cayenne pepper or chili flakes if you prefer dry heat.

    Nutrition Facts

    • Calories: 30 per 2-tablespoon serving
    • Protein: 0g
    • Fat: 0g
    • Carbs: 8g
    • Serving Size: 2 tablespoons

    Frequently Asked Questions

    • Can I make this sauce in advance?
      Absolutely! It can be made a day ahead and stored in the fridge.
    • Is this sauce gluten-free?
      Yes, ensure your Worcestershire sauce and ketchup are gluten-free.
    • How can I make it less spicy?
      Reduce or omit the hot sauce to suit your taste.
    • Can I use lime instead of lemon?
      Yes, lime juice can offer a slightly different but still delicious citrus note.
    • What can I serve this with besides seafood?
      Try it with fries, chicken tenders, or as a burger topping.

  • ZERO PREP: Happiness in a Hurry—Bread & Quick Dips!

    ZERO PREP: Happiness in a Hurry—Bread & Quick Dips!

    Introduction & My Personal Story

    There’s something deeply comforting about the simple pleasure of freshly toasted bread dipped in rich, flavorful oils. I remember the first time I encountered this delight—it was during a summer trip to a quaint coastal village in Italy. The air was filled with the aroma of the sea and fresh herbs, and the locals had a way of creating magic with the simplest of ingredients. One evening, after a long day of exploring, I wandered into a small family-owned trattoria. The owner, Nonna Maria, greeted me with a warm smile and a plate of crusty bread served with an assortment of olive oil dips. The flavors were vibrant and comforting, a perfect blend of spice, sweetness, and earthiness. That experience stayed with me and became a cherished memory.

    Fast forward to my bustling kitchen years later, I found myself recreating those dips with my own spin. In my 5 years of experience as a chef, I’ve learned that you don’t need elaborate preparations to enjoy a gourmet experience. This dish, “Happiness in a Hurry: Bread & Quick Dips,” is my homage to that Italian summer evening. Whenever I need a quick fix that doesn’t skimp on flavor, I turn to these zero-prep olive oil bread dips. They’re perfect for busy weeknights or as a delightful starter at gatherings. It’s a little piece of Italy that you can whip up in mere minutes.

    Why You’ll Love This Recipe

    • Quick & Easy: Ready in under 5 minutes with zero cooking required.
    • Minimal Cleanup: Just a couple of bowls and a spoon.
    • Versatile Flavors: Sweet, spicy, and savory options to please any palate.
    • Perfect for Entertaining: Impress guests with a gourmet appetizer that’s effortless.
    • Customizable: Easily adjust to suit your taste preferences.

    Detailed Ingredients

    For this recipe, you’ll need the following ingredients:

    • Olive Oil: ½ cup (use extra virgin for the best flavor)
    • Garlic: 2 cloves, minced (look for firm, plump cloves)
    • Salt: ¼ teaspoon
    • Crushed Red Pepper: ⅛ teaspoon
    • Black Pepper: ⅛ teaspoon
    • Balsamic Glaze: 1 tablespoon (thick and syrupy is best)
    • Parsley: ½ teaspoon, minced (fresh, vibrant green leaves)
    • Honey: 1 tablespoon (preferably raw or organic)
    • Bread: Your choice of crusty bread, such as ciabatta or baguette

    Step-by-Step Instructions

    Creating these dips is as simple as it gets, but let’s walk through each step to ensure perfection.

    Step 1: Prepare the Bowls

    Take two shallow bowls. The shallow design allows for easy dipping and ensures that the flavors distribute evenly. Place them on a clean, flat surface.

    Step 2: Add the Olive Oil

    Pour ¼ cup of olive oil into each bowl. Opt for a high-quality extra virgin olive oil, as it will be the base of your dips and should shine through with its rich, fruity flavor.

    Step 3: Infuse with Garlic

    Divide the minced garlic between the two bowls, adding one clove to each. Stir gently to begin infusing the oil with that aromatic garlic essence.

    Step 4: Season the Dips

    In one bowl, stir in ⅛ teaspoon of salt and ⅛ teaspoon of crushed red pepper for a spicy kick. In the other bowl, add ⅛ teaspoon of salt and ⅛ teaspoon of black pepper for a more classic flavor.

    Step 5: Add Sweet and Savory Elements

    To the bowl with black pepper, add 1 tablespoon of balsamic glaze and ½ teaspoon of minced parsley. This will give it a sweet, tangy, and herbaceous profile. In the red pepper bowl, add 1 tablespoon of honey to balance the heat with sweetness.

    Step 6: Let the Flavors Marry

    Allow the dips to sit for a few minutes. This resting period lets the flavors meld together beautifully. Meanwhile, toast or prepare your bread of choice. A crispy exterior with a soft interior is ideal for soaking up those luscious oils.

    Common Mistakes to Avoid

    • Using Low-Quality Olive Oil: The oil is the star of this dish. Invest in good quality extra virgin olive oil for the best results.
    • Overloading with Garlic: Too much garlic can overpower the delicate balance of flavors. Stick to the recommended amount.
    • Skipping the Resting Time: Allowing the dips to sit helps the flavors meld. Don’t rush this step.
    • Using Stale Bread: Freshly toasted or baked bread will enhance the overall experience.

    How to Store & Reheat

    If you have any leftovers, store them properly to maintain freshness:

    • Storage: Transfer the dips to airtight containers and refrigerate. Consume within 3 days for optimal flavor.
    • Reheating: Allow the dips to come to room temperature before serving. Avoid microwaving, as it can alter the texture of the oil.

    Ingredient Substitutions

    If you’re missing an ingredient or need to make a substitution, here are some safe swaps:

    • Olive Oil: Substitute with avocado oil or grapeseed oil, although the flavor will differ slightly.
    • Garlic: Use garlic powder if fresh garlic isn’t available, adjusting to taste.
    • Honey: Swap with maple syrup or agave nectar for a vegan alternative.
    • Balsamic Glaze: Create a quick reduction with balsamic vinegar and sugar if glaze isn’t available.

    Nutrition Facts

    • Calories: 150 per serving
    • Protein: 0.5g
    • Fat: 14g
    • Carbs: 5g
    • Serving Size: 2 tablespoons

    Frequently Asked Questions

    Can I make these dips ahead of time?

    Yes, you can prepare them a few hours in advance. Just store them in the refrigerator and bring them to room temperature before serving.

    What type of bread works best for dipping?

    A crusty bread like ciabatta or a baguette is perfect. The texture holds up well to the oils and provides a satisfying crunch.

    Can I add cheese to these dips?

    Absolutely! Grated Parmesan or crumbled feta can add an extra layer of flavor. Sprinkle on top just before serving.

    How can I make this gluten-free?

    Simply use a gluten-free bread option. The dips themselves are naturally gluten-free.

    Is there a way to make these dips spicier?

    Increase the amount of crushed red pepper or add a dash of hot sauce to turn up the heat.

  • ZERO PREP: Show-Stopping Homemade Remoulade in a Flash!

    ZERO PREP: Show-Stopping Homemade Remoulade in a Flash!

    Introduction & My Personal Story

    Ah, remoulade! This zesty, creamy delight has always held a special place in my heart. I remember the first time I tasted it; I was a young chef just starting my culinary journey. It was in a bustling New Orleans kitchen, where the air was thick with the aroma of Cajun spices and the chatter of chefs busy at work. I was tasked with preparing a batch of remoulade for the evening service, and I remember being amazed at how such a simple mix of ingredients could transform into something so flavorful.

    In my 5 years of experience, I’ve learned that while some dishes require hours of preparation and careful attention to detail, others, like this homemade remoulade, can be whipped up in a flash without sacrificing taste or quality. This recipe has become my go-to for those busy weeknights when time is of the essence, yet I still want to serve something that feels special. Whether drizzled over crispy fried shrimp or used as a tangy dip for fresh veggies, this remoulade is a show-stopper every time.

    Today, I’m excited to share with you my zero-prep remoulade recipe that you can make in under five minutes. It’s perfect for those who are short on time but still crave that homemade touch. Let’s dive into this effortless yet impressive dish that will surely become a staple in your kitchen, just as it has in mine.

    Why You’ll Love This Recipe

    • No cooking required – perfect for hot days or when you’re short on time.
    • Minimal cleanup – just one bowl and a spoon.
    • Versatile – use it as a sauce, dip, or spread.
    • Customizable – easily adjust the spice level to your liking.
    • Impressive – tastes gourmet with zero effort.

    Detailed Ingredients

    Here’s what you’ll need to create this quick and delicious remoulade:

    • 1½ cups mayonnaise (350 grams) – Look for a good-quality mayo with a creamy texture.
    • ½ tsp hot sauce – Choose your favorite brand; I love using a classic like Tabasco for its tangy heat.
    • 2 Tbsp grainy mustard (30 grams) – Adds a nice texture and a bit of tang.
    • 2 minced garlic cloves – Fresh garlic is a must; it brings a punch of flavor.
    • 3 Tbsp dill pickle relish (45 grams) – Provides a delightful crunch and acidity.
    • 1 Tbsp prepared horseradish (15 grams) – Adds a spicy kick that balances the richness of the mayo.
    • 1 tsp Worcestershire sauce – Adds depth with its savory, umami notes.
    • ½ tsp smoked paprika – Gives a subtle smokiness that elevates the flavor.
    • ⅛ tsp cayenne pepper – Optional, for an extra hint of heat.
    • 1 Tbsp fresh minced parsley – For a touch of freshness and color.

    Step-by-Step Instructions

    Ready to whip up this quick remoulade? Follow these simple steps:

    Step 1: Gather all the ingredients. Chef’s Tip: Measure and prep everything before you start mixing to streamline the process.

    Step 2: In a medium-sized mixing bowl, combine the mayonnaise, hot sauce, grainy mustard, and minced garlic. Stir with a spoon until the mixture is smooth and well-blended.

    Step 3: Add the dill pickle relish, prepared horseradish, Worcestershire sauce, and smoked paprika to the bowl. Mix until all ingredients are fully incorporated and the sauce has a uniform consistency.

    Step 4: If you’re feeling adventurous, sprinkle in the cayenne pepper for an extra kick. Stir well to ensure the spice is evenly distributed.

    Step 5: Finally, fold in the fresh minced parsley. This not only adds color but also a fresh, herby flavor that brightens the sauce.

    Step 6: Taste the remoulade and adjust seasoning if necessary. You might want to add a bit more hot sauce or salt to suit your personal preference.

    Step 7: Serve immediately with your favorite seafood, or chill in the fridge for about 30 minutes if you prefer a cooler, more melded flavor profile.

    Common Mistakes to Avoid

    Even with a no-prep recipe, there are a few pitfalls to watch out for:

    • Over-mixing: Stir the ingredients just until combined to maintain a nice texture.
    • Using low-quality mayonnaise: The mayo is the base of this sauce, so choose a flavorful, creamy brand.
    • Forgetting to taste: Always taste your remoulade and adjust the seasoning before serving.
    • Skipping the fresh parsley: This herb adds brightness and should not be omitted.

    How to Store & Reheat

    Storing your remoulade properly ensures it stays fresh and delicious:

    • Transfer the remoulade to an airtight container.
    • Refrigerate for up to one week.
    • For best flavor, remove from the fridge 10 minutes before serving to let it come to room temperature.

    Note: This sauce is best served fresh and does not require reheating.

    Ingredient Substitutions

    Need to make some swaps? Here are some safe substitutions:

    • Mayonnaise: Swap with Greek yogurt for a lighter version.
    • Grainy mustard: Use Dijon mustard for a smoother texture.
    • Dill pickle relish: Finely chopped pickles can be used in a pinch.
    • Prepared horseradish: Substitute with wasabi for a similar heat.
    • Fresh parsley: Cilantro can be used for a different but equally fresh flavor.

    Nutrition Facts

    • Calories: 110 per serving
    • Protein: 0.5 grams
    • Fat: 11 grams
    • Carbs: 1 gram
    • Serving Size: 2 tablespoons

    Frequently Asked Questions

    • Can I make this remoulade ahead of time?
      Yes, it’s actually better if made a few hours in advance to let the flavors meld together.
    • Is this remoulade spicy?
      It has a mild kick, but you can adjust the heat by adding more or less hot sauce and cayenne pepper.
    • What dishes pair well with remoulade?
      It pairs beautifully with seafood, sandwiches, and can even be used as a salad dressing.
    • Can I freeze remoulade?
      Freezing is not recommended as it can affect the texture of the sauce.
    • How long does homemade remoulade last?
      It will keep in the fridge for up to one week when stored properly in an airtight container.