Tag: Perfect

  • Fast Fuel: Easy Apple Pie Overnight Oats for the Perfect Meal Prep!

    Fast Fuel: Easy Apple Pie Overnight Oats for the Perfect Meal Prep!

    Introduction & My Personal Story

    I remember the first time I stumbled upon the idea of overnight oats. It was a busy weekday morning, and I had just started my journey as a professional chef. In my 5 years of experience, I had never been a morning person, and breakfast often took a backseat to my morning hustle. One day, while flipping through an old cookbook, I came across a recipe for something called “overnight oats,” and it piqued my curiosity. The concept was simple: prepare your breakfast the night before, let it sit in the fridge, and wake up to a nutritious, ready-to-eat meal.

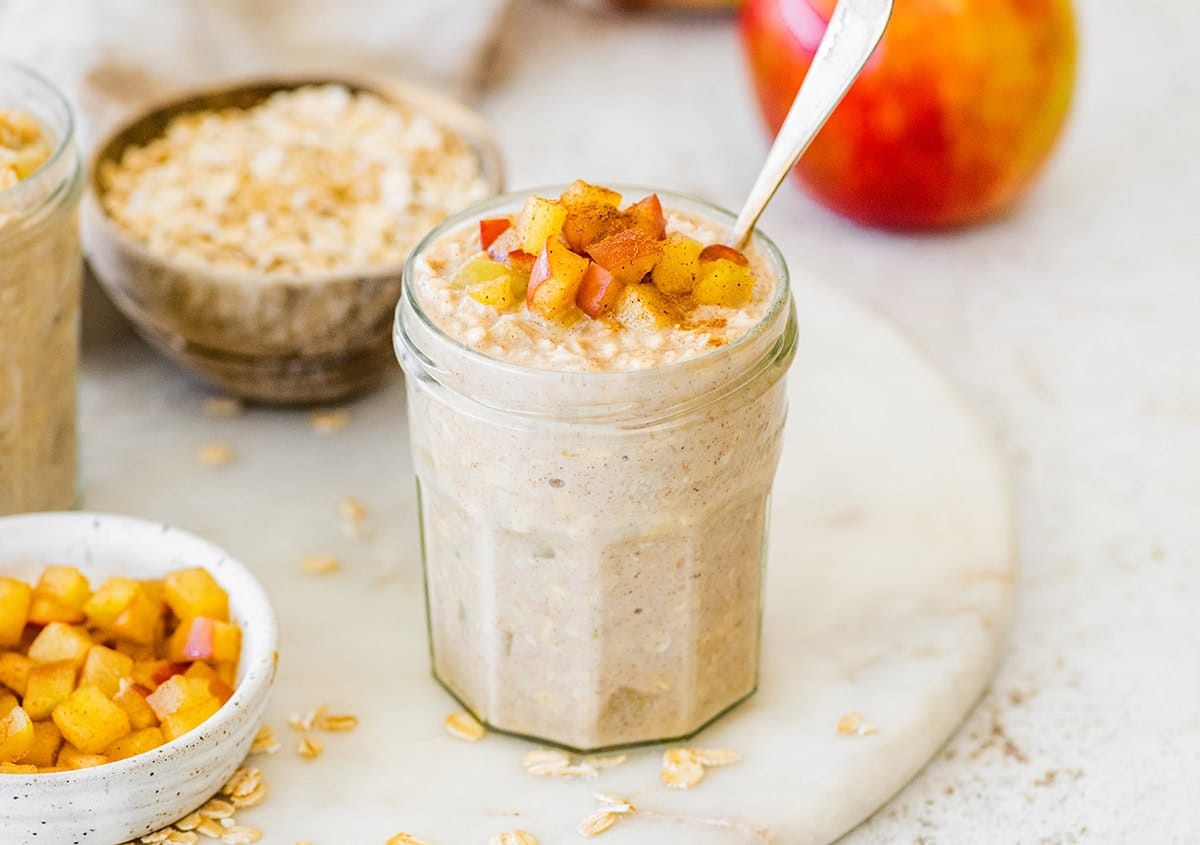
    The idea was revolutionary for someone like me who was always on the go. I decided to put my own twist on it by incorporating flavors reminiscent of my grandmother’s apple pie—a dish that always brought warmth and comfort to our family gatherings. I mixed oats with yogurt, milk, and a hint of cinnamon, then added chunks of soft, sweet apples. The next morning, I was greeted by a breakfast that tasted like dessert, yet was packed with nutrients to fuel my day. That was the beginning of my love affair with Apple Pie Overnight Oats, and it has since become a staple in my meal prep routine. Today, I’m excited to share this recipe with you, hoping it brings the same comfort and convenience to your mornings as it has to mine.

    Why You’ll Love This Recipe

    • Quick and Easy: Takes just 5 minutes to prepare.
    • Nutritious: Packed with fiber, protein, and healthy carbs.
    • Meal Prep Friendly: Perfect for making ahead and enjoying throughout the week.
    • Customizable: Easily adjust flavors and toppings to your liking.
    • Delicious: Tastes like dessert but with the health benefits of a balanced meal.

    Detailed Ingredients

    – **Old-fashioned rolled oats**: 1 cup (90g)
    – **Milk** (dairy or non-dairy): 1 cup (240ml)
    – **Plain Greek yogurt**: 1/2 cup (120g)
    – **Maple syrup**: 2 tablespoons (30ml)
    – **Vanilla extract**: 1 teaspoon (5ml)
    – **Ground cinnamon**: 1 teaspoon
    – **Apple** (medium-sized, peeled and chopped): 1
    – **Optional toppings**: Nut butter, additional cinnamon, or chopped nuts

    When shopping, look for fresh, firm apples and high-quality, pure maple syrup to enhance the natural sweetness of the dish.

    Step-by-Step Instructions

    Step 1: Prepare the Apples

    Start by peeling and chopping one medium-sized apple into small, bite-sized pieces. Place the apple pieces in a microwave-safe bowl, add 1 tablespoon of **maple syrup** and a sprinkle of **cinnamon**. Microwave on high for 30-60 seconds, until the apples are soft and fragrant. This quick cooking method enhances the apple’s sweetness and infuses it with the warm spice of cinnamon.

    Chef’s Tip: If you prefer a more caramelized apple, you can sauté them on the stovetop with a bit of butter until they are golden and tender.

    Step 2: Mix the Base

    In a large jar or airtight container, combine 1 cup of **old-fashioned rolled oats**, 1 cup of **milk**, 1/2 cup of **Greek yogurt**, the remaining tablespoon of **maple syrup**, 1 teaspoon of **vanilla extract**, and 1 teaspoon of **cinnamon**. Stir well until all the ingredients are thoroughly mixed. This base will absorb the flavors and thicken as it sits overnight.

    Step 3: Combine and Chill

    Stir in half of the softened apples into the oat mixture. Seal the jar or container tightly and give it a good shake to ensure everything is well combined. Place it in the refrigerator and let it chill overnight, or for at least 4 hours. This resting period allows the oats to absorb the liquid and flavors, resulting in a creamy, pudding-like consistency.

    Step 4: Serve and Enjoy

    In the morning, give your oats a quick stir. Top with the remaining apples and any optional toppings like nut butter or chopped nuts for added texture and flavor. Enjoy your **Apple Pie Overnight Oats** cold straight from the fridge or warmed up if you prefer a hot breakfast.

    Common Mistakes to Avoid

    • Using Instant Oats: Instant oats can become mushy. Stick with old-fashioned rolled oats for the best texture.
    • Skipping the Rest Time: The oats need time to absorb the liquid and flavors, so don’t cut the resting time short.
    • Overloading on Sweeteners: The natural sweetness of the apples and maple syrup is usually sufficient. Taste first before adding more sweeteners.

    How to Store & Reheat

    Store your **Apple Pie Overnight Oats** in an airtight container in the refrigerator for up to 5 days. This makes it an ideal meal prep option for the week. If you prefer your oats warm, simply transfer a portion to a microwave-safe bowl and heat for 1-2 minutes, stirring halfway through. You can also warm it on the stovetop over low heat, adding a splash of milk if needed to reach your desired consistency.

    Ingredient Substitutions

    – **Milk**: Substitute with almond milk, oat milk, or any preferred non-dairy milk.
    – **Greek Yogurt**: Use a dairy-free yogurt alternative if needed.
    – **Maple Syrup**: Swap with honey or agave syrup for a different flavor profile.
    – **Apples**: Try pears or peaches for a seasonal twist.

    Nutrition Facts

    • Calories: 339 kcal
    • Protein: 13g
    • Fat: 5g
    • Carbohydrates: 58g
    • Serving Size: 1 cup

    Frequently Asked Questions

    Can I make this recipe vegan?

    Absolutely! Use a plant-based yogurt and non-dairy milk to keep it vegan-friendly.

    How long can I store overnight oats?

    These oats can be stored in the refrigerator for up to 5 days, making them perfect for meal prep.

    Can I add protein powder?

    Yes, adding a scoop of protein powder can boost the protein content. Mix it in with the other ingredients before chilling.

    Do I need to cook the oats?

    No cooking is required! The oats soften and absorb the liquid as they sit in the fridge.

    Can I use steel-cut oats?

    Steel-cut oats require more liquid and a longer soaking time. Adjust the recipe accordingly if you choose to use them.

  • GAINS: Perfect Roux for Muscle-Building Gumbo!

    GAINS: Perfect Roux for Muscle-Building Gumbo!

    Introduction & My Personal Story

    Ah, gumbo! The dish that instantly transports me back to my early days in the kitchen, where I first learned the art of crafting a perfect roux. I remember standing beside my grandmother, who hailed from the heart of Louisiana, as she patiently stirred the roux until it reached that signature deep chocolate color. It was a labor of love, and she always said, “A good gumbo starts with a good roux.” Over the years, I’ve taken that wisdom to heart, blending it with my own culinary experiences to create a version of gumbo that not only brings comfort but also packs a punch of protein for those looking to fuel their muscles.

    In my 5 years of experience as a chef, I’ve learned that a dish like gumbo is all about balance. It’s about marrying flavors and textures, and in this case, it’s about creating a meal that not only delights the taste buds but also supports an active lifestyle. Whether you’re a seasoned athlete or someone just starting their fitness journey, this gumbo is designed to keep you going strong. It’s hearty, satisfying, and brimming with nutrients that will help you recover after a tough workout. So, let’s dive into this muscle-building masterpiece and make some gains!

    Why You’ll Love This Recipe

    Detailed Ingredients

    For this muscle-building gumbo, you’ll need:

    • **13.5 oz. andouille sausage**, sliced
    • **1 lb. boneless, skinless chicken thighs**, cubed
    • **2 tablespoons Creole seasoning**
    • **¾ cup vegetable oil**
    • **1 cup all-purpose flour**
    • **1 large onion**, diced
    • **1 green bell pepper**, diced
    • **3 ribs of celery**, sliced
    • **2 garlic cloves**, minced
    • **12 oz. frozen okra**
    • **1 teaspoon dried thyme**
    • **3 bay leaves**
    • **¼ teaspoon salt**
    • **¼ teaspoon black pepper**
    • **6 cups chicken broth**
    • **2 tablespoons hot sauce**
    • **¼ bunch fresh parsley**, chopped
    • **2 green onions**, sliced
    • **2 cups uncooked rice**

    When shopping, look for fresh vegetables and high-quality sausage to ensure the best flavor.

    Step-by-Step Instructions

    Sear the Sausage: Heat 1 tablespoon of vegetable oil in a large, deep skillet over medium heat. Once hot, add the sliced andouille sausage. Brown both sides, about 5 minutes each. Remove and set aside.

    Cook the Chicken: Toss the cubed chicken thighs with 1 tablespoon of Creole seasoning. Add to the skillet, searing for 5 minutes on each side. Remove and cover with foil to keep warm.

    Make the Roux: Lower the heat to medium-low and add **¾ cup vegetable oil** and **1 cup all-purpose flour**. Stir constantly for about 2 hours until it reaches a dark brown color. This step requires patience, as the roux is the foundation of flavor. Chef’s Tip: Keep stirring to prevent burning!

    Add Vegetables: Increase heat to medium. Stir in the diced onion, green pepper, and sliced celery. Cook until softened, about 5 minutes.

    Combine Ingredients: Add the browned chicken, sausage, any accumulated juices, minced garlic, and frozen okra. Season with the remaining tablespoon of Cajun seasoning, dried thyme, bay leaves, salt, and pepper.

    Simmer: Pour in the chicken broth. Bring to a boil, then lower the heat and simmer until thickened, about 30 minutes. The gumbo should have a rich, deep flavor by now.

    Final Touches: In the last 5 minutes, stir in hot sauce, chopped parsley, and sliced green onions, saving some for garnish.

    Cook the Rice: Prepare the rice according to package instructions. Typically, use 4 cups of water and let simmer until tender.

    Serve: Once the rice is cooked, fluff with a fork and serve with gumbo. Garnish with reserved parsley and green onions. Enjoy!

    Common Mistakes to Avoid

    • Burning the Roux: Stir constantly and adjust the heat as needed. If it burns, you’ll need to start over.
    • Overcooking the Meat: Keep an eye on the chicken and sausage to ensure they don’t dry out.
    • Skipping the Simmer: Allow the gumbo to simmer to develop deep flavors and thicken properly.

    How to Store & Reheat

    Store any leftover gumbo in airtight containers in the refrigerator for up to 3 days. For longer storage, freeze in portion-sized containers for up to 3 months. To reheat, thaw overnight in the refrigerator if frozen, then warm on the stove over medium heat until hot.

    Ingredient Substitutions

    • Sausage: Substitute with turkey sausage or a plant-based alternative for a different flavor profile.
    • Chicken Thighs: Use chicken breasts if preferred, but adjust cooking time to prevent drying out.
    • Vegetable Oil: Can be replaced with canola oil or a similar neutral oil.
    • Okra: If not a fan, consider using zucchini or omit entirely.

    Nutrition Facts

    • Calories: 673 kcal
    • Protein: 27g
    • Fat: 36g
    • Carbs: 53g
    • Serving Size: 1 cup of gumbo with rice

    Frequently Asked Questions

    Q: Can I make this gumbo spicier?

    A: Absolutely! Add more hot sauce or a pinch of cayenne pepper to turn up the heat.

    Q: What’s the best way to thicken the gumbo?

    A: The roux does most of the work, but you can also let it simmer uncovered to reduce further.

    Q: Can I make this recipe vegetarian?

    A: Yes, substitute the sausage and chicken with plant-based proteins and use vegetable broth.

    Q: What should I serve with gumbo?

    A: It’s traditionally served with rice, but you can also enjoy it with crusty bread or cornbread.