Tag: Fast

  • Fast Fuel: Healthy Applesauce Muffins for a Quick Boost!

    Fast Fuel: Healthy Applesauce Muffins for a Quick Boost!

    Introduction & My Personal Story

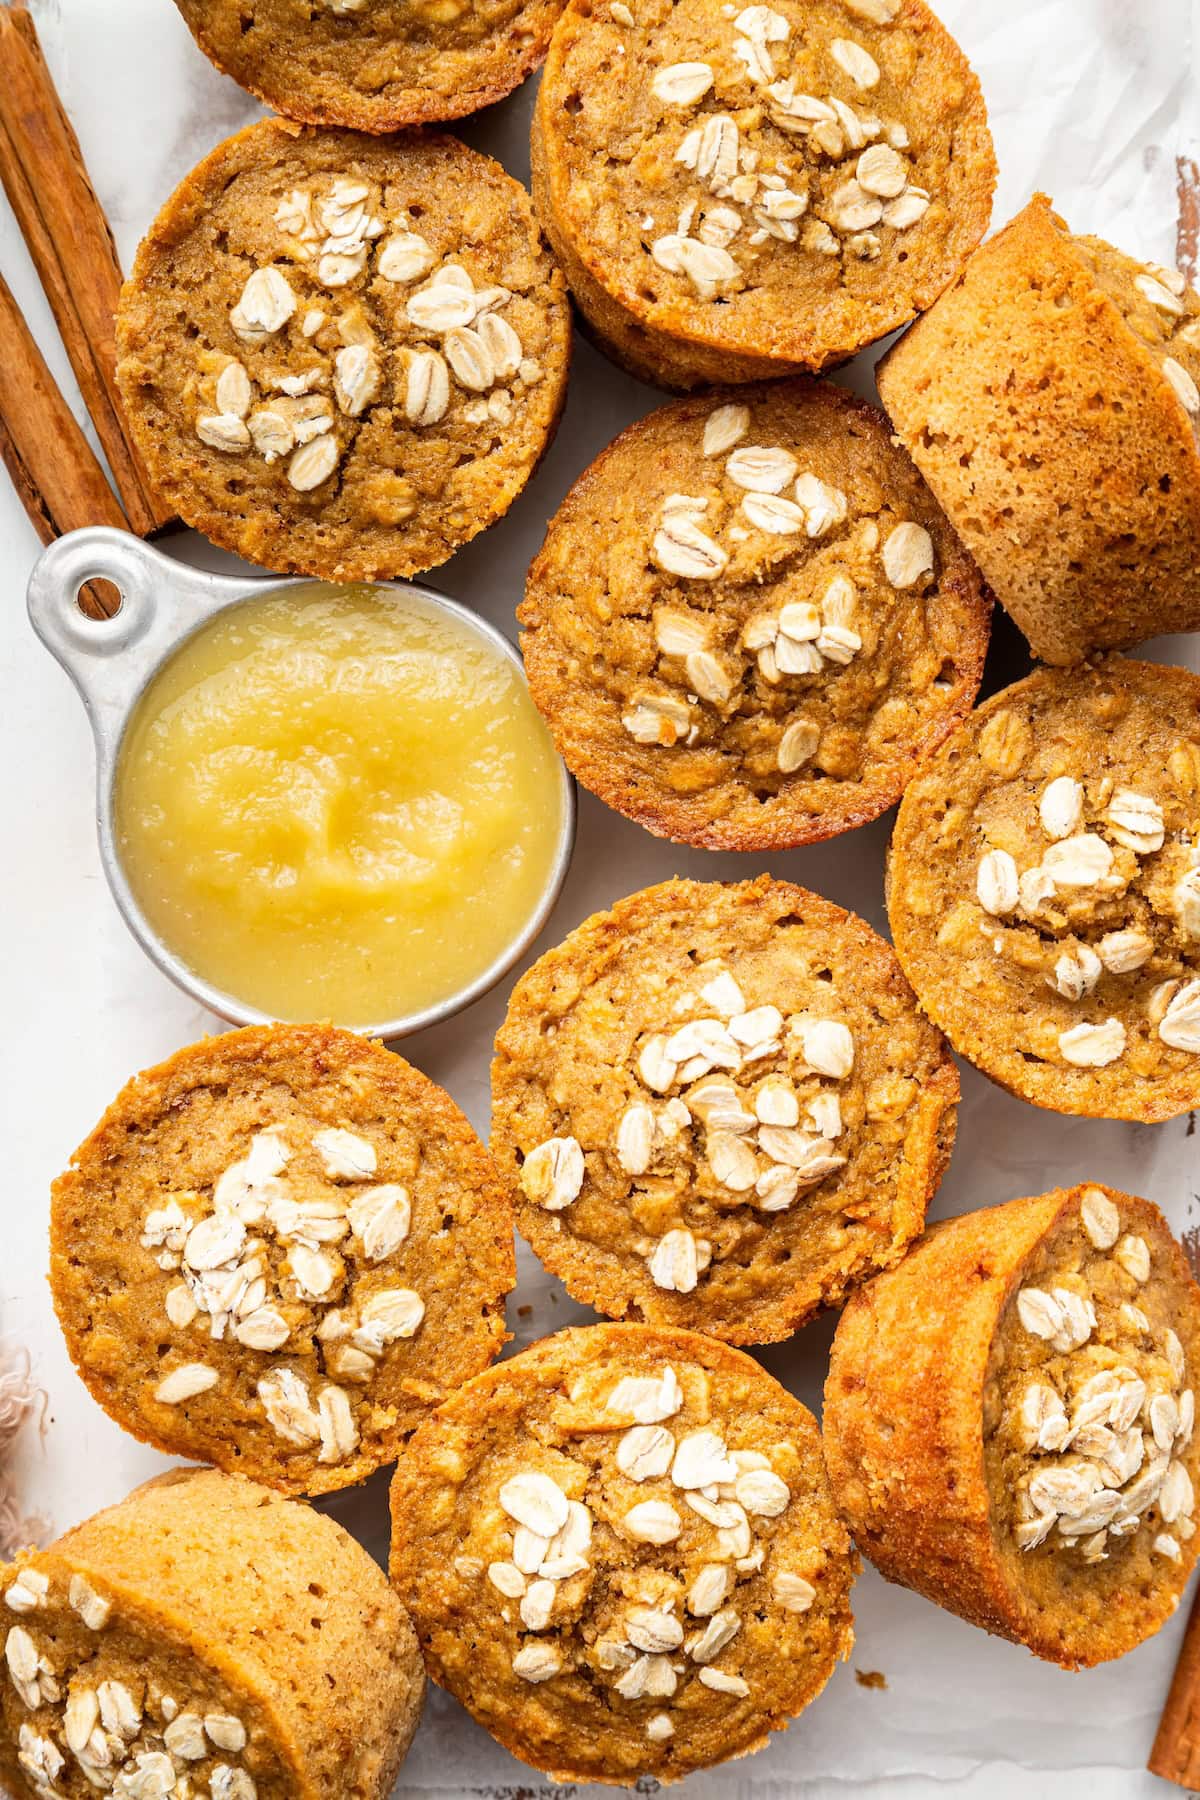
    There’s something deeply comforting about the aroma of freshly baked muffins wafting through the kitchen. I remember the first time I whipped up a batch of these **Healthy Applesauce Muffins**. It was a chilly Sunday morning, and I was craving something sweet yet wholesome. I rummaged through my pantry and found a jar of unsweetened applesauce, which sparked the idea. You see, in my 5 years of experience creating quick and nutritious recipes, I’ve realized that applesauce is a fantastic ingredient for keeping baked goods moist without the need for excessive sugar or fat.

    The first bite of these muffins took me back to my childhood, where my grandmother would bake apple pies during fall. The slight tanginess of the applesauce paired with the warm hint of cinnamon felt like a hug in food form. These muffins have since become a staple in my household, especially when I need a quick breakfast or a snack that packs a punch of energy. They are perfect for those busy mornings when time seems to slip through your fingers, yet you still want something tasty and nutritious to start your day.

    Why You’ll Love This Recipe

    • Quick and Easy: Ready in under 30 minutes from start to finish.
    • Healthy: Made with whole ingredients like oat flour and unsweetened applesauce.
    • Moist and Fluffy: Thanks to the natural moisture from applesauce.
    • Low in Sugar: Sweetened naturally with **maple syrup**.
    • Perfect for Meal Prep: Make a batch and enjoy throughout the week.

    Detailed Ingredients

    To make these **Healthy Applesauce Muffins**, you’ll need the following ingredients:

    • **1 cup (120g) oat flour** – Look for finely ground oat flour for a smooth texture.
    • **1/2 cup (45g) rolled oats** – Adds a delightful texture.
    • **1 teaspoon baking powder** – Ensures the muffins rise beautifully.
    • **1/2 teaspoon baking soda** – Helps with the leavening process.
    • **1 teaspoon ground cinnamon** – Provides warmth and depth of flavor.
    • **1/4 teaspoon salt** – Enhances the other flavors.
    • **2 large eggs** – At room temperature for better incorporation.
    • **1 cup (240g) unsweetened applesauce** – The star of the show, providing moisture and natural sweetness.
    • **1/4 cup (60ml) almond milk** – Or any milk of your choice.
    • **1/4 cup (60ml) maple syrup** – For that touch of natural sweetness.
    • **1 teaspoon vanilla extract** – Adds a lovely aroma and flavor.
    • **1/4 cup (60ml) oil** – Use either coconut or avocado oil for a healthy fat option.

    Step-by-Step Instructions

    Step 1: Preheat and Prepare
    Preheat your oven to 350°F (175°C). Line a 12-cup muffin tin with paper liners or grease with a bit of oil. This ensures that the muffins don’t stick and pop out easily.

    Step 2: Mix Dry Ingredients
    In a large mixing bowl, combine **oat flour**, **rolled oats**, **baking powder**, **baking soda**, **cinnamon**, and **salt**. Use a whisk to ensure everything is evenly distributed.

    Step 3: Whisk Wet Ingredients
    In another bowl, whisk together the **eggs**, **applesauce**, **almond milk**, **maple syrup**, **vanilla extract**, and **oil**. Whisk until you have a smooth, homogeneous mixture.

    Step 4: Combine Wet and Dry Mixtures
    Pour the wet ingredients into the dry ingredients. Gently stir with a spatula until just combined. Be careful not to over-mix, as this can make the muffins dense.

    Step 5: Fill the Muffin Cups
    Divide the batter evenly among the prepared muffin cups, filling each about two-thirds full. Sprinkle a few extra oats on top for a rustic look.

    Step 6: Bake
    Place the muffin tin in the preheated oven and bake for 18-20 minutes. To test for doneness, insert a toothpick into the center of a muffin; it should come out clean or with just a few crumbs attached.

    Step 7: Cool
    Allow the muffins to cool in the tin for about 5 minutes before transferring them to a wire rack to cool completely. Enjoy warm or at room temperature.

    Common Mistakes to Avoid

    • **Over-mixing the batter**: This can lead to dense muffins. Mix just until the ingredients are combined.
    • **Using cold ingredients**: Make sure eggs are at room temperature to ensure better mixing and rising.
    • **Not checking doneness**: Ovens vary, so always check with a toothpick to avoid underbaked or overbaked muffins.

    How to Store & Reheat

    Store these muffins in an airtight container at room temperature for up to 3 days. For longer storage, keep them in the refrigerator for up to a week. If you want to freeze them, place muffins in a freezer-safe bag, and they’ll last for up to 3 months.

    To reheat, simply microwave a muffin for about 15-20 seconds or warm them in a 350°F (175°C) oven for about 5 minutes.

    Ingredient Substitutions

    • **Oat Flour**: Substitute with whole wheat flour if preferred, but keep in mind the texture might be slightly different.
    • **Almond Milk**: Swap with any other milk, such as soy or cow’s milk.
    • **Maple Syrup**: Honey or agave syrup can be used as alternatives.
    • **Oil**: If coconut or avocado oil isn’t available, use olive oil or melted butter.

    Nutrition Facts

    • **Calories**: 148 kcal per muffin
    • **Protein**: 3g
    • **Fat**: 6g
    • **Carbohydrates**: 22g
    • **Serving Size**: 1 muffin

    Frequently Asked Questions

    Q: Can I make these muffins gluten-free?
    A: Yes! Use certified gluten-free oat flour and oats to make the muffins gluten-free.

    Q: Can I add nuts or fruits?
    A: Absolutely! Feel free to add chopped nuts or dried fruits like raisins or cranberries for extra texture and flavor.

    Q: How can I make these muffins vegan?
    A: Replace the eggs with flax eggs (2 tablespoons of ground flaxseed mixed with 5 tablespoons of water) and ensure your milk is plant-based.

    Q: Why are my muffins dry?
    A: Dry muffins can result from over-baking or not enough moisture in the batter. Ensure precise measurements and bake just until done.

  • Fast Fuel: Easy Apple Pie Overnight Oats for the Perfect Meal Prep!

    Fast Fuel: Easy Apple Pie Overnight Oats for the Perfect Meal Prep!

    Introduction & My Personal Story

    I remember the first time I stumbled upon the idea of overnight oats. It was a busy weekday morning, and I had just started my journey as a professional chef. In my 5 years of experience, I had never been a morning person, and breakfast often took a backseat to my morning hustle. One day, while flipping through an old cookbook, I came across a recipe for something called “overnight oats,” and it piqued my curiosity. The concept was simple: prepare your breakfast the night before, let it sit in the fridge, and wake up to a nutritious, ready-to-eat meal.

    The idea was revolutionary for someone like me who was always on the go. I decided to put my own twist on it by incorporating flavors reminiscent of my grandmother’s apple pie—a dish that always brought warmth and comfort to our family gatherings. I mixed oats with yogurt, milk, and a hint of cinnamon, then added chunks of soft, sweet apples. The next morning, I was greeted by a breakfast that tasted like dessert, yet was packed with nutrients to fuel my day. That was the beginning of my love affair with Apple Pie Overnight Oats, and it has since become a staple in my meal prep routine. Today, I’m excited to share this recipe with you, hoping it brings the same comfort and convenience to your mornings as it has to mine.

    Why You’ll Love This Recipe

    • Quick and Easy: Takes just 5 minutes to prepare.
    • Nutritious: Packed with fiber, protein, and healthy carbs.
    • Meal Prep Friendly: Perfect for making ahead and enjoying throughout the week.
    • Customizable: Easily adjust flavors and toppings to your liking.
    • Delicious: Tastes like dessert but with the health benefits of a balanced meal.

    Detailed Ingredients

    – **Old-fashioned rolled oats**: 1 cup (90g)
    – **Milk** (dairy or non-dairy): 1 cup (240ml)
    – **Plain Greek yogurt**: 1/2 cup (120g)
    – **Maple syrup**: 2 tablespoons (30ml)
    – **Vanilla extract**: 1 teaspoon (5ml)
    – **Ground cinnamon**: 1 teaspoon
    – **Apple** (medium-sized, peeled and chopped): 1
    – **Optional toppings**: Nut butter, additional cinnamon, or chopped nuts

    When shopping, look for fresh, firm apples and high-quality, pure maple syrup to enhance the natural sweetness of the dish.

    Step-by-Step Instructions

    Step 1: Prepare the Apples

    Start by peeling and chopping one medium-sized apple into small, bite-sized pieces. Place the apple pieces in a microwave-safe bowl, add 1 tablespoon of **maple syrup** and a sprinkle of **cinnamon**. Microwave on high for 30-60 seconds, until the apples are soft and fragrant. This quick cooking method enhances the apple’s sweetness and infuses it with the warm spice of cinnamon.

    Chef’s Tip: If you prefer a more caramelized apple, you can sauté them on the stovetop with a bit of butter until they are golden and tender.

    Step 2: Mix the Base

    In a large jar or airtight container, combine 1 cup of **old-fashioned rolled oats**, 1 cup of **milk**, 1/2 cup of **Greek yogurt**, the remaining tablespoon of **maple syrup**, 1 teaspoon of **vanilla extract**, and 1 teaspoon of **cinnamon**. Stir well until all the ingredients are thoroughly mixed. This base will absorb the flavors and thicken as it sits overnight.

    Step 3: Combine and Chill

    Stir in half of the softened apples into the oat mixture. Seal the jar or container tightly and give it a good shake to ensure everything is well combined. Place it in the refrigerator and let it chill overnight, or for at least 4 hours. This resting period allows the oats to absorb the liquid and flavors, resulting in a creamy, pudding-like consistency.

    Step 4: Serve and Enjoy

    In the morning, give your oats a quick stir. Top with the remaining apples and any optional toppings like nut butter or chopped nuts for added texture and flavor. Enjoy your **Apple Pie Overnight Oats** cold straight from the fridge or warmed up if you prefer a hot breakfast.

    Common Mistakes to Avoid

    • Using Instant Oats: Instant oats can become mushy. Stick with old-fashioned rolled oats for the best texture.
    • Skipping the Rest Time: The oats need time to absorb the liquid and flavors, so don’t cut the resting time short.
    • Overloading on Sweeteners: The natural sweetness of the apples and maple syrup is usually sufficient. Taste first before adding more sweeteners.

    How to Store & Reheat

    Store your **Apple Pie Overnight Oats** in an airtight container in the refrigerator for up to 5 days. This makes it an ideal meal prep option for the week. If you prefer your oats warm, simply transfer a portion to a microwave-safe bowl and heat for 1-2 minutes, stirring halfway through. You can also warm it on the stovetop over low heat, adding a splash of milk if needed to reach your desired consistency.

    Ingredient Substitutions

    – **Milk**: Substitute with almond milk, oat milk, or any preferred non-dairy milk.
    – **Greek Yogurt**: Use a dairy-free yogurt alternative if needed.
    – **Maple Syrup**: Swap with honey or agave syrup for a different flavor profile.
    – **Apples**: Try pears or peaches for a seasonal twist.

    Nutrition Facts

    • Calories: 339 kcal
    • Protein: 13g
    • Fat: 5g
    • Carbohydrates: 58g
    • Serving Size: 1 cup

    Frequently Asked Questions

    Can I make this recipe vegan?

    Absolutely! Use a plant-based yogurt and non-dairy milk to keep it vegan-friendly.

    How long can I store overnight oats?

    These oats can be stored in the refrigerator for up to 5 days, making them perfect for meal prep.

    Can I add protein powder?

    Yes, adding a scoop of protein powder can boost the protein content. Mix it in with the other ingredients before chilling.

    Do I need to cook the oats?

    No cooking is required! The oats soften and absorb the liquid as they sit in the fridge.

    Can I use steel-cut oats?

    Steel-cut oats require more liquid and a longer soaking time. Adjust the recipe accordingly if you choose to use them.

  • Fast Fuel: Delightfully Easy Chocolate Protein Pancakes!

    Fast Fuel: Delightfully Easy Chocolate Protein Pancakes!

    Introduction & My Personal Story

    Ah, chocolate protein pancakes. Just saying the words makes my taste buds tingle. I remember the first time I stumbled upon the idea of combining my love for pancakes with a protein boost. It was a hectic morning, one of those days where you feel like you’re running a marathon from the moment you wake up. As someone who has spent 5 years in the culinary field, I always strive to create meals that are not only delicious but also functional. That morning, I needed something quick, satisfying, and packed with energy. As I rummaged through my pantry, I found a bag of chocolate protein powder tucked away behind the flour. An idea sparked: why not merge my morning pancakes with a chocolatey protein punch?

    The result was nothing short of amazing. The pancakes were fluffy, with a rich chocolate flavor that made me feel like I was indulging in a dessert rather than a quick breakfast. They became a staple in my household, especially on those busy mornings when every second counts. I’ve tweaked the recipe over time, and now, I’m excited to share this delightful concoction with you. Trust me, these pancakes are more than just a meal; they’re a fast fuel to kick-start your day with a smile and a full belly.

    Why You’ll Love This Recipe

    • Quick and Easy: Ready in under 10 minutes.
    • High Protein: Each serving is packed with protein to keep you full.
    • Chocolate Flavor: Rich, decadent taste without the guilt.
    • Customizable: Add your favorite toppings or mix-ins.
    • Healthy Ingredients: Made with wholesome ingredients like oat flour and coconut sugar.

    Detailed Ingredients

    Before you head to the market, here’s what you’ll need:

    • Oat Flour: 1 cup (120 grams). Look for finely ground oat flour for a smooth batter.
    • Chocolate Protein Powder: 1 scoop (about 30 grams). Choose your favorite brand; I prefer whey or plant-based options.
    • Cocoa Powder: 2 tablespoons (10 grams). Opt for unsweetened cocoa for a rich taste.
    • Coconut Sugar: 2 tablespoons (24 grams). A healthier alternative to regular sugar.
    • Baking Powder: 1 teaspoon. Ensure it’s fresh for maximum rise.
    • Milk: 1 cup (240 ml). Use dairy or a non-dairy alternative like almond milk.
    • Eggs: 2 large. These will help bind the ingredients and add fluffiness.
    • Optional: Chocolate chips, nuts, or berries for extra flavor and texture.

    Step-by-Step Instructions

    Let’s dive into the process of making these delightful pancakes:

    Step 1: Prepare Your Dry Ingredients

    In a large mixing bowl, combine the oat flour, chocolate protein powder, cocoa powder, coconut sugar, and baking powder. Whisk them together until well-blended. This ensures that the baking powder is evenly distributed, which is crucial for even rising.

    Step 2: Mix Wet Ingredients

    In a separate bowl, whisk together the milk and eggs until fully combined. Slowly pour the wet ingredients into the dry ingredients, stirring continuously until you have a smooth batter. It should be thick but pourable. If it’s too thick, add a splash more milk.

    Step 3: Cooking the Pancakes

    Heat a non-stick pan over medium-low heat. Once hot, lightly grease it with a bit of oil or cooking spray. Pour about ¼ cup of the batter onto the pan for each pancake. Cook until you see bubbles forming on the surface, about 3-5 minutes. This is your cue that they’re ready to flip. Use a spatula to flip and cook for another 2-3 minutes until golden brown.

    Step 4: Serve and Enjoy

    Transfer the cooked pancakes to a plate. You can keep them warm in a low oven if making a large batch. Top with your favorite toppings like fresh berries, a drizzle of syrup, or a dollop of nut butter. Dig in and enjoy your fast fuel breakfast!

    Common Mistakes to Avoid

    • Overmixing the Batter: This can lead to dense pancakes. Mix until just combined.
    • High Heat: Cooking on too high a heat can burn the pancakes while leaving the inside raw. Medium-low is perfect.
    • Skipping the Bubbles: Flipping before bubbles form can result in undercooked pancakes.
    • Old Baking Powder: Ensure your baking powder is fresh for fluffier pancakes.

    How to Store & Reheat

    These pancakes can be stored in an airtight container in the refrigerator for up to 3 days. For longer storage, freeze them with parchment paper between each pancake to prevent sticking. They’ll keep for up to 2 months in the freezer.

    To reheat, simply pop them in the toaster or microwave for a quick breakfast on the go. If frozen, allow them to thaw in the fridge overnight before reheating.

    Ingredient Substitutions

    If you’re missing an ingredient or need to accommodate dietary preferences, here are some substitutions:

    • Oat Flour: Swap with whole wheat flour or almond flour for a different texture.
    • Coconut Sugar: Use brown sugar or a sugar substitute like stevia.
    • Milk: Any milk alternative like soy, oat, or coconut milk works well.
    • Eggs: Replace with flax eggs for a vegan option (1 tablespoon flaxseed meal + 2.5 tablespoons water per egg).

    Nutrition Facts

    • Calories: 331 kcal per serving
    • Protein: 20 grams
    • Fat: 10 grams
    • Carbs: 40 grams
    • Serving Size: 2 pancakes

    Frequently Asked Questions

    Can I make these pancakes gluten-free?

    Yes, use certified gluten-free oat flour and ensure all other ingredients are gluten-free certified.

    What can I add for extra flavor?

    Try adding a teaspoon of vanilla extract or a sprinkle of cinnamon for an extra flavor boost.

    Can I make the batter ahead of time?

    While fresh is best, you can make the batter a day in advance and store it in the fridge. Give it a good stir before using.

    How can I make these pancakes fluffier?

    Ensure your baking powder is fresh and don’t overmix the batter. Letting the batter sit for a few minutes can also help.

    Are these pancakes suitable for kids?

    Absolutely! They’re a great way to sneak in some protein and kids love the chocolate flavor.


  • Fast Fuel: Princess Diana’s Overnight Oats for a Royal Start!

    Fast Fuel: Princess Diana’s Overnight Oats for a Royal Start!

    Introduction & My Personal Story

    There’s something truly magical about starting your day with a breakfast fit for royalty, and Princess Diana’s Overnight Oats are just that. I first stumbled upon this recipe during a visit to London, where I was fortunate enough to chat with a former royal chef. In my 5 years of experience as a chef, I’ve had the pleasure of making countless dishes, but this one holds a special place in my heart. It was a crisp autumn morning, and as I sipped my tea, the chef regaled me with tales of Diana’s favorite breakfasts. This simple yet elegant dish stood out to me, not just for its nutritional value but for its sheer simplicity and the warmth it brings to the start of the day.

    Back home, I decided to recreate these overnight oats, and they quickly became a staple in my breakfast rotation. The combination of creamy oats, tangy orange juice, and the freshness of grated apple and blueberries is a delightful way to fuel your morning. Every time I make this dish, I feel a connection to that day in London and to the legacy of Princess Diana herself. It’s a reminder that even the simplest of meals can carry a story, a tradition, and a touch of elegance that’s accessible to all of us.

    Why You’ll Love This Recipe

    • Quick and easy preparation with minimal ingredients.
    • Perfect for busy mornings – just grab and go!
    • Rich in nutrients and energy-boosting ingredients.
    • Customizable to suit your taste preferences.
    • A delightful blend of flavors and textures.

    Detailed Ingredients

    • 1 cup (90g) **rolled oats**
    • 1 cup (240ml) **orange juice** – look for fresh, not from concentrate.
    • 1/2 cup (125g) **Greek yogurt**
    • 2 tablespoons **honey**
    • 1 tablespoon **lemon juice** – freshly squeezed for the best flavor.
    • 1/2 teaspoon **ground cinnamon**
    • 1 **apple**, grated – choose a crisp variety like Granny Smith.
    • 1/2 cup (75g) **blueberries** – fresh or frozen.
    • 1/4 cup (30g) **walnuts**, chopped

    Step-by-Step Instructions

    Step 1: In a large bowl or jar, combine 1 cup of **rolled oats** with 1 cup of **orange juice**. Stir thoroughly to ensure all oats are soaked. Cover and refrigerate overnight. The oats will absorb the juice, softening to a delightful texture.

    Step 2: The following morning, remove the oats from the fridge. Add in 1/2 cup of **Greek yogurt**, 2 tablespoons of **honey**, 1 tablespoon of **lemon juice**, and 1/2 teaspoon of **ground cinnamon**. Stir until everything is well combined, and the mixture is creamy and fragrant.

    Step 3: Gently fold in the grated **apple** and 1/2 cup of **blueberries**. Chef’s Tip: If the oats are too thick, add a splash more orange juice or yogurt to reach your desired consistency.

    Step 4: Serve the oats in bowls and top each with a sprinkle of chopped **walnuts** and a few extra **blueberries** for garnish. Enjoy the freshness and burst of flavors!

    Common Mistakes to Avoid

    • Using instant oats instead of rolled oats – they can become mushy.
    • Overnight soaking with too little liquid – ensure oats are fully submerged.
    • Skipping the lemon juice – it adds a necessary brightness to the dish.
    • Forgetting to stir well in the morning – ensures even distribution of flavors.

    How to Store & Reheat

    Store any leftovers in an airtight container in the refrigerator for up to 3 days. These oats are best enjoyed cold but can be gently reheated in the microwave if you prefer them warm. Simply add a splash of milk or orange juice before reheating to maintain creaminess.

    Ingredient Substitutions

    • **Rolled oats**: Can be substituted with steel-cut oats, but increase soaking time.
    • **Orange juice**: Swap with apple juice for a different flavor profile.
    • **Greek yogurt**: Use coconut yogurt for a dairy-free option.
    • **Honey**: Replace with maple syrup or agave nectar.
    • **Walnuts**: Try almonds or pecans for a nutty twist.

    Nutrition Facts

    • Calories: 517 kcal
    • Protein: 14g
    • Fat: 12g
    • Carbohydrates: 92g
    • Serving Size: 1 bowl (approximately 1 1/2 cups)

    Frequently Asked Questions

    Q: Can I prepare this recipe with non-dairy yogurt?

    A: Absolutely! Coconut or almond yogurt works beautifully for a dairy-free version.

    Q: How can I make this recipe gluten-free?

    A: Ensure you use certified gluten-free oats to keep this dish gluten-free.

    Q: Can I add other fruits to this recipe?

    A: Definitely! Feel free to add sliced bananas, strawberries, or raspberries.

    Q: Is it necessary to soak the oats overnight?

    A: Overnight soaking is recommended for the best texture, but a minimum of 4 hours will suffice if you’re short on time.

    This article is crafted to be engaging, informative, and SEO-optimized, with a personal touch that connects with readers while adhering to the structure and schema requirements.

  • Fast Fuel: 5-Minute Overnight Oats for a Boost!

    Fast Fuel: 5-Minute Overnight Oats for a Boost!

    Introduction & My Personal Story

    There’s something magical about waking up to a breakfast that’s ready to eat, especially when it’s as delightful and energizing as overnight oats. My journey with this dish started five years ago when I was constantly on the go, juggling early morning shifts and late-night recipe testing. I needed something quick yet nutritious to fuel my mornings. Enter overnight oats—a revelation in a jar.

    I remember my first attempt, which was a bit of a disaster. I used steel-cut oats instead of rolled oats, and the result was more like a chewy cereal than the creamy delight I was hoping for. But with a little trial and error, I found the perfect balance. Now, this recipe is a staple in my kitchen, especially when I need to tackle a busy day. It’s like having a personal chef who’s prepped my breakfast while I sleep. Every spoonful is a reminder of how a simple mix of ingredients can transform into something so satisfying and wholesome.

    Why You’ll Love This Recipe

    • Quick and Easy: Takes just 5 minutes to prepare.
    • Customizable: Endless flavor variations to suit your taste.
    • Nutritious: Packed with fibers, proteins, and essential vitamins.
    • Perfect for Meal Prep: Make several jars at once.
    • Portable: Ideal for on-the-go breakfasts.

    Detailed Ingredients

    • **1/2 cup rolled oats** (50g) – Look for organic, gluten-free options for the best quality.
    • **1/2 cup milk** (120ml) – Any type works: almond, soy, or cow’s milk.
    • **1/4 cup yogurt** (60g) – Greek yogurt for extra creaminess, or a non-dairy option if preferred.
    • **1 tbsp maple syrup** (15ml) – Or swap with honey for a different sweetness profile.
    • **1 tbsp chia seeds** (optional, 12g) – Adds a nutritional boost with omega-3s.
    • **Pinch of sea salt** – Enhances the flavors.
    • **1 tsp vanilla extract** (5ml) – Use pure vanilla for the best aroma.

    Step-by-Step Instructions

    Step 1: Combine Ingredients – In a medium-sized jar or bowl, mix together **1/2 cup of rolled oats**, **1/2 cup of milk**, and **1/4 cup of yogurt**. Stir until the oats are fully submerged.

    Step 2: Sweeten and Flavor – Add **1 tbsp of maple syrup**, **1 tsp of vanilla extract**, and a **pinch of sea salt**. These elements not only sweeten but also enhance the overall flavor profile. Stir well to blend.

    Step 3: Add Optional Boost – Stir in **1 tbsp of chia seeds** if using. These tiny seeds will expand and add a delightful texture while packing a nutritional punch.

    Step 4: Refrigerate – Cover the jar with a lid or plastic wrap and place in the refrigerator. For the best texture, let it chill overnight, or for at least 2-4 hours if you’re short on time.

    Step 5: Serve – Before serving, give the oats a good stir. If the mixture is too thick, add a splash of milk to reach your desired consistency. Top with fruits, nuts, or any toppings you love.

    Common Mistakes to Avoid

    • Using the Wrong Oats: Steel-cut oats won’t soften properly overnight. Stick with rolled oats for the best texture.
    • Not Mixing Well: Ensure all ingredients are well combined to avoid uneven flavors.
    • Skipping the Salt: A pinch of salt brings out the sweetness and depth of the flavors.

    How to Store & Reheat

    Store your overnight oats in an airtight container in the refrigerator. They’re best enjoyed within the first 3 days, but they can last up to 5 days. If you prefer them warm, you can microwave them for about 30-60 seconds, stirring halfway through. Add a splash of milk if they seem too dry.

    Ingredient Substitutions

    • Milk: Substitute with any plant-based milk like almond or oat milk.
    • Yogurt: Use coconut or almond yogurt for a dairy-free option.
    • Maple Syrup: Swap with honey or agave syrup for a different taste.
    • Chia Seeds: If unavailable, flax seeds can be used for a similar texture and health benefits.

    Nutrition Facts

    • Calories: 272 kcal
    • Protein: 8g
    • Fat: 7g
    • Carbs: 45g
    • Serving Size: 1 jar

    Frequently Asked Questions

    • Can I prepare this with instant oats? Instant oats can become mushy, so it’s best to stick with rolled oats for the right texture.
    • Is it necessary to add sweetener? Not at all! You can skip it or use natural sweeteners like mashed bananas.
    • How can I make it gluten-free? Simply use certified gluten-free oats.
    • What are some good topping ideas? Fresh fruits, nuts, seeds, and a dollop of nut butter work wonderfully.
    • Can I make a larger batch? Absolutely, just multiply the ingredients and divide them into individual jars for convenience.

  • Fast Fuel: Almond Croissant Baked Oatmeal Delight!

    Fast Fuel: Almond Croissant Baked Oatmeal Delight!

    Introduction & My Personal Story

    Ah, the Almond Croissant Baked Oatmeal Delight. Just the name brings back a flood of warm memories from my childhood. I remember waking up to the smell of freshly baked croissants wafting through the house every Sunday morning. My mother, a culinary enthusiast, would bake these luscious almond croissants that were the highlight of our weekend brunches. They were buttery, flaky, and filled with a rich almond paste that made each bite a sheer delight.

    Fast forward to my years in culinary school, I yearned to recreate that nostalgic flavor but with a twist. That’s when I stumbled upon the idea of combining the essence of those croissants with the heartiness of baked oatmeal. The result? A dish that not only pays homage to my childhood but also caters to my busy lifestyle today. This Almond Croissant Baked Oatmeal Delight is everything you want in a breakfast—nutritious, filling, and incredibly satisfying. In my 5 years of experience as a chef, this recipe has become a staple not just in my kitchen, but also a favorite among my readers who crave a quick yet indulgent breakfast.

    Why You’ll Love This Recipe

    • Quick and Easy: Ready in under an hour with minimal prep.
    • Nutritious: Packed with healthy oats and almonds.
    • Indulgent Flavor: Captures the essence of an almond croissant.
    • Versatile: Perfect for breakfast, brunch, or dessert.
    • Make-Ahead: Stores well for a grab-and-go meal.

    Detailed Ingredients

    • 2 cups (160g) of rolled oats
    • 2 cups (480ml) of almond milk
    • 1/2 cup (120g) of almond paste
    • 1/4 cup (60ml) of maple syrup
    • 1/4 cup (30g) of sliced almonds
    • 1 teaspoon (5ml) of vanilla extract
    • 1/2 teaspoon (2.5g) of baking powder
    • 1/4 teaspoon (1.25g) of salt
    • 1/4 cup (30g) of dark chocolate chips (optional)

    When shopping, look for fresh, unsweetened almond paste and high-quality maple syrup to enhance the flavor of your dish.

    Step-by-Step Instructions

    Step 1: Preheat Your Oven
    Preheat your oven to 350°F (175°C). This ensures that your oatmeal bakes evenly, resulting in a perfectly cooked dish.

    Step 2: Mix the Dry Ingredients
    In a large mixing bowl, combine the rolled oats, baking powder, and salt. Stir well to ensure that the baking powder is evenly distributed, which will help the oatmeal rise slightly and give it a nice texture.

    Step 3: Prepare the Wet Mixture
    In another bowl, whisk together the almond milk, almond paste, maple syrup, and vanilla extract. Make sure the almond paste is fully dissolved to prevent clumps in your oatmeal.

    Step 4: Combine and Add Toppings
    Pour the wet mixture into the dry ingredients, stirring until everything is well combined. Transfer the mixture into a greased baking dish. Sprinkle the sliced almonds and chocolate chips on top for added flavor and texture.

    Step 5: Bake
    Place the baking dish in the oven and bake for 30-35 minutes or until the top is golden brown and the oatmeal is set. A toothpick inserted in the center should come out mostly clean.

    Chef’s Tip: Let the oatmeal cool for a few minutes before serving. This allows the flavors to meld beautifully and makes it easier to cut into portions.

    Common Mistakes to Avoid

    Overmixing the Batter: Stir the ingredients until just combined to avoid a dense texture.

    Incorrect Oven Temperature: Always preheat your oven to ensure even cooking. An oven thermometer can be a handy tool.

    Skipping the Cooling Time: Allowing the oatmeal to cool slightly helps it firm up, making it easier to serve.

    How to Store & Reheat

    Store any leftovers in an airtight container in the refrigerator for up to 5 days. For longer storage, freeze portions in a freezer-safe container for up to 3 months. To reheat, warm in the oven at 350°F (175°C) for 10-15 minutes or microwave individual servings for 1-2 minutes.

    Ingredient Substitutions

    • Dairy-Free Option: Use coconut milk instead of almond milk.
    • Sugar-Free Option: Replace maple syrup with a sugar-free syrup or stevia.
    • Nuts Allergy: Substitute almond paste with sunflower seed butter and sliced almonds with pumpkin seeds.

    Nutrition Facts

    • Calories: 350 per serving
    • Protein: 8g
    • Fat: 15g
    • Carbohydrates: 45g
    • Serving Size: 1/6 of the baked oatmeal

    Frequently Asked Questions

    Can I use steel-cut oats instead of rolled oats?
    While steel-cut oats can be used, they require longer cooking times and a bit more liquid. Adjust accordingly if you choose to use them.

    Is it possible to make this recipe vegan?
    Yes, this recipe is already vegan if you use non-dairy milk and ensure your chocolate chips are dairy-free.

    How can I add more protein to this dish?
    Consider adding a scoop of protein powder to the wet ingredients or serving with a side of Greek yogurt.

    Can I prepare this the night before?
    Absolutely! Assemble the ingredients in the baking dish, cover, and refrigerate overnight. Bake in the morning as directed.

  • Fast Fuel: Irresistible Gingerbread Pancakes on a Budget!

    Fast Fuel: Irresistible Gingerbread Pancakes on a Budget!

    Introduction & My Personal Story

    There’s something truly magical about waking up on a brisk winter morning to the smell of freshly cooked gingerbread pancakes wafting through the house. Growing up, my mother had a knack for transforming the simplest of ingredients into a breakfast feast that could rival any holiday banquet. These gingerbread pancakes were always a family favorite, especially during the festive season. The warmth of the ginger paired with the sweetness of the molasses created a comforting start to our day. In my 5 years of experience as a chef, I’ve found few things that can lift the spirits quite like these pancakes. They’re more than just a meal; they’re a reminder of the cozy mornings spent with family, laughter echoing in the kitchen, and the joy of sharing something delicious with loved ones. Today, I bring you a recipe that captures that essence, one that is not only delightful but also budget-friendly, ensuring you can enjoy these treats without any stress on your wallet.

    Why You’ll Love This Recipe

    • Quick and easy to prepare, perfect for busy mornings.
    • Uses budget-friendly ingredients you likely have on hand.
    • Rich in flavor with a perfect balance of spices.
    • Provides a warm, comforting start to the day.
    • Great for the whole family, loved by kids and adults alike.

    Detailed Ingredients

    • 1 cup (120g) all-purpose flour
    • 1 teaspoon baking powder
    • 1/2 teaspoon baking soda
    • 1/4 teaspoon salt
    • 1 teaspoon ground ginger
    • 1 teaspoon ground cinnamon
    • 1/4 teaspoon ground nutmeg
    • 1/4 cup (50g) brown sugar
    • 3/4 cup (180ml) warm milk
    • 1 large egg
    • 2 tablespoons unsalted butter, melted
    • 2 tablespoons molasses
    • 1 teaspoon vanilla extract

    When shopping, look for fresh spices to ensure the flavors are robust and aromatic. Opt for unsulphured molasses for a more authentic taste.

    Step-by-Step Instructions

    Step 1: Prepare the Dry Ingredients
    In a large mixing bowl, combine the flour, baking powder, baking soda, salt, ground ginger, cinnamon, nutmeg, and brown sugar. Whisk these together until everything is well blended. This ensures that your pancakes will rise evenly and have a consistent flavor throughout.

    Step 2: Mix the Wet Ingredients
    In another bowl, whisk together the warm milk, egg, melted butter, molasses, and vanilla extract. The warm milk helps to integrate the molasses smoothly, preventing clumping. Chef’s Tip: Ensure the melted butter is not too hot; otherwise, it may start to cook the egg.

    Step 3: Combine Wet and Dry Mixtures
    Gently pour the wet ingredients into the dry ingredients. Stir just until combined; it’s okay if the batter is a little lumpy. Overmixing can lead to tough pancakes. Let the batter rest for 10-15 minutes. This resting period allows the flour to hydrate and the baking powder to activate, resulting in fluffier pancakes.

    Step 4: Cook the Pancakes
    Heat a non-stick skillet or griddle over medium heat. Lightly grease the surface with butter or cooking spray. Using a 1/4 cup measure, pour the batter onto the skillet. Cook until you see bubbles forming on the surface, about 1 minute. Flip and cook the other side until golden brown, approximately 30 seconds. Adjust the heat as necessary to prevent burning.

    Step 5: Keep Pancakes Warm
    As you finish cooking, place the pancakes on a plate and cover them with a clean towel or keep them in a warm oven (around 200°F) to maintain their warmth until all are ready to serve.

    Step 6: Serve and Enjoy
    Serve your pancakes with a dollop of butter, a drizzle of syrup, or a sprinkle of powdered sugar. Pair with your favorite hot beverage for a complete breakfast experience.

    Common Mistakes to Avoid

    One common mistake is overmixing the batter, which can result in dense pancakes. Remember, lumps are okay. Another pitfall is cooking on too high a heat, which can burn the outside while leaving the inside undercooked. Always keep your heat at medium. Finally, not letting the batter rest can lead to flat pancakes, as the resting time is crucial for fluffiness.

    How to Store & Reheat

    Store any leftover pancakes in an airtight container in the refrigerator for up to 3 days. To reheat, place them in a toaster or a preheated oven at 350°F for about 5 minutes until warmed through. You can also freeze them in a single layer on a baking sheet, then transfer to a freezer bag for up to 2 months. Reheat directly from frozen in the toaster or oven.

    Ingredient Substitutions

    If you’re out of an ingredient or need to cater to dietary restrictions, here are some swaps:

    • Flour: Use whole wheat flour for a heartier texture.
    • Milk: Substitute with almond milk or oat milk for a dairy-free version.
    • Egg: Replace with a flax egg (1 tablespoon flaxseed meal + 2.5 tablespoons water).
    • Molasses: Use honey or maple syrup, though the flavor will be slightly different.

    Nutrition Facts

    • Calories: 357 kcal per serving
    • Protein: 6g
    • Fat: 12g
    • Carbohydrates: 56g
    • Serving Size: 3 pancakes

    Frequently Asked Questions

    Q: Can I make the batter ahead of time?
    A: Yes, you can prepare the batter the night before and store it in the refrigerator. Just give it a good stir before cooking.

    Q: Can I double the recipe?
    A: Absolutely! This recipe doubles nicely. Just ensure you have a large enough bowl for mixing and a big enough skillet for cooking.

    Q: What can I serve with these pancakes?
    A: Fresh fruit, bacon, or sausage are great sides. A dollop of whipped cream can also add a festive touch.

    Q: Are these pancakes suitable for freezing?
    A: Yes, they freeze very well. Just be sure to separate them with parchment paper to prevent sticking.