Tag: Decadent

  • CHEAT DAY: Decadent Chocolate Cottage Cheese Mousse Delight

    CHEAT DAY: Decadent Chocolate Cottage Cheese Mousse Delight

    Introduction & My Personal Story

    Ah, the indulgence of a cheat day! It’s a concept that many of us hold dear—a day to let go of dietary restrictions and relish in the flavors we’ve been craving. For me, that indulgence often takes the form of a rich, creamy dessert that feels like a hug in a bowl. Enter the Decadent Chocolate Cottage Cheese Mousse Delight. A dessert that not only satisfies the sweet tooth but also sneaks in a bit of protein, courtesy of its secret ingredient—cottage cheese.

    In my 5 years of experience as a chef, I’ve experimented with numerous mousse recipes. But this one holds a special place in my heart. It was born out of a late-night craving and a nearly empty fridge. I remember that night vividly. I had a tub of cottage cheese, a jar of cocoa powder, and a bottle of maple syrup. Hesitant but hopeful, I blended them together, and to my surprise, the result was a silky, chocolatey mousse that was as indulgent as any traditional version.

    This recipe is a testament to creativity in the kitchen and the joy of finding unexpected flavors in familiar ingredients. The combination of the creamy cottage cheese with the rich cocoa creates a dessert that’s both decadent and slightly tangy, offering a unique twist on classic chocolate mousse. It’s become a staple in my kitchen, not just for cheat days, but for any day I need a sweet pick-me-up. I hope it becomes a beloved treat in your home too.

    Why You’ll Love This Recipe

    • Quick and easy to make—no baking required.
    • Rich in protein, thanks to the cottage cheese.
    • Decadent chocolate flavor with a healthy twist.
    • Perfect for satisfying sweet cravings without guilt.
    • Customizable with your favorite toppings.

    Detailed Ingredients

    • Full-fat cottage cheese: 2 cups (about 480 grams). Look for a creamy, smooth texture.
    • Unsweetened cocoa powder: 1/2 cup (about 50 grams). Choose high-quality cocoa for the best flavor.
    • Maple syrup: 1/3 cup (about 80 ml). Opt for pure maple syrup for natural sweetness.
    • Vanilla extract: 1 teaspoon for added depth of flavor.
    • Pinch of salt: Enhances the chocolate flavor.

    Step-by-Step Instructions

    Step 1: Gather Your Ingredients

    Begin by assembling all your ingredients. This includes the cottage cheese, cocoa powder, maple syrup, vanilla extract, and salt. Having everything ready will make the process smooth and enjoyable.

    Step 2: Blend the Ingredients

    In a high-powered blender, combine the cottage cheese, cocoa powder, maple syrup, vanilla extract, and a pinch of salt. Blend on high speed until the mixture is completely smooth. This should take about 2-3 minutes. You’re looking for a creamy, homogenous mixture with no visible lumps of cottage cheese. Chef’s Tip: If your blender struggles, add a tablespoon of milk to help it along.

    Step 3: Chill the Mousse

    Transfer the blended mixture into a serving bowl or individual dessert cups. Cover with plastic wrap and refrigerate for at least 2 hours. This chilling time allows the mousse to firm up and the flavors to meld together beautifully.

    Step 4: Serve and Enjoy

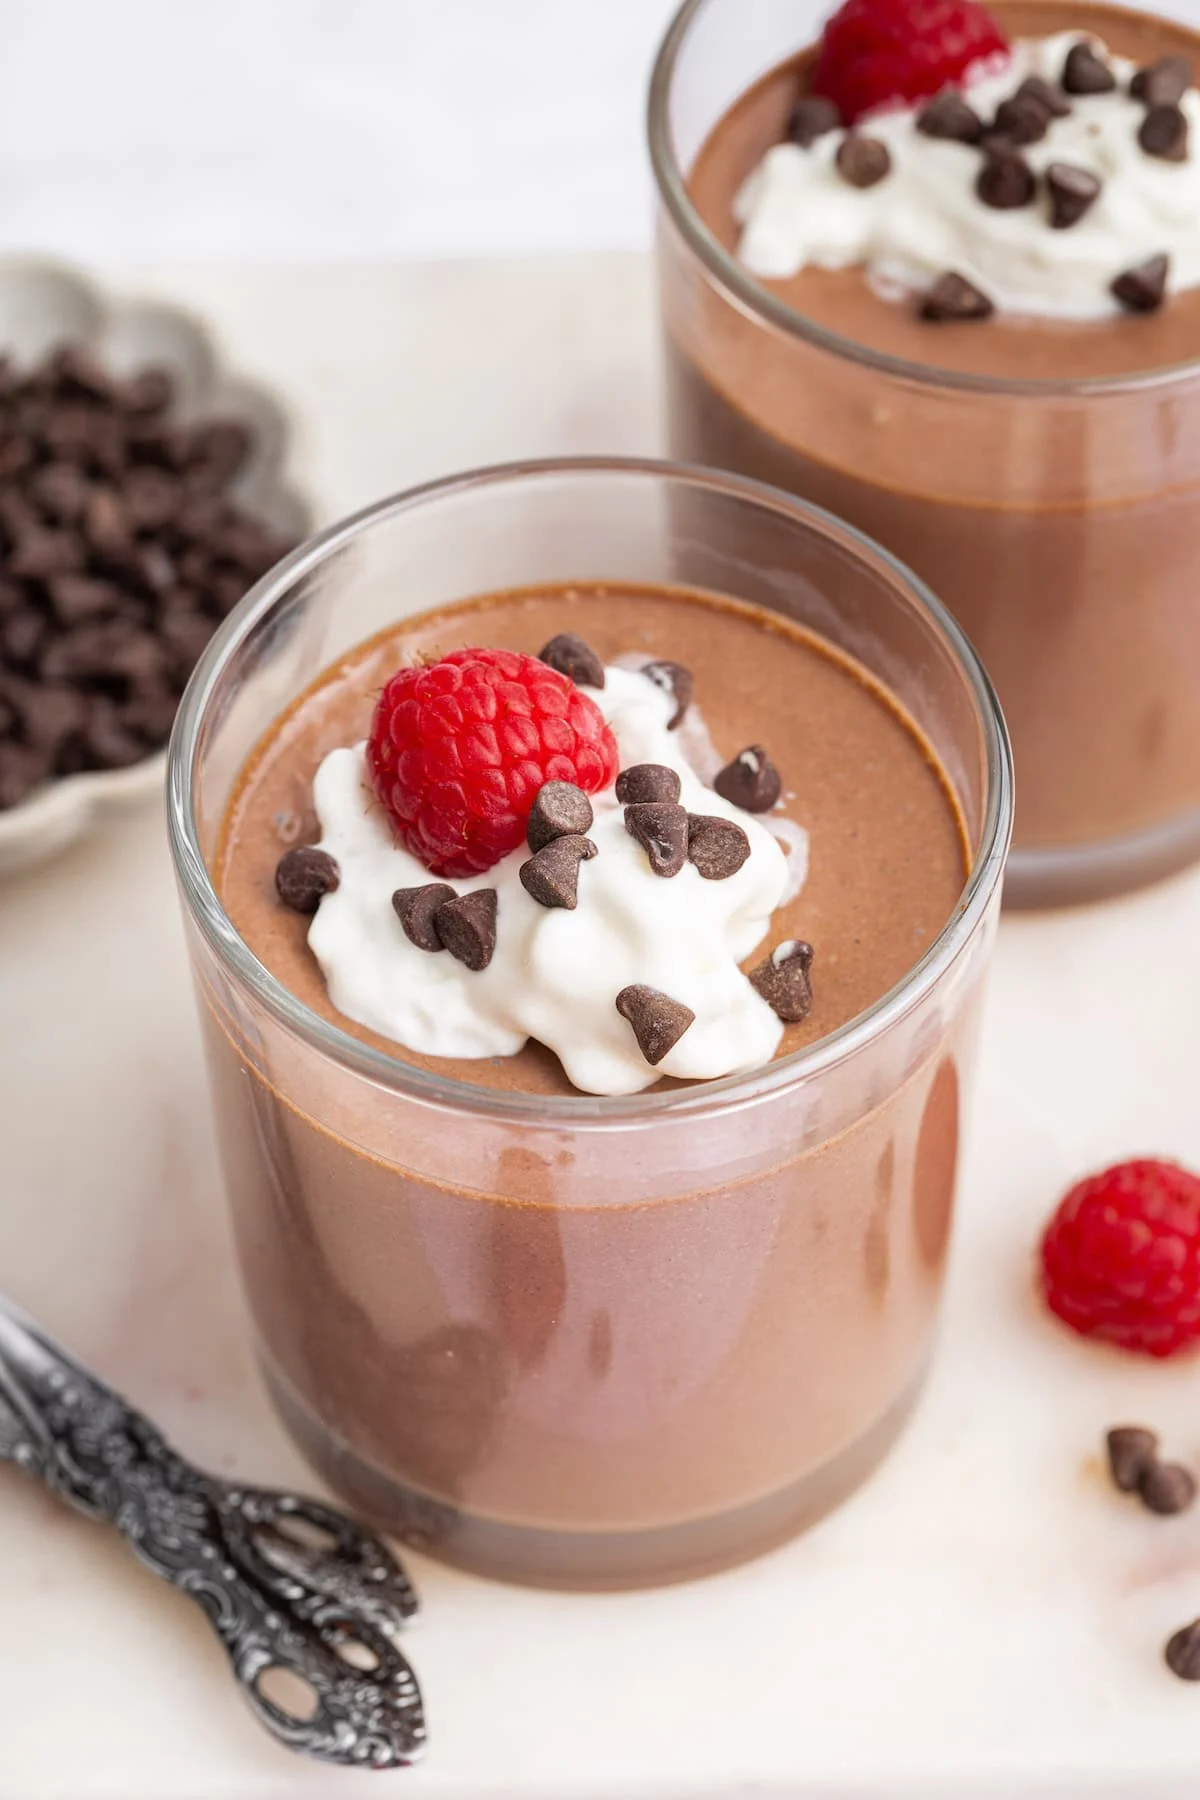
    Once chilled, your mousse is ready to serve. You can enjoy it as is or top it with fresh berries, a dollop of whipped cream, or a sprinkle of chocolate shavings for an added touch of elegance. Indulge in your Decadent Chocolate Cottage Cheese Mousse Delight and savor each rich, creamy bite.

    Common Mistakes to Avoid

    • Using low-fat cottage cheese: This can result in a less creamy texture. Full-fat is key for the best results.
    • Not blending enough: Ensure the mixture is fully smooth to avoid a gritty texture.
    • Skipping the chill time: The mousse needs time to set and develop its full flavor.
    • Over-blending: While a smooth texture is essential, over-blending can incorporate too much air, affecting the consistency.

    How to Store & Reheat

    Store any leftovers in an airtight container in the refrigerator for up to 3 days. While this mousse is best enjoyed chilled, if you prefer a softer texture, let it sit at room temperature for 10-15 minutes before serving. Reheating isn’t necessary, as this is a no-bake dessert meant to be enjoyed cold.

    Ingredient Substitutions

    • Cottage cheese: Swap with Greek yogurt for a tangier flavor.
    • Maple syrup: Honey or agave syrup can be used as alternatives.
    • Cocoa powder: Use Dutch-processed cocoa for a deeper chocolate flavor.
    • Vanilla extract: Almond extract can provide a nutty twist.

    Nutrition Facts

    • Calories: 250 per serving
    • Protein: 12 grams
    • Fat: 9 grams
    • Carbohydrates: 30 grams
    • Serving Size: 1/2 cup

    Frequently Asked Questions

    Can I use a food processor instead of a blender?

    Yes, a food processor will work, though it may take a bit longer to achieve a smooth consistency.

    Is it possible to make this mousse dairy-free?

    Absolutely! Substitute the cottage cheese with a dairy-free yogurt and ensure your cocoa powder is also dairy-free.

    Can I add other flavors to this mousse?

    Definitely! Consider adding a teaspoon of instant coffee for a mocha flavor or a pinch of cinnamon for warmth.

    How can I make the mousse sweeter?

    If you prefer a sweeter mousse, simply increase the amount of maple syrup according to your taste.

    Can I freeze this mousse?

    While it’s possible to freeze, the texture may change. It’s best enjoyed fresh and refrigerated.


  • CHEAT DAY: Decadent High-Protein Strawberry Bliss Mousse

    CHEAT DAY: Decadent High-Protein Strawberry Bliss Mousse

    Introduction & My Personal Story

    Oh, the memories that come rushing back whenever I think of this High-Protein Strawberry Bliss Mousse. It was a chilly weekend afternoon when I first experimented with this recipe, driven by a craving for something sweet yet guilt-free. I remember standing in my kitchen, strawberries in one hand, a tub of cottage cheese in the other, pondering how to create a dessert that could satisfy my sweet tooth without derailing my fitness goals. In my 5 years of experience as a chef, I’ve learned that some of the best recipes are born out of necessity, and this mousse is no exception.

    My journey with this dish began when I was training for a marathon. I needed something that would offer me the indulgence of a cheat day while packing a punch of protein. The first bite was a revelation—a silky, creamy texture with the subtle sweetness of strawberries. It was like tasting a cloud, and I knew immediately that this would become a staple in my repertoire. Over time, I’ve shared this recipe with many friends and family members, each of whom has fallen in love with its simplicity and flavor.

    There’s something magical about combining the creamy richness of full-fat cottage cheese with the fresh, juicy burst of strawberries. It’s a match made in dessert heaven, perfect for those who are mindful of their macros but still want to indulge. Let me take you through the process of creating this delightful treat, ensuring that your next cheat day is nothing short of blissful.

    Why You’ll Love This Recipe

    • High in protein, making it perfect for muscle recovery.
    • No baking required—just blend, chill, and enjoy.
    • Rich, creamy texture with a fresh strawberry flavor.
    • Low effort, high reward—ideal for busy days.
    • Perfect for satisfying your sweet cravings without guilt.

    Detailed Ingredients

    • 200 grams (1 cup) of full-fat cottage cheese – Look for a creamy texture without too much liquid.
    • 300 grams (2 cups) of fresh strawberries – Choose ripe, red strawberries for maximum sweetness and flavor.
    • 150 grams (1 cup) of Cocowhip – A dairy-free whipped topping that adds lightness to the mousse.
    • 2 tablespoons of honey or a sweetener of choice – Adjust based on your sweetness preference.
    • 1 teaspoon of vanilla extract – Enhances the overall flavor of the mousse.

    Step-by-Step Instructions

    Step 1: Prepare the Strawberries

    Start by washing the strawberries thoroughly under cold water. Remove the stems and cut them into halves. Chef’s Tip: For an extra burst of flavor, let the strawberries sit at room temperature for about 15 minutes after cutting. This helps to bring out their natural sweetness.

    Step 2: Blend the Base

    Add the strawberries and full-fat cottage cheese into a high-speed blender. Blend on high until the mixture is smooth and creamy, which should take about 1-2 minutes. You’ll know it’s ready when there are no visible chunks of strawberries.

    Step 3: Sweeten and Flavor

    Add honey and vanilla extract to the blender. Blend for an additional 30 seconds to ensure everything is well incorporated. Taste the mixture and adjust the sweetness if necessary.

    Step 4: Fold in the Cocowhip

    Transfer the strawberry-cottage cheese mixture into a large mixing bowl. Gently fold in the Cocowhip using a spatula. Be careful not to deflate the Cocowhip, as it helps to give the mousse its airy texture.

    Step 5: Chill and Set

    Divide the mixture into two serving containers or ramekins. Cover with plastic wrap and refrigerate for at least 2-4 hours, or preferably overnight. This chilling time allows the mousse to set and the flavors to meld together beautifully.

    Step 6: Serve and Enjoy

    Once set, serve the mousse straight from the fridge. You can garnish with sliced strawberries or a sprinkle of grated dark chocolate if you’re feeling fancy. Enjoy this delightful treat, knowing it’s as nutritious as it is delicious.

    Common Mistakes to Avoid

    • Not blending the strawberries and cottage cheese thoroughly, resulting in a lumpy texture.
    • Deflating the Cocowhip while folding it into the mixture, which can make the mousse dense.
    • Skipping the chilling step, which is crucial for the mousse to set properly.
    • Using unripe strawberries, leading to a less flavorful mousse.

    How to Store & Reheat

    Store any leftovers in an airtight container in the refrigerator for up to 3 days. This mousse is best enjoyed cold, so there’s no need to reheat. If you find it has thickened too much, let it sit at room temperature for about 10 minutes before serving.

    Ingredient Substitutions

    • If you’re dairy-free, substitute the cottage cheese with a plant-based equivalent.
    • For a vegan option, replace honey with maple syrup or agave nectar.
    • Cocowhip can be substituted with any other whipped topping, keeping in mind dietary preferences.

    Nutrition Facts

    • Calories: 250 per serving
    • Protein: 15 grams
    • Fat: 8 grams
    • Carbohydrates: 30 grams
    • Serving Size: 1 container (serves 2)

    Frequently Asked Questions

    • Can I use frozen strawberries? Yes, but make sure to thaw them completely and drain any excess liquid to avoid a watery mousse.
    • Is there a way to make this mousse more keto-friendly? You can use a keto-friendly sweetener instead of honey and ensure the cottage cheese is low-carb.
    • How can I make this mousse thicker? Reduce the amount of Cocowhip or add a bit of gelatin dissolved in water to the mixture before chilling.
    • Can I add other fruits? Absolutely, try adding raspberries or blueberries for a mixed berry mousse.
    • What if I don’t have a blender? You can use a food processor or even an immersion blender to achieve a smooth texture.

  • CHEAT DAY: Decadent High-Protein Strawberry Pretzel Delight!

    CHEAT DAY: Decadent High-Protein Strawberry Pretzel Delight!

    Introduction & My Personal Story

    Ah, the sweet nostalgia of a cheat day. It’s that sacred time when we momentarily cast aside dietary restrictions and indulge in something truly delightful. For me, the Decadent High-Protein Strawberry Pretzel Delight has always been a favorite. I remember the first time I tasted this dish; it was during a particularly busy week, and I needed a quick yet indulgent escape. The combination of crunchy pretzels, creamy filling, and juicy strawberries made my taste buds dance with joy.

    As someone who has spent the last 5 years experimenting with flavors and textures, this dessert holds a special place in my heart. It’s simple, yet each layer brings something unique to the table. The pretzel crust provides a salty crunch that perfectly complements the sweet, creamy filling and the fresh strawberries. Every time I make it, I’m reminded of those carefree summer days spent with family, where food was the centerpiece of our gatherings.

    This dessert is not just about indulgence; it’s about balance. It offers a high-protein punch thanks to the Greek yogurt and cream cheese, making it a guilt-free treat that satisfies both your cravings and your nutritional needs. So, whether you’re planning a cheat day or simply looking for a fun dessert to share with loved ones, this recipe is sure to hit the spot.

    Why You’ll Love This Recipe

    • No-Bake: Perfect for those hot days when you don’t want to turn on the oven.
    • High-Protein: Thanks to Greek yogurt and cream cheese, it’s a treat that packs a nutritional punch.
    • Quick to Prepare: Ready in under 30 minutes, with minimal effort required.
    • Sweet & Salty Delight: The combination of pretzels and strawberries is irresistible.
    • Customizable: Easily swap ingredients to suit dietary needs or personal preferences.

    Detailed Ingredients

    For this recipe, you’ll need the following ingredients:

    • Pretzels: 2 cups (about 100g) of crushed pretzels. Look for pretzels with a good crunch and minimal salt.
    • Butter: 1/4 cup (56g) of melted unsalted butter.
    • Sugar: 2 tablespoons (25g) for the crust, plus 1/4 cup (50g) for the filling.
    • Cream Cheese: 1 cup (240g) of full-fat cream cheese, softened.
    • Greek Yogurt: 1/2 cup (120g) of plain Greek yogurt. Opt for full-fat for a richer taste.
    • Fresh Strawberries: 2 cups (300g) of sliced strawberries. Choose ripe, red strawberries for maximum sweetness.
    • Whipped Topping: 1 cup (240ml) or use coconut cream for a dairy-free option.
    • Vanilla Extract: 1 tablespoon for added flavor.

    Step-by-Step Instructions

    Let’s dive into making this delightful dessert:

    Step 1: Prep the Pretzel Crust

    Start by crushing 2 cups of pretzels. You can do this by placing them in a zip-lock bag and using a rolling pin. Mix the crushed pretzels with 1/4 cup of melted butter and 2 tablespoons of sugar. Ensure everything is well combined, then press the mixture firmly into the bottom of your serving dish, creating an even layer. This will be the base of your dessert, providing a satisfying crunch.

    Step 2: Make the Filling

    In a mixing bowl, beat 1 cup of cream cheese until smooth. Gradually add in 1/2 cup of Greek yogurt and 1/4 cup of sugar, mixing until the ingredients are well incorporated. Spread this creamy mixture evenly over the pretzel crust, ensuring full coverage to create a smooth layer.

    Step 3: Prepare the Topping

    Slice your fresh strawberries, aiming for uniform pieces. Arrange them meticulously over the cream cheese filling. The vibrant red of the strawberries will add a pop of color and a fresh, juicy layer to your dessert.

    Step 4: Add the Final Touch

    In a separate bowl, combine 1 cup of whipped topping with 1 tablespoon of vanilla extract. Spread this mixture evenly over the strawberries, creating a fluffy top layer. The vanilla adds a subtle depth of flavor that ties the dessert together.

    Step 5: Chill

    Refrigerate your creation for at least 30 minutes. This chilling period allows the layers to set, making it easier to slice and serve. Plus, it enhances the flavors, offering a refreshing experience with every bite.

    Common Mistakes to Avoid

    • Not Crushing Pretzels Enough: Ensure pretzels are finely crushed for a cohesive crust.
    • Skipping the Chill Time: Don’t rush. Chilling is crucial for the layers to set properly.
    • Using Low-Fat Ingredients: For optimal taste and texture, stick to full-fat options where possible.
    • Uneven Strawberry Slices: Uniform slices ensure even distribution of flavor.

    How to Store & Reheat

    Store any leftovers in an airtight container in the refrigerator. This dessert can be kept for up to 3 days. If you’ve used coconut cream, it may separate slightly, so give it a gentle stir before serving again. This dish is best enjoyed cold, so there’s no need to reheat.

    Ingredient Substitutions

    • Gluten-Free Pretzels: Swap regular pretzels for gluten-free to accommodate dietary restrictions.
    • Coconut Cream: Use this instead of whipped topping for a dairy-free version.
    • Honey or Maple Syrup: Use these as natural sweeteners instead of sugar if preferred.

    Nutrition Facts

    • Calories: 320 per serving
    • Protein: 8g
    • Fat: 20g
    • Carbs: 28g
    • Serving Size: 1/8 of the dish

    Frequently Asked Questions

    • Can I make this dessert ahead of time? Yes, it’s even better the next day as the flavors meld together.
    • Is there a way to make this vegan? Absolutely, use dairy-free yogurt and cream cheese, along with coconut cream.
    • What if I don’t have Greek yogurt? You can substitute with regular yogurt or even a dairy-free alternative.
    • Can I use frozen strawberries? Fresh is best for texture, but you can use thawed frozen strawberries in a pinch.

  • NO-BAKE REWARD: Decadent High-Protein Banana Delight

    NO-BAKE REWARD: Decadent High-Protein Banana Delight

    Introduction & My Personal Story

    The kitchen has always been my sanctuary, a place where I could create something special from simple ingredients. My journey into the world of high-protein snacks began about five years ago when I was looking for healthier options that didn’t compromise on taste. One lazy Sunday afternoon, I stumbled upon a few overripe bananas in my fruit basket and a half-eaten tub of cottage cheese in the fridge. A light bulb went off, and the idea for a no-bake, high-protein banana delight was born.

    Back then, I was focused on finding delicious ways to increase my protein intake without resorting to bland or overly processed options. I wanted something quick, easy, and satisfying, a recipe that would become a staple in my cheat day repertoire. This banana delight, with its creamy texture and natural sweetness, was the perfect answer. Every spoonful reminded me of banana pudding from my childhood, but with a modern, health-conscious twist.

    In my 5 years of experience, this dish has evolved, but its core remains the same: simplicity, flavor, and a touch of nostalgia. It’s the kind of recipe that makes you feel rewarded for making healthier choices without feeling deprived. Whether you’re a fitness enthusiast or just someone who loves a good dessert, this high-protein banana delight is bound to become a favorite in your household.

    Why You’ll Love This Recipe

    • Quick and easy to prepare with no baking required.
    • Packed with protein from both **cottage cheese** and **Greek yogurt**.
    • Naturally sweetened with ripe **bananas** and **honey**.
    • Customizable with your favorite toppings like nuts or granola.
    • Perfect for a healthy cheat day treat or post-workout snack.

    Detailed Ingredients

    To make this no-bake high-protein banana delight, you’ll need:

    • **2 cups (450g) of cottage cheese** – Opt for low-fat or full-fat based on your dietary preferences.
    • **1 cup (245g) of Greek yogurt** – Choose plain, unsweetened for the best results.
    • **1 ripe banana** – Look for bananas with a few brown spots for optimal sweetness.
    • **2 tablespoons (30ml) of honey** – You can substitute with **maple syrup** if desired.
    • **1 teaspoon (5ml) of vanilla extract** – Pure vanilla extract adds the best flavor.
    • **A pinch of salt** – Enhances the flavors of the other ingredients.
    • **Additional sliced bananas** – For layering and garnishing.
    • **Crushed nuts or granola** – Optional, for added texture and crunch.

    Step-by-Step Instructions

    Step 1: Start by combining the **cottage cheese** and **Greek yogurt** in a large mixing bowl. Using a whisk or an electric mixer, blend the two until you achieve a smooth and creamy consistency. This mixture forms the base of your banana delight.

    Step 2: Mash the **ripe banana** using a fork or potato masher. Add the mashed banana to the cottage cheese and yogurt mixture, and mix thoroughly. The banana should be fully integrated, leaving no large chunks.

    Step 3: Stir in **2 tablespoons of honey** and **1 teaspoon of vanilla extract**. Add a pinch of salt to balance the sweetness and enhance the overall flavor. Mix until all ingredients are well combined.

    Step 4: In a serving dish, begin layering the mixture with **sliced bananas**. Start with a layer of the creamy mixture, followed by a layer of banana slices. Repeat the process until all the mixture is used up, ending with a layer of banana slices on top.

    Step 5: Refrigerate the layered delight for at least 30 minutes. This chilling time allows the flavors to meld together and the texture to firm up slightly.

    Step 6: Before serving, top the banana delight with **crushed nuts or granola** for an added crunch. This step is optional but highly recommended for texture contrast.

    Common Mistakes to Avoid

    Over-mixing: While it’s crucial to have a smooth mixture, over-mixing can lead to a runny texture. Mix just until the ingredients are combined.

    Using underripe bananas: Make sure your bananas are ripe. Underripe bananas won’t provide the natural sweetness needed for this dish.

    Skipping the chill time: The dessert needs time in the fridge to set. Don’t cut this step short, or you may end up with a soupy dessert.

    How to Store & Reheat

    Store any leftovers in an airtight container in the refrigerator. This banana delight will keep well for up to 3 days, though it’s best enjoyed fresh. If you’re adding toppings like granola, consider storing them separately to maintain their crunch.

    Ingredient Substitutions

    • Cottage Cheese: If you’re not a fan, you can substitute with ricotta cheese for a similar texture.
    • Greek Yogurt: Regular yogurt can be used, but it may result in a slightly less creamy texture.
    • Honey: Swap with **maple syrup** or agave syrup for a different flavor profile.
    • Bananas: For a different fruit twist, try using mashed mangoes or peaches.

    Nutrition Facts

    • Calories: 250 per serving
    • Protein: 18g
    • Fat: 5g
    • Carbs: 35g
    • Serving Size: 1 cup

    Frequently Asked Questions

    • Can I make this ahead of time? Yes, this dessert can be made a day in advance. Just be sure to store it properly in the fridge.
    • What other toppings can I use? Consider adding chocolate chips, coconut flakes, or even a dollop of whipped cream.
    • Is this recipe suitable for vegans? Substitute the dairy products with vegan alternatives like almond yogurt and tofu-based cheese.
    • Can I freeze this dessert? Freezing is not recommended as it can alter the texture upon thawing.


  • CHEAT DAY: Decadent Oreo Balls with a Hidden Twist!

    CHEAT DAY: Decadent Oreo Balls with a Hidden Twist!

    Introduction & My Personal Story

    Ah, the sweet allure of a cheat day. There’s something about indulging in a little decadence that makes all the hard work seem worth it. Let me take you back to a time when I stumbled upon my now-famous Decadent Oreo Balls with a Hidden Twist. It was a lazy Saturday afternoon, and I was in the mood for something sweet yet satisfying. I wanted to create a treat that was not only delicious but also had a surprise element—a hidden twist that would leave everyone guessing. My fondness for Oreos, combined with my love for experimenting in the kitchen, led to the birth of these delightful no-bake treats.

    In my 5 years of experience as a chef, I’ve learned that the best recipes often come from moments of spontaneous creativity. That day, I decided to incorporate a bit of cottage cheese into the mix—something I hadn’t seen done before. The result was a creamier, tangier filling that perfectly complemented the sweetness of the Oreos. These Oreo balls quickly became a family favorite, and now I’m thrilled to share this indulgent recipe with you. So, grab your apron, and let’s dive into this cheat day delight!

    Why You’ll Love This Recipe

    • No-Bake: No oven required, making it perfect for a quick treat.
    • Surprise Twist: The addition of cottage cheese adds a creamy tanginess.
    • Customizable: Top with your favorite toppings like sprinkles or crushed Oreos.
    • Simple Ingredients: Requires only a few pantry staples.
    • Quick Chill Time: Ready to enjoy in under an hour.

    Detailed Ingredients

    • Oreos: 36 cookies (about 300 grams), finely crushed.
    • Cream Cheese: 225 grams (8 oz), softened to room temperature.
    • Cottage Cheese: 100 grams, for that secret twist.
    • Chocolate Chips: 300 grams (10 oz), choose your favorite (dark, milk, or white).
    • Coconut Oil: 1 tablespoon, to help melt the chocolate smoothly.
    • Optional Toppings: Sprinkles, crushed Oreos, or sea salt.

    Step-by-Step Instructions

    Step 1: Prepare the Oreos

    Start by placing your Oreos in a food processor. Pulse them until they are finely ground. You want a consistency similar to sand. If you don’t have a food processor, a rolling pin and a ziplock bag will do the trick.

    Step 2: Blend the Mixture

    In a large mixing bowl, combine the crushed Oreos with the softened cream cheese and cottage cheese. Use a spatula or a stand mixer to blend until smooth. The mixture should be well combined with no visible chunks of cream cheese.

    Step 3: Form the Balls

    Scoop out about 1 tablespoon of the mixture and roll it into a ball using your hands. Place each ball on a baking sheet lined with parchment paper. Once all the balls are formed, place the tray in the freezer for about 30 minutes. This will help them firm up for dipping.

    Step 4: Melt the Chocolate

    In a microwave-safe bowl, combine the chocolate chips with the coconut oil. Microwave in 30-second increments, stirring in between, until the chocolate is completely melted and smooth. Alternatively, you can use a double boiler.

    Step 5: Dip the Balls

    Remove the Oreo balls from the freezer. Using a fork, dip each ball into the melted chocolate, ensuring it is fully coated. Let the excess chocolate drip off before placing it back on the parchment-lined sheet.

    Step 6: Add Toppings

    While the chocolate is still wet, sprinkle your choice of toppings—be it sprinkles, extra crushed Oreos, or a pinch of sea salt. This is where you can get creative and personalize each treat.

    Step 7: Final Chill

    Place the coated Oreo balls in the refrigerator for about 15–20 minutes, or until the chocolate is set. Then, they’re ready to serve!

    Common Mistakes to Avoid

    • Skipping the Chill: Don’t rush the chilling process; it’s crucial for firming up the balls before dipping.
    • Overheating Chocolate: Be careful not to burn the chocolate. Use short intervals when microwaving and stir often.
    • Too Much Filling: Avoid overfilling with cream cheese, which can make the balls too soft.

    How to Store & Reheat

    Once your Oreo balls are set, store them in an airtight container in the refrigerator. They will keep well for up to a week. If you prefer them warm, let them sit at room temperature for a few minutes before enjoying. However, they are best served chilled.

    Ingredient Substitutions

    • Oreos: Substitute with any chocolate sandwich cookie.
    • Cream Cheese: Use mascarpone for a richer taste.
    • Chocolate Chips: Use baking chocolate or candy melts as alternatives.

    Nutrition Facts

    • Calories: 150 per ball
    • Protein: 2 grams
    • Fat: 10 grams
    • Carbs: 15 grams
    • Serving Size: 1 ball

    Frequently Asked Questions

    Q: Can I make these Oreo balls in advance?

    A: Absolutely! They can be made a day or two in advance and stored in the fridge.

    Q: Can I use low-fat cream cheese?

    A: Yes, but the texture might be slightly different. Full-fat cream cheese gives the best results.

    Q: What if I don’t have a food processor?

    A: You can crush the Oreos using a rolling pin and a ziplock bag.

    Q: Can I freeze the Oreo balls?

    A: Yes, they can be frozen for up to a month. Thaw in the refrigerator before serving.

  • 5-MIN FUEL: Decadent Chocolate Cherry Cheesecake Yogurt Bowl Packed with 30g Protein!

    5-MIN FUEL: Decadent Chocolate Cherry Cheesecake Yogurt Bowl Packed with 30g Protein!

    Introduction & My Personal Story

    There’s something special about a dish that can be whipped up in just five minutes yet feels like a treat worthy of a leisurely Sunday brunch. My journey with the Decadent Chocolate Cherry Cheesecake Yogurt Bowl started on a particularly hectic morning. As a chef with a bustling schedule, finding time for a nutritious breakfast can be challenging. One day, as I rummaged through my fridge, I stumbled upon some frozen cherries, Greek yogurt, and a bar of chocolate staring back at me. The idea struck like lightning—I could combine these humble ingredients into something spectacular.

    In my 5 years of experience, I’ve learned that the simplest ingredients can create the most profound flavors. That morning, as I took my first bite of this chocolate cherry concoction, I was transported back to childhood summers spent picking cherries with my grandmother. The rich creaminess of the yogurt paired with the tartness of the cherries and the indulgent chocolate undertones made for an unforgettable experience. This bowl is not just about taste; it’s a powerhouse of protein, perfect for anyone who wants to fuel their day without sacrificing flavor. Whether you’re a busy professional or a fitness enthusiast, this dish is designed to fit seamlessly into your lifestyle.

    Why You’ll Love This Recipe

    • Quick and Easy: Ready in just 5 minutes—perfect for those rushed mornings.
    • High in Protein: Packed with over 30g of protein to keep you satiated and energized.
    • Decadent Flavor: Combines the richness of chocolate with the tartness of cherries.
    • Healthy Ingredients: Uses natural, wholesome ingredients without any guilt.
    • Versatile: Enjoy it as a quick breakfast, post-workout snack, or even a dessert.

    Detailed Ingredients

    To craft this Chocolate Cherry Cheesecake Yogurt Bowl, you’ll need:

    • 1 cup (245g) Greek yogurt: Look for unsweetened, full-fat for creaminess.
    • 1/2 cup (120g) cottage cheese: Choose small curd for a smoother texture.
    • 1 cup (150g) frozen cherries: Opt for pitted and unsweetened.
    • 1 teaspoon vanilla extract: Pure extract enhances the cheesecake flavor.
    • 1/4 cup (30g) chocolate cereal: Adds crunch and chocolate goodness.
    • 2 tablespoons chocolate chips: Dark chocolate for a richer taste.
    • 1 tablespoon almond butter: Creamy almond butter for a nutty finish.

    Step-by-Step Instructions

    Step 1: Combine Ingredients
    In a medium-sized bowl, mix together the Greek yogurt and cottage cheese until well combined. This mixture forms the creamy base of your bowl, reminiscent of a cheesecake texture. Chef’s Tip: If you prefer a smoother consistency, blend the cottage cheese before mixing it with the yogurt.

    Step 2: Add Cherries and Vanilla
    Stir in the frozen cherries and vanilla extract. Allow the cherries to sit for a minute or two. The cold cherries will start to thaw slightly, releasing their juices and infusing the yogurt with a sweet-tart flavor. The vanilla adds a subtle depth that ties the flavors together.

    Step 3: Top with Cereal and Chocolate
    Sprinkle the chocolate cereal and chocolate chips on top. The cereal provides a delightful crunch, while the chocolate chips melt slightly, creating pockets of rich chocolatey flavor.

    Step 4: Drizzle with Almond Butter
    Using a spoon, drizzle the almond butter over the top. This step not only adds a nutty flavor but also increases the dish’s protein content, making it even more satisfying.

    Step 5: Mix and Enjoy
    Gently mix all the ingredients together until you have a beautiful, marbled effect. Enjoy immediately for the best texture and flavor.

    Common Mistakes to Avoid

    Even a simple dish like this can have its pitfalls. Here’s how to steer clear of them:

    • Overmixing: Mixing too vigorously can break down the cherries too much, leading to a mushy texture. Stir gently to maintain a pleasant consistency.
    • Using sweetened yogurt: Opting for sweetened yogurt can make the dish overly sweet. Stick to unsweetened to control the sugar levels.
    • Skipping the almond butter: This ingredient is crucial for the protein content and flavor balance. If nut allergies are a concern, consider using sunflower seed butter instead.

    How to Store & Reheat

    While this dish is best enjoyed fresh, you can prepare it in advance. Store any leftovers in an airtight container in the refrigerator for up to 2 days. Before consuming, give it a quick stir to redistribute the ingredients. If the yogurt has thickened too much, add a splash of milk or water to loosen it up.

    Ingredient Substitutions

    Need to make some swaps? Here’s how:

    • Greek yogurt: Substitute with any plant-based yogurt for a vegan version.
    • Frozen cherries: Fresh cherries or berries like strawberries or raspberries work well.
    • Almond butter: Peanut butter or sunflower seed butter can be used as alternatives.
    • Chocolate cereal: Granola or crushed nuts make excellent crunchy substitutes.

    Nutrition Facts

    • Calories: 393 kcal
    • Protein: 30g
    • Fat: 18g
    • Carbohydrates: 35g
    • Serving Size: 1 bowl

    Frequently Asked Questions

    • Can I use fresh cherries instead of frozen?
      Yes, fresh cherries can be used, but the texture will be slightly different. Frozen cherries provide a nice chill and juiciness when they thaw.
    • Is this recipe suitable for vegans?
      With a few substitutions like plant-based yogurt and omitting cottage cheese, you can easily make it vegan.
    • How can I add more protein?
      Consider adding a scoop of protein powder to the yogurt mixture or increasing the amount of cottage cheese.
    • What if I don’t have chocolate cereal?
      You can use granola or any crunchy cereal you have on hand as a substitute.

  • CHEAT DAY: Decadent Chocolate Peppermint Protein Delights!

    CHEAT DAY: Decadent Chocolate Peppermint Protein Delights!

    Introduction & My Personal Story

    Let me take you back to a crisp winter’s afternoon, the kind that demands a cozy sweater and a warm mug of cocoa. I was browsing through a local market when the festive scents of peppermint and chocolate wafted through the air, instantly evoking memories of holidays past. This was the moment the idea for my Decadent Chocolate Peppermint Protein Delights was born. In my 5 years of experience as a chef, I’ve always believed that indulgence and nutrition can coexist harmoniously, and these protein balls are a testament to that belief. They remind me of the joy of sneaking a piece of peppermint bark from the holiday cookie tray, but with a nutritious twist that aligns with my fitness goals. What started as a simple experiment in my kitchen has evolved into a beloved cheat day indulgence, offering the perfect balance of rich chocolate, refreshing peppermint, and a protein punch. These little delights have become a staple in my home, especially during the festive season, and I’m thrilled to share the recipe with you.

    Why You’ll Love This Recipe

    • No-Bake: No oven required, making it a quick and easy treat.
    • High-Protein: Each ball is packed with protein to fuel your day.
    • Festive Flavor: Chocolate and peppermint create a classic holiday taste.
    • Healthy Indulgence: Satisfies sweet cravings without derailing your diet.
    • Make-Ahead: Perfect for preparing in advance and storing for a quick snack.

    Detailed Ingredients

    • 1 cup (150g) **Medjool dates**, pitted
    • 1/2 cup (60g) **oat flour**
    • 1/4 cup (25g) **cacao powder**
    • 1/2 cup (50g) **chocolate protein powder**
    • 2 tablespoons **maple syrup**
    • 1/4 cup (60g) **nut butter** (almond or peanut)
    • 1/4 teaspoon **sea salt**
    • 1 teaspoon **peppermint extract**
    • 1/2 cup (90g) **dark chocolate chips**
    • 1 tablespoon **coconut oil**
    • 2 tablespoons **crushed candy canes** or **flaky sea salt** for topping

    Step-by-Step Instructions

    Step 1: Begin by gathering your ingredients. Ensure your **Medjool dates** are pitted and soft. If they feel a bit dry, soak them in warm water for about 10 minutes to rehydrate.

    Step 2: In a food processor, combine the **dates**, **oat flour**, **cacao powder**, **chocolate protein powder**, **maple syrup**, **nut butter**, **sea salt**, and **peppermint extract**. Blend the mixture until it forms a thick, sticky dough. Chef’s Tip: If your dough seems too dry, add a splash of water and pulse again until the desired consistency is achieved.

    Step 3: Using your hands, scoop out portions of the mixture and roll them into evenly sized balls. Place each ball onto a parchment-lined plate or tray. This should yield approximately 12-15 balls, depending on size.

    Step 4: In a microwave-safe bowl, combine the **dark chocolate chips** and **coconut oil**. Microwave in 30-second intervals, stirring between each, until the chocolate is fully melted and smooth. Stir in the **peppermint extract** to enhance the flavor.

    Step 5: Dip each protein ball into the melted chocolate, allowing any excess to drip off before placing it back on the parchment. Immediately sprinkle with **crushed candy canes** or **flaky sea salt** for a festive touch.

    Step 6: Refrigerate the chocolate-coated balls for about 15-20 minutes, or until the chocolate has set and hardened.

    Common Mistakes to Avoid

    • Dry Dough: If the dough is too dry, it won’t hold together. Add a bit more water or syrup to achieve the right consistency.
    • Over-Melting Chocolate: Be cautious not to overheat the chocolate as it can seize. Use short intervals in the microwave and stir often.
    • Uneven Balls: For uniform balls, use a small cookie scoop to portion the dough evenly.

    How to Store & Reheat

    Store these protein delights in an airtight container in the refrigerator for up to one week. For longer storage, you can freeze them for up to three months. To enjoy, simply take them out of the freezer and let them sit at room temperature for a few minutes before eating.

    Ingredient Substitutions

    • Dates: If you don’t have Medjool dates, use regular dates or dried figs, but ensure they’re soft.
    • Nut Butter: Swap almond or peanut butter with sunflower seed butter for a nut-free option.
    • Oat Flour: You can substitute with almond flour for a gluten-free version.

    Nutrition Facts

    • Calories: 150 per ball
    • Protein: 6g
    • Fat: 7g
    • Carbohydrates: 20g
    • Serving Size: 1 ball

    Frequently Asked Questions

    • Can I make these vegan? Yes, ensure all ingredients, including chocolate chips and protein powder, are vegan-friendly.
    • What if I don’t have a food processor? You can try using a blender, but you may need to work in smaller batches.
    • How do I make the balls firmer? Refrigerate them for longer before dipping in chocolate.
    • Can I add other flavors? Absolutely! Try adding a dash of vanilla extract or a pinch of cinnamon for variation.