Introduction & My Personal Story
There’s something magical about making a dessert that doesn’t require an oven. My journey with **vegan protein ice cream** began five years ago when I was looking for a guilt-free indulgence that could satisfy my sweet tooth without compromising my health goals. During a particularly hot summer, I was inspired to create a creamy, luscious treat that even my non-vegan friends would love. The first time I made this no-bake ice cream, it was like a revelation. I remember the delight on my friends’ faces as they tasted the rich, chocolaty flavors, complemented by the smooth, velvety texture. It quickly became a staple in my household, especially on those days when I wanted something sweet without the hassle. This recipe is a testament to the fact that indulgence and health can go hand in hand. So, join me as we dive into the world of creamy, dreamy vegan protein ice cream, a treat that’s as satisfying to make as it is to eat!
Why You’ll Love This Recipe
- Quick and easy to make, with no baking required.
- Packed with protein to support fitness goals.
- Vegan-friendly and dairy-free.
- Customizable flavors to suit any palate.
- Perfect for a refreshing treat on hot days.
Detailed Ingredients
To ensure the best results, it’s important to use high-quality ingredients. Here’s what you’ll need:
- **4 ripe bananas**, sliced and frozen
- **1 cup almond milk** (or any plant-based milk)
- **2 tablespoons almond butter** (look for unsweetened)
- **3 tablespoons cocoa powder** for the chocolate version
- **1 scoop chocolate protein powder** (about 30g)
- **1 teaspoon vanilla extract** for the vanilla version
- **1 teaspoon ground cinnamon** for a hint of spice
- Optional: **Cacao nibs or chocolate chips** for added texture
Step-by-Step Instructions
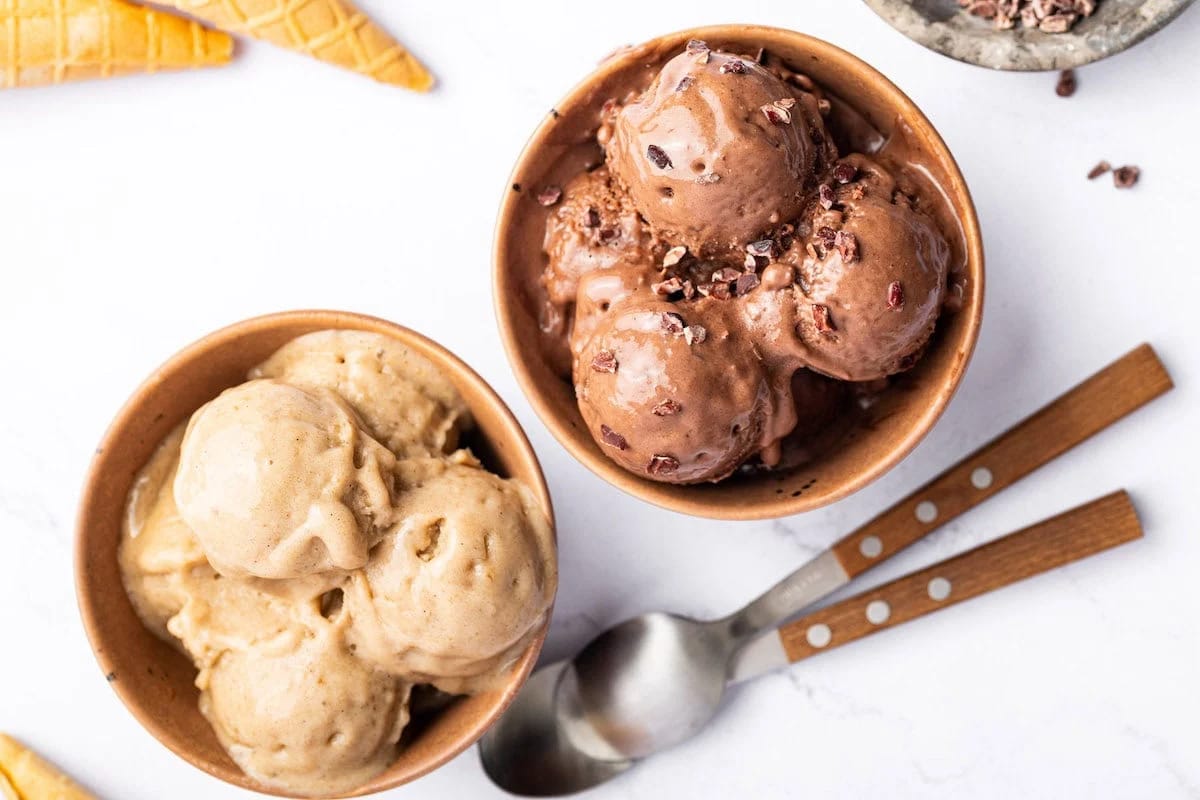
Chocolate Version
Step 1: Start by placing your **frozen banana chunks** into a food processor or high-speed blender. Add in the **almond milk**, **almond butter**, **cocoa powder**, and **chocolate protein powder**.
Step 2: Blend the ingredients on high until the mixture becomes smooth and creamy. This typically takes about 3-4 minutes. Be sure to pause occasionally to scrape down the sides of the blender to ensure everything is well-mixed.
Step 3: If you like a bit of crunch, stir in some **cacao nibs** or **chocolate chips**. Pulse the blender a couple of times to incorporate them into the mixture.
Step 4: You can enjoy the ice cream right away by spooning it into bowls. For a firmer texture, pour the mixture into a loaf pan lined with parchment paper and freeze for at least 2 hours before scooping.
Vanilla Version
Step 1: Place your **frozen banana chunks** into the blender, along with **almond milk**, **vanilla extract**, **ground cinnamon**, and **protein powder**.
Step 2: Blend until smooth and creamy, again stopping to scrape down the sides as needed. This should take 3-4 minutes.
Step 3: Spoon the mixture into bowls for immediate enjoyment, or pour it into a loaf pan lined with parchment paper. Freeze for at least 2 hours for a scoopable consistency.
Common Mistakes to Avoid
Even a simple recipe can have its pitfalls. Here’s how to avoid common mistakes:
- **Not using ripe bananas**: Ensure your bananas are ripe before freezing them. This adds natural sweetness and a creamier texture.
- **Over-blending**: Be careful not to over-blend the mixture, as it can become too runny. If this happens, simply freeze it longer.
- **Skipping scraping**: Not scraping down the sides of the blender can lead to uneven mixing.
How to Store & Reheat
Store your vegan protein ice cream in an airtight container in the freezer. It can last for up to a week, but for the best texture, consume it within a few days. To serve, let it sit at room temperature for about 10 minutes to soften slightly before scooping.
Ingredient Substitutions
If you need to make substitutions, here are some safe swaps:
- **Almond milk** can be replaced with any plant-based milk, such as soy or oat milk.
- **Almond butter** can be swapped with peanut butter or sunflower seed butter for a nut-free option.
- For a different flavor, try using **vanilla protein powder** instead of chocolate.
Nutrition Facts
- Calories: 250 per serving
- Protein: 10g
- Fat: 8g
- Carbs: 35g
- Serving Size: 1 cup
Frequently Asked Questions
Q: Can I use fresh bananas instead of frozen?
A: For the best texture, use frozen bananas. Fresh bananas won’t give the same creamy consistency.
Q: How can I make this recipe nut-free?
A: Swap almond milk for oat milk and use sunflower seed butter instead of almond butter.
Q: Can I add other flavors to the ice cream?
A: Absolutely! Try adding a teaspoon of instant coffee for a mocha flavor or a handful of berries for a fruity twist.
Q: What type of blender is best for this recipe?
A: A high-speed blender or food processor works best to achieve a smooth, creamy texture.