Introduction & My Personal Story
Ah, chocolate protein pancakes. Just saying the words makes my taste buds tingle. I remember the first time I stumbled upon the idea of combining my love for pancakes with a protein boost. It was a hectic morning, one of those days where you feel like you’re running a marathon from the moment you wake up. As someone who has spent 5 years in the culinary field, I always strive to create meals that are not only delicious but also functional. That morning, I needed something quick, satisfying, and packed with energy. As I rummaged through my pantry, I found a bag of chocolate protein powder tucked away behind the flour. An idea sparked: why not merge my morning pancakes with a chocolatey protein punch?
The result was nothing short of amazing. The pancakes were fluffy, with a rich chocolate flavor that made me feel like I was indulging in a dessert rather than a quick breakfast. They became a staple in my household, especially on those busy mornings when every second counts. I’ve tweaked the recipe over time, and now, I’m excited to share this delightful concoction with you. Trust me, these pancakes are more than just a meal; they’re a fast fuel to kick-start your day with a smile and a full belly.
Why You’ll Love This Recipe
- Quick and Easy: Ready in under 10 minutes.
- High Protein: Each serving is packed with protein to keep you full.
- Chocolate Flavor: Rich, decadent taste without the guilt.
- Customizable: Add your favorite toppings or mix-ins.
- Healthy Ingredients: Made with wholesome ingredients like oat flour and coconut sugar.
Detailed Ingredients
Before you head to the market, here’s what you’ll need:
- Oat Flour: 1 cup (120 grams). Look for finely ground oat flour for a smooth batter.
- Chocolate Protein Powder: 1 scoop (about 30 grams). Choose your favorite brand; I prefer whey or plant-based options.
- Cocoa Powder: 2 tablespoons (10 grams). Opt for unsweetened cocoa for a rich taste.
- Coconut Sugar: 2 tablespoons (24 grams). A healthier alternative to regular sugar.
- Baking Powder: 1 teaspoon. Ensure it’s fresh for maximum rise.
- Milk: 1 cup (240 ml). Use dairy or a non-dairy alternative like almond milk.
- Eggs: 2 large. These will help bind the ingredients and add fluffiness.
- Optional: Chocolate chips, nuts, or berries for extra flavor and texture.
Step-by-Step Instructions
Let’s dive into the process of making these delightful pancakes:
Step 1: Prepare Your Dry Ingredients
In a large mixing bowl, combine the oat flour, chocolate protein powder, cocoa powder, coconut sugar, and baking powder. Whisk them together until well-blended. This ensures that the baking powder is evenly distributed, which is crucial for even rising.
Step 2: Mix Wet Ingredients
In a separate bowl, whisk together the milk and eggs until fully combined. Slowly pour the wet ingredients into the dry ingredients, stirring continuously until you have a smooth batter. It should be thick but pourable. If it’s too thick, add a splash more milk.
Step 3: Cooking the Pancakes
Heat a non-stick pan over medium-low heat. Once hot, lightly grease it with a bit of oil or cooking spray. Pour about ¼ cup of the batter onto the pan for each pancake. Cook until you see bubbles forming on the surface, about 3-5 minutes. This is your cue that they’re ready to flip. Use a spatula to flip and cook for another 2-3 minutes until golden brown.
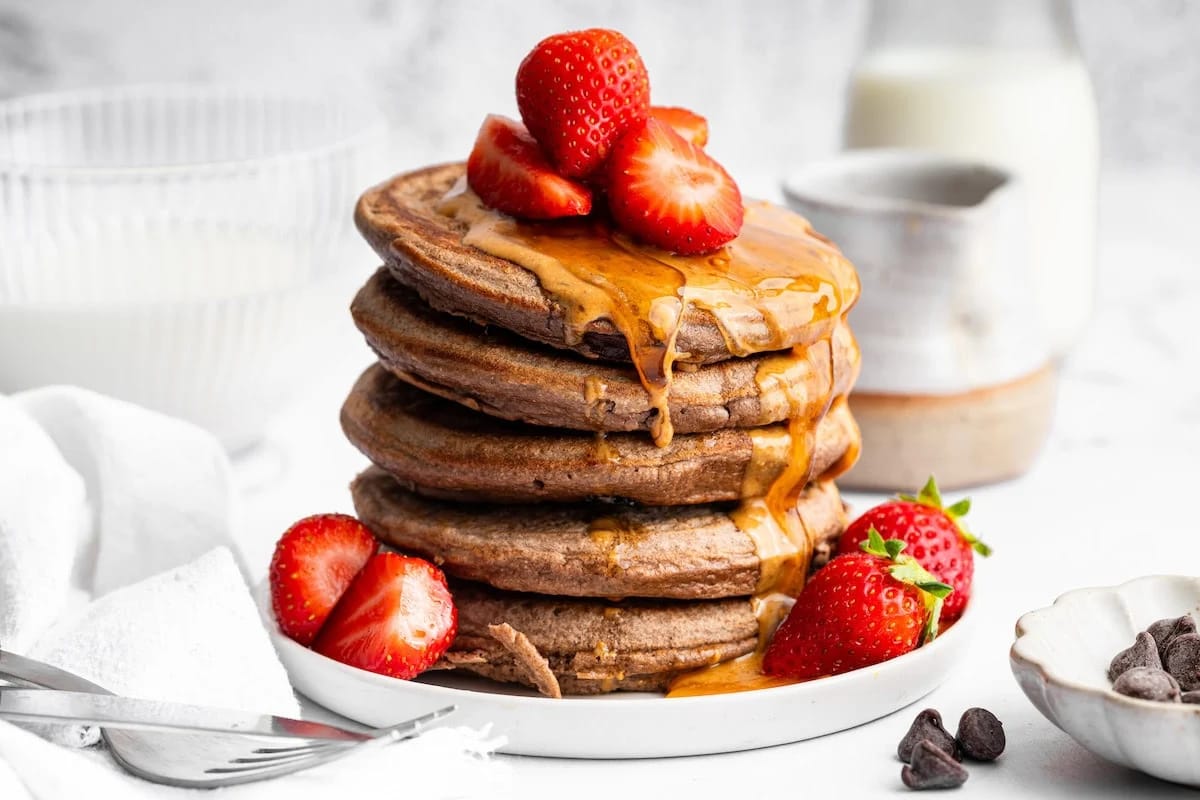
Step 4: Serve and Enjoy
Transfer the cooked pancakes to a plate. You can keep them warm in a low oven if making a large batch. Top with your favorite toppings like fresh berries, a drizzle of syrup, or a dollop of nut butter. Dig in and enjoy your fast fuel breakfast!
Common Mistakes to Avoid
- Overmixing the Batter: This can lead to dense pancakes. Mix until just combined.
- High Heat: Cooking on too high a heat can burn the pancakes while leaving the inside raw. Medium-low is perfect.
- Skipping the Bubbles: Flipping before bubbles form can result in undercooked pancakes.
- Old Baking Powder: Ensure your baking powder is fresh for fluffier pancakes.
How to Store & Reheat
These pancakes can be stored in an airtight container in the refrigerator for up to 3 days. For longer storage, freeze them with parchment paper between each pancake to prevent sticking. They’ll keep for up to 2 months in the freezer.
To reheat, simply pop them in the toaster or microwave for a quick breakfast on the go. If frozen, allow them to thaw in the fridge overnight before reheating.
Ingredient Substitutions
If you’re missing an ingredient or need to accommodate dietary preferences, here are some substitutions:
- Oat Flour: Swap with whole wheat flour or almond flour for a different texture.
- Coconut Sugar: Use brown sugar or a sugar substitute like stevia.
- Milk: Any milk alternative like soy, oat, or coconut milk works well.
- Eggs: Replace with flax eggs for a vegan option (1 tablespoon flaxseed meal + 2.5 tablespoons water per egg).
Nutrition Facts
- Calories: 331 kcal per serving
- Protein: 20 grams
- Fat: 10 grams
- Carbs: 40 grams
- Serving Size: 2 pancakes
Frequently Asked Questions
Can I make these pancakes gluten-free?
Yes, use certified gluten-free oat flour and ensure all other ingredients are gluten-free certified.
What can I add for extra flavor?
Try adding a teaspoon of vanilla extract or a sprinkle of cinnamon for an extra flavor boost.
Can I make the batter ahead of time?
While fresh is best, you can make the batter a day in advance and store it in the fridge. Give it a good stir before using.
How can I make these pancakes fluffier?
Ensure your baking powder is fresh and don’t overmix the batter. Letting the batter sit for a few minutes can also help.
Are these pancakes suitable for kids?
Absolutely! They’re a great way to sneak in some protein and kids love the chocolate flavor.