Tag: 5MIN

  • 5-MIN FUEL: Snickerdoodle Overnight Oats That Pack a Protein Punch!

    5-MIN FUEL: Snickerdoodle Overnight Oats That Pack a Protein Punch!

    Introduction & My Personal Story

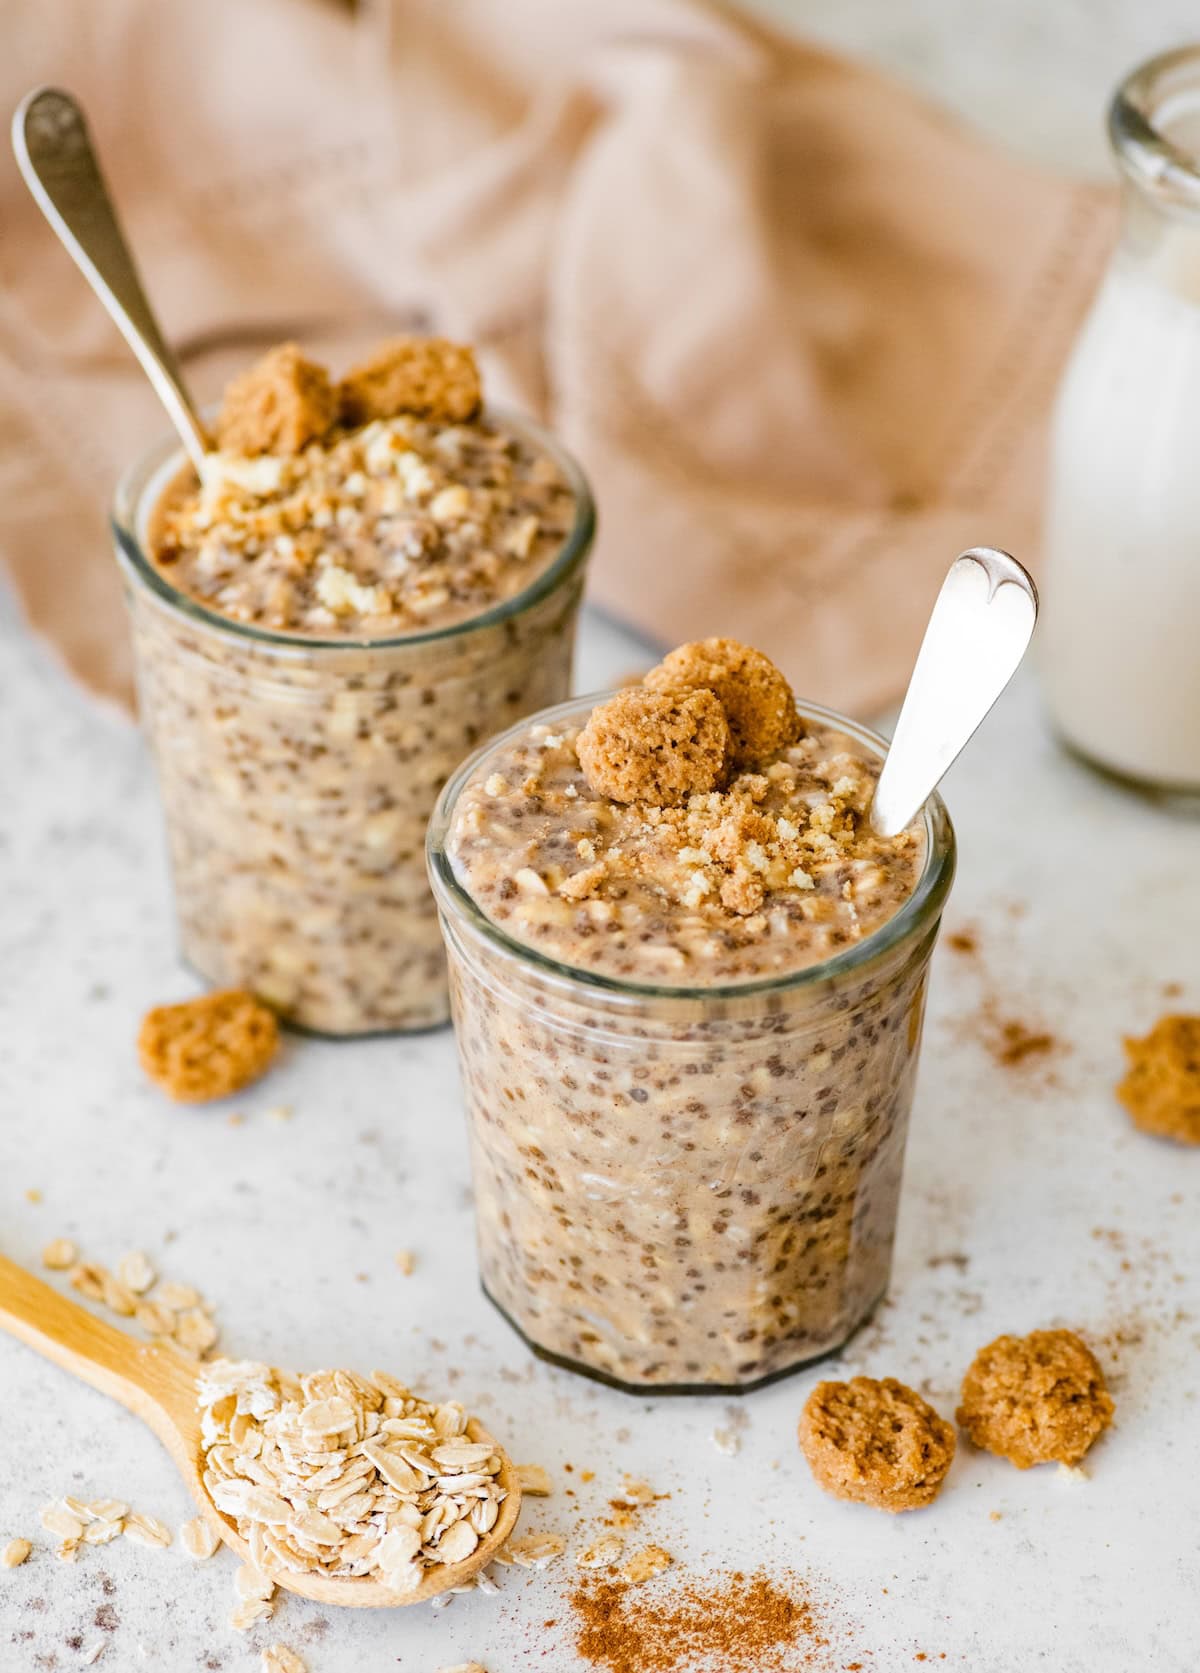
    There’s something truly magical about waking up to a breakfast that’s already waiting for you, especially when it’s as scrumptious as Snickerdoodle Overnight Oats. This recipe takes me back to a time when I was just starting my culinary journey. In my 5 years of experience as a chef, I’ve learned that the simpler the dish, the more room there is for creativity and flavor. I remember those early mornings in culinary school when time was of the essence, and breakfast had to be quick, yet satisfying. That’s when I stumbled upon the concept of overnight oats. The allure of having a ready-to-eat, nutritious meal in the morning was unbeatable.

    One particular morning, I decided to infuse my oats with the warm, comforting flavors of a snickerdoodle cookie. It was a game-changer! The aroma of cinnamon and vanilla wafting through the kitchen made it feel like the holidays in the middle of July. Each spoonful was a delightful reminder of the cookies my grandmother used to bake during festive seasons. Now, whenever I prepare this dish, I am transported back to those cozy mornings, blending nostalgia with the hustle of modern life. It’s a recipe that not only fuels your body but also warms your soul.

    Why You’ll Love This Recipe

    • **Quick & Easy:** Perfect for busy mornings with just 5 minutes of prep.
    • **Protein Packed:** Keeps you full and energized throughout the day.
    • **Customizable:** Adapt the flavors to suit your taste preferences.
    • **Make-Ahead Convenience:** Prepare the night before for a stress-free breakfast.
    • **Nutritious & Delicious:** Combines the flavors of a classic cookie with the benefits of whole grains.

    Detailed Ingredients

    To create the perfect Snickerdoodle Overnight Oats, you’ll need the following ingredients:

    • Rolled oats: 1/2 cup (45 grams). Choose old-fashioned oats for the best texture.
    • Unsweetened almond milk: 1 cup (240 ml). Look for a brand with no added sugars.
    • Chia seeds: 1 tablespoon (12 grams). These add thickness and extra nutrients.
    • Protein powder: 1 scoop (about 30 grams). Opt for snickerdoodle or vanilla for that authentic cookie flavor.
    • Cinnamon: 1 teaspoon (2 grams). Freshly ground if possible, for the most robust flavor.
    • Vanilla extract: 1/2 teaspoon (2.5 ml). Pure vanilla extract is preferred.
    • Maple syrup: 1 tablespoon (15 ml). Adds natural sweetness.
    • Sea salt: A pinch. Enhances all the flavors.

    Step-by-Step Instructions

    Creating these oats is as easy as pie. Follow these steps for the best results:

    Step 1: Mix Ingredients

    In a medium-sized jar or bowl, combine the **rolled oats**, **almond milk**, **chia seeds**, **protein powder**, **cinnamon**, **vanilla extract**, **maple syrup**, and a pinch of **sea salt**. Chef’s Tip: Use a jar with a tight-fitting lid if you plan to grab and go in the morning.

    Step 2: Stir Thoroughly

    Mix everything until well combined. Make sure there are no clumps of protein powder remaining. A whisk can be helpful here. The mixture should be smooth and homogenous.

    Step 3: Refrigerate

    Cover the jar or bowl and place it in the refrigerator. Let it chill for at least 4 hours, but overnight is ideal for the oats to fully absorb the liquid and flavors. You’ll know it’s ready when the mixture is thick and creamy.

    Step 4: Enjoy

    In the morning, give the oats a good stir. If you find them too thick, add a splash more almond milk to reach your desired consistency. Top with extra cinnamon or some cookie crumbles for added texture and flavor.

    Common Mistakes to Avoid

    • **Using Quick Oats:** These will become mushy. Stick with rolled oats for the best texture.
    • **Skipping the Stir:** Make sure you mix thoroughly to avoid clumps of protein powder.
    • **Not Refrigerating Long Enough:** Give it enough time to chill and thicken properly.
    • **Overloading on Sweeteners:** The protein powder and maple syrup add plenty of sweetness, so taste before adding more.

    How to Store & Reheat

    Store your **Snickerdoodle Overnight Oats** in the refrigerator for up to 4 days. Make sure they are in a sealed container to keep them fresh. If you prefer your oats warm, you can gently heat them in the microwave for 30-60 seconds, stirring halfway through. Add a bit of almond milk to loosen them up if needed.

    Ingredient Substitutions

    • **Almond Milk:** Swap with any milk of your choice, like soy, oat, or cow’s milk.
    • **Chia Seeds:** Use flaxseeds for a similar thickening effect.
    • **Protein Powder:** If you’re not a fan of snickerdoodle flavor, vanilla or plain protein powder works well too.
    • **Maple Syrup:** Honey or agave nectar can serve as alternatives.

    Nutrition Facts

    • **Calories:** 452 kcal
    • **Protein:** 20 grams
    • **Fat:** 10 grams
    • **Carbs:** 63 grams
    • **Serving Size:** 1 jar (entire recipe)

    Frequently Asked Questions

    Can I use steel-cut oats instead of rolled oats?

    Steel-cut oats require more liquid and longer soaking times, so they’re not ideal for overnight oats. Stick with rolled oats for the best texture.

    Is it necessary to use protein powder?

    No, but it adds a significant protein boost. If you prefer, you can leave it out or replace it with Greek yogurt.

    Can I add fruits to my overnight oats?

    Absolutely! Fresh fruits like bananas, apples, or berries make great additions and add natural sweetness.

    How can I make this recipe vegan?

    The recipe is already vegan if you use plant-based milk and protein powder. Just ensure your toppings are vegan-friendly too.

    Can I double the recipe?

    Yes, you can easily double or triple the ingredients to make more servings, perfect for meal prepping.

  • 5-MIN FUEL: Your Ultimate Crustless Quiche Recipe!

    5-MIN FUEL: Your Ultimate Crustless Quiche Recipe!

    Introduction & My Personal Story

    Ah, the crustless quiche! Just the mention of it takes me back to my bustling college days. I remember those early mornings when I had just five minutes to whip up breakfast before dashing off to class. Back then, I was on a tight budget and even tighter schedule, so I had to get creative in the kitchen. That’s when I stumbled upon the idea of a crustless quiche. It was simple, quick, and packed with the energy I needed to keep me going through a long day of lectures and study sessions.

    The first time I made it, I was skeptical. Could something so easy really taste good? But as I pulled that golden, fluffy quiche out of the oven, the aroma was irresistible. One bite, and I was hooked. The combination of **eggs**, **ham**, **broccoli**, and **cheese** created a flavor explosion that was both satisfying and nourishing. Over the years, this recipe has been my go-to for busy mornings, lazy brunches, and even late-night snacks. It’s a dish that feels like a warm hug, reminding me of those formative years when I learned to balance life, studies, and my passion for cooking.

    Why You’ll Love This Recipe

    • Quick and easy – Ready in just 5 minutes of prep!
    • No crust – Fewer carbs and gluten-free.
    • Versatile – Customize with your favorite ingredients.
    • Great for meal prep – Make ahead and enjoy all week.
    • Perfect for any meal – Breakfast, lunch, or dinner.

    Detailed Ingredients

    To make this delicious crustless quiche, you’ll need:

    • **5 large eggs** – Fresh and free-range if possible.
    • **1 cup (240 ml) whole milk** – For a rich and creamy texture.
    • **1/4 teaspoon salt** – Enhance the natural flavors.
    • **1/4 teaspoon black pepper** – Freshly ground for best taste.
    • **1/4 teaspoon garlic powder** – Adds a subtle kick.
    • **1 cup (150 g) chopped cooked ham** – Look for a quality cut at the deli.
    • **1 cup (150 g) chopped broccoli** – Fresh or frozen, just make sure it’s thawed.
    • **1/2 cup (75 g) chopped onion** – Adds sweetness and depth.
    • **1 cup (100 g) shredded cheese** – Cheddar or your favorite blend.

    Step-by-Step Instructions

    Step 1: Preheat and Prep

    Start by preheating your oven to 375°F (190°C). While the oven heats, grease a 9-inch pie dish with a bit of butter or non-stick spray. This will ensure your quiche releases easily after baking.

    Step 2: Whisk the Mixture

    In a large bowl, crack the **eggs** and add the **milk**. Whisk together until fully combined. Add the **salt**, **pepper**, and **garlic powder**, whisking again to incorporate the seasonings evenly. Chef’s Tip: Whisking thoroughly ensures a light, airy texture.

    Step 3: Add the Fillings

    Stir in the **chopped ham**, **broccoli**, and **onion**. Make sure these ingredients are evenly distributed throughout the egg mixture. Finally, fold in the **shredded cheese**, ensuring it’s well combined. In my 5 years of experience, I’ve found that mixing the cheese into the egg mixture, rather than just sprinkling it on top, prevents it from burning and gives a more uniform flavor.

    Step 4: Pour and Bake

    Carefully pour the mixture into your prepared pie dish, spreading it evenly with a spatula. Place it in the oven and bake for 35–40 minutes, or until the quiche is set and a knife inserted into the center comes out clean. The top should be lightly golden, and the quiche should have a slight jiggle when you gently shake the dish.

    Step 5: Cool and Serve

    Remove from the oven and let it cool for 5–10 minutes. This resting time allows the quiche to set further and makes slicing easier. Serve warm, garnished with fresh herbs if desired.

    Common Mistakes to Avoid

    Even a simple dish like this can have pitfalls. Here are some common mistakes and how to avoid them:

    • Overbaking: This can lead to a dry, rubbery texture. Keep an eye on the quiche during the last 5 minutes of baking.
    • Uneven Cooking: Make sure ingredients are evenly distributed to avoid uneven cooking.
    • Using Too Much Liquid: Stick to the recipe’s milk-to-egg ratio to prevent a soggy quiche.
    • Skipping the Grease: Always grease your dish to ensure the quiche releases easily.

    How to Store & Reheat

    Once your quiche has cooled completely, cover it tightly with plastic wrap or transfer slices to an airtight container. It will keep in the refrigerator for up to 4 days. For longer storage, you can freeze slices individually wrapped in plastic wrap and then foil, for up to 2 months.

    To reheat, place a slice in the microwave for 1-2 minutes or until heated through. If frozen, thaw in the refrigerator overnight before reheating.

    Ingredient Substitutions

    If you don’t have all the ingredients on hand, here are some safe swaps:

    • Milk: Substitute with almond milk or soy milk for a dairy-free option.
    • Ham: Use cooked bacon or sausage for a different flavor profile.
    • Broccoli: Spinach or kale can be a great alternative for greens.
    • Cheese: Try using feta, mozzarella, or Swiss cheese for a unique taste.

    Nutrition Facts

    Here’s the nutritional breakdown per slice (assuming 6 slices):

    • **Calories:** 293 kcal
    • **Protein:** 18g
    • **Fat:** 20g
    • **Carbohydrates:** 7g
    • **Serving Size:** 1 slice

    Frequently Asked Questions

    • Can I make this quiche ahead of time? Absolutely! It’s perfect for meal prep. Make it the night before and reheat in the morning.
    • Can I make this quiche vegetarian? Yes, simply omit the ham and add more vegetables or a vegetarian protein like tofu.
    • What can I serve with this quiche? It’s great on its own, but you can pair it with a fresh salad or some whole grain toast.
    • How do I know when the quiche is done? The center should be set, and a knife inserted should come out clean.
    • Can I use egg substitutes? Yes, liquid egg substitutes work well if you’re looking to reduce cholesterol.

  • 5-MIN FUEL: Effortless Chia Pudding Delight!

    5-MIN FUEL: Effortless Chia Pudding Delight!

    Introduction & My Personal Story

    There’s something magical about discovering a dish that perfectly fits into the hustle and bustle of modern life. For me, that dish is the **Effortless Chia Pudding Delight**. Let me take you back a few years ago when I was knee-deep in culinary school, balancing late-night study sessions with early morning shifts at a local café. It was during this chaotic period that I stumbled upon the wonders of chia seeds.

    One morning, as I was rushing out the door, I realized I had forgotten to prepare breakfast. In a moment of desperation, I mixed together some chia seeds, almond milk, and a drizzle of honey in a mason jar, hoping for the best. To my surprise, when I returned home later that day, I found a deliciously thick and creamy pudding waiting for me. It was a moment of pure culinary serendipity.

    In my 5 years of experience as a chef, I’ve learned that the best recipes are those that require minimal effort but deliver maximum flavor and nutrition. This chia pudding has become my go-to solution for busy mornings or post-workout snacks. It’s quick, customizable, and incredibly satisfying. Plus, it feels like a little treat every time I open the fridge and see those jars lined up, ready to fuel my day.

    Why You’ll Love This Recipe

    • Quick and Easy: Takes only 5 minutes to prepare.
    • Nutritious: Packed with omega-3s, fiber, and protein.
    • Customizable: Add your favorite fruits, nuts, or sweeteners.
    • Make-Ahead: Perfect for meal prepping; lasts up to 7 days in the fridge.
    • Diet-Friendly: Naturally gluten-free and can be made vegan or keto.

    Detailed Ingredients

    When you’re shopping for the ingredients, keep an eye out for quality. Here’s what you’ll need:

    – **Chia Seeds**: 3-4 tablespoons (about 30-40 grams). Look for organic, high-quality seeds.
    – **Milk**: 1 cup (240 ml). You can use any milk – almond, soy, oat, or regular dairy.
    – **Maple Syrup**: 1 tablespoon (15 ml). Pure maple syrup is best for a natural sweetness.
    – **Vanilla Extract**: 1 teaspoon (5 ml), optional. Adds a lovely aroma and depth of flavor.

    Chef’s Tip: Try experimenting with different types of milk to find your favorite flavor combination.

    Step-by-Step Instructions

    Step 1: Mix Ingredients

    In a medium-sized bowl or a mason jar, combine **3-4 tablespoons of chia seeds**, **1 cup of milk**, **1 tablespoon of maple syrup**, and **1 teaspoon of vanilla extract**. Stir well to ensure the chia seeds are evenly distributed. This initial mix is crucial as it prevents clumping.

    Step 2: Let it Sit

    Allow the mixture to sit for about 5 minutes. This is when the magic begins. You’ll notice the seeds starting to absorb the liquid, forming a gel-like consistency.

    Step 3: Stir Again

    After the seeds have started to gel, give it another stir. This step is important to break any clumps and ensure an even texture throughout the pudding.

    Step 4: Chill and Thicken

    Cover the mixture with a lid or plastic wrap and refrigerate for at least 1-2 hours. For the best results, let it sit overnight. The longer it chills, the thicker it becomes.

    Step 5: Serve and Enjoy

    Once thickened to your liking, it’s ready to eat. Top with your favorite fruits, nuts, or a sprinkle of cinnamon for an extra kick.

    Common Mistakes to Avoid

    – **Not Stirring Enough**: Failing to stir the mixture properly can lead to clumps. Stir initially and again after 5 minutes.
    – **Wrong Liquid Ratio**: Too much liquid can result in a runny pudding, while too little can make it too thick. Stick to the recommended measurements.
    – **Inadequate Chilling Time**: Rushing the chilling process will affect the texture. Patience is key.

    How to Store & Reheat

    Store your **chia pudding** in airtight containers in the refrigerator. It will keep fresh for up to 5-7 days. If you need to reheat it, simply add a bit of milk and microwave for 30 seconds, stirring halfway through. However, this pudding is typically enjoyed cold.

    Ingredient Substitutions

    – **Milk Alternatives**: Use coconut milk for a tropical twist or cashew milk for creaminess.
    – **Sweetener Options**: Substitute maple syrup with honey, agave nectar, or a sugar-free alternative like stevia for a low-carb version.
    – **Flavor Variations**: Add cocoa powder for a chocolate version or mashed berries for a fruity touch.

    Nutrition Facts

    – **Calories**: Approximately 170 kcal per serving
    – **Protein**: 5 grams
    – **Fat**: 9 grams
    – **Carbohydrates**: 19 grams
    – **Serving Size**: 1 cup

    Frequently Asked Questions

    Can I use water instead of milk?

    Yes, but the pudding will be less creamy. Consider adding a bit of coconut cream if using water.

    How can I make it thicker?

    Add an extra tablespoon of chia seeds if you prefer a thicker consistency.

    Is chia pudding suitable for kids?

    Absolutely! It’s a nutritious option for children, just adjust the sweetness to their taste.

    Can I freeze chia pudding?

    Yes, you can freeze it for up to a month. Thaw in the fridge overnight before consuming.

    What toppings go well with chia pudding?

    Fresh fruits, nuts, granola, or a dollop of yogurt are all excellent choices.

  • 5-MIN FUEL: Whip Up Delicious Matcha Chia Pudding!

    5-MIN FUEL: Whip Up Delicious Matcha Chia Pudding!

    Introduction & My Personal Story

    There’s something magical about waking up to a breakfast that’s both nourishing and invigorating. For me, that magic is encapsulated in my Matcha Chia Pudding. My love affair with matcha started years ago during a trip to Japan, where I was introduced to the traditional tea ceremony. The vibrant green hue and the earthy aroma of matcha left an indelible mark on my culinary soul. Fast forward to today, and it’s become a staple in my kitchen, especially in this quick and delightful pudding.

    In my 5 years of experience as a chef, I’ve always sought recipes that are as practical as they are delicious. This matcha chia pudding is a perfect example. It was born out of necessity during my hectic early morning routines. I needed something that could be prepared in minutes but would keep me energized and focused throughout the day. Combining the antioxidant-rich matcha with the omega-packed chia seeds was a game-changer. It’s a dish that not only fuels my day but also brings back fond memories of my culinary journey.

    Every spoonful is a reminder of that serene Japanese garden and the calm it brought me. Now, I share this recipe with you, hoping it brings as much joy and energy to your mornings as it does to mine.

    Why You’ll Love This Recipe

    • Quick and easy: Ready in just 5 minutes of prep time.
    • Rich in antioxidants and omega-3 fatty acids.
    • Customizable with your favorite toppings.
    • Perfect for meal prep and busy mornings.
    • Vegan and gluten-free.

    Detailed Ingredients

    • Almond milk – 1 cup (240 ml). Look for unsweetened varieties for a healthier option.
    • Chia seeds – 3 tablespoons (36 grams). Ensure they are fresh and not clumped together.
    • Matcha powder – 1 teaspoon (2 grams). Opt for high-quality, ceremonial-grade matcha for the best flavor.
    • Maple syrup – 1 tablespoon (15 ml). Pure maple syrup will add a natural sweetness.
    • Vanilla extract – 1 teaspoon (5 ml). Use real vanilla extract for a richer taste.
    • Optional toppings: Fresh berries, nuts, coconut flakes, or a spoonful of almond butter.

    Step-by-Step Instructions

    Step 1: In a medium-sized jar or bowl, pour in 1 cup of **almond milk**. Make sure it’s cold, as this will help the chia seeds to thicken faster.

    Step 2: Add 1 teaspoon of **matcha powder** to the almond milk. Chef’s Tip: Use a small whisk or a matcha whisk to ensure the powder dissolves completely, leaving no clumps.

    Step 3: Stir in 1 tablespoon of **maple syrup** and 1 teaspoon of **vanilla extract**. These will add sweetness and depth to the pudding.

    Step 4: Gradually add 3 tablespoons of **chia seeds** into the mixture, stirring constantly to prevent them from clumping. The seeds should be evenly distributed throughout the liquid.

    Step 5: Cover the jar or bowl and place it in the refrigerator. Allow it to chill for at least 2–3 hours, or overnight for best results. The mixture should thicken to a pudding-like consistency.

    Step 6: Before serving, give the pudding a good stir to break up any clumps. Top with your favorite toppings such as fresh berries, nuts, or coconut flakes for added texture and flavor.

    Common Mistakes to Avoid

    • Not whisking the matcha properly: Ensure the matcha is fully dissolved to avoid a gritty texture.
    • Using old chia seeds: Fresh chia seeds are crucial for proper thickening. If your pudding is watery, your seeds might be past their prime.
    • Skipping the stir: Stir the pudding before serving to ensure even distribution of the chia seeds.

    How to Store & Reheat

    This matcha chia pudding can be stored in the refrigerator for up to 5 days. Keep it in an airtight container to maintain freshness. If the pudding becomes too thick over time, simply stir in a little more almond milk before serving.

    Ingredient Substitutions

    • Swap **almond milk** for any plant-based milk like coconut or soy milk.
    • Replace **maple syrup** with honey or agave for different sweetness profiles.
    • Use **vanilla bean paste** instead of extract for a more intense vanilla flavor.

    Nutrition Facts

    • Calories: 250 per serving
    • Protein: 6 grams
    • Fat: 10 grams
    • Carbs: 30 grams
    • Serving Size: 1 cup

    Frequently Asked Questions

    • Can I use regular milk instead of almond milk? Yes, but it will no longer be vegan.
    • Can I make this pudding ahead of time? Absolutely! It’s perfect for meal prep and can be made several days in advance.
    • What if I don’t like the taste of matcha? You can reduce the amount or omit it entirely and still enjoy a delicious chia pudding.
    • How can I make this pudding thicker? Add an extra tablespoon of chia seeds if you prefer a thicker consistency.

  • 5-MIN FUEL: Protein-Packed French Toast Delight (36g Protein!)

    5-MIN FUEL: Protein-Packed French Toast Delight (36g Protein!)

    Introduction & My Personal Story

    Growing up, breakfast was a sacred ritual in my family. My father would always make sure we started our day with something hearty and wholesome. One morning, as I stumbled into the kitchen with sleep still clinging to me like a warm blanket, I was greeted by the irresistible aroma of cinnamon and vanilla wafting through the air. That was my first introduction to French toast, a dish that would become a beloved staple in our household.

    Fast forward to my college years, and like many of us, I found myself juggling classes, part-time jobs, and a social life. Breakfast had become a grab-and-go affair, often skipped in favor of a few extra minutes of sleep. It was during this hectic time that I decided to reinvent my childhood favorite into something that could fuel my busy mornings without compromising on nutrition. Thus, the Protein-Packed French Toast Delight was born.

    In my 5 years of experience as a chef and food blogger, I’ve learned that the best recipes are those that combine nostalgia with practicality. This French toast delivers just that—comforting flavors with a muscle-building twist. Every bite takes me back to those cherished mornings while giving me the energy to tackle whatever the day throws my way.

    Why You’ll Love This Recipe

    • High in protein — a whopping 36g per serving!
    • Quick and easy — ready in just 5 minutes.
    • Minimal ingredients — perfect for busy mornings.
    • Versatile and customizable with your favorite toppings.
    • Healthy yet indulgent — satisfies your sweet tooth without guilt.

    Detailed Ingredients

    • 2 large eggs
    • 1/2 cup (120 ml) unsweetened almond milk
    • 1 scoop (about 30g) vanilla protein powder
    • 1/2 teaspoon ground cinnamon
    • 1 teaspoon pure vanilla extract
    • A pinch of salt
    • 4 slices of whole-grain bread (look for bread that’s dense and firm to hold the batter well)
    • Cooking spray for the skillet

    Step-by-Step Instructions

    Start by whisking together the eggs, almond milk, protein powder, cinnamon, vanilla, and a pinch of salt in a shallow bowl. Make sure the protein powder is fully dissolved and the mixture is smooth.

    Take your slices of whole-grain bread and soak each one in the mixture for about 15–30 seconds per side. You want the bread to absorb the liquid but not become too soggy. Chef’s Tip: Use slightly stale bread for better absorption without falling apart.

    Heat a nonstick skillet over medium heat and coat it lightly with cooking spray. Once heated, add the soaked bread slices. Cook each side for about 2–3 minutes, or until they turn a beautiful golden brown and have a slight crispiness on the edges.

    Once done, serve your French toast warm. You can top it with fresh berries, a dollop of Greek yogurt, or a drizzle of maple syrup for an added touch of sweetness.

    Common Mistakes to Avoid

    • Over-soaking the bread: This can lead to a soggy texture. Keep the soak time to 15–30 seconds per side.
    • Using too high heat: Cooking on high heat can burn the outside while leaving the inside undercooked. Stick to medium heat for even cooking.
    • Skipping the protein powder: This is crucial for the protein content. Ensure it’s fully mixed into the batter for the best results.

    How to Store & Reheat

    If you have leftovers, let the French toast cool completely before storing. Place in an airtight container and refrigerate for up to 3 days. To reheat, simply pop them in a toaster or warm them in a skillet over medium heat until heated through.

    Ingredient Substitutions

    • Almond milk: Can be replaced with any other milk or milk alternative you prefer.
    • Whole-grain bread: Swap with gluten-free bread if needed.
    • Vanilla protein powder: Feel free to experiment with other flavors like chocolate or cinnamon.

    Nutrition Facts

    • Calories: 401 kcal
    • Protein: 36g
    • Fat: 10g
    • Carbohydrates: 42g
    • Serving Size: 2 slices

    Frequently Asked Questions

    Can I make this recipe vegan? Yes, you can substitute the eggs with a flaxseed mixture and use a plant-based protein powder.

    What other toppings can I use? Besides berries and yogurt, try nut butter, sliced bananas, or chopped nuts.

    Is it okay to use flavored protein powder? Absolutely! Just ensure it complements the vanilla and cinnamon flavors.

    How can I make the French toast crispier? Use a toaster to give them a quick crisp before serving.

    Can I prepare the batter ahead of time? Yes, you can mix the batter the night before and store it in the refrigerator.

  • 5-MIN FUEL: Decadent Chocolate Cherry Cheesecake Yogurt Bowl Packed with 30g Protein!

    5-MIN FUEL: Decadent Chocolate Cherry Cheesecake Yogurt Bowl Packed with 30g Protein!

    Introduction & My Personal Story

    There’s something special about a dish that can be whipped up in just five minutes yet feels like a treat worthy of a leisurely Sunday brunch. My journey with the Decadent Chocolate Cherry Cheesecake Yogurt Bowl started on a particularly hectic morning. As a chef with a bustling schedule, finding time for a nutritious breakfast can be challenging. One day, as I rummaged through my fridge, I stumbled upon some frozen cherries, Greek yogurt, and a bar of chocolate staring back at me. The idea struck like lightning—I could combine these humble ingredients into something spectacular.

    In my 5 years of experience, I’ve learned that the simplest ingredients can create the most profound flavors. That morning, as I took my first bite of this chocolate cherry concoction, I was transported back to childhood summers spent picking cherries with my grandmother. The rich creaminess of the yogurt paired with the tartness of the cherries and the indulgent chocolate undertones made for an unforgettable experience. This bowl is not just about taste; it’s a powerhouse of protein, perfect for anyone who wants to fuel their day without sacrificing flavor. Whether you’re a busy professional or a fitness enthusiast, this dish is designed to fit seamlessly into your lifestyle.

    Why You’ll Love This Recipe

    • Quick and Easy: Ready in just 5 minutes—perfect for those rushed mornings.
    • High in Protein: Packed with over 30g of protein to keep you satiated and energized.
    • Decadent Flavor: Combines the richness of chocolate with the tartness of cherries.
    • Healthy Ingredients: Uses natural, wholesome ingredients without any guilt.
    • Versatile: Enjoy it as a quick breakfast, post-workout snack, or even a dessert.

    Detailed Ingredients

    To craft this Chocolate Cherry Cheesecake Yogurt Bowl, you’ll need:

    • 1 cup (245g) Greek yogurt: Look for unsweetened, full-fat for creaminess.
    • 1/2 cup (120g) cottage cheese: Choose small curd for a smoother texture.
    • 1 cup (150g) frozen cherries: Opt for pitted and unsweetened.
    • 1 teaspoon vanilla extract: Pure extract enhances the cheesecake flavor.
    • 1/4 cup (30g) chocolate cereal: Adds crunch and chocolate goodness.
    • 2 tablespoons chocolate chips: Dark chocolate for a richer taste.
    • 1 tablespoon almond butter: Creamy almond butter for a nutty finish.

    Step-by-Step Instructions

    Step 1: Combine Ingredients
    In a medium-sized bowl, mix together the Greek yogurt and cottage cheese until well combined. This mixture forms the creamy base of your bowl, reminiscent of a cheesecake texture. Chef’s Tip: If you prefer a smoother consistency, blend the cottage cheese before mixing it with the yogurt.

    Step 2: Add Cherries and Vanilla
    Stir in the frozen cherries and vanilla extract. Allow the cherries to sit for a minute or two. The cold cherries will start to thaw slightly, releasing their juices and infusing the yogurt with a sweet-tart flavor. The vanilla adds a subtle depth that ties the flavors together.

    Step 3: Top with Cereal and Chocolate
    Sprinkle the chocolate cereal and chocolate chips on top. The cereal provides a delightful crunch, while the chocolate chips melt slightly, creating pockets of rich chocolatey flavor.

    Step 4: Drizzle with Almond Butter
    Using a spoon, drizzle the almond butter over the top. This step not only adds a nutty flavor but also increases the dish’s protein content, making it even more satisfying.

    Step 5: Mix and Enjoy
    Gently mix all the ingredients together until you have a beautiful, marbled effect. Enjoy immediately for the best texture and flavor.

    Common Mistakes to Avoid

    Even a simple dish like this can have its pitfalls. Here’s how to steer clear of them:

    • Overmixing: Mixing too vigorously can break down the cherries too much, leading to a mushy texture. Stir gently to maintain a pleasant consistency.
    • Using sweetened yogurt: Opting for sweetened yogurt can make the dish overly sweet. Stick to unsweetened to control the sugar levels.
    • Skipping the almond butter: This ingredient is crucial for the protein content and flavor balance. If nut allergies are a concern, consider using sunflower seed butter instead.

    How to Store & Reheat

    While this dish is best enjoyed fresh, you can prepare it in advance. Store any leftovers in an airtight container in the refrigerator for up to 2 days. Before consuming, give it a quick stir to redistribute the ingredients. If the yogurt has thickened too much, add a splash of milk or water to loosen it up.

    Ingredient Substitutions

    Need to make some swaps? Here’s how:

    • Greek yogurt: Substitute with any plant-based yogurt for a vegan version.
    • Frozen cherries: Fresh cherries or berries like strawberries or raspberries work well.
    • Almond butter: Peanut butter or sunflower seed butter can be used as alternatives.
    • Chocolate cereal: Granola or crushed nuts make excellent crunchy substitutes.

    Nutrition Facts

    • Calories: 393 kcal
    • Protein: 30g
    • Fat: 18g
    • Carbohydrates: 35g
    • Serving Size: 1 bowl

    Frequently Asked Questions

    • Can I use fresh cherries instead of frozen?
      Yes, fresh cherries can be used, but the texture will be slightly different. Frozen cherries provide a nice chill and juiciness when they thaw.
    • Is this recipe suitable for vegans?
      With a few substitutions like plant-based yogurt and omitting cottage cheese, you can easily make it vegan.
    • How can I add more protein?
      Consider adding a scoop of protein powder to the yogurt mixture or increasing the amount of cottage cheese.
    • What if I don’t have chocolate cereal?
      You can use granola or any crunchy cereal you have on hand as a substitute.

  • 5-MIN FUEL: Quick & Creamy Hollandaise Sauce Made Simple!

    5-MIN FUEL: Quick & Creamy Hollandaise Sauce Made Simple!

    Introduction & My Personal Story

    Every chef has a few go-to recipes tucked in their back pocket, and for me, it’s the **Quick & Creamy Hollandaise Sauce**. My love affair with this luscious sauce began during my culinary school days. Picture this: a bustling kitchen filled with the aroma of warm butter and the sound of sizzling pans. I was a wide-eyed student, eager to master the classics. One morning, our instructor demonstrated the magic of Hollandaise. I remember the smooth, velvety texture, the perfect balance of rich butter and tangy lemon. It was love at first taste.

    Years later, in my 5 years of experience as a chef, I’ve churned out countless variations of this sauce, fine-tuning it to perfection. The beauty of this recipe lies in its simplicity. With just a handful of ingredients and a few minutes, you can transform any dish into something extraordinary. Whether it’s drizzled over poached eggs for a classic Eggs Benedict or served alongside grilled asparagus, this sauce never fails to impress. Trust me, once you try it, you’ll understand why it’s a staple in my kitchen and why it should be in yours too.

    Why You’ll Love This Recipe

    • Ready in just 5 minutes – perfect for busy mornings or quick dinners.
    • Uses simple, everyday ingredients you likely already have.
    • Rich, creamy texture that enhances any dish.
    • Perfect for impressing guests without breaking a sweat.
    • Customizable to your taste with easy ingredient swaps.

    Detailed Ingredients

    To create this quick and creamy Hollandaise sauce, you’ll need:

    • 1 egg yolk – Look for fresh, free-range eggs for the best flavor.
    • 1 tablespoon water – Helps in emulsifying the sauce.
    • ½ tablespoon lemon juice – Freshly squeezed for a bright, tangy kick.
    • 4 tablespoons unsalted butter (56 grams) – Cut into small cubes for easy melting.
    • ⅛ teaspoon cayenne pepper – Adds a subtle heat.
    • Salt to taste – Elevates the flavors.

    Step-by-Step Instructions

    Creating a perfect Hollandaise sauce is easier than you might think. Just follow these steps:

    Step 1: Prepare the Base

    Start by separating the egg yolk from the white. Place the yolk in a small saucepan. Chef’s Tip: Save the whites for another recipe, like a meringue or omelet. Add **1 tablespoon of water** and **½ tablespoon of lemon juice** to the yolk. Whisk until smooth. This mixture forms the base of your sauce and will help with the emulsification.

    Step 2: Add the Butter

    Cut **4 tablespoons of unsalted butter** into small cubes. This ensures it melts evenly and quickly. Add the butter to the saucepan with the yolk mixture.

    Step 3: Heat and Whisk

    Place the saucepan over medium-low heat. Continuously whisk the mixture as the butter melts. You’ll notice the mixture starting to froth. This is a good sign! Keep whisking to prevent the eggs from scrambling.

    Step 4: Thicken the Sauce

    Continue to cook the sauce for about 3-5 minutes. You’re looking for a consistency similar to gravy. It should coat the back of a spoon. Once you reach this stage, remove the saucepan from the heat.

    Step 5: Season

    Stir in **⅛ teaspoon of cayenne pepper** and salt to taste. The cayenne adds a gentle warmth without overpowering the sauce. Taste and adjust the seasoning as needed.

    Common Mistakes to Avoid

    Making Hollandaise can be tricky, but here are some pitfalls to watch out for:

    • **Overheating:** If the heat is too high, the eggs can scramble. Keep it at medium-low.
    • **Not whisking continuously:** This can lead to uneven cooking and separation.
    • **Adding butter too quickly:** Add it gradually to ensure a smooth emulsion.

    How to Store & Reheat

    If you have leftovers, store the Hollandaise sauce in an airtight container in the refrigerator for up to 2 days. To reheat, place the sauce in a heatproof bowl over a pot of simmering water. Whisk gently until warmed through. Avoid microwaving, as it can cause the sauce to separate.

    Ingredient Substitutions

    Here’s how you can tweak the recipe if needed:

    • **Butter:** Use ghee for a nuttier flavor or margarine for a vegan option.
    • **Lemon Juice:** Substitute with lime juice or white wine vinegar for a different tang.
    • **Cayenne Pepper:** Try smoked paprika for a milder, smoky taste.

    Nutrition Facts

    Here’s the nutritional breakdown per serving (approx. 2 tablespoons):

    • Calories: 238 kcal
    • Protein: 1.7 grams
    • Fat: 25 grams
    • Carbohydrates: 0.5 grams
    • Serving Size: 2 tablespoons

    Frequently Asked Questions

    Q: Can I make Hollandaise sauce ahead of time?

    A: Yes, but it’s best served fresh. If needed, make it up to a day in advance and reheat gently.

    Q: What dishes pair well with Hollandaise sauce?

    A: It’s classic with Eggs Benedict, but also great over vegetables, fish, or steak.

    Q: How can I fix a broken Hollandaise sauce?

    A: Whisk in a splash of hot water or lemon juice to bring it back together.

    Q: Is there a way to make it spicier?

    A: Add more cayenne pepper or a dash of hot sauce for extra heat.

    Conclusion

    There you have it, a quick and creamy Hollandaise sauce that’s both simple and satisfying. Whether you’re a seasoned chef or a kitchen newbie, this recipe is sure to become a favorite. With its rich flavor and silky texture, you’ll find yourself reaching for it time and again. Happy cooking!

  • 5-MIN FUEL: 17 Delicious Stir-Fry Recipes on a Budget!

    5-MIN FUEL: 17 Delicious Stir-Fry Recipes on a Budget!

    Introduction & My Personal Story

    Let me take you back to a time when I was just starting out in the bustling world of culinary arts. I was a novice chef, working my way through the ranks in a busy kitchen. It was during this period that I discovered the magic of the quick vegetable stir-fry. Picture this: a late night after a grueling shift, with only a handful of ingredients left in the pantry. I was hungry, tired, and in desperate need of a meal that would not only satisfy my hunger but also lift my spirits. That’s when I stumbled upon the idea of a simple stir-fry.

    Armed with a few bell peppers, some broccoli, and a carrot or two, I heated up a trusty skillet. I remember the sizzle of the oil as I tossed in the chopped vegetables, the vibrant colors coming to life in the pan. In just a few minutes, my kitchen was filled with the mouth-watering aroma of garlic and ginger mingling with soy sauce. That night, I learned the art of creating something extraordinary from the simplest of ingredients, and it was a revelation. The quick vegetable stir-fry became my go-to dish, a symbol of resourcefulness and culinary creativity. It’s a dish that has stayed with me over the years, and I’m thrilled to share it with you.

    Why You’ll Love This Recipe

    • Quick and easy: Ready in just 5 minutes.
    • Budget-friendly: Uses simple, affordable ingredients.
    • Healthy: Packed with vitamins and nutrients.
    • Versatile: Customize with your favorite vegetables.
    • Low-calorie: Perfect for those watching their intake, with an estimated 300 kcal.

    Detailed Ingredients

    Here’s what you’ll need for this delightful stir-fry:

    • **1 tablespoon vegetable oil** – Look for a neutral oil like canola or sunflower.
    • **1 cup bell peppers**, sliced – Choose a mix of red, yellow, and green for color.
    • **1 cup broccoli florets** – Fresh is best, but frozen works in a pinch.
    • **1/2 cup carrots**, julienned – Adds a touch of sweetness and crunch.
    • **2 tablespoons soy sauce** – Opt for low-sodium if preferred.
    • **2 cloves garlic**, minced – Fresh garlic enhances the flavor.
    • **1 teaspoon fresh ginger**, grated – Adds warmth and depth.

    Step-by-Step Instructions

    Let’s dive into the process of creating this vibrant stir-fry:

    Step 1: Prepare Your Vegetables

    Start by washing and slicing your **bell peppers**, **broccoli**, and **carrots**. Aim for uniform sizes to ensure even cooking. Chef’s Tip: Use a sharp knife to make prep quicker and safer.

    Step 2: Heat the Skillet

    Place a large skillet over medium-high heat and add **1 tablespoon of vegetable oil**. Allow the oil to heat up until it shimmers. This indicates it’s ready for the vegetables.

    Step 3: Stir-Fry the Vegetables

    Carefully add the sliced vegetables to the hot skillet. Stir them continuously for about 2-3 minutes. You’re looking for them to become slightly tender yet still vibrant in color.

    Step 4: Add Flavor

    In a small bowl, combine **2 tablespoons soy sauce**, **2 minced garlic cloves**, and **1 teaspoon grated ginger**. Pour this mixture over the vegetables in the skillet. Stir everything together for an additional minute, ensuring the vegetables are well-coated with the sauce.

    Step 5: Serve

    Transfer the stir-fry to a plate and serve it hot over a bed of cooked rice or quinoa for a complete meal. Chef’s Tip: Garnish with sesame seeds or chopped green onions for an added touch of flavor.

    Common Mistakes to Avoid

    • **Overcrowding the Pan:** This leads to steaming rather than stir-frying. Use a large enough skillet to allow the vegetables to cook evenly.
    • **Not Preheating the Oil:** Adding vegetables to cold oil results in a soggy texture. Ensure the oil is hot before adding your ingredients.
    • **Overcooking the Vegetables:** Stir-frying is quick. Keep an eye on the vegetables to maintain their crunch and color.

    How to Store & Reheat

    Store any leftovers in an airtight container in the refrigerator for up to 3 days. To reheat, simply place the stir-fry in a skillet over medium heat, stirring occasionally until warmed through. Alternatively, microwave it in a microwave-safe dish for 1-2 minutes.

    Ingredient Substitutions

    • **Vegetable Oil:** Swap with olive oil or sesame oil for a different flavor profile.
    • **Soy Sauce:** Tamari or coconut aminos are great gluten-free alternatives.
    • **Broccoli:** Cauliflower or snap peas can be used if you prefer.

    Nutrition Facts

    • Calories: 300 kcal
    • Protein: 5g
    • Fat: 10g
    • Carbohydrates: 45g
    • Serving Size: 1 cup

    Frequently Asked Questions

    Can I use frozen vegetables?

    Yes, frozen vegetables are a convenient option. Just be sure to thaw them before cooking to avoid excess moisture in the pan.

    What other vegetables can I add?

    Feel free to add mushrooms, zucchini, or snow peas for additional variety and flavor.

    Is this dish vegan?

    Yes, as long as you use a plant-based oil and soy sauce, this stir-fry is completely vegan.

    Can I add protein to the stir-fry?

    Absolutely! Tofu, chicken, or shrimp make excellent protein additions to this dish.

    How can I make it spicier?

    Add a dash of chili flakes or a splash of sriracha for a spicy kick.

  • 5-MIN FUEL: Love at First Bite White Bean Skillet!

    5-MIN FUEL: Love at First Bite White Bean Skillet!

    Introduction & My Personal Story

    There’s something magical about a dish that can be whipped up in a flash yet tastes like it’s been simmering for hours. My 5-Minute Fuel: Love at First Bite White Bean Skillet is exactly that kind of dish. It takes me back to my college days when time was of the essence, and sustenance needed to be both quick and nourishing. I remember those late nights spent cramming for exams, my mind craving something more than just caffeine. I stumbled upon this recipe almost by accident, combining the ingredients I had on hand in a moment of desperation. Little did I know, it would become a staple in my kitchen.

    In my 5 years of experience as a chef, I’ve learned that the simplest dishes often bring the most joy. This white bean skillet is no exception. Its creamy texture and rich flavors are a testament to the beauty of minimalism in cooking. Whether you’re a busy professional or a parent juggling multiple tasks, this dish provides the perfect balance of ease and satisfaction. It’s a dish that has seen me through countless busy weeks, and I promise it will become a favorite in your household too.

    Why You’ll Love This Recipe

    • Quick and Easy: Ready in under 10 minutes.
    • Nutritious: Packed with protein and fiber from the white beans.
    • Versatile: Can be served with crusty bread, over rice, or even pasta.
    • Flavorful: Rich in herbs and spices, creating a delightful taste.
    • Minimal Cleanup: Only requires one skillet.

    Detailed Ingredients

    • 2 tablespoons sun-dried tomato oil (or olive oil)
    • 1 medium onion, diced (about 150 grams)
    • 3 cloves garlic, minced
    • 1/2 teaspoon red pepper flakes
    • 2 cans (15 oz each) white beans, with liquid
    • 1 cup vegetable broth
    • 1/2 cup sun-dried tomatoes, chopped
    • 1 teaspoon salt
    • 1 teaspoon Italian seasoning
    • 1 cup thawed spinach, squeezed dry
    • 1/2 cup heavy cream
    • 1/4 cup grated Parmesan cheese
    • Fresh basil for garnish

    Step-by-Step Instructions

    Step 1: Gather Ingredients – Before you start cooking, make sure all your ingredients are prepped and ready to go. This will make the cooking process smoother and faster. Chef’s Tip: Use the oil from the jar of sun-dried tomatoes for extra flavor.

    Step 2: Heat Oil – In a large skillet, heat the sun-dried tomato oil over medium heat. You’ll want the oil to shimmer but not smoke, indicating it’s the perfect temperature to start sautéing.

    Step 3: Sauté Aromatics – Add the diced onion, minced garlic, and red pepper flakes to the skillet. Cook for 2-3 minutes until the onions are translucent and the garlic is fragrant. Stir occasionally to prevent burning.

    Step 4: Combine Ingredients – Stir in the white beans (including their liquid), vegetable broth, chopped sun-dried tomatoes, salt, and Italian seasoning. Increase the heat slightly and bring to a gentle boil.

    Step 5: Simmer – Reduce the heat to low and let the mixture simmer for about 15 minutes. This allows the flavors to meld together beautifully. You’ll notice the liquid reducing and thickening slightly.

    Step 6: Add Creaminess – Stir in the thawed spinach, heavy cream, and Parmesan cheese. Allow the mixture to simmer for an additional 5 minutes until it’s creamy and the spinach is fully incorporated.

    Step 7: Serve Up – Spoon the white bean skillet into bowls and garnish with fresh basil. Serve warm with crusty bread or over rice. Enjoy the comforting, rich flavors!

    Common Mistakes to Avoid

    • Skipping the Sauté: The sauté step builds the flavor base. Don’t rush it.
    • Overcooking the Beans: They should be tender but not mushy. Keep an eye on the simmer time.
    • Using Stale Spices: Ensure your spices are fresh for maximum flavor.
    • Forgetting to Adjust Seasoning: Taste before serving and adjust salt and pepper as needed.

    How to Store & Reheat

    To store, transfer the leftovers to an airtight container and refrigerate for up to 3 days. For longer storage, place in a freezer-safe container and freeze for up to 2 months.

    To reheat, simply warm on the stove over medium heat until heated through. If the mixture is too thick, add a splash of broth or water. For frozen portions, thaw in the refrigerator overnight before reheating.

    Ingredient Substitutions

    • Beans: You can swap white beans for chickpeas or cannellini beans.
    • Heavy Cream: Substitute with coconut milk for a dairy-free option.
    • Spinach: Kale or swiss chard can be used if preferred.
    • Parmesan Cheese: Nutritional yeast can be used for a vegan option.

    Nutrition Facts

    • Calories: 313 kcal per serving
    • Protein: 12g
    • Fat: 16g
    • Carbs: 32g
    • Serving Size: 1 cup

    Frequently Asked Questions

    • Can I use fresh tomatoes instead of sun-dried? Yes, but you may need to add a bit more salt to compensate for the reduced intensity of flavor.
    • Is this dish suitable for meal prep? Absolutely! It’s perfect for preparing in advance and reheats well.
    • What can I serve this dish with? It’s great with crusty bread, over rice, or tossed with pasta.
    • Can I make this dish vegan? Yes, simply substitute the heavy cream with coconut milk and the Parmesan with nutritional yeast.

  • 5-MIN FUEL: Lentil & Cranberry Power Salad!

    5-MIN FUEL: Lentil & Cranberry Power Salad!

    Introduction & My Personal Story

    There’s something incredibly satisfying about a dish that not only fuels your body but also delights your taste buds. The 5-MINUTE FUEL: Lentil and Cranberry Power Salad is one such recipe that has a special place in my heart. I first stumbled upon this gem of a salad five years ago when I was knee-deep in culinary school. With tight schedules and endless cooking experiments, I needed something quick yet nourishing to keep me going. This salad became my go-to. The earthy lentils paired with the sweet bursts of dried cranberries and crunchy walnuts were just what I needed to power through long days.

    In my 5 years of experience as a chef, I have found that a well-balanced salad can be a game changer. This particular recipe has not only become a staple in my personal diet but also a favorite among my clients and friends. There’s a certain nostalgia that hits me every time I make it, reminding me of those formative days in the kitchen, learning and experimenting. It’s a simple dish, but one that packs a punch in terms of flavor and nutrition, and I’m thrilled to share it with you today.

    Why You’ll Love This Recipe

    • Quick & Easy: Ready in just 5 minutes if you have pre-cooked lentils.
    • Nutritious: Packed with protein, fiber, and essential nutrients.
    • Flavorful: A delicious combination of earthy, sweet, and tangy flavors.
    • Versatile: Perfect as a main dish or a side.
    • Meal Prep Friendly: Keeps well in the fridge for quick meals throughout the week.

    Detailed Ingredients

    To make the Lentil and Cranberry Power Salad, you’ll need the following ingredients:

    • Lentils: 1 cup of dried lentils (about 200 grams). Look for lentils that are firm and free of debris.
    • Spinach: 2 cups of fresh spinach (around 60 grams), washed and dried.
    • Dried Cranberries: 1/2 cup (about 60 grams), look for unsweetened varieties if you prefer less sugar.
    • Apple: 1 medium-sized apple (about 150 grams), diced. Choose a crisp variety like Granny Smith or Honeycrisp.
    • Feta Cheese: 1/4 cup (about 40 grams), crumbled.
    • Walnuts: 1/4 cup (about 30 grams), roughly chopped.
    • Olive Oil: 3 tablespoons for the vinaigrette.
    • Lemon Juice: 2 tablespoons, freshly squeezed.
    • Apple Cider Vinegar: 1 tablespoon.
    • Dijon Mustard: 1 teaspoon.
    • Sugar: 1 teaspoon.
    • Garlic Powder: 1/2 teaspoon.
    • Salt & Pepper: To taste.

    Step-by-Step Instructions

    Here’s how you can whip up this delightful salad:

    Step 1: Cook the Lentils

    Begin by rinsing 1 cup of dried lentils under cold water to remove any dirt or debris. In a medium-sized pot, bring 3 cups of water to a boil. Add the lentils, cover, and reduce the heat to simmer. Let them cook for about 20 minutes or until tender. Chef’s Tip: Lentils should be cooked but not mushy, with a slight bite to them.

    Step 2: Prepare the Vinaigrette

    While the lentils are cooking, prepare the vinaigrette. In a small bowl, whisk together 2 tablespoons of lemon juice, 1 tablespoon of apple cider vinegar, 1 teaspoon of Dijon mustard, 1 teaspoon of sugar, 1/2 teaspoon of garlic powder, and a pinch of salt and pepper. Gradually drizzle in 3 tablespoons of olive oil while whisking continuously until the dressing is smooth and emulsified.

    Step 3: Assemble the Salad

    Once the lentils are cooked, drain them and rinse with cold water to stop the cooking process. In a large mixing bowl, combine the lentils with 2 cups of fresh spinach. Add 1/2 cup of dried cranberries, 1 diced apple, 1/4 cup of crumbled feta cheese, and 1/4 cup of chopped walnuts. Pour the vinaigrette over the salad and toss gently to combine all the ingredients.

    Step 4: Serve

    Transfer the salad to a serving platter or individual bowls. Serve immediately or let it chill in the fridge for 30 minutes to allow the flavors to meld. This salad is a great make-ahead option and tastes even better the next day!

    Common Mistakes to Avoid

    • Overcooking Lentils: Keep an eye on the lentils as they cook. Overcooked lentils can become mushy and lose their texture.
    • Not Rinsing Lentils: Rinsing lentils after cooking helps to cool them quickly and prevents further cooking.
    • Skipping the Vinaigrette Emulsification: Gradually adding the olive oil while whisking is crucial for a smooth dressing.

    How to Store & Reheat

    Store any leftover salad in an airtight container in the refrigerator for up to 3 days. The flavors will continue to develop, making it even more delicious over time. If you plan to store it for longer, keep the dressing separate and add it just before serving. This will prevent the salad from becoming soggy.

    Ingredient Substitutions

    • Lentils: Feel free to use canned lentils if you’re short on time. Just make sure to rinse them well.
    • Spinach: Arugula or mixed greens can be used for a different flavor profile.
    • Dried Cranberries: Swap with raisins or chopped dried apricots for a different sweetness.
    • Feta Cheese: Goat cheese or blue cheese can be used for a stronger flavor.
    • Walnuts: Pecans or almonds can be used for a different crunch.

    Nutrition Facts

    • Calories: 288 kcal
    • Protein: 12g
    • Fat: 13g
    • Carbohydrates: 34g
    • Serving Size: 1 bowl (approximately 250g)

    Frequently Asked Questions

    • Can I make this salad vegan? Yes, simply omit the feta cheese or replace it with a vegan cheese alternative.
    • What type of lentils should I use? Green or brown lentils work best as they hold their shape better than red lentils.
    • Can I add protein to this salad? Absolutely! Grilled chicken or tofu are great additions for extra protein.
    • Is this salad gluten-free? Yes, all the ingredients listed are naturally gluten-free.